学习CocosCreator有段时间了,现在花了两天时间写了个像素鸟的小游戏,这个游戏之前又看到过,但是不知道怎么又下架了,之前还是蛮火的游戏,想起来后去网上看了看,原来是因为侵犯了 超级玛丽 的游戏元素,都是像素级小游戏,嗯,国外人的版权意识还是挺高的。好了,题外话就到这了,开始切入正题吧。
写这个游戏也不难,最主要的是思路,该怎么去写,我也在网上看到过 C++版 的,易语言的,Cocos2d的,都挺多的,都是大神啊

我这个是Creator版的,跟Cocos2d有点差别,但是差别又不大
好了,上代码(本来是想截图的,但是想想还是要对得起自己,还是手敲吧)
这个游戏我是用 ts 写的,外加CocosCreator
onLoad(){
// 获取到小鸟,管道,背景,陆地的节点, 这些this的都是先在前面声明了的
// 小鸟
this.bird = cc.find('layout_wrap/node_bird', this.node)
// 背景
this.bg = cc.find('layout_wrap/layout_bg', this.node)
// 管道
this.pipe = cc.find('layout_wrap/layout_cont', this.node)
// 陆地
this.land = cc.find('layout_wrap/layout_land', this.node)
}
// 这里去初始化一下,一些声明的游戏数据
private initData(): void {
this.time = 0 // 帧率(每帧调用,模拟小鸟扇动翅膀)
this.speed = 0 // 速度
this.distance = 150 // 管道距离
this.rateSpeed = 1 // 移速
this.upSpeed = 2 // 加速
this.slowSpeed = 0.06 // 减速
// 监听运行事件
let wrap = cc.find('layout_wrap', this.node)
wrap.on(cc.Node.EventType.TOUCH_START, this.runnIng.bind(this), this)
// 开始界面
this.layoutstar = cc.find('layout_wrap/layout_star', this.node)
// 开始按钮
this.starbtn = cc.find('layout_content/button_play', this.layoutstar)
this.addClickEvent(this.starbtn, 'onClickStar')
// 暂停按钮
let pausebtn = cc.find('node_score/button_pause', wrap)
this.addClickEvent(pausebtn, 'onClickPause')
// 继续按钮
let resumebtn = cc.find('layout_pause/button_resume', wrap)
this.addClickEvent(resumebtn, 'onClickResume')
// 游戏结束,重新开始
let again = cc.find('layout_over/node_content/button_play', wrap)
this.addClickEvent(again, 'onClickAgain')
// Get Ready提示节点
this.ready = cc.find('node_score/node_ready', wrap)
// 游戏结束
this.gameover = cc.find('layout_over', wrap)
// 加载管道
this.addPipe()
// 碰撞系统
let manager = cc.director.getCollisionManager()
manager.enabled = true
}
//下面开始写功能
// 点击开始
protected onClickStar(): void {
// 缩放界面
let act = cc.callFunc(() => {
this.layoutstar.active = false
this.layoutstar.destroy()
})
// 这里用到动作系统的缩放和渐隐,算是一点点动画效果吧
let seq = cc.sequence(cc.spawn(cc.scaleTo(0.3, 0), cc.fadeOut(0.3)), act)
if (this.layoutstar) {
this.layoutstar.runAction(seq)
}
// 这里是避免忘记吧结束界面没有隐藏掉,
if (this.gameover) {
this.gameover.active = false
}
}
// 点击运行
private runnIng(): void {
if (this.ready.active && !this.layoutstar.active) {
// 隐藏Get Ready提示节点
this.ready.active = false
// 显示update, ison是作为update的开关
this.ison = true
}
this.speed = 2.5 // 给小鸟一个向上的加速度
}
// 加载管道, 这里的管道是通过预制体来加载上去的
private addPipe(): void {
this.LoadPrefabs('node_pipe', (n: cc.Node) => {
if (!n) {
return
}
for (let i = 0; i < 4; i++) {
// 复制节点
let copy = cc.instantiate(n)
// 插入节点
this.pipe.addChild(copy, i)
// 调整管道位置
copy.x = this.node.width / 2 + (this.distance + copy.width) * i
// 480~720
copy.y = (Math.random() * 0.5 + 1) * 480
if (i > 0) {
// 相邻管道之间的差距不超过120
this.distanceY(i, i - 1)
}
}
})
}
// 移动背景
private moveBg(bgs: cc.Node): void {
bgs.x = bgs.x - 1
// 当背景移动出屏幕后,将这个背景再加到两个背景的前面
// 像素对齐,所以bg.x为一个确切数
if (bgs.x < -614) {
bgs.x = 1228
// 调整节点顺序
if (bgs == this.bg.children[0]) {
this.bg.children[1].zIndex = 0
this.bg.children[2].zIndex = 1
this.bg.children[0].zIndex = 2
} else if (bgs == this.bg.children[1]) {
this.bg.children[2].zIndex = 0
this.bg.children[0].zIndex = 1
this.bg.children[1].zIndex = 2
} else if (bgs == this.bg.children[2]) {
this.bg.children[0].zIndex = 0
this.bg.children[1].zIndex = 1
this.bg.children[2].zIndex = 2
}
}
}
// 移动管道
private movePipe(pipes: cc.Node): void {
pipes.x = pipes.x - 2
// 当管道移动一个屏幕宽后,再将这个管道的位置改变到屏幕右侧
if (pipes.x < -(pipes.width + this.node.width / 2)) {
pipes.x = 515
// 480~1000
pipes.y = (Math.random() + 1) * 520 - 40
// 相邻管道之间的差距不超过120
if (pipes == this.pipe.children[0]) {
this.distanceY(0, 3)
} else if (pipes == this.pipe.children[1]) {
this.distanceY(1, 0)
} else if (pipes == this.pipe.children[2]) {
this.distanceY(2, 1)
} else if (pipes == this.pipe.children[3]) {
this.distanceY(3, 2)
}
}
}
// 移动陆地
private moveLand(lands: cc.Node): void {
lands.x = lands.x - 2 * this.rateSpeed
// 当陆地移动一个屏幕宽后,再将这个陆地的位置改变到屏幕右侧
if (lands.x < -(this.node.width)) {
lands.x = this.node.width - 2 * this.rateSpeed
}
}
// 相邻管道之间的Y方向差距
private distanceY(a: number, b: number): void {
if (Math.abs(this.pipe.children[a].y - this.pipe.children[b].y) > 140) {
this.pipe.children[a].y = this.pipe.children[b].y + ((Math.random() * 2 - 1) * 140)
if (this.pipe.children[a].y > 1000) {
this.pipe.children[a].y = this.pipe.children[b].y - (Math.random() * 140)
} else if (this.pipe.children[a].y < 480) {
this.pipe.children[a].y = this.pipe.children[b].y + (Math.random() * 140)
}
}
}
// 最主要的是这个思路,要形成流畅的效果,就要每帧都去调用它,
update(dt: number) {
// 终止移动
if (this.gameover.active) {
this.ison = false
}
// 帧率切换节点的显示,模拟扇翅膀
if (this.ison) {
let timeTemp = this.time + dt
this.time = timeTemp
if (this.time > 0.5) {
if (this.bird.children[0].active) {
this.bird.children[0].active = false
this.bird.children[1].active = true
}
else if (this.bird.children[1].active) {
this.bird.children[1].active = false
this.bird.children[2].active = true
}
else if (this.bird.children[2].active) {
this.bird.children[2].active = false
this.bird.children[3].active = true
}
else if (this.bird.children[3].active) {
this.bird.children[3].active = false
this.bird.children[0].active = true
}
// 别忘了要重置为零
this.time = 0
}
// 给定小鸟的下降减速
this.speed = this.speed - 0.06
// 小鸟在y轴上的移动
this.bird.y = this.bird.y + this.speed
// 小鸟上飞改变方向, 通过改变旋转方向来实现小鸟的朝向
this.bird.angle = this.speed * 10
// 移动背景
this.moveBg(this.bg.children[0])
this.moveBg(this.bg.children[1])
this.moveBg(this.bg.children[2])
// 移动管道
this.movePipe(this.pipe.children[0])
this.movePipe(this.pipe.children[1])
this.movePipe(this.pipe.children[2])
this.movePipe(this.pipe.children[3])
// 移动陆地
this.moveLand(this.land.children[0])
this.moveLand(this.land.children[1])
}
}
// 这是挂载在主场景上的脚本,画面和功能做出来了,但是如果没有结束,那么相信这个游戏也不会太有趣
// 如何来结束游戏? 那就是当小鸟装上管道后,就结束游戏,如果没有,那就加分啦
// 这里用到的是碰撞去写的,当然也可以去用其他的方法去实现
// 这是挂载在小鸟的这个节点上的脚本
// 加载的时候会初始分数
onLoad() {
// 分数
this.gameMain.Score = 0
// 分数节点
this.topScore = cc.find('node_score/label_score', this.node.parent)
}
// 这里用到的碰撞,在小鸟,管道,和中间的空隙都会绑定碰撞的组件
// 当小鸟撞在管道上,游戏结束,
// 小鸟通过中间的空隙,加一分
onCollisionEnter(other, self) {
if (other.tag == 2) {
this.gameMain.Score++
} else if (other.tag == 1) {
this.gameOver()
}
// 显示分数
this.topScore.getComponent(cc.Label).string = this.gameMain.Score.toString()
}
// 结束游戏
private gameOver(): void {
// 显示结束游戏的界面
let gameover = cc.find('layout_over', this.node.parent)
gameover.active = true
// 渐显
gameover.runAction(cc.fadeTo(0.5, 255))
// 分数
let scorelabel = cc.find('node_content/sprite_panel/label_score', gameover).getComponent(cc.Label)
scorelabel.string = this.gameMain.Score.toString()
// 重置分数
this.scheduleOnce(() => {
this.gameMain.Score = 0
}, 0.5)
}
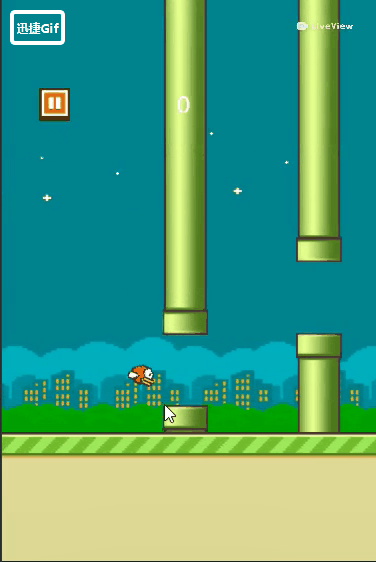
好啦,一个简单的单机像素鸟就做好了,想要更详细的源码的小伙伴可以私聊我哦~~
下面放出效果图,唉,没有挂载服务器,无法直接上传到web平台,只能放出gif啦
- [Canvas前端游戏开发]——FlappyBird详解
一直想自己做点小东西,直到最近看了本<HTML5游戏开发>,才了解游戏开发中的一点点入门知识. 本篇就针对学习的几个样例,自己动手实践,做了个FlappyBird,源码共享在度盘 :也可以 ...
- HTML5游戏实战(4): 20行代码实现FlappyBird
这个系列很久没有更新了.几个月前有位读者调侃说,能不能一行代码做一个游戏呢.呵呵,接下来一段时间,我天天都在想这个问题,怎么能让GameBuilder+CanTK进一步简化游戏的开发呢.经过几个月的努 ...
- cocos2dx实例开发之flappybird(入门版)
cocos2dx社区里有个系列博客完整地复制原版flappybird的全部特性.只是那个代码写得比較复杂,新手学习起来有点捉摸不透,这里我写了个简单的版本号.演演示样例如以下: watermark/2 ...
- Canvas前端游戏开发——FlappyBird详解
一直想自己做点小东西,直到最近看了本<HTML5游戏开发>,才了解游戏开发中的一点点入门知识. 本篇就针对学习的几个样例,自己动手实践,做了个FlappyBird,源码共享在度盘;也可以参 ...
- 【原创】纯OO:从设计到编码写一个FlappyBird (四)
第三部分请点这里 这里来实现Obstacle类.其实flappybird的本质就是小鸟原地掉,然后几根柱子在走.这也是在Game类里,用obs.move()来实现游戏逻辑的原因. 我们首先必须确定几个 ...
- 【原创】纯OO:从设计到编码写一个FlappyBird (一)
说起来,自学计算机也有2年多的时间了,自己还没有从设计到编码,完完整整的设计一个基于面向对象的软件的经历..囧 于是,就有了这个系列.首先选用的语言是Java,没别的原因,HeadFirst设计模式是 ...
- Cocos2d-x 2.3.3版本 FlappyBird
Cocos2d-x 2.3.3版本 FlappyBird 本篇博客基于Cocos2d-x 2.3.3, 介绍怎样开发一款之前非常火的一款游戏FlappyBird.本篇博客内容大纲例如以下: 1 ...
- 一个简单用原生js实现的小游戏----FlappyBird
这是一个特别简单的用原生js实现的一个小鸟游戏,比较简单,适合新手练习 这是html结构 <!DOCTYPE html><html lang="en">&l ...
- iOS开发实战-基于SpriteKit的FlappyBird小游戏
写在前面 最近一直在忙自己的维P恩的事情 公司项目也是一团乱 于是...随手找了个游戏项目改了改就上线了,就当充数了. SpriteKit简介 SpriteKit是iOS 7之后苹果推出的2D游戏框架 ...
- FlappyBird Pygame
视频链接 GitHub链接:https://github.com/yanpeng1314/FlappyBird from InitObject import * def startGame(): mo ...
随机推荐
- 使用JSP/Servlet技术开发新闻发布系统---JSP数据交互(二)
JSP内置对象application application对象 JSP常用的内置对象 对象的作用域 作用的分类 对象的作用域 page作用域 实例 //页面1 <% String name = ...
- PHP怎么实现字符串转义和还原?
首先大家可以简单了解下什么是转义字符?有什么用? 转义字符是一种特殊的字符常量.转义字符以反斜线"\"开头,后跟一个或几个字符.转义字符具有特定的含义,不同于字符原有的意义,故称“ ...
- [English] - 单词阶段1
百词斩这个app很好玩,尤其是在记忆单词的时候,效果显著. 有的PK赛场也是比较谁的单词翻译提交的快,这个我曾经连胜好几次.
- SYSTEM_INFORMATION_CLASS
source: https://github.com/processhacker/processhacker/blob/master/phnt/include/ntexapi.h // rev // ...
- 【原创】go语言学习(七)数组
目录 数组定义 二维数组 数组拷贝.传参 数组定义 1. 数组是同一类型的元素集合. var a [3]int //定义一个数组 //Go中数组下标从0开始,因此⻓长度为n的数组下标范围:[0,n-1 ...
- Fidller抓包分析post请求
目的:抓包是为了最近做接口测试做准备,以前没有用过这个工具,最近来学下,但是网上很多文章了,所以不一一记录,有一部分参考即可 1.如何抓取想要的web端或者手机端包,已经有很多文章谢了,推荐的参考文章 ...
- idea 2019激活码
9MWZD5CC4E-eyJsaWNlbnNlSWQiOiI5TVdaRDVDQzRFIiwibGljZW5zZWVOYW1lIjoiMjAxNzY1MDYxQGNxdS5lZHUuY24gLiIsI ...
- IDEA启动Tomcat服务器时某些端口(如1099端口)被占用的解决办法
启动Tomcat服务器时,出现1099端口被其它进程占用了解决办法: 1.找出占用1099端口的进程,进入windows命令,查看什么进程占用了1099端口,使用命令:netstat -aon|fin ...
- final和finally的区别
final关键字可以用于修饰类,方法,变量.用该关键字修饰类,方法,变量都有不可变的特性. 1)final关键字用于基本数据类型前,就表明该变量就变成了一个常量,在被定义后的赋值不能被修改. 2)fi ...
- Hibernate 关系配置
表之间关系 1. 一对多 一个部门有多个员工,一个员工只能属于某一个部门 一个班级有多个学生,一个学生只能属于一个班级 2. 多对多 一个老师教多个学生,一个学生可以被多个老师教 一个学生可以先择多门 ...