iOS-CYLTabBarController【好用的TabbarController】
用TabbarController进行模块分类和管理,这里推荐一个CYLTabBarController,只需两个数组就可以使用和管理;
1.导入CYLTabBarController
使用cocoapods导入即可 pod 'CYLTabBarController', '~> 1.14.1',终端 pod install 即可
2.配置
新建一个基于 NSObject 类 MainTabBarControllerConfig,用于配置CYLTabBarController及管理;头文件引入
#import <CYLTabBarController.h>
.h
@interface MainTabBarControllerConfig : NSObject
///CYLTabBarController

@property (nonatomic,strong) CYLTabBarController *mainTabBarController;

@end
.m
@implementation MainTabBarControllerConfig
- (CYLTabBarController *)mainTabBarController{
if (!_mainTabBarController) {
UIEdgeInsets imageInsets = UIEdgeInsetsZero;
UIOffset titlePositionAdjustment = UIOffsetZero;
_mainTabBarController = [CYLTabBarController tabBarControllerWithViewControllers:[self arrayViewControllerItem] tabBarItemsAttributes:[self arrayAttributesItem] imageInsets:imageInsets titlePositionAdjustment:titlePositionAdjustment];
[self customizeTabBarAppearance:_mainTabBarController];
}
return _mainTabBarController;
}
- (NSArray *)arrayViewControllerItem{
BookcaseNavViewController *bookcaseNavi = [wkj_getSboardBookcase instantiateViewControllerWithIdentifier:@"BookcaseNavViewController"];
AskKaoLaNavViewController *askKlNavi = [wkj_getSboardAskKaoLa instantiateViewControllerWithIdentifier:@"AskKaoLaNavViewController"];
DiscoverNavViewController *discoverNavi = [wkj_getSboardDiscover instantiateViewControllerWithIdentifier:@"DiscoverNavViewController"];
UserNavViewController *userNavi = [wkj_getSboardUser instantiateViewControllerWithIdentifier:@"UserNavViewController"];
///返回需要加载的模块
return @[bookcaseNavi,discoverNavi,askKlNavi,userNavi];
}
- (NSArray *)arrayAttributesItem{
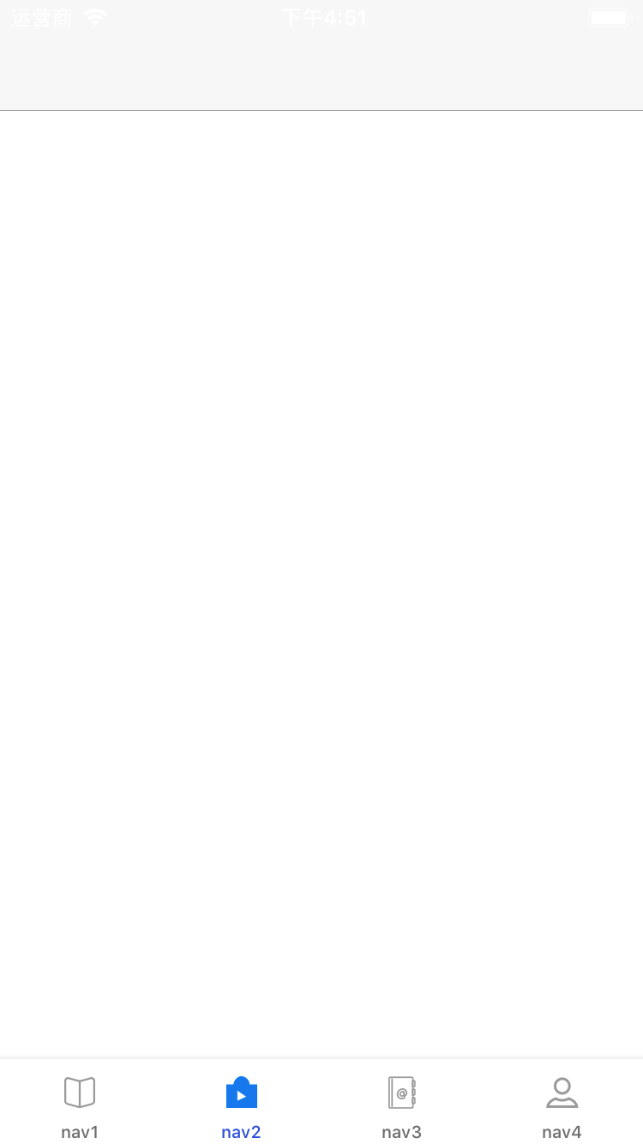
NSDictionary *bookcaseItemsAttributes =@{CYLTabBarItemTitle : @"nav1",
CYLTabBarItemImage : @"bar_tk_01",
/* NSString and UIImage are supported*/
CYLTabBarItemSelectedImage : @"bar_tk_02",};
NSDictionary *discoverItemsAttributes = @{CYLTabBarItemTitle : @"nav2",
CYLTabBarItemImage : @"bar_kc_01",
CYLTabBarItemSelectedImage : @"bar_kc_02",};
NSDictionary *askklItemsAttributes = @{CYLTabBarItemTitle : @"nav3",
CYLTabBarItemImage : @"bar_dzs_01",
CYLTabBarItemSelectedImage : @"bar_dzs_02",};
NSDictionary *userItemsAttributes = @{CYLTabBarItemTitle : @"nav4",
CYLTabBarItemImage : @"bar_wd_01",
CYLTabBarItemSelectedImage : @"bar_wd_02"};
NSArray *tabBarItemsAttributes = @[bookcaseItemsAttributes,
discoverItemsAttributes,
askklItemsAttributes,
userItemsAttributes];
return tabBarItemsAttributes;
}
/**
* 更多TabBar自定义设置:比如:tabBarItem 的选中和不选中文字和背景图片属性、tabbar 背景图片属性等等
*/
- (void)customizeTabBarAppearance:(CYLTabBarController *)tabBarController {
// Customize UITabBar height
// 自定义 TabBar 高度
// tabBarController.tabBarHeight = CYLTabBarControllerHeight;
// set the text color for unselected state
// 普通状态下的文字属性
NSMutableDictionary *normalAttrs = [NSMutableDictionary dictionary];
normalAttrs[NSForegroundColorAttributeName] = [UIColor grayColor];
// set the text color for selected state
// 选中状态下的文字属性
NSMutableDictionary *selectedAttrs = [NSMutableDictionary dictionary];
selectedAttrs[NSForegroundColorAttributeName] = Wonderful_BlueColor6;
// set the text Attributes
// 设置文字属性
UITabBarItem *tabBar = [UITabBarItem appearance];
[tabBar setTitleTextAttributes:normalAttrs forState:UIControlStateNormal];
[tabBar setTitleTextAttributes:selectedAttrs forState:UIControlStateSelected];
// Set the dark color to selected tab (the dimmed background)
// TabBarItem选中后的背景颜色
// [self customizeTabBarSelectionIndicatorImage];
// update TabBar when TabBarItem width did update
// If your app need support UIDeviceOrientationLandscapeLeft or UIDeviceOrientationLandscapeRight,
// remove the comment '//'
// 如果你的App需要支持横竖屏,请使用该方法移除注释 '//'
// [self updateTabBarCustomizationWhenTabBarItemWidthDidUpdate];
// set the bar shadow image
// This shadow image attribute is ignored if the tab bar does not also have a custom background image.So at least set somthing.
[[UITabBar appearance] setBackgroundImage:[[UIImage alloc] init]];
[[UITabBar appearance] setBackgroundColor:[UIColor whiteColor]];
[[UITabBar appearance] setShadowImage:[UIImage imageNamed:@"tapbar_top_line"]];
// set the bar background image
// 设置背景图片
// UITabBar *tabBarAppearance = [UITabBar appearance];
// [tabBarAppearance setBackgroundImage:[UIImage imageNamed:@"tab_bar"]];
// remove the bar system shadow image
// 去除 TabBar 自带的顶部阴影
// [[UITabBar appearance] setShadowImage:[[UIImage alloc] init]];
}
3.使用
在AppDelegate.m didFinishLaunchingWithOptions:(NSDictionary *)launchOptions 方法中
- (BOOL)application:(UIApplication *)application didFinishLaunchingWithOptions:(NSDictionary *)launchOptions {

    // Override point for customization after application launch.

//    /加载中间自定义按钮

//    [TabbarPlusButton registerPlusButton];

    MainTabBarControllerConfig *tabbarConfig = [[MainTabBarControllerConfig alloc]init];

    CYLTabBarController *mainTabbarController = tabbarConfig.mainTabBarController;

    [self.window setRootViewController:mainTabbarController];

    return YES;

}
4.自定义按钮
加入中间按钮之前,确保上面的功能已经实现;新建一个基于 CYLPlusButton 的类 TabbarPlusButton,实现代理 CYLPlusButtonSubclassing
.h
@interface TabbarPlusButton : CYLPlusButton<CYLPlusButtonSubclassing>

@end
.m
@implementation TabbarPlusButton
- (instancetype)initWithFrame:(CGRect)frame {
if (self = [super initWithFrame:frame]) {
self.titleLabel.textAlignment = NSTextAlignmentCenter;
self.adjustsImageWhenHighlighted = NO;
}
return self;
}
//上下结构的 button
- (void)layoutSubviews {
[super layoutSubviews];
// 控件大小,间距大小
// 注意:一定要根据项目中的图片去调整下面的0.7和0.9,Demo之所以这么设置,因为demo中的 plusButton 的 icon 不是正方形。
CGFloat const imageViewEdgeWidth = self.bounds.size.width * 0.7;
CGFloat const imageViewEdgeHeight = imageViewEdgeWidth * 0.9;
CGFloat const centerOfView = self.bounds.size.width * 0.5;
CGFloat const labelLineHeight = self.titleLabel.font.lineHeight;
CGFloat const verticalMargin = (self.bounds.size.height - labelLineHeight - imageViewEdgeHeight) * 0.5;
// imageView 和 titleLabel 中心的 Y 值
CGFloat const centerOfImageView = verticalMargin + imageViewEdgeHeight * 0.5;
CGFloat const centerOfTitleLabel = imageViewEdgeHeight + verticalMargin * + labelLineHeight * 0.5 + ;
//imageView position 位置
self.imageView.bounds = CGRectMake(, , imageViewEdgeWidth, imageViewEdgeHeight);
self.imageView.center = CGPointMake(centerOfView, centerOfImageView);
//title position 位置
self.titleLabel.bounds = CGRectMake(, , self.bounds.size.width, labelLineHeight);
self.titleLabel.center = CGPointMake(centerOfView, centerOfTitleLabel);
}
#pragma mark -
#pragma mark - CYLPlusButtonSubclassing Methods
/*
*
Create a custom UIButton with title and add it to the center of our tab bar
*
*/
+ (id)plusButton {
TabbarPlusButton *button = [[TabbarPlusButton alloc] init];
///中间按钮图片
UIImage *buttonImage = [UIImage imageNamed:@"post_normal"];
[button setImage:buttonImage forState:UIControlStateNormal];
[button setTitle:@"发布" forState:UIControlStateNormal];
[button setTitleColor:[UIColor grayColor] forState:UIControlStateNormal];
[button setTitle:@"发布" forState:UIControlStateSelected];
[button setTitleColor:[UIColor blueColor] forState:UIControlStateSelected];
button.titleLabel.font = [UIFont systemFontOfSize:9.5];
[button sizeToFit]; // or set frame in this way `button.frame = CGRectMake(0.0, 0.0, 250, 100);`
// button.frame = CGRectMake(0.0, 0.0, 250, 100);
// button.backgroundColor = [UIColor redColor];
// if you use `+plusChildViewController` , do not addTarget to plusButton.
[button addTarget:button action:@selector(clickPublish) forControlEvents:UIControlEventTouchUpInside];
return button;
}
/*
*
Create a custom UIButton without title and add it to the center of our tab bar
*
*/
//+ (id)plusButton
//{
//
// UIImage *buttonImage = [UIImage imageNamed:@"hood.png"];
// UIImage *highlightImage = [UIImage imageNamed:@"hood-selected.png"];
//
// CYLPlusButtonSubclass* button = [CYLPlusButtonSubclass buttonWithType:UIButtonTypeCustom];
//
// button.autoresizingMask = UIViewAutoresizingFlexibleRightMargin | UIViewAutoresizingFlexibleLeftMargin | UIViewAutoresizingFlexibleBottomMargin | UIViewAutoresizingFlexibleTopMargin;
// button.frame = CGRectMake(0.0, 0.0, buttonImage.size.width, buttonImage.size.height);
// [button setBackgroundImage:buttonImage forState:UIControlStateNormal];
// [button setBackgroundImage:highlightImage forState:UIControlStateHighlighted];
// [button addTarget:button action:@selector(clickPublish) forControlEvents:UIControlEventTouchUpInside];
//
// return button;
//}
#pragma mark -
#pragma mark - Event Response
- (void)clickPublish {
CYLTabBarController *tabBarController = [self cyl_tabBarController];
UIViewController *viewController = tabBarController.selectedViewController;
UIActionSheet *actionSheet = [[UIActionSheet alloc] initWithTitle:nil
delegate:nil
cancelButtonTitle:@"取消"
destructiveButtonTitle:nil
otherButtonTitles:@"拍照", @"从相册选取", @"淘宝一键转卖", nil];
[actionSheet showInView:viewController.view];
}
#pragma mark - UIActionSheetDelegate
- (void)actionSheet:(UIActionSheet *)actionSheet didDismissWithButtonIndex:(NSInteger)buttonIndex {
NSLog(@"buttonIndex = %@", @(buttonIndex));
}
#pragma mark - CYLPlusButtonSubclassing
//+ (UIViewController *)plusChildViewController {
// UIViewController *plusChildViewController = [[UIViewController alloc] init];
// plusChildViewController.view.backgroundColor = [UIColor redColor];
// plusChildViewController.navigationItem.title = @"PlusChildViewController";
// UIViewController *plusChildNavigationController = [[UINavigationController alloc]
// initWithRootViewController:plusChildViewController];
// return plusChildNavigationController;
//}
//
//+ (NSUInteger)indexOfPlusButtonInTabBar {
// return 4;
//}
//
//+ (BOOL)shouldSelectPlusChildViewController {
// BOOL isSelected = CYLExternPlusButton.selected;
// if (isSelected) {
// NSLog(@"
iOS-CYLTabBarController【好用的TabbarController】的更多相关文章
- iOS 在使用UINavigationController和TabBarController时view的frame
可能是以前记错了,总认为在ios6上使用了UINavigationController或者TabBarController会因为多了bar而影响子controller的view的frame大小.今天在 ...
- iOS:CYLTabBarController的具体使用实例:实现新浪微博的主流框架
使用CocoaPods或者手动集成将CYLTabBarController这个第三方框架导入项目后,截图如下: 在AppDelegate.m类中实现的代码如下: // AppDelegate.m // ...
- iOS的非常全的三方库,插件,大牛博客
转自: http://www.cnblogs.com/zyjzyj/p/6015625.html github排名:https://github.com/trending, github搜索:http ...
- iOS 第三方库、插件、知名博客总结
iOS 第三方库.插件.知名博客总结 用到的组件 1.通过CocoaPods安装 项目名称 项目信息 AFNetworking 网络请求组件 FMDB 本地数据库组件 SDWebImage 多个缩略图 ...
- ios很好的开源库
Tim9Liu9/TimLiu-iOS 自己总结的iOS.mac开源项目及库,持续更新.. 目录 UI 下拉刷新 模糊效果 AutoLayout 富文本 图表 表相关与Tabbar 隐藏与显示 HUD ...
- iOS - 第三方库总结篇
Swift版本点击这里 欢迎加入QQ群交流: 594119878 About A curated list of iOS objective-C ecosystem. How to Use Simpl ...
- iOS:CYLTabBarController【低耦合集成TabBarController】
导航 与其他自定义TabBarController的区别 集成后的效果 项目结构 使用CYLTabBarController 第一步:使用CocoaPods导入CYLTabBarController ...
- iOS 自定义选项卡-CYLTabBarController
正常的选项卡流程 cocoapods就不说了 创建一个CYLTabBarControllerConfig类 #import <Foundation/Foundation.h> #impor ...
- iOS 如何使用TabbarController
xcode中给我内置很多app模版,不过很多时候我们需要更加灵活的初始化项目.下面我就简单介绍一下,如何从0开始制作一个tabbar app. 创建个项目,由于我们从头开始写程序,因此理论上对模版没有 ...
- 【iOS】自己定义TabBarController
一.自己定义的思路 iOS中的TabBarController确实已经非常强大了.大部分主流iOS应用都会採用. 可是往往也不能满足所有的需求,因此须要自己定义TabBar,自己定义须要对系统的Tab ...
随机推荐
- 如何让一个DIV水平,垂直方向都居中于浏览器?
<style type="text/css"><!-- div {position:absolute;top:50%;left:50%;margin:-150px ...
- Timus Online Judge:ural:1006. Square Frames
原题链接:http://acm.timus.ru/problem.aspx?space=1&num=1006 看到题第一反应:这玩意怎么读入…… 本地的话因为是全角字符,会占两个位置,所以需要 ...
- HDU6237-A Simple Stone Game-找素因子(欧拉函数)-2017中国大学生程序设计竞赛-哈尔滨站-重现赛
A Simple Stone Game Time Limit: 2000/1000 MS (Java/Others) Memory Limit: 262144/262144 K (Java/Ot ...
- linux 内核提权
不经意间找到了大牛总结的一些Linux提权exp 我直接借花献佛分享给大家 #CVE #Description #Kernels CVE-2017-1000367 [Sudo] (Sudo 1.8.6 ...
- c# base 和this 继承
父类的构造函数总是在子类之前执行的.既先初始化静态构造函数,后初始化子类构造函数. public class BaseCircle { public BaseCircle() { Console.Wr ...
- 一致性哈希java实现
值得注意的点 哈希函数的选择 murmur哈希函数 该函数是非加密型哈希,性能高,且发生哈希碰撞的概率据说很低 md5 SHA 可以选择guava包,提供了丰富的哈希函数的API 支持虚拟节点+加权, ...
- Typescript学习笔记
什么是 TypeScript TypeScript 是 JavaScript 的类型的超集,它可以编译成纯 JavaScript. 安装 TypeScript 命令行工具安装: npm install ...
- [ios 开发笔记]:一句话笔记
1.NSString转int int a=[@"123" intValue]; 同样适用于NSDictionary将NSNumber转为int 2.switch(stateme ...
- tone() 和 IRremote 冲突的解决办法
tone()函数冲突 http://www.geek-workshop.com/thread-4037-1-1.html 可以自制函数newtone() void newtone(byte toneP ...
- 关于手残,搞废我的OLED屏幕的 追悼会
2017-12-1913:36:41 昨天按照B站的资料利用esp12F做了一个天气站,可预报天气,惭愧的是模型做好了,照片还没拍就夭折了,可怜了我20块的屏幕,我心伤悲,莫知我哀呀! 本来调试已经成 ...