自己定义View Controller转换动画
- 原文链接 : Introduction to Custom View Controller Transitions and Animations
- 原文作者 : joyce echessa
- 译文出自 : 开发技术前线 www.devtf.cn
- 译者 : kmyhy
观察 iOS 自带的 App,你会看到当你从一个视图导航到还有一个视图时总是会显示各种各样的转换动画,以“主-从”视图为例(相似的程序有Messages App或者系统设置程序),一个轻扫动作能够让详情视图呈如今主视图之上,在呈现一个新的 View Controller 时还会带有丰富的转换动画。
iOS 7 新增的自己定义 View Controller 转换动画,使让开发人员在 App 中发生从一个 View Controller 到还有一个 View Controller 的导航时,创建自己定义的动画效果。在本教程中。我们将学习这个内容。此外。我们还会学习怎样通过手势来发起一个导航,也就是所谓的“交互式导航”。
在開始之前,请下载本教程中用到的 dl=0">開始项目
開始
创建自己定义转换动画的,能够分成 3 个步骤进行:
指定一个类,实现 UIViewControllerAnimatedTransitioning 协议。在这个类中,我们编写执行动画的代码。这个类充当动画控制器。
在呈现一个 View Controller 之前,设置这个 View Controller 的 transitioningDelegate 属性为某个对象。这个对象在呈现这个 View Controller 的过程中将被调用。用于获取转场时应该使用什么对象作为动画控制器。
实现回调方法。用于返回一个你在第一歩中创建的动画控制器对象。
执行開始项目,你将看到一个列表。在导航栏上有一个 Action button。点击它,它将呈现一个新的 View Controller(以 modal 方式从底部向上弹起)。我们将为这个转换动作自己定义转换动画。
Custom Present Transition
实现 View Controller 呈现动画
如前面所述。首先须要创建动画控制器。新建一个 NSObject 子类 CustomPresentAnimationController,声明将遵守 UIViewControllerAnimatedTransitioning 协议:
class CustomPresentAnimationController: NSObject, UIViewControllerAnimatedTransitioning {UIViewControllerAnimatedTransitioning protocol has two required methods which we’ll add next. Add the following methods to the class.
UIViewControllerAnimatedTransitioning 协议有两个必须实现的方法,我们来实现它们:
func transitionDuration(transitionContext: UIViewControllerContextTransitioning) -> NSTimeInterval {

    return 2.5

}

func animateTransition(transitionContext: UIViewControllerContextTransitioning) {

    let fromViewController = transitionContext.viewControllerForKey(UITransitionContextFromViewControllerKey)!

    let toViewController = transitionContext.viewControllerForKey(UITransitionContextToViewControllerKey)!

    let finalFrameForVC = transitionContext.finalFrameForViewController(toViewController)

    let containerView = transitionContext.containerView()

    let bounds = UIScreen.mainScreen().bounds

    toViewController.view.frame = CGRectOffset(finalFrameForVC, 0, bounds.size.height)

    containerView.addSubview(toViewController.view)

    UIView.animateWithDuration(transitionDuration(transitionContext), delay: 0.0, usingSpringWithDamping: 0.5, initialSpringVelocity: 0.0, options: .CurveLinear, animations: {

        fromViewController.view.alpha = 0.5

        toViewController.view.frame = finalFrameForVC

        }, completion: {

            finished in

            transitionContext.completeTransition(true)

            fromViewController.view.alpha = 1.0

    })

}
第一个方法用于指定动画播放的时长。对于本例。我们指定为 2.5 秒。当然在真正的 App 你能够把这个数字调小一些。
第二个方法带有一个 transitionContext 參数,通过这个对象,我们能够获取转换过程中涉及的 from 控制器(開始控制器)、to 控制器(到达控制器)、当动画完毕后的 final frame (to 视图的最终位置及大小),以及 containerView——这个容器用于包括 from 控制器和 to 控制器的 UIView。
然后。我们将 to 视图放在屏幕的下方,并将 to 视图加入到 containerView。
在动画块中,我们将 to 视图移动到 final frame 的位置。同一时候将 from 视图的 alpha 值设置为 0.5。这样,当 to 视图向上滑入的同一时候 from 视图淡出。
执行动画块时。第一个參数调用了transitionDuration(transitionContext:)方法,用这种方法的返回值作为动画块的执行时间。当动画完毕,调用完毕块,我们在完毕块中通知 transitionContext 动画已经完毕,同一时候将 from 视图的 alpha 值设回 1.0。
写好动画控制器类之后,我们须要在故事板中将动画控制器分配给某个 segue。
打开 ItemsTableViewController.swift ,改动类声明例如以下:
class ItemsTableViewController: UITableViewController, UIViewControllerTransitioningDelegate {UIViewController 有一个 transitionDelegate 属性,用于指定自己定义转换动画。当转场到一个 View Controller 时,框架会使用这个属性进行转换。而 UIViewControllerTransitioningDelegate 属性则负责提供自己定义转换对象。
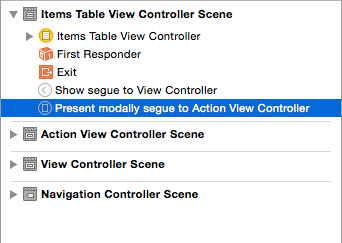
打开 Main.storyboard 选择导航到 Action View Controller 的那条 segue,在属性面板将它的 Identifier 设置为 showAction。
回到 ItemsTableViewController ,加入例如以下代码:
let customPresentAnimationController = CustomPresentAnimationController()

override func prepareForSegue(segue: UIStoryboardSegue, sender: AnyObject?) {

    if segue.identifier == "showAction" {

        let toViewController = segue.destinationViewController as UIViewController

        toViewController.transitioningDelegate = self

    }

}
这里我们创建了一个我们的动画控制器对象。然后在 prepareForSegue() 方法中,找到 ID 为 showAction 的 segue,设置它的 to 视图控制器的 transitioningDelegate 属性。
然后在这个类中实现 UIViewControllerTransitioningDelegate 方法。并在这些方法中返回我们的自己定义动画控制器。
func animationControllerForPresentedController(presented: UIViewController, presentingController presenting: UIViewController, sourceController source: UIViewController) -> UIViewControllerAnimatedTransitioning?

{

    return customPresentAnimationController

}
执行程序,你能够看到 Action 视图从屏幕底部缓缓弹起,并在停止前呈阻尼运动。

假设想看看其它效果,在 CustomPresentAnimationController.swift 中找到例如以下语句:
toViewController.view.frame = CGRectOffset(finalFrameForVC, 0, bounds.size.height)改动为:
toViewController.view.frame = CGRectOffset(finalFrameForVC, 0, -bounds.size.height)这将让 to 视图从屏幕上方向下滑入。
执行 App 效果例如以下:
自己定义解散动画
前面我们自己定义了呈现动画,但当视图解散时。仍然使用的是默认的动画效果。
UIViewControllerTransitioningDelegate 协议还同意我们指定一个动画控制器作位解散动画。就如同呈现时我们所做的一样。我们接下来就来实现它。
创建一个 NSObject 子类 CustomDismissAnimationController,改动其类声明例如以下:
class CustomDismissAnimationController: NSObject, UIViewControllerAnimatedTransitioning {加入例如以下方法:
func transitionDuration(transitionContext: UIViewControllerContextTransitioning) -> NSTimeInterval {

    return 2

}

func animateTransition(transitionContext: UIViewControllerContextTransitioning) {

    let fromViewController = transitionContext.viewControllerForKey(UITransitionContextFromViewControllerKey)!

    let toViewController = transitionContext.viewControllerForKey(UITransitionContextToViewControllerKey)!

    let finalFrameForVC = transitionContext.finalFrameForViewController(toViewController)

    let containerView = transitionContext.containerView()

    toViewController.view.frame = finalFrameForVC

    toViewController.view.alpha = 0.5

    containerView.addSubview(toViewController.view)

    containerView.sendSubviewToBack(toViewController.view)

    UIView.animateWithDuration(transitionDuration(transitionContext), animations: {

        fromViewController.view.frame = CGRectInset(fromViewController.view.frame, fromViewController.view.frame.size.width / 2, fromViewController.view.frame.size.height / 2)

        toViewController.view.alpha = 1.0

    }, completion: {

        finished in

        transitionContext.completeTransition(true)

    })

}
事实上这和呈现动画的实现真的非常像。在 animateTransition() 方法中。我们获取 to/from 视图控制器。
在这里。to 控制器变成了表格控制器。
我们改动了 to 视图在动画正式開始之前的 alpha 值。然后将 to 视图加入到 containerView,并将它放到 from 视图的后面,以便它在一開始的时候不可见。
在动画块中,我们让 from 视图的大小变成 0,0。但中心位置不变。这将导致 from 视图由大变小直至消失。同一时候将 to 视图的 alpha 值设置为 1.0 使其可见。
在 ItemsTableViewController 中加入几个属性声明:
let customDismissAnimationController = CustomDismissAnimationController()然后加入例如以下方法:
func animationControllerForDismissedController(dismissed: UIViewController) -> UIViewControllerAnimatedTransitioning? {
return customDismissAnimationController
}
UIViewControllerTransitioningDelegate 协议的这种方法返回一个动画控制器作为解散控制器。
执行效果例如以下:
动画效果不是我们所预料的。你能够看到 from 视图的白色框架确实是如预期的缩小了,但图片的尺寸根本不会改变。这是由于只改变视图的 frame 并不会影响它的 subviews。我们能够用 UIView 的截屏功能解决问题。
UIView 截屏功能会对一个 UIView 进行截图,将它绘制在一个“轻量级”的 UIView 中。
我们将在淡入淡出动画中使用截屏进行动画,而不是直接用真正的视图进行动画。
将 animateTransition() 方法代码改动为:
func animateTransition(transitionContext: UIViewControllerContextTransitioning) {

    let fromViewController = transitionContext.viewControllerForKey(UITransitionContextFromViewControllerKey)!

    let toViewController = transitionContext.viewControllerForKey(UITransitionContextToViewControllerKey)!

    let finalFrameForVC = transitionContext.finalFrameForViewController(toViewController)

    let containerView = transitionContext.containerView()

    toViewController.view.frame = finalFrameForVC

    toViewController.view.alpha = 0.5

    containerView.addSubview(toViewController.view)

    containerView.sendSubviewToBack(toViewController.view)

    let snapshotView = fromViewController.view.snapshotViewAfterScreenUpdates(false)

    snapshotView.frame = fromViewController.view.frame

    containerView.addSubview(snapshotView)

    fromViewController.view.removeFromSuperview()

    UIView.animateWithDuration(transitionDuration(transitionContext), animations: {

        snapshotView.frame = CGRectInset(fromViewController.view.frame, fromViewController.view.frame.size.width / 2, fromViewController.view.frame.size.height / 2)

        toViewController.view.alpha = 1.0

    }, completion: {

        finished in

        snapshotView.removeFromSuperview()

        transitionContext.completeTransition(true)

    })

}
这里,我们创建了 from 视图的截屏,将截屏加到 containerView,然后将 from 视图从 containerView 中移除。
如今,动画效果最终正常了。

定制导航控制器转换动画
面看到,要在呈现一个模式窗体的过程中呈现自己定义动画,我们须要让负责呈现的 View Controller 实现一个 Transitioning 协议。可是,为每个 View Controller 都指定一个托付对象还是太麻烦了,尤其是当我们在使用 UITabBarController 或 UINavigationController 的时候。
对于这两种控制器。有一种更简单的办法,能够使用 UITabBarControllerDelegate 或者 UINavigationControllerDelegate 协议来实现自己定义转换动画。
我们来看一下自己定义导航控制器转换动画的样例。
首先,创建一个动画控制器。新建一个 NSObject 子类 CustomNavigationAnimationController。改动其类声明例如以下:
class CustomNavigationAnimationController: NSObject, UIViewControllerAnimatedTransitioning {然后编写例如以下代码。这里我准备实现一个简单的魔方动画。
这个动画控制器和前面实现的两个动画控制器相似。
注意 reverse 变量,我们用这个变量来指定动画的方向,也就是说要进行的动画是主视图->从视图,抑或相反方向。
var reverse: Bool = false

func transitionDuration(transitionContext: UIViewControllerContextTransitioning) -> NSTimeInterval {

    return 1.5

}

func animateTransition(transitionContext: UIViewControllerContextTransitioning) {

    let containerView = transitionContext.containerView()

    let toViewController = transitionContext.viewControllerForKey(UITransitionContextToViewControllerKey)!

    let fromViewController = transitionContext.viewControllerForKey(UITransitionContextFromViewControllerKey)!

    let toView = toViewController.view

    let fromView = fromViewController.view

    let direction: CGFloat = reverse ?

-1 : 1

    let const: CGFloat = -0.005

    toView.layer.anchorPoint = CGPointMake(direction == 1 ?

0 : 1, 0.5)

    fromView.layer.anchorPoint = CGPointMake(direction == 1 ? 1 : 0, 0.5)

    var viewFromTransform: CATransform3D = CATransform3DMakeRotation(direction * CGFloat(M_PI_2), 0.0, 1.0, 0.0)

    var viewToTransform: CATransform3D = CATransform3DMakeRotation(-direction * CGFloat(M_PI_2), 0.0, 1.0, 0.0)

    viewFromTransform.m34 = const

    viewToTransform.m34 = const

    containerView.transform = CGAffineTransformMakeTranslation(direction * containerView.frame.size.width / 2.0, 0)

    toView.layer.transform = viewToTransform

    containerView.addSubview(toView)

    UIView.animateWithDuration(transitionDuration(transitionContext), animations: {

        containerView.transform = CGAffineTransformMakeTranslation(-direction * containerView.frame.size.width / 2.0, 0)

        fromView.layer.transform = viewFromTransform

        toView.layer.transform = CATransform3DIdentity

    }, completion: {

        finished in

        containerView.transform = CGAffineTransformIdentity

        fromView.layer.transform = CATransform3DIdentity

        toView.layer.transform = CATransform3DIdentity

        fromView.layer.anchorPoint = CGPointMake(0.5, 0.5)

        toView.layer.anchorPoint = CGPointMake(0.5, 0.5)

        if (transitionContext.transitionWasCancelled()) {

            toView.removeFromSuperview()

        } else {

            fromView.removeFromSuperview()

        }

        transitionContext.completeTransition(!transitionContext.transitionWasCancelled())

    })

}
打开 ItemsTableViewController.swift,将类声明改动为:
class ItemsTableViewController: UITableViewController, UIViewControllerTransitioningDelegate, UINavigationControllerDelegate {UINavigationControllerDelegate 协议负责提供动画控制器对象。
加入例如以下属性:
let customNavigationAnimationController = CustomNavigationAnimationController()在 viewDidLoad 方法最后加入:
navigationController?.delegate = self这句代码将导航控制器的 delegate 设置为 self,这样 ItemsTableViewController 就必须实现新的转换托付方法。
新增例如以下方法:
func navigationController(navigationController: UINavigationController, animationControllerForOperation operation: UINavigationControllerOperation, fromViewController fromVC: UIViewController, toViewController toVC: UIViewController) -> UIViewControllerAnimatedTransitioning? {

    customNavigationAnimationController.reverse = operation == .Pop

    return customNavigationAnimationController

}
这种方法会在导航控制器发生导航时调用,导航控制器会要求这种方法返回一个动画控制器实例。
转换的方向依据动画的类型(Push或Pop)而定。
执行程序。点击表格单元格,效果例如以下:
交互式转换
我们将让上述转换变成“交互式转换”,这样用户能够用手势来进行视图控制器的转换。
iOS 有很多 App 支持这个特性。通过交互式转换,你能够从左向右滑动来替代返回button的功能。你还能够用小幅度的轻扫手势查看 master 视图的内容,然后中途取消转换。
大幅度的轻扫手势则是进行 Pop 导航操作。
首先,须要创建一个交互式控制器。交互式控制器须要实现 UIViewControllerInteractiveTransitioning 协议。UINavigationControllerDelegate 或 Transitioning 托付在请求完一个动画控制器之后还会请求一个交互式控制器。
接下来创建交互式控制器。
新建一个 UIPercentDrivenInteractiveTransition 子类,名为 CustomInteractionController。
UIPercentDrivenInteractiveTransition 类已经实现了 UIViewControllerInteractiveTransitioning 协议,因此我们的类就没有必要再声明对这个协议的实现了。
对于 UIPercentDrivenInteractiveTransition 子类,我们必须使用单独的 UIView 动画,以便动画能够被停止、返回和播放。
继续加入例如以下代码:
var navigationController: UINavigationController!

var shouldCompleteTransition = false

var transitionInProgress = false

var completionSeed: CGFloat {

    return 1 - percentComplete

}

func attachToViewController(viewController: UIViewController) {

    navigationController = viewController.navigationController

    setupGestureRecognizer(viewController.view)

}

private func setupGestureRecognizer(view: UIView) {

        view.addGestureRecognizer(UIPanGestureRecognizer(target: self, action: "handlePanGesture:"))

}

func handlePanGesture(gestureRecognizer: UIPanGestureRecognizer) {

    let viewTranslation = gestureRecognizer.translationInView(gestureRecognizer.view!.superview!)

    switch gestureRecognizer.state {

    case .Began:

        transitionInProgress = true

        navigationController.popViewControllerAnimated(true)

    case .Changed:

        var const = CGFloat(fminf(fmaxf(Float(viewTranslation.x / 200.0), 0.0), 1.0))

        shouldCompleteTransition = const > 0.5

        updateInteractiveTransition(const)

    case .Cancelled, .Ended:

        transitionInProgress = false

        if !shouldCompleteTransition || gestureRecognizer.state == .Cancelled {

            cancelInteractiveTransition()

        } else {

            finishInteractiveTransition()

        }

    default:

        println("Swift switch must be exhaustive, thus the default")

    }

}
attachToViewController方法中。引用了一个导航控制器并保存到实例变量。以便当手势发生时用于初始化 Pop 转换。然后在视图中加入了一个手势识别器,并将手势处理方法指定为 handlePanGesture()方法。手势处理方法将处理手势的每个状态,包括:
開始:将 transitionInProgress 设置为 true,然后開始进行 Pop 导航。
改变:这个状态表示手势尚处于进行过程中,因此须要计算出转换的进度(百分比)。
这里假设扫动距离>= 200像素视同手势100%的完毕。假设小于此距离则计算手势划过的距离占200像素的百分之几。并以此作为动画完毕的进度。同一时候我们检查用户在释放手指前,划过的距离是否超过了一半,并将推断结果保存到 shouldCompleteTransition 变量。
取消/结束:将 transitionInProgress 设置为 false。同一时候推断 shouldCompleteTransition 变量是否为 false 或者手势已取消,假设是则取消动画,否则让动画完毕。
用一个计算属性来衡量完毕速度。
UIPercentDrivenInteractiveTransitio 有一个 completionSeed 属性,这个属性用于告诉框架当手势已经完毕时,还剩下多少动画须要播放。
当手势取消时,假设这个数值越大。则 View Controller 弹回去的速度就越快。
接下来就是使用这个交互式控制器。
打开 ItemsTableViewController.swift,加入例如以下属性:
let customInteractionController = CustomInteractionController()在 navigationController(_:animationControllerForOperation:fromViewController:toViewController:)方法開始部分加入:
if operation == .Push {

    customInteractionController.attachToViewController(toVC)

}
假设是 Push 动画,则调用 CustomInteractionController 的 attachToViewController() 方法,将 toViewController 传递给动画控制器。
然后加入例如以下方法:
func navigationController(navigationController: UINavigationController, interactionControllerForAnimationController animationController: UIViewControllerAnimatedTransitioning) -> UIViewControllerInteractiveTransitioning?

{

    return customInteractionController.transitionInProgress ? customInteractionController : nil

}
当框架请求一个动画控制器之时,它也会用上面的这种方法请求一个交互式控制器。
在这种方法中,我们推断是否转换開始,假设是。则返回一个交互式控制器给它。
执行 App ,查看转换动画效果:
结论
我们学习了怎样创建一个自己定义的 View Controller 转换,以及怎样创建交互式转换。通过这些特性,开发人员能够在 App 中彻底控制从一个视图控制器切换到还有一个视图控制器时的转换动画。并通过创建一系列独特的体验来取悦他们的用户。你能够从此下载完整的演示样例项目。
注意: 本教程有一个中文版本号(台湾繁体)。我们还将支持很多其它语言。
假设你想參加我们的翻译小组。请和我们联系。
自己定义View Controller转换动画的更多相关文章
- Swift:超炫的View Controller切换动画
匿名社交应用Secret的开发者开发了一款叫做Ping的应用,用户可以他们感兴趣的话题的推送. Ping有一个很炫的东西,就是主界面和之间切换的动画做的非常的好.每次看到一个非常炫的动画,都不由得会想 ...
- View Controller容器
在 iOS 5 之前,view controller 容器是 Apple 的特权.实际上,在 view controller 编程指南中还有一段申明,指出你不应该使用它们.Apple 对 view c ...
- 【IOS笔记】View Controller Basics
View Controller Basics 视图控制器基础 Apps running on iOS–based devices have a limited amount of screen s ...
- iOS7之定制View Controller切换效果
在iOS5和iOS6前,View Controller的切换主要有4种: 1. Push/Pop,NavigationViewController常干的事儿 2. Tab,TabViewControl ...
- MVC(Model View Controller)框架
MVC框架 同义词 MVC一般指MVC框架 MVC全名是Model View Controller,是模型(model)-视图(view)-控制器(controller)的缩写,一种软件设计典范,用一 ...
- 用Swift完成不同View Controller之间的切换
之前用objective-c开发时,页面之间的切换很容易.其实用swift没有很大的变化,如果你是用storyboard完成的界面,基本上是同样的方式,只不过在代码部分写成swift风格的就行了. 今 ...
- Android 它们的定义View它BounceProgressBar
转载请注明出处:http://blog.csdn.net/bbld_/article/details/41246247 [Rocko's blog] 之前几天下载了非常久没用了的桌面版酷狗来用用的时候 ...
- Android自己定义view之measure、layout、draw三大流程
自己定义view之measure.layout.draw三大流程 一个view要显示出来.须要经过測量.布局和绘制这三个过程,本章就这三个流程具体探讨一下.View的三大流程具体分析起来比較复杂,本文 ...
- iOS 自己定义页面的切换动画与交互动画 By Swift
在iOS7之前,开发人员为了寻求自己定义Navigation Controller的Push/Pop动画,仅仅能受限于子类化一个UINavigationController,或是用自己定义的动画去覆盖 ...
随机推荐
- mysql +keeplive+drbd高可用架构
1MySQL+DRBD+keepalived高可用架构 DRBD(DistributedReplicatedBlockDevice)是一个基于块设备级别在远程服务器直接同步和镜像数据的开源软件,类似于 ...
- Python 列表浅拷贝与深拷贝
浅拷贝 shallow copy 和深拷贝 deep copy list.copy() 浅拷贝:复制此列表(只复制一层,不会复制深层对象) 等同于 L[:] 举例: 浅拷贝: a = [1.1, 2. ...
- 前端基于react,后端基于.net core2.0的开发之路(1) 介绍
文章提纲目录 1.前端基于react,后端基于.net core2.0的开发之路(1) 介绍 2.前端基于react,后端基于.net core2.0的开发之路(2) 开发环境的配置,注意事项,后端数 ...
- javascript 中parseInt 的用法
<!DOCTYPE html> <html> <head lang="en"> <meta charset="UTF-8 ...
- Container With Most Water 容器最大水容量
描述 Given n non-negative integers a1, a2, ..., an, where each represents a point at coordinate (i, ai ...
- Java实现邮箱发送验证码
第一步,导入JAR包,JAR包下载地址[http://pan.baidu.com/s/1kVRvGyF] 正式代码: 首先书写一个工具类: MailUtil import javax.mail.*; ...
- C# 4.0 新特性dynamic、可选参数、命名参数等
1.dynamic ExpandoObject熟悉js的朋友都知道js可以这么写 : 1 var t = new Object(); 2 t.Abc = ‘something’; 3 t.Valu ...
- .net core 使用X509 私钥加密请求
1.获取证书路径 var basePath = _environment.ContentRootPath; //商户私钥证书,用于对请求报文进行签名 "); 2.数据加密 .net core ...
- React+Redux实现追书神器网页版
引言 由于现在做的react-native项目没有使用到redux等框架,写了一段时间想深入学习react,有个想法想做个demo练手下,那时候其实还没想好要做哪一个类型的,也看了些动漫的,小说阅读, ...
- Entity Framework Core 使用HiLo生成主键
#cnblogs_post_body.cnblogs-markdown p img { max-width: 95%; } HiLo是在NHiernate中生成主键的一种方式,不过现在我们可以在Ent ...