『计算机视觉』Mask-RCNN_推断网络终篇:使用detect方法进行推断
一、detect和build
前面多节中我们花了大量笔墨介绍build方法的inference分支,这节我们看看它是如何被调用的。
在dimo.ipynb中,涉及model的操作我们简单进行一下汇总,首先创建图并载入预训练权重,

然后规范了类别序列,

实际开始检测的代码块如下,
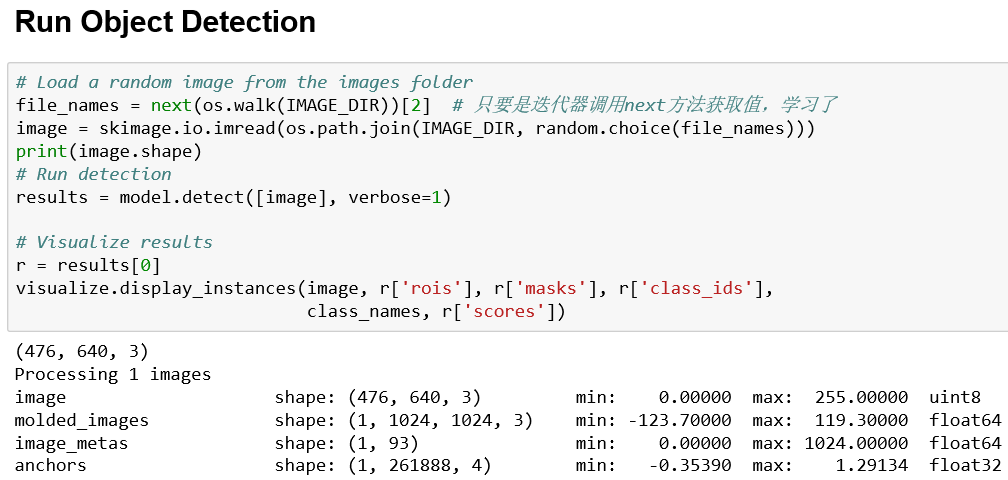
经由model.detect方法,调用model.build方法(也就是我们前面多节在讲解的方法)构建图,实施预测。
二、detect方法
首先看看detect方法的前几行(和build一样,同见model.py),
    def detect(self, images, verbose=0):

        """Runs the detection pipeline.

        images: List of images, potentially of different sizes.

        Returns a list of dicts, one dict per image. The dict contains:

        rois: [N, (y1, x1, y2, x2)] detection bounding boxes

        class_ids: [N] int class IDs

        scores: [N] float probability scores for the class IDs

        masks: [H, W, N] instance binary masks

        """

        assert self.mode == "inference", "Create model in inference mode."

        assert len(

            images) == self.config.BATCH_SIZE, "len(images) must be equal to BATCH_SIZE"

        # 日志记录

        if verbose:

            log("Processing {} images".format(len(images)))

            for image in images:

                log("image", image)
1、待检测图像预处理
        # Mold inputs to format expected by the neural network

        molded_images, image_metas, windows = self.mold_inputs(images)

        # Validate image sizes

        # All images in a batch MUST be of the same size

        image_shape = molded_images[0].shape

        for g in molded_images[1:]:

            assert g.shape == image_shape,\

                "After resizing, all images must have the same size. Check IMAGE_RESIZE_MODE and image sizes."
简单的纠错和日志控制之后,即调用mold_input函数对输入图片进行调整,并记录图片信息。
self.mold_inputs方法如下,
    def mold_inputs(self, images):

        """Takes a list of images and modifies them to the format expected

        as an input to the neural network.

        images: List of image matrices [height,width,depth]. Images can have

            different sizes.

        Returns 3 Numpy matrices:

        molded_images: [N, h, w, 3]. Images resized and normalized.

        image_metas: [N, length of meta data]. Details about each image.

        windows: [N, (y1, x1, y2, x2)]. The portion of the image that has the

            original image (padding excluded).

        """

        molded_images = []

        image_metas = []

        windows = []

        for image in images:

            # Resize image

            # TODO: move resizing to mold_image()

            molded_image, window, scale, padding, crop = utils.resize_image(

                image,

                min_dim=self.config.IMAGE_MIN_DIM,      # 800

                min_scale=self.config.IMAGE_MIN_SCALE,  # 0

                max_dim=self.config.IMAGE_MAX_DIM,      # 1024

                mode=self.config.IMAGE_RESIZE_MODE)     # square

            molded_image = mold_image(molded_image, self.config)  # 减平均像素

            # Build image_meta 形式为np数组

            image_meta = compose_image_meta(

                0, image.shape, molded_image.shape, window, scale,

                np.zeros([self.config.NUM_CLASSES], dtype=np.int32))

            # Append

            molded_images.append(molded_image)

            windows.append(window)

            image_metas.append(image_meta)

        # Pack into arrays

        molded_images = np.stack(molded_images)

        image_metas = np.stack(image_metas)

        windows = np.stack(windows)

        return molded_images, image_metas, windows
utils.resize_image函数用于缩放原图像,它生成一个scale,返回图像大小等于输入图像大小*scale并保证
- 最短边等于输入min_dim,最长边不大于max_dim
- 如果最长边超过了max_dim则保证最长边等于max_dim,最短边不再限制
最后,将图片padding到max_dim*max_dim大小(即molded_images大小其实是固定的),其返回值如下:
image.astype(image_dtype), window, scale, padding, crop
表示:resize后图片,原图相对resize后图片的位置信息(详见『计算机视觉』Mask-RCNN_推断网络其五:目标检测结果精炼),放缩倍数,padding信息(四个整数),crop信息(四个整数或者None)。
mold_image函数更为简单,就是把图片像素减去了个平均值,MEAN_PIXEL=[123.7 116.8 103.9]。
compose_image_meta记录了全部的原始信息,可以看到,crop并未收录在内,
def compose_image_meta(image_id, original_image_shape, image_shape,

                       window, scale, active_class_ids):

    """Takes attributes of an image and puts them in one 1D array.

    image_id: An int ID of the image. Useful for debugging.

    original_image_shape: [H, W, C] before resizing or padding.

    image_shape: [H, W, C] after resizing and padding

    window: (y1, x1, y2, x2) in pixels. The area of the image where the real

            image is (excluding the padding)

    scale: The scaling factor applied to the original image (float32)

    active_class_ids: List of class_ids available in the dataset from which

        the image came. Useful if training on images from multiple datasets

        where not all classes are present in all datasets.

    """

    meta = np.array(

        [image_id] +                  # size=1

        list(original_image_shape) +  # size=3

        list(image_shape) +           # size=3

        list(window) +                # size=4 (y1, x1, y2, x2) in image cooredinates

        [scale] +                     # size=1

        list(active_class_ids)        # size=num_classes

    )

    return meta
最后拼接返回。
2、anchors生成
首先调用方法get_anchors生成锚框(见『计算机视觉』Mask-RCNN_锚框生成),shape为[anchor_count, (y1, x1, y2, x2)],
        # Anchors

        anchors = self.get_anchors(image_shape)

        # Duplicate across the batch dimension because Keras requires it

        # TODO: can this be optimized to avoid duplicating the anchors?

        # [anchor_count, (y1, x1, y2, x2)] --> [batch, anchor_count, (y1, x1, y2, x2)]

        anchors = np.broadcast_to(anchors, (self.config.BATCH_SIZE,) + anchors.shape)
然后为之添加batch维度,最终[batch, anchor_count, (y1, x1, y2, x2)]。
3、inference网络预测
调用keras的predict方法前向传播,在预测任务中我们仅仅关注detections和mrcnn_mask两个输出。
        # Run object detection

        # 于__init__中定义:self.keras_model = self.build(mode=mode, config=config)

        # 返回list:    [detections, mrcnn_class, mrcnn_bbox,

        #               mrcnn_mask, rpn_rois, rpn_class, rpn_bbox]

        # detections,  [batch, num_detections, (y1, x1, y2, x2, class_id, score)]

        # mrcnn_mask,  [batch, num_detections, MASK_POOL_SIZE, MASK_POOL_SIZE, NUM_CLASSES]

        detections, _, _, mrcnn_mask, _, _, _ =\

            self.keras_model.predict([molded_images, image_metas, anchors], verbose=0)
4、坐标框重映射
我们对于坐标的操作都是基于输入图片的相对位置,且单位长度也是其宽高,在最后我们需要将之修正回像素空间坐标。
令输入图片list不需要输入图片具有相同的尺寸,所以我们在恢复时必须注意单张处理之。
        # Process detections

        results = []

        for i, image in enumerate(images):

            # 需要单张处理,因为原始图片images不保证每张尺寸一致

            final_rois, final_class_ids, final_scores, final_masks =\

                self.unmold_detections(detections[i], mrcnn_mask[i],

                                       image.shape, molded_images[i].shape,

                                       windows[i])
目标检测框重映射:unmold_detections函数
    def unmold_detections(self, detections, mrcnn_mask, original_image_shape,

                          image_shape, window):

        """Reformats the detections of one image from the format of the neural

        network output to a format suitable for use in the rest of the

        application.

        detections: [N, (y1, x1, y2, x2, class_id, score)] in normalized coordinates

        mrcnn_mask: [N, height, width, num_classes]

        original_image_shape: [H, W, C] Original image shape before resizing

        image_shape: [H, W, C] Shape of the image after resizing and padding

        window: [y1, x1, y2, x2] Pixel coordinates of box in the image where the real

                image is excluding the padding.

        Returns:

        boxes: [N, (y1, x1, y2, x2)] Bounding boxes in pixels

        class_ids: [N] Integer class IDs for each bounding box

        scores: [N] Float probability scores of the class_id

        masks: [height, width, num_instances] Instance masks

        """

        # How many detections do we have?

        # Detections array is padded with zeros. Find the first class_id == 0.

        zero_ix = np.where(detections[:, 4] == 0)[0]  # DetectionLayer 末尾对结果进行了全0填充

        N = zero_ix[0] if zero_ix.shape[0] > 0 else detections.shape[0]  # 有意义的检测结果数N

        # Extract boxes, class_ids, scores, and class-specific masks

        boxes = detections[:N, :4]                         # [N, (y1, x1, y2, x2)]

        class_ids = detections[:N, 4].astype(np.int32)     # [N, class_id]

        scores = detections[:N, 5]                         # [N, score]

        masks = mrcnn_mask[np.arange(N), :, :, class_ids]  # [N, height, width, num_classes]

        # Translate normalized coordinates in the resized image to pixel

        # coordinates in the original image before resizing

        window = utils.norm_boxes(window, image_shape[:2])  # window相对输入图片规范化

        wy1, wx1, wy2, wx2 = window

        shift = np.array([wy1, wx1, wy1, wx1])

        wh = wy2 - wy1  # window height

        ww = wx2 - wx1  # window width

        scale = np.array([wh, ww, wh, ww])

        # Convert boxes to normalized coordinates on the window

        boxes = np.divide(boxes - shift, scale)  # box相对window坐标规范化

        # Convert boxes to pixel coordinates on the original image

        boxes = utils.denorm_boxes(boxes, original_image_shape[:2])  # box相对原图解规范化

        # Filter out detections with zero area. Happens in early training when

        # network weights are still random

        exclude_ix = np.where(

            (boxes[:, 2] - boxes[:, 0]) * (boxes[:, 3] - boxes[:, 1]) <= 0)[0]

        if exclude_ix.shape[0] > 0:

            boxes = np.delete(boxes, exclude_ix, axis=0)

            class_ids = np.delete(class_ids, exclude_ix, axis=0)

            scores = np.delete(scores, exclude_ix, axis=0)

            masks = np.delete(masks, exclude_ix, axis=0)

            N = class_ids.shape[0]

        # Resize masks to original image size and set boundary threshold.

        full_masks = []

        for i in range(N):  # 单个box操作

            # Convert neural network mask to full size mask

            full_mask = utils.unmold_mask(masks[i], boxes[i], original_image_shape)

            full_masks.append(full_mask)

        full_masks = np.stack(full_masks, axis=-1)\

            if full_masks else np.empty(original_image_shape[:2] + (0,))

        # [n, (y1, x1, y2, x2)]

        # [n, class_id]

        # [n, class_id]

        # [h, w, n]

        return boxes, class_ids, scores, full_masks
为了将输出结果格式还原,我们需要进行如下几步:
剔除为了凑齐DETECTION_MAX_INSTANCES 填充的全0检测结果
将box放缩回原始图片对应尺寸
剔除面积为0的box
mask输出尺寸还原
在网络中操作的box尺寸为基于输入图片的规范化坐标,window为像素坐标,所以我们先将window相对输入图片规范化,使得window和box处于同一坐标系,然后这两者坐标就可以直接交互了,使box相对window规范化,此时box坐标尺寸都是window的相对值,而window和原始图片是直接有映射关系的,所以box遵循其关系,映射回原始像素大小即可。
完成box映射后,我们开始对mask进行处理。
Mask信息重映射:utils.unmold_mask函数
utils.unmold_mask受调用于unmold_detections尾部:
        # Resize masks to original image size and set boundary threshold.

        full_masks = []

        for i in range(N):  # 单个box操作

            # Convert neural network mask to full size mask

            full_mask = utils.unmold_mask(masks[i], boxes[i], original_image_shape)

            full_masks.append(full_mask)

        full_masks = np.stack(full_masks, axis=-1)\

            if full_masks else np.empty(original_image_shape[:2] + (0,))
首先重申我们的unmold_detections函数是对单张图片进行处理的,而mask处理进一步的是对每一个检测框进行处理的,
def unmold_mask(mask, bbox, image_shape):

    """Converts a mask generated by the neural network to a format similar

    to its original shape.

    mask: [height, width] of type float. A small, typically 28x28 mask.

    bbox: [y1, x1, y2, x2]. The box to fit the mask in.

    Returns a binary mask with the same size as the original image.

    """

    threshold = 0.5

    y1, x1, y2, x2 = bbox

    mask = resize(mask, (y2 - y1, x2 - x1))

    mask = np.where(mask >= threshold, 1, 0).astype(np.bool)

    # Put the mask in the right location.

    full_mask = np.zeros(image_shape[:2], dtype=np.bool)

    full_mask[y1:y2, x1:x2] = mask

    return full_mask
我们在inference中输出的mask信息仅仅是一般的生成网络输出,所以为了得到掩码格式我们需要一个阈值。明确了这个概念,下一步就简单了,我们将mask输出放缩到对应的box大小即可(此时的box已经相对原始图片进行了放缩,是像素坐标),然后将放缩后的掩码按照box相对原始图片的位置贴在一张和原始图片等大的空白图片上。
我们对每一个检测目标做这个操作,就可以得到等同于检测目标数的原始图片大小的掩码图片(每个掩码图片上有一个掩码对象),将之按照axis=-1拼接,最终获取[h, w, n]格式输出,hw为原始图片大小,n为最终检测到的目标数目。
最终,将计算结果返回,退出函数。
        # [n, (y1, x1, y2, x2)]

        # [n, class_id]

        # [n, class_id]

        # [h, w, n]

        return boxes, class_ids, scores, full_masks
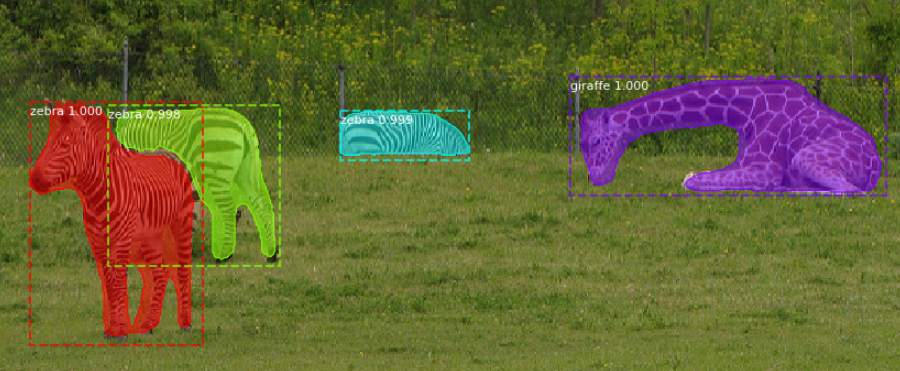
实际调用如下:

『计算机视觉』Mask-RCNN_推断网络终篇:使用detect方法进行推断的更多相关文章
- 『计算机视觉』经典RCNN_其二:Faster-RCNN
项目源码 一.Faster-RCNN简介 『cs231n』Faster_RCNN 『计算机视觉』Faster-RCNN学习_其一:目标检测及RCNN谱系 一篇讲的非常明白的文章:一文读懂Faster ...
- 『计算机视觉』经典RCNN_其一:从RCNN到Faster-RCNN
RCNN介绍 目标检测-RCNN系列 一文读懂Faster RCNN 一.目标检测 1.两个任务 目标检测可以拆分成两个任务:识别和定位 图像识别(classification)输入:图片输出:物体的 ...
- 『计算机视觉』Mask-RCNN_推断网络其二:基于ReNet101的FPN共享网络暨TensorFlow和Keras交互简介
零.参考资料 有关FPN的介绍见『计算机视觉』FPN特征金字塔网络. 网络构架部分代码见Mask_RCNN/mrcnn/model.py中class MaskRCNN的build方法的"in ...
- 『计算机视觉』Mask-RCNN_推断网络其四:FPN和ROIAlign的耦合
一.模块概述 上节的最后,我们进行了如下操作获取了有限的proposal, # [IMAGES_PER_GPU, num_rois, (y1, x1, y2, x2)] # IMAGES_PER_GP ...
- 『计算机视觉』Mask-RCNN_训练网络其三:训练Model
Github地址:Mask_RCNN 『计算机视觉』Mask-RCNN_论文学习 『计算机视觉』Mask-RCNN_项目文档翻译 『计算机视觉』Mask-RCNN_推断网络其一:总览 『计算机视觉』M ...
- 『计算机视觉』Mask-RCNN_训练网络其二:train网络结构&损失函数
Github地址:Mask_RCNN 『计算机视觉』Mask-RCNN_论文学习 『计算机视觉』Mask-RCNN_项目文档翻译 『计算机视觉』Mask-RCNN_推断网络其一:总览 『计算机视觉』M ...
- 『计算机视觉』Mask-RCNN_训练网络其一:数据集与Dataset类
Github地址:Mask_RCNN 『计算机视觉』Mask-RCNN_论文学习 『计算机视觉』Mask-RCNN_项目文档翻译 『计算机视觉』Mask-RCNN_推断网络其一:总览 『计算机视觉』M ...
- 『计算机视觉』Mask-RCNN_从服装关键点检测看KeyPoints分支
下图Github地址:Mask_RCNN Mask_RCNN_KeyPoints『计算机视觉』Mask-RCNN_论文学习『计算机视觉』Mask-RCNN_项目文档翻译『计算机视觉』Mas ...
- 『计算机视觉』Mask-RCNN_锚框生成
Github地址:Mask_RCNN 『计算机视觉』Mask-RCNN_论文学习 『计算机视觉』Mask-RCNN_项目文档翻译 『计算机视觉』Mask-RCNN_推断网络其一:总览 『计算机视觉』M ...
随机推荐
- (转)RabbitMQ学习
(二期)24.消息中间件RabbitMq [课程24]RabbitM...概念.xmind60.2KB [课程24]五种队列模式.xmind0.8MB [课程24]消息确...rm).xmind84. ...
- UML类图中箭头的含义
Explanation of the UML arrows Here's some explanations from the Visual Studio 2015 docs: UML Class D ...
- The Mathematics of the Rubik’s Cube
https://web.mit.edu/sp.268/www/rubik.pdf Introduction to Group Theory and Permutation Puzzles March ...
- c# 之 事务
SqlTransaction事务的简单例子 { DataTable dt = new DataTable(); System.Data.SqlClient.SqlConnection cnn = ne ...
- MySQL 安装步骤
今天用了一下MySQL,刚好看到之前电保存脑的笔记,于是整理了一下,还是记在博客上方便查询. 1.官网下载https://dev.mysql.com/downloads/mysql/之前安装的是mys ...
- springBoot 学习(总)
springBoot有个中文文档网址,应该是持续更新的. 别的资料 http://tengj.top/2017/02/26/springboot1/ http://412887952-qq-c ...
- Cisco 2960交换机配置
一. 基本操作 Switch(config)#hostname test01(交换机名称) //全局模式下修改交换机名称 Switch(config)#enable secret 123456 //全 ...
- 【.Net】在windows server 2016 和Windows10这些server上安装.net fw3.5
一般就是打开server manager. 一直next到add feature 讲net3.5勾选 发现需要指定一个路径是什么 source\sxs之类的 下载microsoft-windows-n ...
- Vs Code搭建 TypeScript 开发环境
一.npm install -g typescript 全局安装TypeScript 二.使用Vs Code打开已创建的文件夹,使用快捷键Ctrl+~启动终端输入命令 tsc --init 创建t ...
- C++通过jsoncpp类库读写JSON文件-json用法详解
介绍: JSON 是常用的数据的一种格式,各个语言或多或少都会用的JSON格式. JSON是一个轻量级的数据定义格式,比起XML易学易用,而扩展功能不比XML差多少,用之进行数据交换是一个很好的选择. ...