css3基础-选择器+边框与圆角+背景与渐变
Css3选择器相关:
section > div直接子元素选择器
div + article相邻兄弟选择器(在元素之后出现)
div ~ article通用兄弟选择器(在元素之后出现)
属性选择器:
a[href] {

    text-decoration: none;

}

a[href="#"] {

    color: #f00;

}

/*包含two且属性值用空格分隔:*/

a[class~="two"] {

    color: #ff0;

}

/*属性的第一个值以#开头:*/

a[href^="#"] {

    color: #0f0;

}

/*以#结尾:*/

a[href$="#"] {

    color: #00f;

}

/*包含#:*/

a[href*="#"] {

    color: #0ff;

}

/*第一个属性值以#-开头:*/

a[href|="#"] {

    color: #f0f;

}
UI元素伪类:
Input:disabled
Input:enabled
Input:checked
div:first-child匹配属于其父元素的第1个子元素且是div,计数时不分类型,显示时分类型
div:last-child匹配属于其父元素的最后1个子元素且是div,计数时不分类型,显示时分类型div:nth-child(2) 匹配属于其父元素的第n个子元素且是div,计数时不分类型,显示时分类型div:nth-lat-child(2) 匹配属于其父元素的第n个子元素且是div,计数时不分类型,显示时分类型
n匹配下标,从0开始计算:
li:nth-child(2n) 双数
li:nth-child(2n+1) 单数
li:nth-child(n+4)
li:nth-child(odd) 奇数,下标从1开始计算
li:nth-child(even) 偶数,下标从1开始计算
li:nth-last-child(3) 倒数第3个
article:only-child 属于父元素的唯一元素,且是article(没有任何其他子元素)
div:nth-of-type(2) 匹配属于其父元素的第2个子元素且是div,计数时分类型
div:nth-last-of-type(2)
div:first-of-type div:last-of-type
article:only-of-type 属于父元素的唯一article元素(可以有其他类型的子元素)
div:empty 没有子元素的div元素(包括文本也没有)
a:not(:last-of-type) 不是最后一个a子元素
id选择器权重大于属性选择器
.red > [class=”red”]
Css伪元素:
div::selection 文本被选中后的样式
::-moz-selection 火狐
Css3边框与圆角:
四个值按照顺时针方向来
Border-radius兼容性写法:
-webkit-border-radius: 50%;

       -moz-border-radius: 50%;

        -ms-border-radius: 50%;

         -o-border-radius: 50%;

            border-radius: 50%;
box-shadow水平偏移 垂直偏移 模糊 扩展 颜色 内部
box-shadow: 50px 30px 0px 0px yellow inset;
border-image-repeat:stretch(拉伸)/repeat(重复)/round(铺满)/initial/inherit
border-image-source: url("border.jpg");

    border-image-slice: 50%;/*图像边界向内偏移*/

    border-image-width: 50%;/*图像边界的宽度*/

    border-image-outset: 2; /*在边框外部绘制*/

    border-image-repeat: repeat;
css3背景与渐变:
背景绘制区域(显示范围)
background-clip: border-box;

background-clip: padding-box;

background-clip: content-box;
背景图像定位(起始位置,原点位置,与偏移搭配使用)
background-origin: border-box;

background-origin: padding-box;

background-origin: content-box;

background-position:10px 10px; /*与偏移搭配使用*/
background-size只写一个值,第二个默认是auto,根据比例等比缩放
background-size: contain; /*等比缩放到某一边达到容器边缘*/

background-size: cover;/*等比缩放填满容器*/

background-size: 800px 500px;

background-size: 800px;

background-size: 50% 50%;

background-size: 50%;

background-size: 100% 100%;

background-size: 100%;
background-image多重背景,前面的会覆盖后面的
background-image: url('bg2.png'), url('bg1.jpg');
demo:
<!DOCTYPE html>

<html>

<head>

    <meta charset="UTF-8">

    <title>background-image</title>

    <style type="text/css">

        div{

            width:300px;

            height:300px;

            background:url(1.jpg) no-repeat center top,

            url(2.jpg) no-repeat center 100px,

            url(3.jpg) no-repeat center 200px;

            margin:0 auto;

        }

    </style>

</head>

<body>

    <div></div>

</body>

</html>
默认从上到下渐变:
div {

    width: 800px; height: 500px;

    background: -webkit-linear-gradient(red, blue);

    background:    -moz-linear-gradient(red, blue);

    background:      -o-linear-gradient(red, blue);

    background:         linear-gradient(red, blue);

}
从左到右渐变
div {

    width: 800px; height: 500px;

    background: -webkit-linear-gradient(left, red , blue);

    background:    -moz-linear-gradient(right, red, blue);

    background:      -o-linear-gradient(right, red, blue);

    background:         linear-gradient(to right, red , blue);

}
左上角开始的对角线渐变
div {

    width: 800px; height: 500px;

    background: -webkit-linear-gradient(       left top, red, yellow, blue);

    background:    -moz-linear-gradient(   right bottom, red, yellow, blue);

    background:      -o-linear-gradient(   right bottom, red, yellow, blue);

    background:         linear-gradient(to right bottom, red, yellow, blue);

}
角度控制方向
角度渐变是水平线和渐变线之间的角度,0deg是从下到上,90度是从左到右
div {

    width: 800px; height: 500px;

    background: -webkit-linear-gradient(135deg, red, yellow, blue);

    background:    -moz-linear-gradient(135deg, red, yellow, blue);

    background:      -o-linear-gradient(135deg, red, yellow, blue);

    background:         linear-gradient(135deg, red, yellow, blue);

}
渐变具体位置控制
div {

    width: 800px; height: 500px;

    background: -webkit-linear-gradient(90deg, red 10%, orange 15%, yellow 20%, green 50%, blue 70%, indigo 80%, violet 100%);

    background:    -moz-linear-gradient(90deg, red 10%, orange 15%, yellow 20%, green 50%, blue 70%, indigo 80%, violet 100%);

    background:      -o-linear-gradient(90deg, red 10%, orange 15%, yellow 20%, green 50%, blue 70%, indigo 80%, violet 100%);

    background:         linear-gradient(90deg, red 10%, orange 15%, yellow 20%, green 50%, blue 70%, indigo 80%, violet 100%);

}
透明色渐变
div {

    width: 800px; height: 500px;

    background: -webkit-linear-gradient(90deg, rgba(255, 0, 0, 0), rgba(255, 0, 0, 1));

    background:    -moz-linear-gradient(90deg, rgba(255, 0, 0, 0), rgba(255, 0, 0, 1));

    background:      -o-linear-gradient(90deg, rgba(255, 0, 0, 0), rgba(255, 0, 0, 1));

    background:         linear-gradient(90deg, rgba(255, 0, 0, 0), rgba(255, 0, 0, 1));

}
重复渐变
div {

    width: 800px; height: 500px;

    background: -webkit-repeating-linear-gradient(90deg, red 0%, blue 10%, red 20%);

    background:    -moz-repeating-linear-gradient(90deg, red 0%, blue 10%, red 20%);

    background:      -o-repeating-linear-gradient(90deg, red 0%, blue 10%, red 20%);

    background:         repeating-linear-gradient(90deg, red 0%, blue 10%, red 20%);

}
径向渐变,从内到外
div {

    width: 800px; height: 500px;

    background: -webkit-radial-gradient(red, blue);

    background:    -moz-radial-gradient(red, blue);

    background:      -o-radial-gradient(red, blue);

    background:         radial-gradient(red, blue);

}
圆形渐变
div {

    width: 800px; height: 500px;

    background: -webkit-radial-gradient(circle, red, blue);

    background:    -moz-radial-gradient(circle, red, blue);

    background:      -o-radial-gradient(circle, red, blue);

    background:         radial-gradient(circle, red, blue);

}
椭圆形渐变
div {

    width: 800px; height: 500px;

    background: -webkit-radial-gradient(ellipse, red, blue);

    background:    -moz-radial-gradient(ellipse, red, blue);

    background:      -o-radial-gradient(ellipse, red, blue);

    background:         radial-gradient(ellipse, red, blue);

}
渐变从圆心到最近边
div.closest-side {

    width: 300px; height: 200px; margin: 50px;

    background: -webkit-radial-gradient(30% 70%, circle closest-side, red, blue);

    background:    -moz-radial-gradient(30% 70%, circle closest-side, red, blue);

    background:      -o-radial-gradient(30% 70%, circle closest-side, red, blue);

    background:         radial-gradient(30% 70%, circle closest-side, red, blue);

}
渐变从圆心到最远边
div.farthest-side {

    width: 300px; height: 200px; margin: 50px;

    background: -webkit-radial-gradient(30% 70%, farthest-side, red, blue);

    background:    -moz-radial-gradient(30% 70%, farthest-side, red, blue);

    background:      -o-radial-gradient(30% 70%, farthest-side, red, blue);

    background:         radial-gradient(30% 70%, farthest-side, red, blue);

}
渐变从圆心到最近角
div.closest-corner {

    width: 300px; height: 200px; margin: 50px;

    background: -webkit-radial-gradient(30% 70%, closest-corner, red, blue);

    background:    -moz-radial-gradient(30% 70%, closest-corner, red, blue);

    background:      -o-radial-gradient(30% 70%, closest-corner, red, blue);

    background:         radial-gradient(30% 70%, closest-corner, red, blue);

}
渐变从圆心到最远角
div.farthest-corner {

    width: 300px; height: 200px; margin: 50px;

    background: -webkit-radial-gradient(30% 70%, farthest-corner, red, blue);

    background:    -moz-radial-gradient(30% 70%, farthest-corner, red, blue);

    background:      -o-radial-gradient(30% 70%, farthest-corner, red, blue);

    background:         radial-gradient(30% 70%, farthest-corner, red, blue);

}
IE渐变从上到下
div {

    width: 800px;

    height: 500px;

    filter: progid:DXImageTransform.Microsoft.gradient( startColorstr='#ff0000', endColorstr='#0000ff',GradientType=0 );

}
IE渐变从左到右
div {

    width: 800px;

    height: 500px;

    filter: progid:DXImageTransform.Microsoft.gradient( startColorstr='#ff0000', endColorstr='#0000ff',GradientType=1 );

}
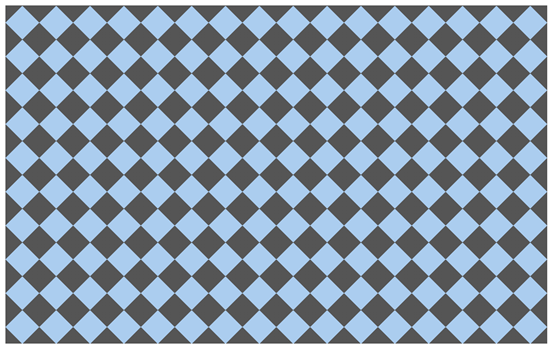
Demo:
<!DOCTYPE html>

<html lang="en">

<head>

<meta charset="UTF-8">

<title>线性渐变 - 特殊案例</title>

<style type="text/css">

div {

    width: 800px; height: 500px; background: #abcdef; background-size: 50px 50px;

    background-image:

        -webkit-gradient(linear, 0 0, 100% 100%, color-stop(.25, #555), color-stop(.25, transparent), to(transparent)),

        -webkit-gradient(linear, 0 100%, 100% 0, color-stop(.25, #555), color-stop(.25, transparent), to(transparent)),

        -webkit-gradient(linear, 0 0, 100% 100%, color-stop(.75, transparent), color-stop(.75, #555)),

        -webkit-gradient(linear, 0 100%, 100% 0, color-stop(.75, transparent), color-stop(.75, #555));

    background-image:

        -moz-linear-gradient(45deg, #555 25%, transparent 25%, transparent),

        -moz-linear-gradient(-45deg, #555 25%, transparent 25%, transparent),

        -moz-linear-gradient(45deg, transparent 75%, #555 75%),

        -moz-linear-gradient(-45deg, transparent 75%, #555 75%);

    background-image:

        -o-linear-gradient(45deg, #555 25%, transparent 25%, transparent),

        -o-linear-gradient(-45deg, #555 25%, transparent 25%, transparent),

        -o-linear-gradient(45deg, transparent 75%, #555 75%),

        -o-linear-gradient(-45deg, transparent 75%, #555 75%);

    background-image:

        linear-gradient(45deg, #555 25%, transparent 25%, transparent),

        linear-gradient(-45deg, #555 25%, transparent 25%, transparent),

        linear-gradient(45deg, transparent 75%, #555 75%),

        linear-gradient(-45deg, transparent 75%, #555 75%);

}

</style>

</head>

<body>

<div></div>

</body>

</html>
css3基础-选择器+边框与圆角+背景与渐变的更多相关文章
- 【Android UI】案例02 圆角边框、圆角背景的实现(shape)
本文主要分享圆角边框与圆角背景的实现方式.该方式的实现,须要了解shape的使用.该部分的具体介绍,请阅读博客http://blog.csdn.net/mahoking/article/details ...
- CSS3基础选择器
/*选择器分组:多个选择器使用同一个样式*/ h1,h2,a{ color: blue; } strong{ color: aquamarine; } /*选择器继承:body中未设置样式的会使用继承 ...
- CSS3——边框 圆角 背景 渐变 文本效果
边框 圆角边框 盒阴影 边界图片 圆角 CSS3 圆角制作器 指定每个角 背景 多重背景图像 大小 图像的定位 背景剪裁 渐变 线性渐变(Linear Gradients)- 向下/向上/向左/向右/ ...
- CSS入门(css简介与样式汇总、CSS的使用方式和特征、CSS基础选择器和复杂选择器、边框阴影)
一.CSS的作用 1.以统一的方式实现样式的定义 2.提高页面样式的可重用性和可维护性 3.实现了内容(HTML)和表示(CSS)的分离 HTML和CSS之间有什么关系? HTML:构建网页的结构 C ...
- CSS3入门之边框与背景
CSS3入门之边框与背景 *:first-child { margin-top: 0 !important; } body>*:last-child { margin-bottom: 0 !im ...
- 清除系统默认样式,文本样式,高级选择器(权重),边界圆角,a标签的四大伪类,背景图片
清除系统默认样式 大多系统预定义标签,有默认样式,不满足实际开发需求,反倒影响布局通常清除系统样式,利于开发 body,h1-h6,p,table { margin:; } ul { margin:; ...
- 盒子总结,文本属性操作,reset操作,高级选择器,高级选择器优先级,边界圆角(了解),a标签的四大伪类,背景图片操作,背景图片之精灵图
盒子总结 ''' block: 设置宽高 1.没有设置宽,宽自适应父级的宽(子级的border+padding+width=父级的width) 2.没有设置高,高由内容撑开 设置了宽高 一定采用设置的 ...
- 使用css3来实现边框圆角效果
经常看到别人的网站有个边框来修饰文字区域,类似圆角矩形把文字环绕起来,特别有感觉,于是就试着用图片边框来修饰,但是用图片过多会拉慢网页的加载速度,能不能使用css3来实现边框圆角效果呢?当然borde ...
- CSS3 基础(1)——选择器详解
CSS3选择器详解 一. 属性选择器 在CSS3中,追加了三个属性选择器分别为:[att*=val].[att^=val]和[att$=val],使得属性选择器有了通配符的概念. 选择器 示例 描述 ...
随机推荐
- hadoop-2.10.0安装hive-2.3.6
公司建立数仓,hive是必不可少的,hive是建立在hadoop基础上的数据库,前面已经搭建起了hadoop高可用,要学习hive,先从搭建开始,下面梳理一下hive搭建过程 1.下载hive安装包 ...
- Paper慢慢读 - AB实验人群定向 Double Machine Learning
Hetergeneous Treatment Effect旨在量化实验对不同人群的差异影响,进而通过人群定向/数值策略的方式进行差异化实验,或者对实验进行调整.Double Machine Learn ...
- java数据域初始化
1.在声明中赋值 /** * Created by N3verL4nd on 2016/11/19. */ class Test{ private String str = "Hello W ...
- 不要被C++“自动生成”所蒙骗
http://www.cnblogs.com/fanzhidongyzby/archive/2013/01/12/2858040.html C++对象可以使用两种方式进行创建:构造函数和复制构造函数. ...
- tomcat的编码设置
Connector port="8080" protocol="HTTP/1.1" URIEncoding="UTF-8" ...
- Node——request使用代理
本文知识点 Node环境搭建 使用代理 进阶学习 环境配置 Node 安装request 安装request npm install request 确认环境安装无误 node -v 代码样例 使用代 ...
- POJ_1208_模拟
题目描述: 给定一个长度n,有0~n-1编号的箱子和位置,起始个编号的箱子放在相同编号的位置. 有一系列操作: move a onto b,将a,b上面的箱子放回初始位置,并将a放到b箱上. move ...
- To be contine ,NW NMM backup sqlserver failed.
Last time, we talk about separate under one cluster backup into two diffetent AG backup. Does it wor ...
- uniapp单页面配置无导航栏
{ "path": "pages/login/login", "style": { "navigationStyle": ...
- Java中类的关系
在java里类的关系大致分为三种, 1.继承(a is b):继承extends,实现implement 2.包含(a has b):组合>聚合>关联.关系亲密度越来越小,一个类在另一个类 ...