2流高手速成记(之三):SpringBoot整合mybatis/mybatis-plus实现数据持久化
接上回
上一篇我们简单介绍了基于SpringBoot实现简单的Web开发,本节来看Web开发中必不可少的内容——数据持久化
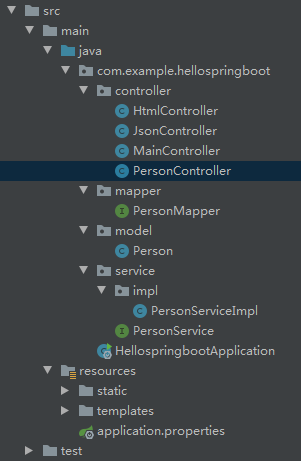
先看项目结构:
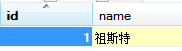
1. 创建数据表
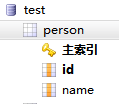
打开mysql,打开数据库 test (没有可以创建一个),创建表格 person
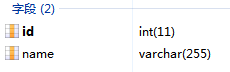
给 person 表创建两个字段 id、name
2. 打开 pom.xml,添加相关依赖
        <!-- 引入mybatis、mybatis-plus、mysql等依赖 -->

        <dependency>

            <groupId>org.mybatis.spring.boot</groupId>

            <artifactId>mybatis-spring-boot-starter</artifactId>

            <version>2.2.2</version>

        </dependency>

        <dependency>

            <groupId>com.baomidou</groupId>

            <artifactId>mybatis-plus-boot-starter</artifactId>

            <version>3.5.2</version>

        </dependency>

        <dependency>

            <groupId>mysql</groupId>

            <artifactId>mysql-connector-java</artifactId>

        </dependency>
mybatis-spring-boot-starter 满足了 mybatis在springboot下的拆箱即用
mybatis-plus-boot-starter 实现了 mybatis-plus 的自动化配置,同样拆箱即用
注意:是mybatis-plus-boot-starter,不是mybatis-plus;前者包含后者的引用,如果只引用后者执行程序会报错!
由于mybatis-plus是基于mybatis的,所以两者引用缺一不可
mysql-connector-java 是基础的mysql驱动接口,这个也是不可或缺的
mybatis是安全、优秀的java持久层框架,基于xml可灵活定制sql语句
mybatis-plus在mybatis的基础上做了更进一步的简化,可免去xml编写
同时,mybatis-plus遵循非侵入式设计的原则,即完全兼容原mybatis的使用习惯,非常方便
3. 给application.properties添加数据库配置
# mysql相关设置

spring.datasource.username=admin

spring.datasource.password=admin

spring.datasource.url=jdbc:mysql://localhost:3306/test?useSSL=false&useUnicode=true&characterEncoding=utf-8&serverTimezone=GMT%2B8

spring.datasource.driver-class-name=com.mysql.cj.jdbc.Driver
到这里可能有人会问,咋没看到mybatis.xml的配置?不是一般都会有一句:
#指定Mybatis的Mapper文件

mybatis.mapper-locations=classpath:mapper/*xml
如果我们使用mybatis的原生功能,这一句配置是需要加上的,但是如果我们基于mybatis-plus,可以先不加这一句,因为它是免xml配置的!
4. 新建 model/Person
package com.example.hellospringboot.model;

public class Person {

    private Integer id = 0;

    private String name = "";

    public Integer getId() {

        return id;

    }

    public void setId(Integer id) {

        this.id = id;

    }

    public String getName() {

        return name;

    }

    public void setName(String name) {

        this.name = name;

    }

}
注意:类名 Person 要和数据库表名 person 一致(首字母大写是Java的类命名规则,这个没有问题)
id和name两个字段的名称和类型也要和数据库保持一致
5. 新建 mapper/PersonMapper
package com.example.hellospringboot.mapper;

import com.baomidou.mybatisplus.core.mapper.BaseMapper;

import com.example.hellospringboot.model.Person;

import org.apache.ibatis.annotations.Mapper;

import org.springframework.stereotype.Repository;

@Mapper

@Repository

public interface PersonMapper extends BaseMapper<Person> {

}
这里让PersonMapper继承自mybatis-plus提供的BaseMapper,这是启用mybatis-plus免xml特性的关键!
BaseMapper为我们定制常用的数据库增删改查的方法,直接继承使用即可!
6. 新建 service/PersonService 接口及其实现类 service/impl/PersonServiceImpl
package com.example.hellospringboot.service;

import com.example.hellospringboot.model.Person;

import java.util.List;

public interface PersonService {

    Integer insert(Person person);

    Integer update(Person person);

    Integer delete(int id);

    List<Person> select();

}
package com.example.hellospringboot.service.impl;

import com.example.hellospringboot.mapper.PersonMapper;

import com.example.hellospringboot.model.Person;

import com.example.hellospringboot.service.PersonService;

import org.springframework.beans.factory.annotation.Autowired;

import org.springframework.stereotype.Service;

import java.util.List;

@Service

public class PersonServiceImpl implements PersonService {

    @Autowired

    PersonMapper mapper;

    public Integer insert(Person person){

        return mapper.insert(person);

    }

    public Integer update(Person person){

        return mapper.updateById(person);

    }

    public Integer delete(int id){

        return mapper.deleteById(id);

    }

    public List<Person> select(){

        return mapper.selectList(null);

    }

}
我们给mapper新增了@Repository注解,可以让Service自动装载Mapper不报错
通过代码我们可以看到,继承自BaseMapper<Person>的PersonMapper,不加任何代码不写任何xml,就可以支持Person数据模型的常见的增删改查等操作,真的非常方便!
7. 新建 controller/PersonController
package com.example.hellospringboot.controller;

import com.example.hellospringboot.model.Person;

import com.example.hellospringboot.service.PersonService;

import org.springframework.beans.factory.annotation.Autowired;

import org.springframework.web.bind.annotation.GetMapping;

import org.springframework.web.bind.annotation.PostMapping;

import org.springframework.web.bind.annotation.RequestMapping;

import org.springframework.web.bind.annotation.RestController;

import java.util.List;

@RestController

@RequestMapping("/person")

public class PersonController {

    @Autowired

    PersonService service;

    @PostMapping("/insert")

    public Integer insert(Person person){

        return service.insert(person);

    }

    @PostMapping("/update")

    public Integer update(Person person){

        return service.update(person);

    }

    @PostMapping("/delete")

    public Integer delete(int id){

        return service.delete(id);

    }

    @GetMapping("/select")

    public List<Person> select(){

        return service.select();

    }

}
我们这里使用了@RestController注解,这样可以非常方便的测试我们的业务逻辑
这里可以看到,insert、update、delete三个写方法我们使用了Post协议,select读方法使用了Get协议
其实标准的RestApi风格另外还有Put和Delete协议,这里其实没有严格的规定
由于Get协议的参数是直接暴露在url串里的,所以一般写方法我们不建议使用Get协议
8. 使用Postman测试结果
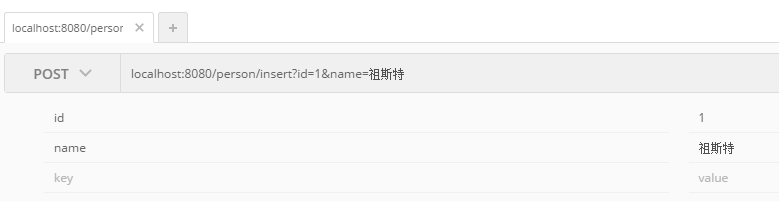
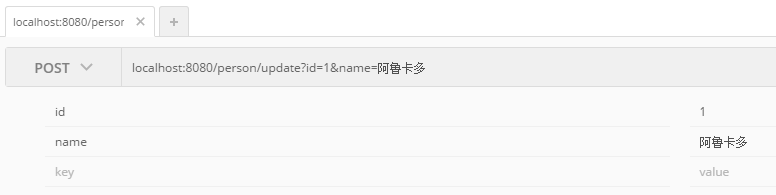
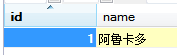
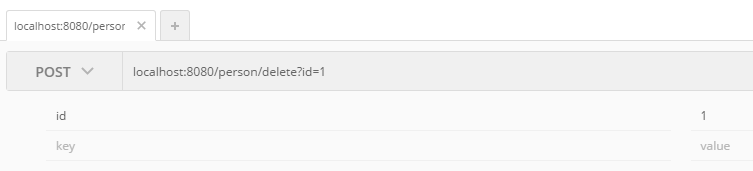
我们在请求参数中分别传入id和name,springboot框架会自动将其拼装成Person对象,真的是非常智能化!
另外,得益于mybatis-plus免xml的特性,我们不用自己手写任何的xml逻辑实现,甚至通篇未出现任何大家常见的mybatis相关配置!
以上。
本节内容我们介绍了数据持久化的相关操作,并且是基础传统的关系型数据库——mysql
下一节我们将共同探讨如何使用SpringBoot整合redis及mongodb,敬请期待!
2流高手速成记(之三):SpringBoot整合mybatis/mybatis-plus实现数据持久化的更多相关文章
- 2流高手速成记(之六):从SpringBoot到SpringCloudAlibaba
咱们接上回 2流高手速成记(之五):Springboot整合Shiro实现安全管理 - 14号程序员 - 博客园 (cnblogs.com) 身边常有朋友说:小项目用PHP.大项目用Java(这里绝无 ...
- 2流高手速成记(之七):基于Dubbo&Nacos的微服务简要实现
本节内容会用到之前给大家讲过的这两篇: 2流高手速成记(之六):从SpringBoot到SpringCloudAlibaba 2流高手速成记(之三):SpringBoot整合mybatis/mybat ...
- 2流高手速成记(之四):SpringBoot整合redis及mongodb
最近很忙,好不容易才抽出了时间,咱们接上回 上次我们主要讲了如何通过SpringBoot快速集成mybatis/mybatis-plus,以实现业务交互中的数据持久化,而这一切都是基于关系型数据库(S ...
- 2流高手速成记(之五):Springboot整合Shiro实现安全管理
废话不多说,咱们直接接上回 上一篇我们讲了如何使用Springboot框架整合Nosql,并于文章最后部分引入了服务端Session的概念 而早在上上一篇中,我们则已经讲到了如何使用Springboo ...
- 2流高手速成记(之八):基于Sentinel实现微服务体系下的限流与熔断
我们接上回 上一篇中,我们进行了简要的微服务实现,也体会到了SpringCloudAlibaba的强大和神奇之处 我们仅改动了两个注释,其他全篇代码不变,原来的独立服务就被我们分为了provider和 ...
- 【SpringBoot】11.Springboot整合SpringMVC+Mybatis(上)
Springboot整合SpringMVC+Mybatis 需求分析:通过使用Springboot+SpringMVC+Mybatis 整合实现一个对数据库表users表的CRUD操作. 1.创建项目 ...
- SpringBoot整合Freemarker+Mybatis
开发工具 , 开始 新建工程 .选择Spring Initializr 下一步 下一步,选择需要的组件 ..改一下工程名,Finish ..目录结构 首先,修改pom文件 然后,将applicatio ...
- 【SpringBoot】11-1.Springboot整合Springmvc+Mybatis增删改查操作(下)
整合过程:https://www.isdxh.com/68.html 一.增--增加用户 1.创建实体类 package com.dxh.pojo; public class Users { priv ...
- springboot 整合 mongodb实现 批量更新数据
现需求:需要批量将1000个数据先查询在更新到mongodb(如果查询不到数据,则添加数据) 1:工具类BathUpdateOptions import org.springframework.dat ...
随机推荐
- 7 什么是dubbo
什么是dubbo 快速入门dubbo 了解什么是dubbo之前,我们得先了解什么是分布式系统? <分布式系统原理与范型>定义: 分布式系统是若干独立计算机的集合,这些计算机对于用户来说就像 ...
- 淘淘蓝蓝的CSP-S神妙膜你赛2-淘淘蓝蓝喜欢01串 题解
问题简述 给定\(n\)个盒子,每个盒子的容器为\(b[i]\),里面装有\(a[i]\)个物品.今有\(q\)组询问,每组询问给出一个正整数\(k(k<=n)\),已知一个盒子里的一件物品转移 ...
- linux学习之selinux安全处理
linux在默认情况下会开启selinux,如果软件开放的端口不是selinux默认的协议端口会导致防火墙端口开放后还是无法访问.以下是解决办法. [root@localhost ~]# semana ...
- React报错之Objects are not valid as a React child
正文从这开始~ 总览 当我们尝试在JSX代码中,直接渲染对象或者数组时,会产生"Objects are not valid as a React child"错误.为了解决该错误, ...
- RocketMQ的push消费方式实现的太聪明了
大家好,我是三友,我又来了~~ 最近仍然畅游在RocketMQ的源码中,这几天刚好翻到了消费者的源码,发现RocketMQ的对于push消费方式的实现简直太聪明了,所以趁着我脑子里还有点印象的时候,赶 ...
- 大数据平台迁移实践 | Apache DolphinScheduler 在当贝大数据环境中的应用
大家下午好,我是来自当贝网络科技大数据平台的基础开发工程师 王昱翔,感谢社区的邀请来参与这次分享,关于 Apache DolphinScheduler 在当贝网络科技大数据环境中的应用. 本次演讲主要 ...
- DolphinScheduler 新晋 Committer 成员啦
Apache DolphinScheduler在2021年的3月18号正式成为 Apache 顶级项目后,就又迎来了好消息,经过Apache DolphinScheduler PMC们的推荐和投票, ...
- 稳定好用的短连接生成平台,支持API批量生成
https://www.5w.fit/ 01 安全:快码拥有两种模式:防封模式和极速模式,防封模式使短链更加安全! 02 无流量劫持:快码短链绝不劫持流量! 03 极速:专属大量服务器,支持高并发 ...
- java学习第一天.day06
方法 方法的优点 1. 使程序变得更简短而清晰. 2. 有利于程序维护. 3. 可以提高程序开发的效率. 4. 提高了代码的重用性. static的作用 static在方法中如果没有添加就只能用对象调 ...
- Taurus.MVC 微服务框架 入门开发教程:项目部署:3、微服务应用程序版本升级:全站升级和局部模块升级。
系列目录: 本系列分为项目集成.项目部署.架构演进三个方向,后续会根据情况调整文章目录. 本系列第一篇:Taurus.MVC V3.0.3 微服务开源框架发布:让.NET 架构在大并发的演进过程更简单 ...