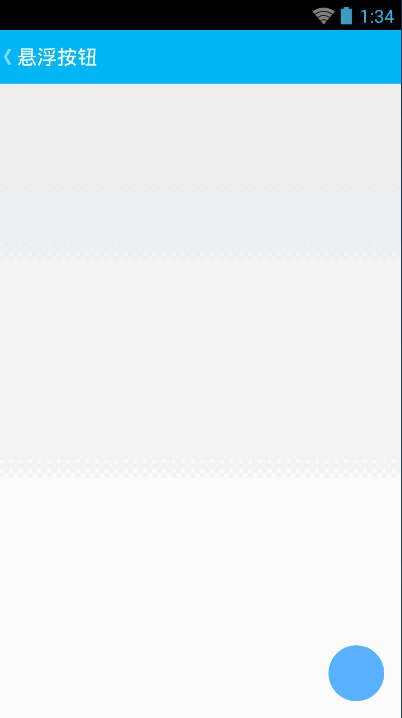
自定义悬浮按钮:FloatingButton
floating_button_layout.xml
 <?xml version="1.0" encoding="utf-8"?>

 <RelativeLayout xmlns:android="http://schemas.android.com/apk/res/android"

     android:layout_width="match_parent"

     android:layout_height="match_parent" >

     <ImageButton

         android:id="@+id/ImageButton_Floating"

         android:layout_width="50dp"

         android:layout_height="50dp"

         android:layout_alignParentBottom="true"

         android:layout_alignParentRight="true"

         android:layout_marginBottom="15dp"

         android:layout_marginRight="15dp"

         android:background="@drawable/floating_button_style"

         android:contentDescription="@null" >

     </ImageButton>

 </RelativeLayout>
floating_menu.xml
 <?xml version="1.0" encoding="utf-8"?>

 <LinearLayout xmlns:android="http://schemas.android.com/apk/res/android"

     android:layout_width="match_parent"

     android:layout_height="match_parent"

     android:orientation="vertical" >

     <Button

         android:id="@+id/Button1"

         android:layout_width="match_parent"

         android:layout_height="wrap_content"

         android:text="选项1" />

     <Button

         android:id="@+id/Button2"

         android:layout_width="match_parent"

         android:layout_height="wrap_content"

         android:text="选项2" />

     <Button

         android:id="@+id/Button3"

         android:layout_width="match_parent"

         android:layout_height="wrap_content"

         android:text="选项3" />

     <Button

         android:id="@+id/Button4"

         android:layout_width="match_parent"

         android:layout_height="wrap_content"

         android:text="选项4" />

 </LinearLayout>
FloatingMenu.java
 package com.wangzhen.view;

 import com.wangzhen.animation.R;

 import android.content.Context;

 import android.graphics.drawable.ColorDrawable;

 import android.view.LayoutInflater;

 import android.view.View;

 import android.view.View.OnClickListener;

 import android.view.WindowManager.LayoutParams;

 import android.widget.Button;

 import android.widget.PopupWindow;

 import android.widget.Toast;

 /**

  * 漂浮菜单

  *

  * @author Administrator

  *

  */

 public class FloatingMenu extends PopupWindow {

     private Context mContext;

     private View view;

     private Button Button1;

     private Button Button2;

     private Button Button3;

     private Button Button4;

     public FloatingMenu(Context context) {

         mContext = context;

         LayoutInflater mInflater = LayoutInflater.from(mContext);

         view = mInflater.inflate(R.layout.floating_menu, null);

         Button1 = (Button) view.findViewById(R.id.Button1);

         Button2 = (Button) view.findViewById(R.id.Button2);

         Button3 = (Button) view.findViewById(R.id.Button3);

         Button4 = (Button) view.findViewById(R.id.Button4);

         Button1.setOnClickListener(new MyClick());

         Button2.setOnClickListener(new MyClick());

         Button3.setOnClickListener(new MyClick());

         Button4.setOnClickListener(new MyClick());

         setWidth(300);

         setHeight(LayoutParams.WRAP_CONTENT);

         setFocusable(true);

         ColorDrawable drawable = new ColorDrawable(0xb000000);

         setBackgroundDrawable(drawable);

         setContentView(view);

     }

     private void ShowToast(String string) {

         Toast.makeText(mContext, string, Toast.LENGTH_SHORT).show();

     }

     class MyClick implements OnClickListener {

         @Override

         public void onClick(View v) {

             switch (v.getId()) {

             case R.id.Button1:

                 ShowToast("Button1");

                 break;

             case R.id.Button2:

                 ShowToast("Button2");

                 break;

             case R.id.Button3:

                 ShowToast("Button3");

                 break;

             case R.id.Button4:

                 ShowToast("Button4");

                 break;

             default:

                 break;

             }

             dismiss();

         }

     }

 }
FloatingButtonActivity.java
 package com.wangzhen.animation;

 import com.lidroid.xutils.ViewUtils;

 import com.lidroid.xutils.view.annotation.ContentView;

 import com.lidroid.xutils.view.annotation.ViewInject;

 import com.lidroid.xutils.view.annotation.event.OnClick;

 import com.wangzhen.view.FloatingMenu;

 import android.content.Context;

 import android.os.Bundle;

 import android.support.v7.app.ActionBar;

 import android.support.v7.app.ActionBarActivity;

 import android.view.Gravity;

 import android.view.KeyEvent;

 import android.view.MenuItem;

 import android.view.View;

 import android.widget.ImageButton;

 @ContentView(R.layout.floating_button_layout)

 public class FloatingButtonActivity extends ActionBarActivity {

     private Context mContext;

     @ViewInject(R.id.ImageButton_Floating)

     private ImageButton ImageButton_Floating;

     @Override

     protected void onCreate(Bundle savedInstanceState) {

         super.onCreate(savedInstanceState);

         ViewUtils.inject(this);

         mContext = this;

         ActionBar mActionBar = getSupportActionBar();

         mActionBar.setDisplayHomeAsUpEnabled(true);

         mActionBar.setDisplayShowHomeEnabled(false);

     }

     @OnClick({ R.id.ImageButton_Floating })

     private void OnClick(View view) {

         switch (view.getId()) {

         case R.id.ImageButton_Floating:

             FloatingMenu menu = new FloatingMenu(mContext);

             menu.setFocusable(true);

             menu.setOutsideTouchable(true);

             View view_btn = findViewById(R.id.ImageButton_Floating);

             menu.showAtLocation(view_btn, Gravity.BOTTOM | Gravity.RIGHT, 0,

                     view_btn.getHeight() + 30);

             break;

         default:

             break;

         }

     }

     @Override

     public boolean onOptionsItemSelected(MenuItem item) {

         switch (item.getItemId()) {

         case android.R.id.home:

             FinishActivity();

             break;

         default:

             break;

         }

         return super.onOptionsItemSelected(item);

     }

     /**

      * 退出Activity

      */

     private void FinishActivity() {

         finish();

         overridePendingTransition(0, R.anim.anim_page_out);

     }

     @Override

     public boolean onKeyDown(int keyCode, KeyEvent event) {

         if (keyCode == KeyEvent.KEYCODE_BACK) {

             FinishActivity();

         }

         return false;

     }

 }
自定义悬浮按钮:FloatingButton的更多相关文章
- (IOS)悬浮按钮Demo
思路:传入一个底层的view,将悬浮按钮(用view实现)和展开的子按钮列表add在其上,子按钮列表开始将坐标和悬浮按钮对应好后先将其隐藏,悬浮按钮识别到tap手势后触发展示子按钮列表的方法.通过在t ...
- android悬浮按钮(Floating action button)的两种实现方法
原文: http://www.jcodecraeer.com/a/anzhuokaifa/androidkaifa/2014/1028/1857.html 最近android中有很多新的设计规范被引入 ...
- 在TableView上添加悬浮按钮
如果直接在TableVIewController上贴Button的话会导致这个会随之滚动,下面解决在TableView上实现位置固定悬浮按钮的两种方法: 1.在view上贴tableView,然后将悬 ...
- Mono自定义图片按钮
首先,我们编写一个MyImageButton类,继承自LinearLayout public class MyPhoneImageButton:LinearLayout { private Image ...
- android自定义控件(3)-自定义当前按钮属性
那么还是针对我们之前写的自定义控件:开关按钮为例来说,在之前的基础上,我们来看看有哪些属性是可以自定义的:按钮的背景图片,按钮的滑块图片,和按钮的状态(是开还是关),实际上都应该是可以在xml文件中直 ...
- iOS 自定义返回按钮,保留系统滑动返回
原文链接 自定义返回按钮保留系统滑动返回手势.gif 1.简介 使用苹果手机,最喜欢的就是用它的滑动返回.作为一个开发者,我们在编写很多页面的时候,总是会因为这样那样的原因使得系统的滑动返回不可用.使 ...
- Android FloatingActionButton(FAB) 悬浮按钮
FloatingActionButton 悬浮按钮 ...
- easyUI——datebox验证和自定义取消按钮
来源:http://blog.csdn.net/liusong0605/article/details/42270463 1. datebox验证 验证结束时间<起始时间: 起始时 ...
- iOS 7 自定义Back按钮 与 Pop interactive gesture 问题
1.自定义Back按钮 iOS中很多时候我们都会自定义返回按钮,也是一件easy的事,类似如下: // 返回按钮 1 - (void)showNavBackButton { UIButton *bac ...
随机推荐
- 转自:http://blog.sina.com.cn/s/blog_86e874d30101e3d8.html(谢谢原文作者),Win7下安装CentOS 6.5双系统
经过一下午的折腾,终于在64位的Windows 7上面成功安装了CentOS 6.5(64bit)系统,中途因为硬盘分区的问题失败了一次.下面是安装过程: 在安装过程中借助了这篇文章的内容:http: ...
- 删除Excel中的打印预览留下的打印线
Excel 工作表打印后,会留有几条虚线打印线.如下图所示: 不少同学反映,他们尝试了很多操作却仍然无法消除.难道除了重新打开就没有别的办法了? 可以这样做: 在 Excel 2010 中,单 ...
- LPC1758串口ISP下载程序
最近手上拿到一块人家公司做的3D打印机的板子,用的核心芯片是LPC1758,板上引出了ISP下载接口.那接口共4个引出脚,如下图所示: 其中ME_EN引脚又连接到了芯片的P2[10]引脚,那个引脚 ...
- [51单片机]18B20驱动函数
/**********DS18B20.h**********/ #include "REG52.H" #include "INTRINS.H" sbit DQ ...
- 转 Jona Dany 一个20年架构师程序员的经验总结
1.估算问题解决所需要的时间,为自己定一个时间限制,1小时,30分钟,15分钟.如果这期间不能解决问题,那就去寻求帮助.不要做超级堆码员. 2.编程语言是一种语言,只是一种语言.只要理解一种语言的原理 ...
- 检测客户端显示器分辨率、浏览器类型和客户端IP
原文:检测客户端显示器分辨率.浏览器类型和客户端IP 下面的代码实现了检测客户端显示器分辨率.浏览器类型和客户端IP的功能.你可以把客户端信息保存到Session,ViewState等中以便在其它的页 ...
- Oracle 客户端 NLS_LANG 的设置(转)
1. NLS_LANG 参数组成NLS_LANG参数由以下部分组成:NLS_LANG=<Language>_<Territory>.<Clients Characters ...
- FlashPaper组件——api
属性摘要 属性 说明 documentPath:String FlashPaper文件的路径. borderThickness:Number 边框宽度. borderColor:String 边框颜色 ...
- City Tour
Description Alice想要从城市A出发到城市B,由于Alice最近比较穷(不像集训队陈兴老师是个rich second),所以只能选择做火车从A到B.不过Alice很讨厌坐火车,火车上人比 ...
- Android ViewPager实现软件的第一次加载的滑动效果
public class MainActivity extends Activity { private ViewPager viewPager; private List<View> V ...