Qt Quick之TableView的使用
本博只是简单的展示TableView的基本使用(TableView、style:TableViewStyle、headerDelegate、rowDelegate、itemDelegate、TableViewColumn、ListModel及访问和修改Model),关于更多属性和方法的使用可以参考TableView QML Type
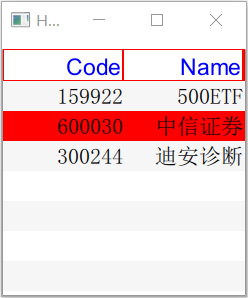
1. 效果图
2. 代码实现
import QtQuick 2.9

import QtQuick.Window 2.2

import QtQuick.Controls 1.4

import QtQuick.Controls.Styles 1.4

Window {

    visible: true

    width:

    height:

    title: qsTr("Hello World")

    TableView

    {

        id:stockTable;

        anchors.left: parent.left;

        anchors.top:parent.top;

        anchors.topMargin: ;

        anchors.right: parent.right;

        anchors.bottom: parent.bottom;

        //alternatingRowColors : true;

        style:TableViewStyle

        {

            id:tstyle;

            backgroundColor:"white";

            alternateBackgroundColor:"#f6F6F6";

            textColor:"black";

            // 设置TableView的头部

            headerDelegate: Canvas

            {

                implicitWidth:;

                implicitHeight:;

                onPaint:

                {

                    var ctx = getContext("2d");

                    ctx.lineWidth = ;

                    ctx.strokeStyle="red";

                    ctx.fillStyle="blue";

                    ctx.beginPath();

                    console.log("width:",width,"--","height:",height);

                    ctx.rect(,,width,height);

                    ctx.stroke();

                    ctx.font="14pt sans-serif";

                    ctx.textAlign="right"

                    ctx.textBaseLine="middle";

                    ctx.fillText(styleData.value,width-,height/+);

                }

            }

            // 设置行

            rowDelegate:Rectangle

            {

                height:;

                color: styleData.selected? "red":

                    (styleData.alternate ? tstyle.backgroundColor :

                                           tstyle.alternateBackgroundColor);

            }

            // 设置单元格

            itemDelegate: Text

            {

                text:styleData.value;

                font.pointSize:;

                verticalAlignment:Text.AlignVCenter;

                horizontalAlignment:Text.AlignRight;

            }

        }

        TableViewColumn

        {

            role:"code";

            title:qsTr("Code");

            width:;

            movable: false;

        }

        TableViewColumn

        {

            role:"name";

            title:qsTr("Name");

            width:;

            movable: false;

        }

        ListModel {

              id: libraryModel

              ListElement {

                  code: ""

                  name: "500ETF"

              }

              ListElement {

                  code: ""

                  name: "中信证券"

              }

              ListElement {

                  code: ""

                  name: "迪安诊断"

              }

          }

        model: libraryModel;

    }

}
3. 访问和修改Model
(1) 访问数据
    itemDelegate: Text

            {

                text:styleData.value;

                font.pointSize:;

                verticalAlignment:Text.AlignVCenter;

                horizontalAlignment:Text.AlignRight;

                MouseArea

                {

                    anchors.fill:parent;

                    onClicked:

                    {

                        console.log("currentRow:",styleData.row, "-", styleData.column);

                        console.log(libraryModel.get(styleData.row).code, "-",

                                    libraryModel.get(styleData.row).name);

                    }

                }

            }
(2)删除数据
    rowDelegate:Rectangle

            {

                height:;

                color: styleData.selected? "red":

                    (styleData.alternate ? tstyle.backgroundColor :

                                           tstyle.alternateBackgroundColor);

                MouseArea

                {

                    anchors.fill:parent;

                    onClicked:

                    {

                        libraryModel.remove(styleData.row);

                    }

                }

            }
(3)修改数据
    itemDelegate: Text

            {

                text:styleData.value;

                font.pointSize:;

                verticalAlignment:Text.AlignVCenter;

                horizontalAlignment:Text.AlignRight;

                MouseArea

                {

                    anchors.fill:parent;

                    onClicked:

                    {

                        console.log("currentRow:",styleData.row, "-", styleData.column);

                        console.log(libraryModel.get(styleData.row).code, "-",

                                    libraryModel.get(styleData.row).name);

                        libraryModel.set(styleData.row, {"code":"888888", "name":"modify"});

                    }

                }

            }
(4)添加数据
    rowDelegate:Rectangle

            {

                height:;

                color: styleData.selected? "red":

                    (styleData.alternate ? tstyle.backgroundColor :

                                           tstyle.alternateBackgroundColor);

                MouseArea

                {

                    anchors.fill:parent;

                    onClicked:

                    {

                        //libraryModel.remove(styleData.row);

                        libraryModel.append({"code":"666666", "name":"add"});

                    }

                }

            }
Qt Quick之TableView的使用的更多相关文章
- Qt 学习之路 :Qt Quick Controls
自 QML 第一次发布已经过去一年多的时间,但在企业应用领域,QML 一直没有能够占据一定地位.很大一部分原因是,QML 缺少一些在企业应用中亟需的组件,比如按钮.菜单等.虽然移动领域,这些组件已经变 ...
- Qt Quick Controls 与 Qt Quick Controls 2的区别(详细对照)
Qt Quick Controls 原本是为支持桌面平台而开发的,后来又加入了移动平台和嵌入式平台的支持.它们应用非常广泛,因为它们提供了足够灵活的样式系统,以允许开发具有平台相关或者无关风格的应用程 ...
- 《Qt Quick 4小时入门》学习笔记4
http://edu.csdn.net/course/detail/1042/14806?auto_start=1 Qt Quick 4小时入门 第七章:处理鼠标与键盘事件 1.处理鼠标事件 鼠标信号 ...
- 《Qt Quick 4小时入门》学习笔记3
http://edu.csdn.net/course/detail/1042/14807?auto_start=1 Qt Quick 4小时入门 第八章:Qt Quick中的锚(anchors)布局 ...
- 《Qt Quick 4小时入门》学习笔记2
http://edu.csdn.net/course/detail/1042/14805?auto_start=1 Qt Quick 4小时入门 第五章:Qt Quick基本界面元素介绍 1. ...
- 《Qt Quick 4小时入门》学习笔记
http://edu.csdn.net/course/detail/1042/14804?auto_start=1 Qt Quick 4小时入门 第五章:Qt Quick里的信号与槽 QML中 ...
- 从头学Qt Quick(3)-- 用QML写一个简单的颜色选择器
先看一下效果图: 实现功能:点击不同的色块可以改变文字的颜色. 实现步骤: 一.创建一个默认的Qt Quick工程: 二.添加文件Cell.qml 这一步主要是为了实现一个自定义的组件,这个组件就是我 ...
- 从头学Qt Quick(1) --体验快速构建动态效果界面
自2005年Qt4发布以来,Qt已经为成千上万的应用程序提供了框架服务,现在Qt已经基本上支持所有的开发平台了,这里面既包含了桌面.嵌入式领域,也包括了Android.IOS.WP等移动操作平台,甚至 ...
- Qt Quick实现的涂鸦程序
之前一直以为 Qt Quick 里 Canvas 才干够自绘.后来发觉不是,原来还有好几种方式都能够画图! 能够使用原始的 OpenGL(Qt Quick 使用 OpenGL 渲染).能够构造QSGN ...
随机推荐
- IOS中UITableView异步加载图片的实现
本文转载至 http://blog.csdn.net/enuola/article/details/8639404 最近做一个项目,需要用到UITableView异步加载图片的例子,看到网上有一个E ...
- 【BZOJ4069】[Apio2015]巴厘岛的雕塑 按位贪心+DP
[BZOJ4069][Apio2015]巴厘岛的雕塑 Description 印尼巴厘岛的公路上有许多的雕塑,我们来关注它的一条主干道. 在这条主干道上一共有 N 座雕塑,为方便起见,我们把这些雕塑从 ...
- spring web app的结构
1 入口是web.xml tomcat加载war的时候会去读该入库文件. 2 web.xml中spring mvc的配置 定义servlet到servlet-mapping之间的映射,org.spri ...
- The space of such functions is known as a reproducing kernel Hilbert space.
Reproducing kernel Hilbert space Mapping the points to a higher dimensional feature space http://www ...
- 升级pip3后出现importerror:cannot import name main
在ubuntu中,升级了pip3,再次使用pip3安装相关的python包的时候就出现以下错误 ImportError: cannot import name main 解决:pip3文件在/usr/ ...
- LeetCode:二叉树的前、中、后序遍历
描述: ------------------------------------------------------- 前序遍历: Given a binary tree, return the pr ...
- CKeditor插件开发流程(二)SyntaxHighlighter
CKEditor整合SyntaxHighlighter实现代码高亮显示 1,版本说明 CKEditor:ckeditor_4.0.1_standard.zipSyntaxHighlighter:syn ...
- 《程序员代码面试指南》第三章 二叉树问题 Tarjan算法与并查集解决二叉树节点间最近公共祖先的批量查询问题
题目待续.... Tarjan算法与并查集解决二叉树节点间最近公共祖先的批量查询问题 java代码
- import与import static
import ......className (静态导入) 功能: 导入一个类 import static ......className.* 功能:导入这个类里的静态方法,是JDK1.5中的新特性, ...
- Smarty 的安装
1.下载Smarty包可以从官方站点下载:http://smarty.php.net/ 2.解压缩Smarty包解压后的文件夹重命名为Smarty,放置在C:\Apache2\include下 3.修 ...