【Ray Tracing The Next Week 超详解】 光线追踪2-3
Preface
终于到了激动人心的纹理章节了
然鹅,看了下,并不激动
因为我们之前就接触过
当初有一个 attenuation 吗?

对了,这就是我们的rgb分量过滤器,我们画出的红色、蓝色、绿色等等,都是通过它来控制的
专业点的词语叫做rgb衰减比例,比如rtvec(1.,0.,0.),最后呈现出来的是红色,因为r保留了100%
它是怎么控制的呢,我们来回顾一下这个过程
首先,我们创建一个材质球

后面那个rtvec(0.4,0.2,0.1)就是衰减比例(衰减到原来的百分之。。)
之后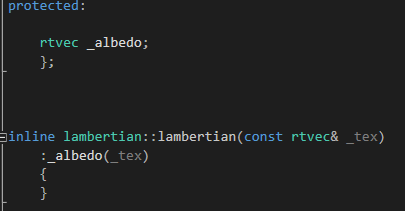
进入数据成员中,之后主函数调用lerp的时候
info.materialp->scatter(sight, info, attenuation, scattered))
球体的材质调用scatter函数
即:
没有丝毫改动地有数据成员传递到了attenuation 中
然后用attenuation 做乘法进行rgb衰减,递归就不用说了吧,最后递归到深处为黑色,不然为背景色
为什么要在前言将这个东东,因为
attenuation 所控制形成的物体表面颜色就是最简单的纹理
说白了这章比较简单,因为下一章是这本书的另外一个高难度章节(分别分布于第二章和第四章)
所以,中间第三章来点简单好玩的,过渡一下
先看效果

Chapter 3:Solid Textures
废话不多说,先写一个纹理类
/// texture.hpp

// -----------------------------------------------------

// [author]        lv

// [begin ]        2019.1

// [brief ]        the texture-class for the ray-tracing project

//                from the 《ray tracing the next week》

#pragma once

namespace rt

{

class texture

    {

public:

    virtual rtvec value(rtvar u, rtvar v, const rtvec& p)const = ;

    };

}
u 和 v后面用到再讲,p就是衰减向量
然后写一个常量纹理(基础纹理)
/// constant_tex.hpp

// -----------------------------------------------------

// [author]        lv

// [begin ]        2019.1

// [brief ]        the constant_texture-class for the ray-tracing project

//                from the 《ray tracing the next week》

// -----------------------------------------------------

#pragma once

namespace rt

{

class constant_texture :public texture

    {

    public:

        constant_texture() {  }

        constant_texture(const rtvec& color);

        virtual rtvec value(rtvar u, rtvar v, const rtvec& p)const override;

    public:

        inline const rtvec& color()const { return _color; }

    private:

        rtvec _color;

    };

inline constant_texture::constant_texture(const rtvec& color)

    :_color(color)

    {

    }

rtvec constant_texture::value(rtvar u, rtvar v, const rtvec& p)const

    {

    return _color;

    }

}
之后,我们把材质中的rtvec向量改为纹理指针
/// diffuse.hpp

// https://www.cnblogs.com/lv-anchoret/p/10198423.html

// -----------------------------------------------------

// [author]        lv

// [begin ]        2018.12

// [brief ]        one of the materials

// -----------------------------------------------------

#pragma once

namespace rt

{

class texture;

//diffuse material

class lambertian : public material

    {

public:

    lambertian(texture* _tex);

    virtual bool scatter(const ray& rIn, const hitInfo& info, rtvec& attenuation, ray& scattered)const override;

protected:

    texture* _albedo;

    };

inline lambertian::lambertian(texture* _tex)

    :_albedo(_tex)

    {

    }

bool lambertian::scatter(const ray& rIn, const hitInfo& info, rtvec& attenuation, ray& scattered)const

    {

    rtvec target = info._p + info._n + lvgm::random_unit_sphere();

    scattered = ray{ info._p, target - info._p };

    attenuation = _albedo->value(.,.,info._p);

    return true;

    }

}
之前我们创建的材质球代码就要改一种风格了

把其他的材质类也做相应的改动
我们今天最重要的是弄棋盘(checkerboard)纹理
棋盘纹理就是交错的双色格子,呈现一定的规律性
所以我们想象一下利用某些映射函数来实现这种类似二值性,且呈现周期性
我们比较容易想到利用正余弦函数,呈现周期性,且值域为【-1,1】是个有界函数
如何体现二值呢,正负嘛,正余弦函数一定关于x轴对称
如何将物体表面和正余弦函数联系在一起形成双色交错的格子呢
我们采用每个点在3D空间中的位置来将两者联系在一起
综上,如果我们在所有三个维度中相乘某个正余弦函数,那么该公式的符号形成一个棋盘形式
即:rtvar sines = sin(10 * p.x()) * sin(10 * p.y()) * sin(10 * p.z());
当然,你也可以试一下sgnx函数,设置一个相关的判别式
/// checker_tex.hpp

// -----------------------------------------------------

// [author]        lv

// [begin ]        2019.1

// [brief ]        the checker_texture-class for the ray-tracing project

//                from the 《ray tracing the next week》

// -----------------------------------------------------

#pragma once

namespace rt

{

class checker_texture :public texture

    {

    public:

        checker_texture() {  }

        checker_texture(texture* t1, texture* t2);

        virtual rtvec value(rtvar u, rtvar v, const rtvec& p)const override;

    private:

        texture* _even;

        texture* _odd;

    };

inline checker_texture::checker_texture(texture * t1, texture * t2)

        :_even(t1)

        , _odd(t2)

    {

    }

rtvec checker_texture::value(rtvar u, rtvar v, const rtvec& p)const

    {

    rtvar sines = sin( * p.x()) * sin( * p.y()) * sin( * p.z());

    if (sines < )

        return _odd->value(u, v, p);

    else

        return _even->value(u, v, p);

    }

}
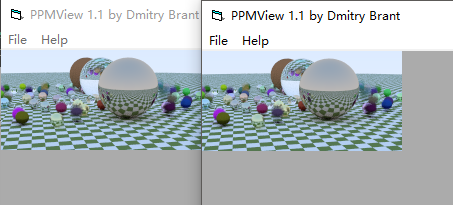
我们把大球设置为棋盘纹理
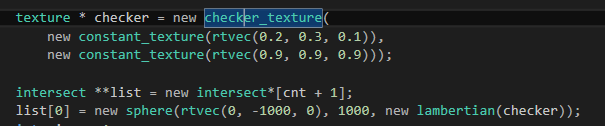
就是开篇图
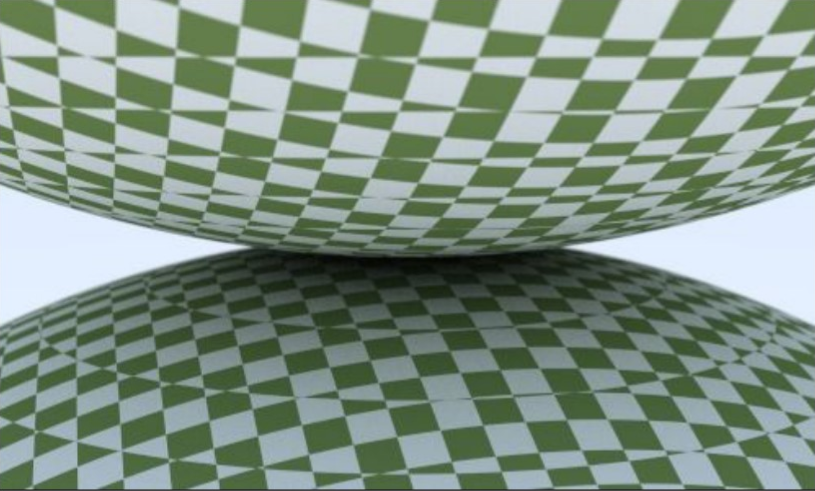
然后,我把判别式中的10改成了30依旧是原图
10(左)30(右)
y = sin(wx + φ)
你可以尝试改动一下φ参数试一下
补充:
使用
使得纹理向屏幕左部偏移了一段距离

下面是另外一个图:
随机球体生成函数改成

相机参数依旧是之前的

会得到这样一个图
感谢您的阅读,生活愉快~
【Ray Tracing The Next Week 超详解】 光线追踪2-3的更多相关文章
- 【Ray Tracing The Next Week 超详解】 光线追踪2-9
我们来整理一下项目的代码 目录 ----include --hit --texture --material ----RTdef.hpp ----ray.hpp ----camera.hpp ---- ...
- 【Ray Tracing The Next Week 超详解】 光线追踪2-6 Cornell box
Chapter 6:Rectangles and Lights 今天,我们来学习长方形区域光照 先看效果 light 首先我们需要设计一个发光的材质 /// light.hpp // ------- ...
- 【Ray Tracing in One Weekend 超详解】 光线追踪1-4
我们上一篇写了Chapter5 的第一个部分表面法线,那么我们来学剩下的部分,以及Chapter6. Chapter5:Surface normals and multiple objects. 我们 ...
- 【Ray Tracing The Next Week 超详解】 光线追踪2-7 任意长方体 && 场景案例
上一篇比较简单,很久才发是因为做了一些好玩的场景,后来发现这一章是专门写场景例子的,所以就安排到了这一篇 Preface 这一篇要介绍的内容有: 1. 自己做的光照例子 2. Cornell box画 ...
- 【Ray Tracing The Next Week 超详解】 光线追踪2-8 Volume
Preface 今天有两个东东,一个是体积烟雾,一个是封面图 下一篇我们总结项目代码 Chapter 8:Volumes 我们需要为我们的光线追踪器添加新的物体——烟.雾,也称为participat ...
- 【Ray Tracing The Next Week 超详解】 光线追踪2-5
Chapter 5:Image Texture Mapping 先看效果: 我们之前的纹理是利用的是撞击点p处的位置信息,比如大理石纹理 而我们今天的图片映射纹理采用2D(u,v)纹理坐标来进行. 在 ...
- 【Ray Tracing in One Weekend 超详解】 光线追踪1-8 自定义相机设计
今天,我们来学习如何设计自定义位置的相机 ready 我们只需要了解我们之前的坐标体系,或者说是相机位置 先看效果 Chapter10:Positionable camera 这一章我们直接用概念 ...
- 【Ray Tracing The Next Week 超详解】 光线追踪2-4 Perlin noise
Preface 为了得到更好的纹理,很多人采用各种形式的柏林噪声(该命名来自于发明人 Ken Perlin) 柏林噪声是一种比较模糊的白噪声的东西:(引用书中一张图) 柏林噪声是用来生成一些看似杂乱 ...
- 【Ray Tracing The Next Week 超详解】 光线追踪2-2
Chapter 2:Bounding Volume Hierarchies 今天我们来讲层次包围盒,乍一看比较难,篇幅也多,但是咱们一步一步来,相信大家应该都能听懂 BVH 和 Perlin text ...
随机推荐
- Chapter 9 (排序)
1.排序算法: //****************************Sort.h******************************************** #ifndef SOR ...
- Hadoop基础-MapReduce的工作原理第二弹
Hadoop基础-MapReduce的工作原理第二弹 作者:尹正杰 版权声明:原创作品,谢绝转载!否则将追究法律责任. 一.Split(切片) 1>.MapReduce处理的单位(切片) 想必 ...
- html <label>标签
label元素在呈现上没有特殊效果,但为鼠标用户增进了可用性. 如果在label元素内点击文本,就会触发表单控件. 也就是说,当用户选择该标签时,浏览器就会自动将焦点转到和标签相关的表单控件上. &l ...
- 阿里云Tengine和Openresty/1.11.2.3 数据对比
HLS播放延迟测试:阿里云48s ,openresy 31s Cache-Control: max-age=300 NGINX下配置CACHE-CONTROL Content-Length:637 ...
- dede调用多级导航的方法
<div id="navWrapper"> <div class="content"> <ul class="nav m ...
- GraphChi/graphchi-java程序配置
1.导入graphchi-java maven项目时报错: Plugin execution not covered by lifecycle configuration: org.scala-too ...
- html template--(来自网易)
html template 概述 包含完整头部信息和主体结构的HTML基础模板. 代码展示 <!DOCTYPE html> <html> <head> < ...
- 网页中创建音频、视频和Flash等多媒体:object元素
<object>元素:它主要用于定义网页中的多媒体,比如音频.视频.Java applets.PDF.ActiveX和Flash.Object标签是成对出现的,在object标签内可以使用 ...
- 利用 ASP.NET 的内置功能抵御 Web 攻击 (1)
摘要: Dino 总结了最常见的 Web 攻击类型,并介绍了 Web 开发人员可以如何使用 ASP.NET 的内置功能来改进安全性. 一.ASP.NET 开发人员应当始终坚持的做法 如果您正在阅读本文 ...
- <td>内容超出自动换行
td 内容自动换行 table表格td设置宽度后文字太多自动换行 设置table 的 style="table-layout:fixed;" 然后设置td的 style=" ...