
truffle init 从零开始创建简单DApp项目
下面的部分软件需要翻墙。这里默认你已经会科学上网,不懂的可以自己搜索解决。
软件安装
chrome浏览器
metamask插件
在谷歌应用商店中搜索metamask
ganche(图形版)
nodejs和npm
下载地址
安装完成需要将node.exe所在路径加入环境变量PATH中
并且需要保证在cmd中可以使用node和npm命令,简单测试:
$ node -v

$ npm -v
开发环境配置
- 启动
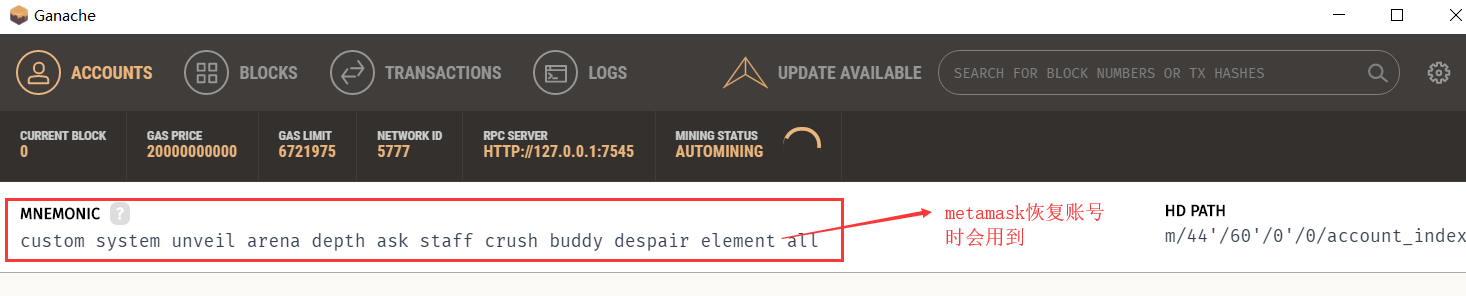
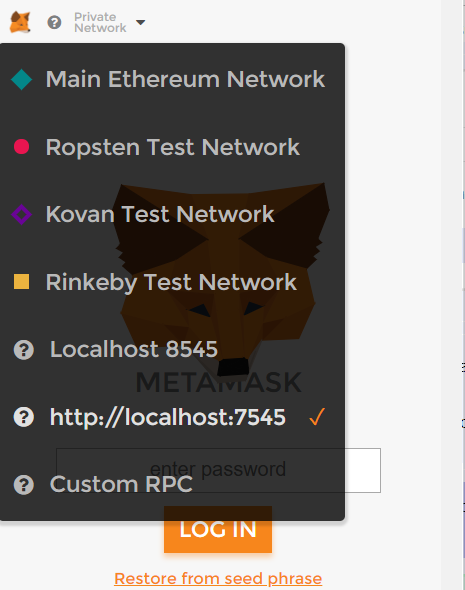
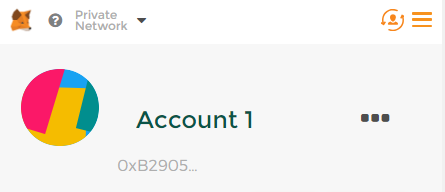
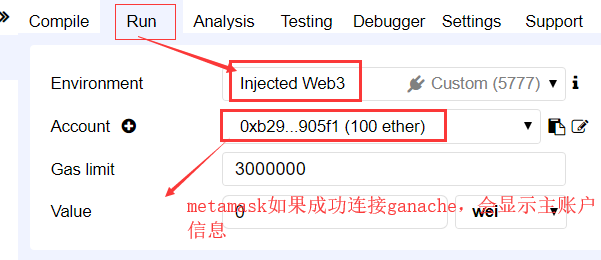
ganache remix切换运行环境。点击remix在线编辑器右侧的run->Environment,选择Injected Web3metamask连接ganache。打开chrome浏览器中的metamask插件,首先通过12个单词短语恢复账号。然后通过"Custom RPC", 输入http://localhost:7545,保存并将换网络切换至http://localhost:7545,连接成功后显示主账户信息''
配置截图
Demo项目
$ mkdir demo

$ cd demo

$ npm init
后面全部enter默认选择(直接敲回车)就好了,效果如下:
$ ls

package.json

$ cat package.json

{

  "name": "demo",

  "version": "1.0.0",

  "description": "",

  "main": "index.js",

  "scripts": {

    "test": "echo \"Error: no test specified\" && exit 1"

  },

  "author": "",

  "license": "ISC"

}
$ npm install ethereum/web3.js --save
安装比较耗时, 需要耐心等待安装完成
完成后效果:
$ ls

node_modules/  package.json  package-lock.json

$ ls node_modules/

bignumber.js/  crypto-js/  web3/          xmlhttprequest/

cookiejar/     utf8/       xhr2-cookies/

$ ls node_modules/web3/

bower.json  example/      lib/        package.json     styleguide.md

circle.yml  gulpfile.js*  LICENSE.md  package-init.js

dist/       index.js      package.js  README.md

# 发现配置已经发生了改变

$ cat package.json

{

  "name": "demo",

  "version": "1.0.0",

  "description": "",

  "main": "index.js",

  "scripts": {

    "test": "echo \"Error: no test specified\" && exit 1"

  },

  "author": "",

  "license": "ISC",

  "dependencies": {

    "web3": "github:ethereum/web3.js"

  }

}
完整项目结构
在项目根目录下创建index.html和main.css
如下:
$ ls demo

index.html  main.css  node_modules/  package.json  package-lock.json
index.html
<!DOCTYPE html>

<html>

<head>

    <meta charset="utf-8">

    <meta http-equiv="X-UA-Compatible" content="IE=edge,chrome=1">

    <meta name="viewport" content="width=device-width, initial-scale=1">

    <title>DApp Demo</title>

    <link rel="stylesheet" type="text/css" href="main.css">

    <script src="./node_modules/web3/dist/web3.min.js"></script>

    <script src="https://cdn.bootcss.com/jquery/1.12.4/jquery.js"></script>

</head>

<body>

<div class="container">

    <h1>Simple DApp Demo</h1>

    <h2 id="info"></h2>

    <label for="name" class="col-lg-2 control-label">Name</label>

    <input id="name" type="text">

    <label for="age" class="col-lg-2 control-label">Age</label>

    <input id="age" type="text">

    <button id="button">更新个人信息</button>

</div>

<script>

    window.addEventListener('load', function () {

        if (typeof web3 !== 'undefined') {

            web3 = new Web3(web3.currentProvider);

        } else {

            web3 = new Web3(new Web3.providers.HttpProvider("http://127.0.0.1:7545"));

        }

        //web3.eth.defaultAccount = web3.eth.accounts[0];

        // replace with your abi code

        const abi = [

            {

                "constant": false,

                "inputs": [

                    {

                        "name": "_name",

                        "type": "string"

                    },

                    {

                        "name": "_age",

                        "type": "uint256"

                    }

                ],

                "name": "setPersonalInfo",

                "outputs": [],

                "payable": false,

                "stateMutability": "nonpayable",

                "type": "function"

            },

            {

                "constant": true,

                "inputs": [],

                "name": "getPersonalInfo",

                "outputs": [

                    {

                        "name": "",

                        "type": "string"

                    },

                    {

                        "name": "",

                        "type": "uint256"

                    }

                ],

                "payable": false,

                "stateMutability": "view",

                "type": "function"

            }

        ];

        // replace with your contract address

        const address = "0x0d4aed2bf6178c870355ce1100a11e8fafdbd15d";

        // create contract instance

        const PersonalInfo = web3.eth.contract(abi).at(address);

        console.log("PersonalInfoContract:", PersonalInfo);

        PersonalInfo.getPersonalInfo(function (error, result) {

            if (!error) {

                $("#info").html(result[0] + ' (' + result[1] + ' years old)');

                console.log("get PersonalInfo success: ", result);

            } else {

                console.error("failed to get PersonalInfo :", error);

            }

        });

        $("#button").click(function () {

            var name = $("#name").val();

            var age = $("#age").val();

            PersonalInfo.setPersonalInfo(name, age, function (error, result) {

                if (!error) {

                    // update label

                    $("#info").html(name + ' (' + age + ' years old)');

                    console.log("setPersonalInfo success: " + result);

                } else {

                    consoe.log("fail to setPersonalInfo: " + error);

                }

            });

        });

    });

</script>

</body>

</html>
main.css
body {

    background-color:#F0F0F0;

    padding: 2em;

    font-family: 'Raleway','Source Sans Pro', 'Arial';

}

.container {

    width: 50%;

    margin: 0 auto;

}

label {

    display:block;

    margin-bottom:10px;

}

input {

    padding:10px;

    width: 50%;

    margin-bottom: 1em;

}

button {

    margin: 2em 0;

    padding: 1em 4em;

    display:block;

}

#info {

    padding:1em;

    background-color:#fff;

    margin: 1em 0;

}
使用web3.js和智能合约进行交互
使用solidity在线编辑器remix
solidity代码如下:
pragma solidity ^0.4.16;

contract PersonalInfo {

   string name;

   uint age;

   function setPersonalInfo(string _name, uint _age) public {

       name =_name;

       age = _age;

   }

   function getPersonalInfo() public view returns(string, uint){

       return (name, age);

   }

}
使用metamask须知:
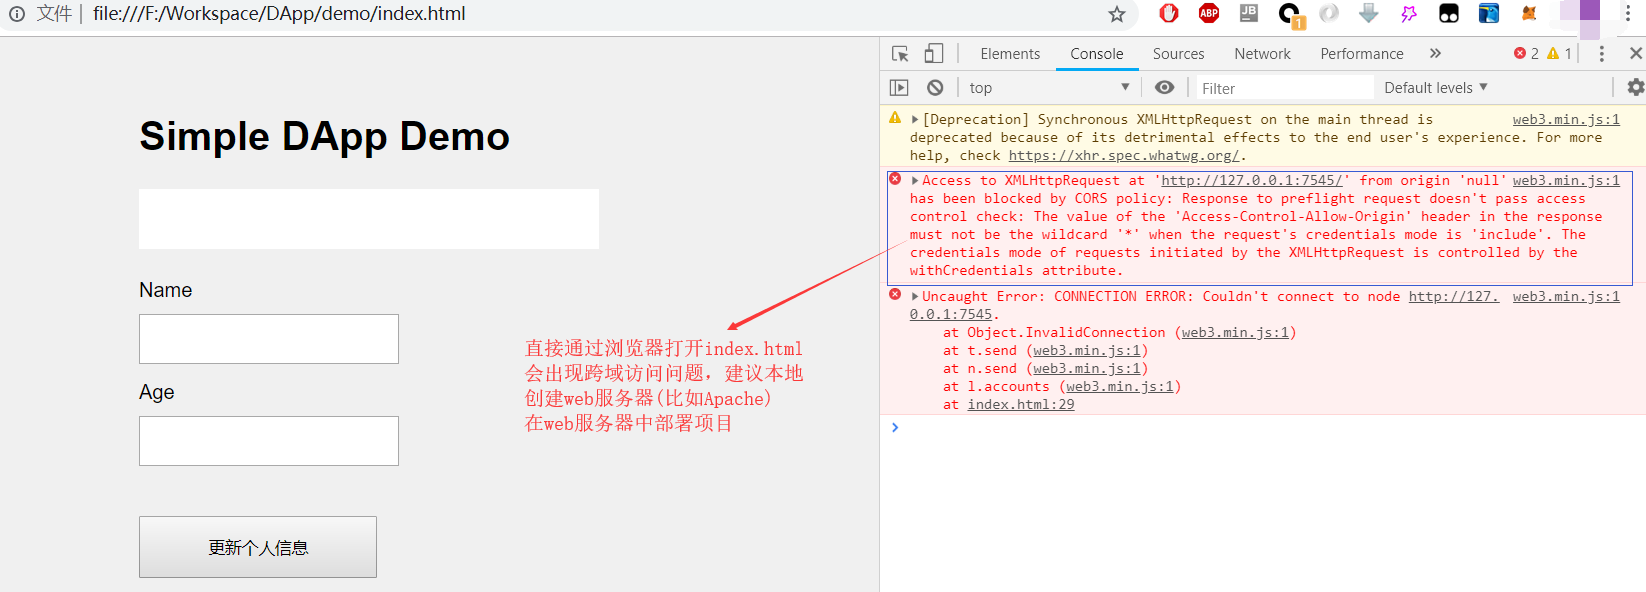
Due to browser security restrictions, we can't communicate with dapps running on file://. Please use a local server for development.
如果直接使用浏览器打开index.html会出现跨域访问,如下图:
遇到的问题:
The MetaMask Web3 object does not support synchronous methods like eth_sendTransaction without a callback parameter
官方解释:
All Async - Think of MetaMask as a light client
The user does not have the full blockchain on their machine, so data lookups can be a little slow. For this reason, we are unable to support most synchronous methods. The exceptions to this are:
- eth_accounts (web3.eth.accounts)
- eth_coinbase (web3.eth.coinbase)
- eth_uninstallFilter (web3.eth.uninstallFilter)
- web3.eth.reset (uninstalls all filters).
- net_version (web3.version.network).
解决方法:
在合约实例调用对应函数的时候,加上回调函数。形如:
 PersonalInfoContract.setPersonalInfo(name, age, function (error, result) {

                if (!error) {

                    // update label

                    $("#info").html(name + ' (' + age + ' years old)');

                    console.log("setPersonalInfo success: " + result);

                } else {

                    consoe.log("fail to setPersonalInfo: " + error);

                }

            });
参考:
- https://coursetro.com/posts/code/99/Interacting-with-a-Smart-Contract-through-Web3.js-(Tutorial)
- https://truffleframework.com/docs/truffle/getting-started/creating-a-project
- https://github.com/MetaMask/faq/blob/master/DEVELOPERS.md
- https://github.com/ethereum/wiki/wiki/JavaScript-API
- https://ethereum.stackexchange.com/questions/8736/how-to-call-my-contracts-function-using-sendtransaction
- https://web3js.readthedocs.io/en/1.0/web3-eth-contract.html
- https://github.com/MetaMask/faq/blob/master/DEVELOPERS.md#dizzy-all-async---think-of-metamask-as-a-light-client
truffle init 从零开始创建简单DApp项目的更多相关文章
- Intellij创建简单Springboot项目
Intellij创建简单Springboot项目 第一步:选择创建新项目——file-new-project 第二步:选择项目类型——Spring Initializr-next 第三步:输入项目信息 ...
- 创建简单web项目
Intellij Idea直接安装(可根据需要选择自己设置的安装目录),jdk使用1.6/1.7/1.8都可以,主要是配置好系统环境变量,tomcat7上tomcat的官网下载压缩包解压即可. 一.创 ...
- Gradle——创建简单的项目
项目 & 任务 Gradle 的一切都是基于项目和任务的. 构建由一个或多个项目组成.项目的概念很抽象,它取决于你要用Gradle 做什么 .项目可以是 一个 Jar 库或者一个 web 程序 ...
- fir.im Weekly - 从零开始创建 Android 新项目
今年的 Google I/O 大会上,人工智能和虚拟现实的产品发布让我们对未来多了几分惊喜.对于开发者部分,Google 发布了 Android N 系统,感受最深的是全新的 Android Stud ...
- 使用Intellij Idea创建简单Maven项目(转)
我是学Java Web的,基本靠自学,在网上收集了各种视频资料,逐一的看,代码逐一的敲.学习了这么久之前一直未成想过要把自己的学习路程记录下来,在网上也看到过很多人把自己的学习历程以及遇到的问题写在了 ...
- 手动创建简单webpack项目及React使用
一.创建基本的webpack4.x项目 1.运行 npm init -y 快速初始化项目 2.在项目根目录创建src的源代码目录和dist产品目录 3.在src目录下创建 index.html 4.使 ...
- IDEA创建简单SpringBoot项目
环境:jdk 1.打开IDEA -->New --> Project -->Spring Initalizer-->next 2.此处,只做创建示例,所以next后Group等 ...
- IDEA创建简单SSM项目使用传统Jar包
#IDEA SSM项目使用传统Jar包 创建项目 下一步,命名 下一步,创建完成 下一步,创建资源文件夹resources 页面概览 左侧目录树 演示如下 一些简单的说明 其中包之间的层次调用 ent ...
- 创建简单Maven项目
目录: Maven基础构建概念.仓库.构建与部署 Maven作用 Maven项目install Maven安装配置.目录结构.配置文件 配置Maven默认本地仓库 Maven常见命令 使用Maven ...
随机推荐
- SSRF漏洞浅析
大部分web应用都提供了从其他的服务器上获取数据的功能,如使用用户指定的URL,web应用可以获取图片,下载文件,读取文件内容等.如果服务端提供了从其他服务器应用获取数据的功能且没有对目标地址做过滤与 ...
- 微信小程序 image属性 mode
mode属性可以改变图片的填充容器方式
- centos7 安装mysql出现Could NOT find Curses (missing CURSES_LIBRARY CURSES_INCLUDE_PATH)
今天安装mysql 5.7 编译时出现一下问题: [root@localhost software]# cd mysql-5.7.21 [root@localhost mysql-5.7.21]# c ...
- eclipse 中git无法https下载提交代码
使用eclipse下载github代码时,报错信息为cannot open git-upload-pack,如下图: 其实就是ssl协议的版本不对, 2018年2月8日后禁止通过TLSv1.1协议连接 ...
- 右键菜单添加包含ICON图片的快捷打开方式
右键菜单添加包含ICON图片的快捷打开方式: ①保存如下代码为“submit.reg”, ②修改对应的程序地址 ③双击创建的文件,导入到注册表中,即可 Windows Registry Editor ...
- flask 手机号码正则匹配的简单操作
1 导包 Import re 2 匹配邮箱 ret=re.match("[a-zA-Z0-9]{4,20}@163\.com",字符串) If ret: print(ret.gro ...
- Java基于opencv—归一化
Opencv中提供了resize函数,可以把图像调整到相同大小 Java中resize函数的声明,内部调用的都是native方法 public static void resize(Mat src, ...
- 前段时间碰到的一些问题(免费WiFi设置+fiddler对手机进行抓包+fiddler抓不到https的请求)
这段时间转入移动端测试,对这块比较陌生,工作开展起来比较困难,所以好多东西都只是以解决问题为第一目标,没有去细细推敲其中原理,可能会有些语无伦次之感,但还是记一下当时解决问题的大致思路,供以后参考. ...
- vue配置 请求本地json数据
第一步:在build文件夹下找到webpack.dev.conf.js文件,在const portfinder = require('portfinder')后添加 //第一步const expres ...
- div介绍 盒子模型边框属性 CSS初始化 文字排版 边框调整 溢出
今天学习的div,了解了div是干什么用的掌握了什么是盒子模型,以及div的外边距内边距以及边框,运用div和CSS给文字排版,利用边框的来做图像,div溢出的处理 CSS初始化: 精确排版的时候用这 ...