
postgresql安装部署
一、下载安装:
1、下载:
官网下载地址:https://www.postgresql.org/download/linux/redhat/
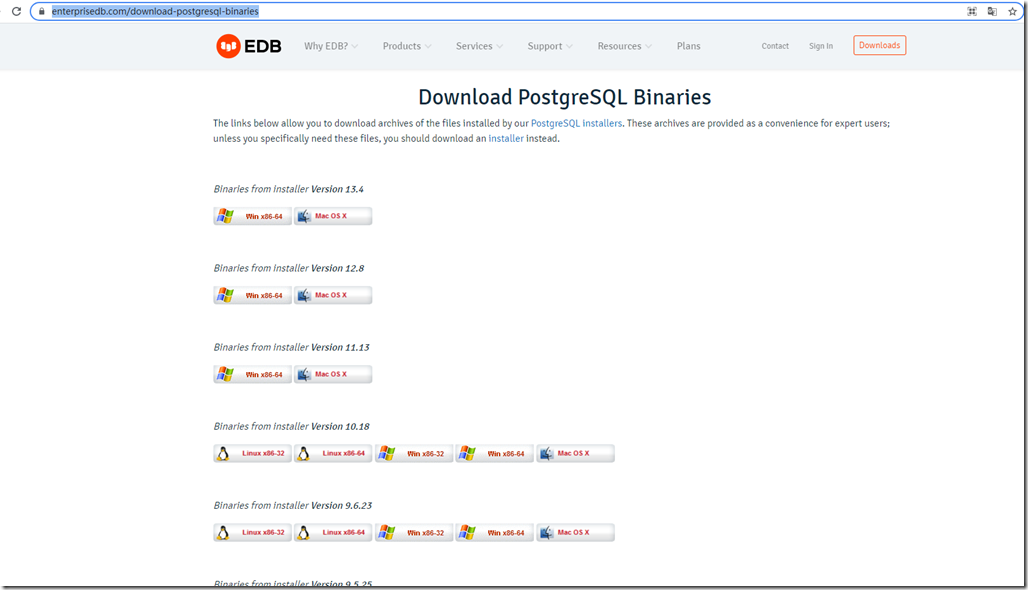
也可以用这个:https://www.enterprisedb.com/download-postgresql-binaries
从上述地址可以看到,其实官方从11开始已经没有二进制版本提供了,都是使用对应平台的发行版yum安装了。
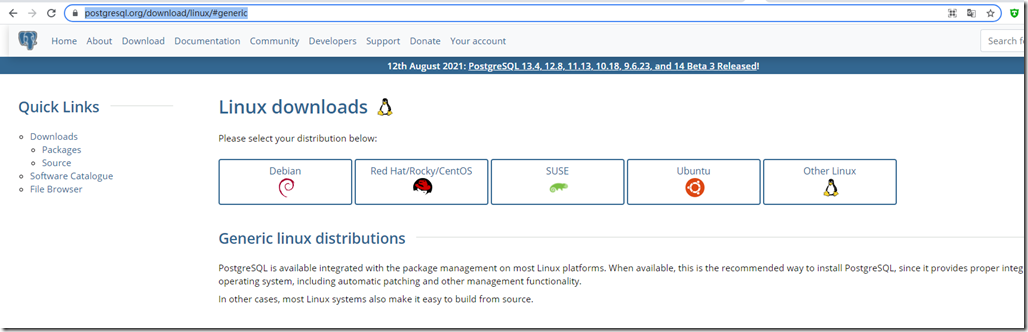
去官网看other linux,已经没有最新的二进制包了。
https://www.postgresql.org/download/linux/#generic
2、安装:
我们使用官方提供的yum方式安装
https://www.postgresql.org/download/linux/redhat/
选择对应的平台与版本
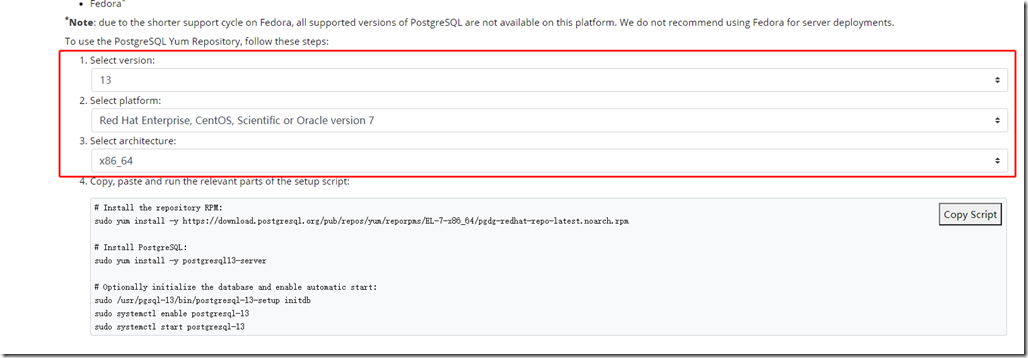
# Install the repository RPM:

sudo yum install -y https://download.postgresql.org/pub/repos/yum/reporpms/EL-7-x86_64/pgdg-redhat-repo-latest.noarch.rpm

# Install PostgreSQL:

sudo yum install -y postgresql13-server

# Optionally initialize the database and enable automatic start:

sudo /usr/pgsql-13/bin/postgresql-13-setup initdb

sudo systemctl enable postgresql-13

sudo systemctl start postgresql-13
二、初始化配置:
默认安装目录:
bin目录:/usr/pgsql-13/bin
data目录:/var/lib/pgsql/13/data
1、修改data目录
# 暂停服务

systemctl stop postgresql-13

# 移动data目录:

mv /var/lib/pgsql /data/apps/pgsql

# 修改配置,第46行

vim /data/apps/pgsql/13/data/postgresql.conf

...

data_directory = '/data/apps/pgsql/13/data'

...

# 修改postgres用户家目录,否则使用su - postgres的时候会报错:su: warning: cannot change directory to /var/lib/pgsql: No such file or directory

vim /etc/passwd

...

postgres:x:26:26:PostgreSQL Server:/data/apps/pgsql:/bin/bash

# 修改启动项里的data目录路径PGDATA

vim /usr/lib/systemd/system/postgresql-13.service

...

Environment=PGDATA=/data/apps/pgsql/13/data/

...

# 启动服务

systemctl daemon-reload

systemctl start postgresql-13.service
2、登录修改超级用户密码:
需要从root切换到postgres用户,修改密码:
# 切换用户到postgres

[root@dev-predictionio-206 bin]# su - postgres

Last login: Mon Sep  6 10:22:28 CST 2021 on pts/0

# 直接用postgres超级用户登录,默认不需要密码,psql直接回车就以postgres用户进入了postgres数据库

-bash-4.2$ psql -U postgres

psql (13.4)

Type "help" for help.

# 修改超级用户密码为:postgres

postgres=# alter role postgres with password 'postgres';

ALTER ROLE

# 退出

postgres-# \q
在postgres用户下重载配置
修改用户
# 修改用户认证模式trust为md5

bash-4.2$ vim /data/apps/pgsql/13/data/pg_hba.conf

# IPv4 local connections:

host    all             all             all                     md5

host    all             all             127.0.0.1/32            md5

host    all             all             0.0.0.0/0               md5

# IPv6 local connections:

host    all             all             ::1/128                 md5

# 重载配置

-bash-4.2$  export PGPORT=5432

-bash-4.2$ export PGDATE=postgres

-bash-4.2$  export PGDATA=/data/apps/pgsql/13/data

-bash-4.2$  export PGUSER=postgres

-bash-4.2$ vim /etc/profile

-bash-4.2$ source /etc/profile

-bash-4.2$ pg_ctl reload

server signaled

-bash-4.2$ exit

logout
3、创建新用户:
如上所述,先切换到Linux用户postgres,并执行psql:
[root@dev-predictionio-206 data]# su - postgres

Last login: Mon Sep  6 13:57:07 CST 2021 on pts/4

-bash-4.2$ psql

psql (13.4)

Type "help" for help.

postgres=#

# 现在位于数据库提示符下。

# 创建数据库新用户,如 dbuser:

postgres=# CREATE USER wangshuangxi WITH PASSWORD '123456';

CREATE ROLE

postgres=# CREATE USER dbuser WITH PASSWORD '*****';

注意:

语句要以分号结尾。

密码要用单引号括起来。

3、创建用户数据库,如exampledb:

postgres=# CREATE DATABASE exampledb OWNER dbuser;

4、将exampledb数据库的所有权限都赋予dbuser:

postgres=# GRANT ALL PRIVILEGES ON DATABASE exampledb TO dbuser;

5、使用命令 \q 退出psql:

postgres=# \q

6、创建Linux普通用户,与刚才新建的数据库用户同名,如 dbuser:

$ sudo adduser dbuser

$ sudo passwd dbuser

7、以dbuser的身份连接数据库exampledb:

$ su - dbuser

Password:

Last login: Wed Mar 1 11:52:07 CST 2017 on pts/

[dbuser@master ~]$ psql -d exampledb
4、开启远程访问:
# 修改配置文件,添加监听地址,改为*

vim postgresql.conf

listen_addresses = '*'

# 修改pg_hba.conf,添加远程主机地址,放在第一行:允许任意用户从任意机器上以密码方式访问数据库,把下行添加为第一条规则:

host    all             all             0.0.0.0/0               md5

# 重启服务:

sudo systemctl restart postgresql-13.service
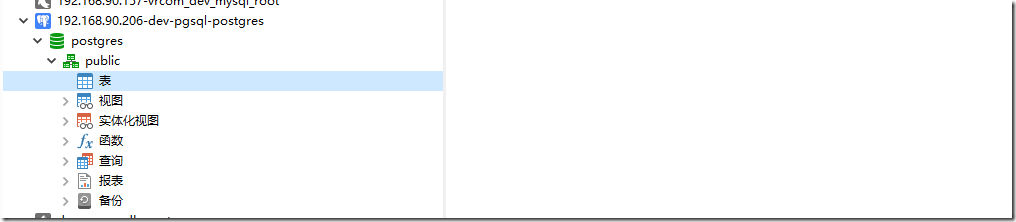
5、通过navicat连接访问:
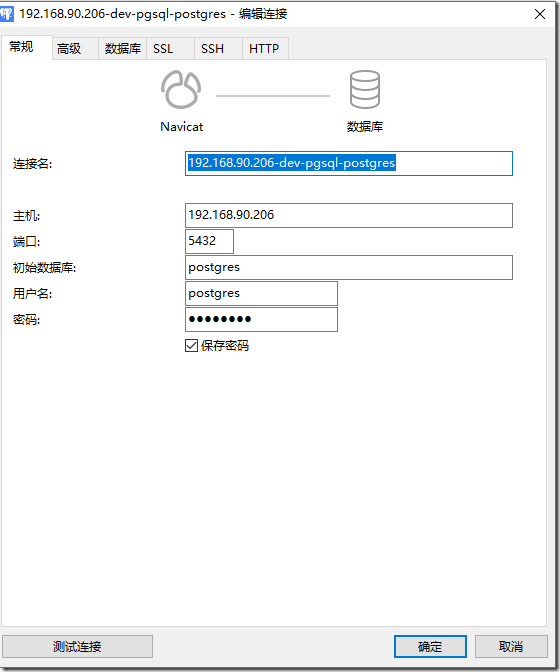
连接成功如下:
三、安装pgadmin图形管理界面
参考:https://www.cnblogs.com/whitebai/p/13094540.html
查看官网安装方式:https://www.pgadmin.org/download/pgadmin-4-rpm/
我们选择rpm包的安装方式:(也可以选择python或者其他方式)
# 安装基础repo包

sudo rpm -i https://ftp.postgresql.org/pub/pgadmin/pgadmin4/yum/pgadmin4-redhat-repo-2-1.noarch.rpm

# To install pgAdmin, run one of the following commands:

# Install for both desktop and web modes.

# 同时安装桌面版与web版

sudo yum install pgadmin4

# Install for desktop mode only.

sudo yum install pgadmin4-desktop

# Install for web mode only.

# 只安装web版,(我们只需要安装这个就可以了)

sudo yum install pgadmin4-web
安装过程有点长,可能需要输入y确认。
安装完成后:启动web初始化配置:
Finally, if you have installed pgadmin4 or pgadmin4-web, run the web setup script to configure the system to run in web mode:
#  sudo /usr/pgadmin4/bin/setup-web.sh

Setting up pgAdmin 4 in web mode on a Redhat based platform...

Creating configuration database...

NOTE: Configuring authentication for SERVER mode.

Enter the email address and password to use for the initial pgAdmin user account:

Email address: ops@lgitt.com

Password:

Retype password:

pgAdmin 4 - Application Initialisation

======================================

Creating storage and log directories...

Configuring SELinux...

setsebool:  SELinux is disabled.

setsebool:  SELinux is disabled.

The Apache web server is not running. We can enable and start the web server for you to finish pgAdmin 4 installation. Continue (y/n)? y

Created symlink from /etc/systemd/system/multi-user.target.wants/httpd.service to /usr/lib/systemd/system/httpd.service.

Apache successfully enabled.

Apache successfully started.

You can now start using pgAdmin 4 in web mode at http://127.0.0.1/pgadmin4
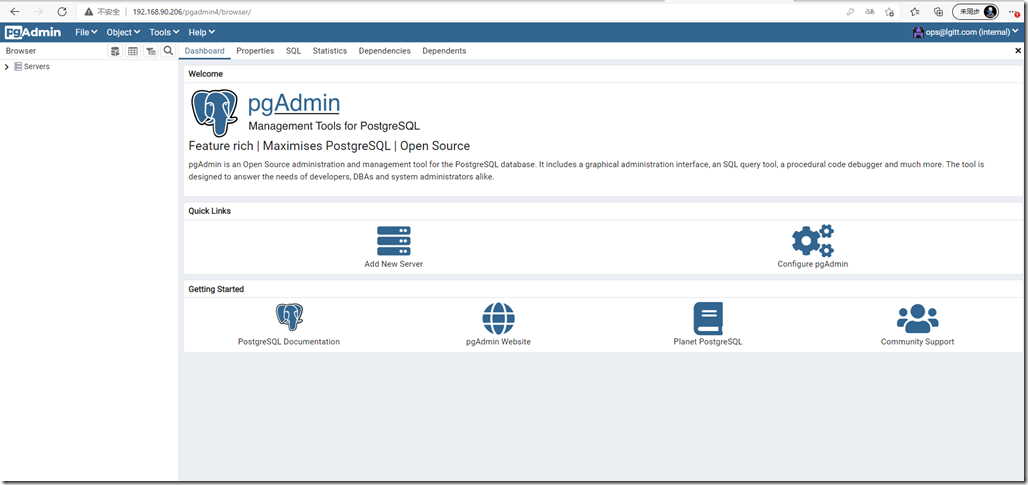
输入地址:http://192.168.90.206/pgadmin4/
如下:

登录后如图所示:
四、安装插件mysql-fdw (可选)
网上很多编译安装的方法,官网也是编译安装的,编译安装依赖包太多,因为只是插件,这里直接采用yum安装:
yum安装mysql-fdw
# 首先查找一下fdw

yum search postgresql|grep fdw

# 找到了对应包名,安装:

yum install mysql_fdw_13
源码编译安装参考:https://www.cnblogs.com/funnyzpc/p/14223167.html
准备libmysqlclient
注意:若mysql与postgresql在同一台linux机上,则无需安装mysql工具,请略过本段
wget https://dev.mysql.com/get/Downloads/MySQL-8.0/mysql-8.0.22-linux-glibc2.17-x86_64-minimal.tar.xz

tar -xf mysql-8.0.22-linux-glibc2.17-x86_64-minimal.tar.xz

mv mysql-8.0.22-linux-glibc2.17-x86_64-minimal /data/apps/mysql-client

chown -R mysql:mysql /data/apps/mysql-client
配置环境变量
- 配置文件
vi /etc/profile
- 添加mysql环境变量
# mysql-client

export MYSQL_HOME=/data/apps/mysql-client

export PATH=$PATH:$MYSQL_HOME/bin

export LD_LIBRARY_PATH=$PG_HOME/lib:$MYSQL_HOME/lib:$LD_LIBRARY_PATH
确保pgsql的环境变量存在:
# pgsql

export PG_HOME=/usr/pgsql-13/

export PATH=$PATH:$PG_HOME/bin
刷新配置
source /etc/profile
下载并编译mysql_fdw
下载地址:
https://github.com/EnterpriseDB/mysql_fdw/releases
tar xf mysql_fdw-REL-2_6_0.tar.gz

cd mysql_fdw-REL-2_6_0

make USE_PGXS=1

make USE_PGXS=1 install
编译报错:
# make USE_PGXS=1

Makefile:39: /usr/pgsql-13/lib/pgxs/src/makefiles/pgxs.mk: No such file or directory

Makefile:44: *** PostgreSQL 9.6, 10, 11, 12, or 13 is required to compile this extension.  Stop.

解决办法:
yum install postgresql13-devel -y
如果遇到依赖报错:
--> Finished Dependency Resolution

Error: Package: postgresql13-devel-13.4-1PGDG.rhel7.x86_64 (pgdg13)

           Requires: llvm-toolset-7-clang >= 4.0.1

 You could try using --skip-broken to work around the problem

 You could try running: rpm -Va --nofiles --nodigest
解决办法:
yum install centos-release-scl-rh -y

yum install postgresql13-devel -y
编译完,重启pgsql
systemctl restart postgresql-13.service
postgresql安装部署的更多相关文章
- Linux下apache+phppgadmin+postgresql安装配置
Linux下apache+phppgadmin+postgresql安装配置 操作系统:CentOS 安装包:httpd(首选yum), php(包括php以及php-pgsql,php-mbstri ...
- Greenplum 数据库安装部署(生产环境)
Greenplum 数据库安装部署(生产环境) 硬件配置: 16 台 IBM X3650, 节点配置:CPU 2 * 8core,内存 128GB,硬盘 16 * 900GB,万兆网卡. 万兆交换机. ...
- 在Ubuntu 12.10 上安装部署Openstack
OpenStack系统有几个关键的项目,它们能够独立地安装但是能够在你的云计算中共同工作.这些项目包括:OpenStack Compute,OpenStack Object Storage,OpenS ...
- [转]Centos 7 安装部署 GitLab 服务器
Centos 7 安装部署 GitLab 服务器 转自:https://www.jianshu.com/p/79bfded68899 文前说明 作为码农中的一员,需要不断的学习,我工作之余将一些分析总 ...
- zabbix的安装部署及自定义监控的实现
此篇感谢我的小师傅. 1. Zabbix主要功能和优劣势说明 1. Zabbix主要功能和优劣势说明 1.1 Zabbix主要功能: 1)Application monitoring 应用监控 数据库 ...
- ubuntu14.04, Cloudera Manager 5.11.1, cdh5.11.1 postgresql离线部署
最近一段时间团队接到的项目需要处理的数据量非常大,之前的处理方式难以满足现有需求.最近两周前前后后折腾了不少,在搭建了hadoop+hbase+hive+spark的一个集群后,由于感觉管理和监控太麻 ...
- Sqoop-1.4.6安装部署及详细使用介绍
之所以选择Sqoop1是因为Sqoop2目前问题太多.无法正常使用,综合比较后选择Sqoop1. Sqoop1安装配置比较简单 一.安装部署 (1).下载安装包 下载地址:http://archive ...
- CentOS7.4安装部署openstack [Liberty版] (一)
一.OpenStack简介 OpenStack是一个由NASA(美国国家航空航天局)和Rackspace合作研发并发起的,以Apache许可证授权的自由软件和开放源代码项目. OpenStack是一个 ...
- [转帖]VMware Vsphere 6.0安装部署 (三) vCenter Server安装
VMware Vsphere 6.0安装部署 (三) vCenter Server安装 2016年08月29日 14:59:14 dAng1r0Us 阅读数:72942 版权声明:本文为博主原创文 ...
随机推荐
- jQuery根据地址获取经纬度
一.HTML部分 1 @*景区位置*@ 2 <tr> 3 <th>景区名称:</th> 4 <td><input class="txt ...
- 跟着老猫来搞GO,集跬步而致千里
上次博客中,老猫已经和大家同步了如何搭建相关的GO语言的开发环境,相信在车上的小伙伴应该都已经搞定了环境了.那么本篇开始,我们就来熟悉GO语言的基础语法.本篇搞定之后,其实期待大家可以和老猫一样,能够 ...
- 攻防世界 WEB 高手进阶区 XCTF Web_php_unserialize Writeup
攻防世界 WEB 高手进阶区 XCTF Web_php_unserialize Writeup 题目介绍 题名考点 PHP反序列化漏洞 正则匹配 Writeup <?php class Demo ...
- 攻防世界 WEB 高手进阶区 tinyctf-2014 NaNNaNNaNNaN-Batman Writeup
攻防世界 WEB 高手进阶区 tinyctf-2014 NaNNaNNaNNaN-Batman Writeup 题目介绍 题目考点 了解js代码(eval函数.splice函数) 了解正则 Write ...
- CentOS8安装VirtualBox,并创建CentOS虚拟机
安装VirtualBox 执行以下命令并启用VirtualBox和EPEL包仓库 [root@localhost~] dnf config-manager --add-repo=https://dow ...
- Spring Boot 面试总结
1.使用 Spring Boot 前景? 多年来,随着新功能的增加,spring变得越来越复杂.只需访问https://spring.io/projects页面,我们就会看到可以在我们的应用程序中使用 ...
- mysql: 看不见的空符号 char(9) char(10) char(13)
在统计年度销售额时,总觉得哪里不对劲.于是找了找,对了对,试了trim,消除前后的空格,也没反应. 在崩溃的边缘,终于发现了错的原因. 原来我在录入的时候,粘贴多了其他空白符号,看不见,摸不着,啊~ ...
- [第二章]c++学习笔记2(类和对象的基础3)
隐藏的概念 隐藏的作用 使用例 成员函数的重载与缺省(附使用例) 注意事项
- php多域名跳转nginx
当web服务器nginx已经配置好了网站根目录时,需要增加另外的域名.但是由于限制必须在原来的网站根目录下面,nginx已经无法实现.只能通过php index页面进行调试.如下面: define(' ...
- 使用pmml跨平台部署机器学习模型Demo——房价预测
基于房价数据,在python中训练得到一个线性回归的模型,在JavaWeb中加载模型完成房价预测的功能. 一. 训练.保存模型 工具:PyCharm-2017.Python-39.sklearn2 ...