带你入门SpringCloud 之 通过SpringCloud Bus 自动更新配置
前言
在《带你入门SpringCloud统一配置 | SpringCloud Config》中通过 SpringCloud Config 完成了统一配置基础环境搭建,但是并没有实现配置修改自动更新的操作(GitHub 或Gitee 修改配置后,需要重启配置服务才能更新配置)。
本文是《带你入门SpringCloud统一配置 | SpringCloud Config》的续篇,通过 SpringCloud Bus 完成配置修改自动更新的操作介绍。
阅读本文前需要你先移步《带你入门SpringCloud统一配置 | SpringCloud Config》因为本文是在其基础上进行讲解的。
另外需要你熟悉 SpringBoot 项目的基本使用即可,还有一点需要注意的是在操作过程中尽量和我本地环境一致,因为环境不一致可能会带来一些问题。我本地环境如下:
- SpringBoot Version: 2.1.0.RELEASE
- SpringCloud Version: Greenwich.RELEASE
- Apache Maven Version: 3.6.0
- Java Version: 1.8.0_144
- IDEA:Spring Tools Suite (STS)
接下来就开始 SpringCloud Bus 环境搭建操作介绍!
SpringCloud Bus 环境搭建
第一步:安装并启用 RabbitMQ,这里就不做详细介绍了。可以查看之前的总结:Windows 环境安装 RabbitMQ
如果你的 RabbitMQ和 Config Server 端不在一台机器上,或者端口、用户名、密码不是使用的默认配置,那么你需要进行如下配置在 Config Server 端 application.properties 中
spring.rabbitmq.host=rabbitmq 服务IP地址
spring.rabbitmq.port=rabbitmq 服务端口号
spring.rabbitmq.username=rabbitmq 服务用户名
spring.rabbitmq.password=rabbitmq 服务密码
第二步:在 Config Server 端端和客户端都引入 spring-cloud-starter-bus-amqp 依赖。具体代码如下:
<dependency>

	<groupId>org.springframework.cloud</groupId>

	<artifactId>spring-cloud-starter-bus-amqp</artifactId>

</dependency>
第三步:在Config Server 端的 application.properties 中需要添加如下配置,目的是把刷新配置接口暴露出来,具体配置如下:
management.endpoints.web.exposure.include= *
第四步:Config Client 端引入openfeign starter 依赖,具体代码如下:
		<dependency>

			<groupId>org.springframework.cloud</groupId>

			<artifactId>spring-cloud-starter-openfeign</artifactId>

		</dependency>
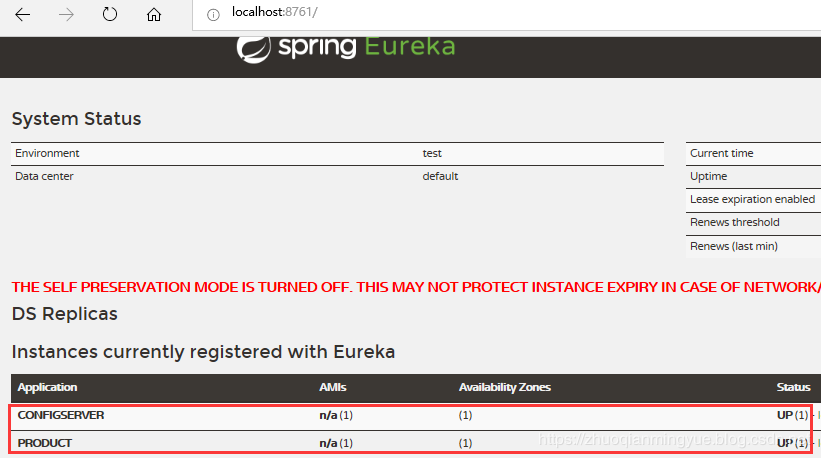
第五步:验证 Config Server 端和 Config Client 端是否在 RabbitMQ 注册队列和是否注册到 Eureka Server 端上。如下图所示:
需要先启动 Eureka Server 服务端,然后在依次启动 Config Server端和Config Client端。

第六步:Config Client 端上访问配置的 Controller 声明刷新配置作用域@RefreshScope。具体代码如下:
@RestController

@RefreshScope

public class EvnController {

	@Value("${env}")

    private String env;

	@RequestMapping("/env")

    public String evn() {

        return this.env;

    }

}
不添加 @RefreshScope注解,配置更新后不会生效。
如果是自定义前缀配置需要在@ConfigurationProperties下添加 @RefreshScope即可,
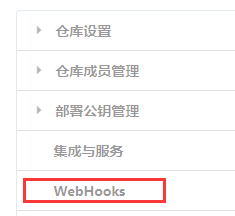
最七步在 Gitee 上配置 WebHooks,具体操作方式如下图所示:
进入Gitee 点击管理,然后点击 WebHooks。

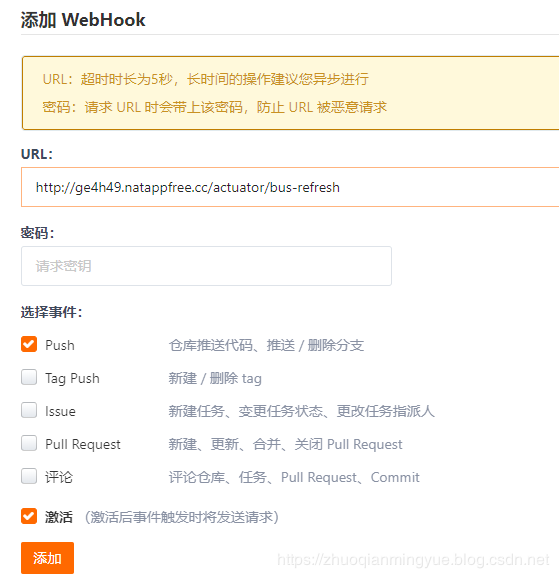
点击添加按钮添加新的 WebHooks 设置。

输入本地映射外网访问域名+/actuator/bus-refresh,自己测试可以使用 NATAPP 进行内网穿穿透配置。具体配置请查看 https://natapp.cn/。
测试
手动访问更新链接进行测试
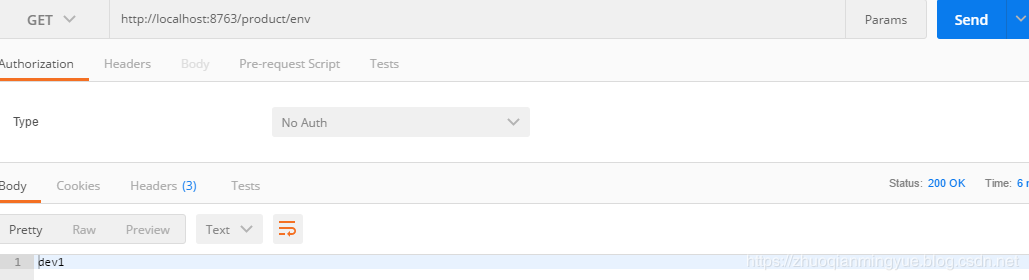
修改配置在码云远程仓库上,然后使用 PostMan 访问:http://localhost:8080/actuator/bus-refresh ,如下图所示:
这里演示直接是在码云上操作,相当于执行 git push 操作。
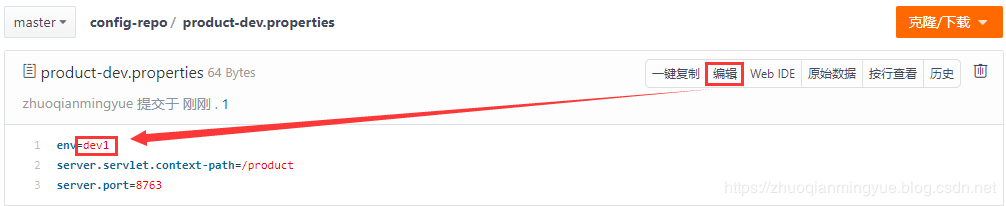

然后在查看商品服务(Config Client端)配置是否生效。如下图所示自动更新成功!
WebHooks 测试
进入 WebHooks 设置,然后点击测试。会报如下图所示错误:

解决方案:
参考来CSDN 作者 tinysakurac 解决方案。
文章:《解决使用spring cloud config bus使用webhook自动刷新出现的400问题》 (https://blog.csdn.net/m0_37556444/article/details/82812816)
问题产生原因:GitHub在进行 POST 请求的同时默认会在 Body 加上这么一串载荷(payload),而 /actuator/bus-refresh 接口没有进行接受这些信息处理,所以就报错了。
解决问题思路:通过拦截器拦截 bus-refresh请求,然后在 HttpServletRequestMapper 包装类将 Request中 Body 内容置空。具体代码如下:
拦截 bus-refresh请求Filter 类。
public class BusRefreshFilter implements Filter{

	@Override

	public void doFilter(ServletRequest request, ServletResponse response, FilterChain chain)

			throws IOException, ServletException {

		HttpServletRequest httpServletRequest = (HttpServletRequest)request;

        String url = new String(httpServletRequest.getRequestURI());

        //只过滤/actuator/bus-refresh请求

        if (!url.endsWith("/bus-refresh")) {

        	chain.doFilter(request, response);

            return;

        }

        //使用HttpServletRequest包装原始请求达到修改post请求中body内容的目的

        CustometRequestWrapper requestWrapper = new CustometRequestWrapper(httpServletRequest);

        chain.doFilter(requestWrapper, response);

	}

}
自定义 HttpServletRequestWrapper 类
public class CustometRequestWrapper extends HttpServletRequestWrapper{

	public CustometRequestWrapper(HttpServletRequest request) {

		super(request);

	}

	@Override

    public ServletInputStream getInputStream() throws IOException {

        byte[] bytes = new byte[0];

        ByteArrayInputStream byteArrayInputStream = new ByteArrayInputStream(bytes);

        return new ServletInputStream() {

            @Override

            public boolean isFinished() {

                return byteArrayInputStream.read() == -1 ? true:false;

            }

            @Override

            public boolean isReady() {

                return false;

            }

            @Override

            public void setReadListener(ReadListener readListener) {

            }

            @Override

            public int read() throws IOException {

                return byteArrayInputStream.read();

            }

        };

    }

}
将拦截 bus-refresh请求Filter 添加到 Spring 上下文中配置类。
@Configuration

public class FilterConfig {

	 @Bean

	    public FilterRegistrationBean<BusRefreshFilter> filterRegistration() {

	        FilterRegistrationBean<BusRefreshFilter> registration = new FilterRegistrationBean<BusRefreshFilter>();

	        registration.setFilter(new BusRefreshFilter());

	        List<String> urlList = new ArrayList<String>();

	        urlList.add("/*");

	        registration.setUrlPatterns(urlList);

	        registration.setName("BusRefreshFilter");

	        registration.setOrder(1);

	        return registration;

	    }

}

然后修改Gitee 上的配置信息后就可以自动更新了,这里就不在进行演示操作来。
还有一种方式是通过访问 Config Server端域名/monitor 来取代 Config Server端域名//actuator/bus-refresh。本方式个人尝试没有成功!具体配置官网介绍如下:
Many source code repository providers (such as Github, Gitlab, Gitea, Gitee, Gogs, or Bitbucket) notify you of changes in a repository through a webhook. You can configure the webhook through the provider’s user interface as a URL and a set of events in which you are interested. For instance, Github uses a POST to the webhook with a JSON body containing a list of commits and a header (X-Github-Event) set to push. If you add a dependency on the spring-cloud-config-monitor library and activate the Spring Cloud Bus in your Config Server, then a /monitor endpoint is enabled.
在Config Server 添加 spring-cloud-config-monitor 依赖
<dependency>

          <groupId>org.springframework.cloud</groupId>

          <artifactId>spring-cloud-config-monitor</artifactId>

</dependency>
然后在Config Client 添加如下配置:
参考:https://github.com/spring-cloud/spring-cloud-bus/issues/124
spring.cloud.bus.id=${vcap.application.name:${spring.application.name:application}}:${vcap.application.instance_index:${spring.profiles.active:${local.server.port:${server.port:0}}}}:${vcap.application.instance_id:${random.value}}
小结
当将远程仓库配置文件修改后,通过GitHub 或者 Gitee 的 WebHooks 配置自动访问接口bus-refresh 来通知Config Server 端。
Config Server 端收到请求后将配置 clone 下来,然后通过消息队列(默认是RabbitMQ)将修改后的配置发送给 Config Client 端。Config Client 端收到消息后重新从Config Server 端获取最新的配置信息。
而WebHooks 配置请求接口 bus-refresh 和消息队列发送配置给 Config Client 端都是 SpringCloud Bus 帮助我们完成的。
代码示例
如果你按照上述方式搭建并未成功,可以参考我在GitHub 项目 spring-cloud-get-started 仓库中模块名为:
spring-cloud-config-eureka-service
spring-cloud-config-server
spring-cloud-config-product-service
进行对比查看是否配置有误。
spring-cloud-get-started 项目地址:https://github.com/zhuoqianmingyue/spring-cloud-get-started
参考文献
https://blog.csdn.net/m0_37556444/article/details/82812816 By tinysakurac
https://cloud.spring.io/spring-cloud-config/reference/html/
带你入门SpringCloud 之 通过SpringCloud Bus 自动更新配置的更多相关文章
- Spring Cloud Bus 自动更新配置
---恢复内容开始--- Spring Cloud Config 结合 Spring Cloud bus 实现 git 仓库提交配置文件 触发消息队列 应用自动更新配置 1. config 服务端 添 ...
- spring cloud 使用spring cloud bus自动刷新配置
Spring Cloud Bus提供了批量刷新配置的机制,它使用轻量级的消息代理(例如RabbitMQ.Kafka等)连接分布式系统的节点,这样就可以通过Spring Cloud Bus广播配置的变化 ...
- Spring Cloud Bus实现自动更新配置
一.概述 1. 配置环境 版本:Spring Boot版本2.0.3.RELEASE,Spring Cloud版本Finchley.SR1,RabbitMQ 3.7.7 说明:本文章是在https:/ ...
- Spring Cloud(八):使用Spring Cloud Bus来实现配置动态更新
使用Spring Cloud Config我们能实现服务配置的集中化管理,在服务启动时从Config Server获取需要的配置属性.但如果在服务运行过程中,我们需要将某个配置属性进行修改,比如将验证 ...
- 带你入门SpringCloud统一配置 | SpringCloud Config
前言 在微服务中众多服务的配置必然会出现相同的配置,如果配置发生变化需要修改,一个个去修改然后重启项目的方案是绝对不可取的.而 SpringCloud Config 就是一个可以帮助你实现统一配置选择 ...
- 【微服务】- SpringCloud中Config、Bus和Stream
文章目录 SpringCloud中Config 1.Config的简介 官网 分布式系统面临的问题 config是什么 如何使用 能做什么 与git的配合使用 2.Config服务端的配置和测试 准备 ...
- SpringCloud(六)Bus消息总线
Bus 消息总线 概述 分布式自动刷新配置功能 Spring Cloud Bus 配合 Spring Cloud Config使用可以实现配置的动态刷新 Bus支持两种消息代理:RabbitMQ和Ka ...
- SpringCloud学习(SPRINGCLOUD微服务实战)一
SpringCloud学习(SPRINGCLOUD微服务实战) springboot入门 1.配置文件 1.1可以自定义参数并在程序中使用 注解@component @value 例如 若配置文件为a ...
- springcloud情操陶冶-springcloud config server(一)
承接前文springcloud情操陶冶-springcloud context(二),本文将在前文基础上浅析下ConfigServer的工作原理 前话 根据前文得知,bootstrapContext引 ...
随机推荐
- 你知道JavaScript这六种错误类型吗?
前言 今日话题,了解JavaScript的错误处理机制. 一.ReferenceError 引用一个不存在的变量时发生的错误.将一个值分配给无法分配的对象,比如对函数的运行结果或者函数赋值. 举栗子 ...
- python内建Exception类型
1.Exception类型及分层结构如下: BaseException +-- SystemExit +-- KeyboardInterrupt +-- GeneratorExit +-- Excep ...
- 【CF 1059C】 Sequence Transformation 数学
C. Sequence Transformation:http://codeforces.com/contest/1059/problem/C 题意 给你一个n,第一次输出1-n个数的gcd,然后你可 ...
- 背包形动态规划 fjutoj1380 Piggy-Bank
Piggy-Bank TimeLimit: 2000/1000 MS (Java/Others) MemoryLimit: 65536/32768 K (Java/Others) 64-bit in ...
- POJ2084 Game of Connections 卡特兰数 关于卡特兰数经典的几个问题
Game of Connections Time Limit: 1000MS Memory Limit: 30000K Total Submissions: 9128 Accepted: 44 ...
- 解决flutter:unable to find valid certification path to requested target 的问题
1.问题 周末在家想搞搞flutter,家里电脑是windows的,按照官网教程一步步安装好以后,创建flutter工程,点击运行,一片红色弹出来,WTF? PKIX path building fa ...
- cve_2019_0708_bluekeep复现采坑
0X01 简介 Microsoft Windows是美国微软公司发布的视窗操作系统.远程桌面连接是微软从Windows 2000 Server开始提供的功能组件. 2019年5月14日,微软发布了月度 ...
- pt工具校验主从数据一致性之dsns方式
mysql主从数据一致性校验,常用的方法是Percona-Toolkit的组件pt-table-checksum,这东西怎么用网上一大堆,就不啰嗦了.主要说一下通过dsns方式发现从库的一种方式. p ...
- Asterisk13.23.1如何增加G723编码和G729编码
文章主要将如何配置Asterisk G729的编码和G723的编码问题 今天在配置语音电话过程中踩到一个坑,就是在对接线路过程中出现了一个报错,在传到对方线路过程中出现无法转码从而导致报错. 查看了下 ...
- Python 之父的解析器系列之六:给 PEG 语法添加动作
原题 | Adding Actions to a PEG Grammar 作者 | Guido van Rossum(Python之父) 译者 | 豌豆花下猫("Python猫"公 ...