
Kubernetes3-kubectl管理Kubernetes容器平台-2
一、kubectl管理集群中deployment资源与service服务
1、相关参数
2、导入镜像
二、编辑创建nginx-deployment.yaml /nginx-svc.yaml
1、创建deployment.yaml
[root@master ~]# vim nginx-deployment.yaml

kind: Deployment

apiVersion: extensions/v1beta1

metadata:

  name: nginx

spec:

  replicas:

  template:

    metadata:

      labels:

        name: nginx

    spec:

      containers:

      - name: nginx

        image:  docker.io/nginx:latest

        imagePullPolicy: IfNotPresent

        ports:

        - containerPort:

          protocol: TCP
2、创建servcie
vim nginx-svc.yaml
[root@master ~]# vim nginx-svc.yaml

kind: Service

apiVersion: v1

metadata:

  name: nginx

  labels:

    name: nginx

spec:

  type: NodePort

  ports:

  - protocol: TCP

    nodePort:

    targetPort:

    port:

  selector:

    name: nginx
3、几个端口说明
nodePort:31008 #---后期用户可以通过node节点上这个端口访问nginx,公网接口
targetPort:80 #---指定nginx docker容器的端口
port:80 #---pod端口
4、create deployment/service
1)创建
kubectl create -f nginx-deployment.yaml
kubectl create -f nginx-svc.yaml
2)查看deployment/service/pod详细信息
kubectl get deploy
kubectl get svc
kubectl get pod -o wide
[root@master ~]# kubectl create -f nginx-deployment.yaml

deployment "nginx" created

[root@master ~]# kubectl create -f nginx-svc.yaml

service "nginx" created

[root@master ~]# kubectl get deploy

NAME      DESIRED   CURRENT   UP-TO-DATE   AVAILABLE   AGE

mysql                                              1h

nginx                                              26s

[root@master ~]# kubectl get svc

NAME         CLUSTER-IP     EXTERNAL-IP   PORT(S)        AGE

kubernetes   10.254.0.1     <none>        /TCP        5d

nginx        10.254.8.125   <nodes>       80:31008/TCP   24s

[root@master ~]#
[root@master ~]# kubectl get pod -o wide

NAME                     READY     STATUS    RESTARTS   AGE       IP            NODE

mysql--2f905   /       Running             1h        10.255.36.2   node2

nginx-1011335894-9wd5h   1/1       Running   0          2m        10.255.41.2   node1

[root@master ~]#
3)访问
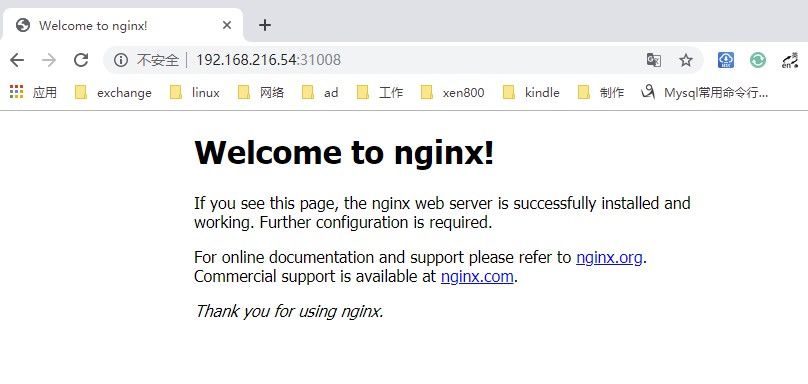
上面已经知道pod运行在哪台节点及对外监听端口,接下来就是访问(上面标红字段)

4)通过其他节点访问nginx
虽然nginx是在node1上运行,但是通过其他节点也是可以访问,因为已经做负载均衡
三、kubectl edit命令
主要作用是修改service值
1、使用get -o参数指定输出消息为yaml类型
kubectl get service nginx -o yaml
[root@master ~]# kubectl get service nginx -o yaml

apiVersion: v1

kind: Service

metadata:

  creationTimestamp: --03T20::43Z

  labels:

    name: nginx

  name: nginx

  namespace: default

  resourceVersion: ""

  selfLink: /api/v1/namespaces/default/services/nginx

  uid: e7775727-fe7a-11e9-bc69-000c291c8b39

spec:

  clusterIP: 10.254.8.125

  ports:

  - nodePort:

    port:

    protocol: TCP

    targetPort:

  selector:

    name: nginx

  sessionAffinity: None

  type: NodePort

status:

  loadBalancer: {}
2、修改对外端口为31009
kubectl edit service nginx
和vim类似的操作
[root@master ~]# kubectl edit service nginx

# Please edit the object below. Lines beginning with a '#' will be ignored,

# and an empty file will abort the edit. If an error occurs while saving this file will be

# reopened with the relevant failures.

#

apiVersion: v1

kind: Service

metadata:

  creationTimestamp: --03T20::43Z

  labels:

    name: nginx

  name: nginx

  namespace: default

  resourceVersion: ""

  selfLink: /api/v1/namespaces/default/services/nginx

  uid: e7775727-fe7a-11e9-bc69-000c291c8b39

spec:

  clusterIP: 10.254.8.125

  ports:

  - nodePort: 31009

    port:

    protocol: TCP

    targetPort:

  selector:

    name: nginx

  sessionAffinity: None

  type: NodePort

status:

  loadBalancer: {}
3、查看service,并验证
kubectl get service
[root@master ~]# kubectl get service

NAME         CLUSTER-IP     EXTERNAL-IP   PORT(S)        AGE

kubernetes   10.254.0.1     <none>        /TCP        5d

nginx        10.254.8.125   <nodes>       :/TCP   20m
访问web端

四、kubectl replace
replace 替换的意思
1、查看服务
kubectl get service
2、重定向一个nginx_replace的yaml文件
kubectl get service nginx -o yaml >nginx_replace.yaml
3、编辑,修改端口为31010
vim nginx_replace.yaml
4、执行替换
kubectl replace -f nginx_replace.yaml
5、检查service是否生效
kubectl get service
[root@master ~]# kubectl get service

NAME         CLUSTER-IP     EXTERNAL-IP   PORT(S)        AGE

kubernetes   10.254.0.1     <none>        /TCP        5d

nginx        10.254.8.125   <nodes>       :/TCP   20m

[root@master ~]# kubectl get service nginx -o yaml >nginx_replace.yaml

[root@master ~]# vim nginx_replace.yaml

apiVersion: v1

kind: Service

metadata:

  creationTimestamp: --03T20::43Z

  labels:

    name: nginx

  name: nginx

  namespace: default

  resourceVersion: ""

  selfLink: /api/v1/namespaces/default/services/nginx

  uid: e7775727-fe7a-11e9-bc69-000c291c8b39

spec:

  clusterIP: 10.254.8.125

  ports:

  - nodePort:

    port:

    protocol: TCP

    targetPort:

  selector:

    name: nginx

  sessionAffinity: None

  type: NodePort

status:

  loadBalancer: {}

~

~

[root@master ~]# kubectl get service

NAME         CLUSTER-IP     EXTERNAL-IP   PORT(S)        AGE

kubernetes   10.254.0.1     <none>        /TCP        6d

nginx        10.254.8.125   <nodes>       :/TCP   17h

~
五、kubectl patch
当修改一部分配置时,使用patch会方便点,如pod换个image镜像
这里比如更换镜像使得nginx支持php
1、检查当前镜像是否支持php
kubectl exec -it nginx-1011335894-853ql bash
php
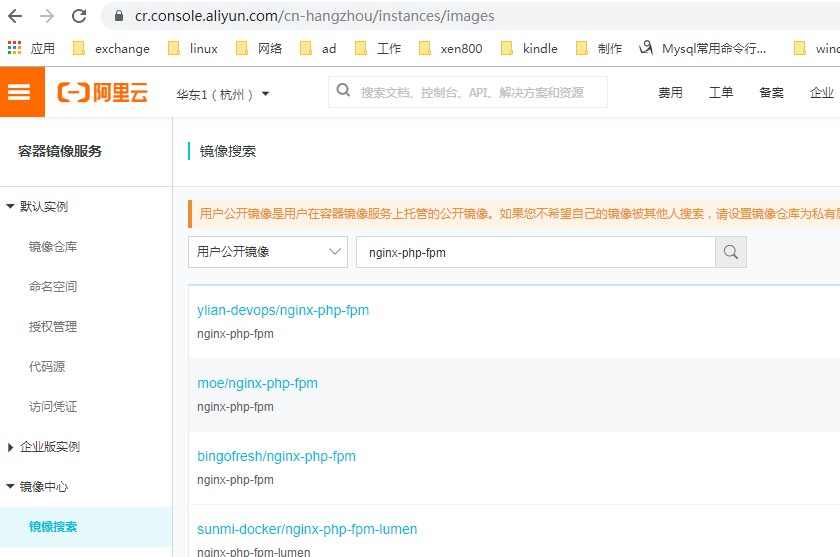
2、上传新镜像,并导入
这个可以在阿里云随便找一个
3、执行patch进行替换
kubectl patch pod nginx-1011335894-673bv -p '{"spec":{"containers":[{"name":"nginx","image":"docker.io/zxg/nginx-php-fpm56:latest"}]}}'
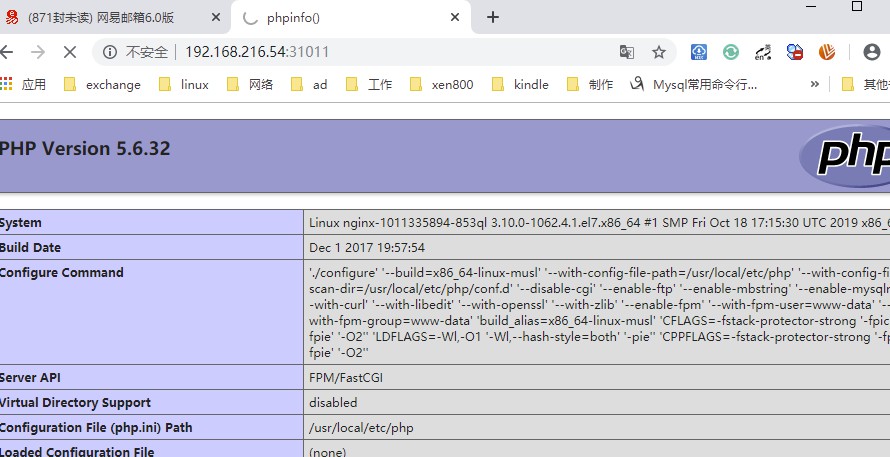
4、检查是否支持php
kubectl exec nginx-1011335894-853ql -it bash
[root@master ~]# kubectl get pod -o wide

NAME                     READY     STATUS    RESTARTS   AGE       IP            NODE

mysql--jwrfc   /       Running             2h        10.255.41.5   node1

nginx--853ql   /       Running             13s       10.255.36.2   node2

nginx--pzgsj   /       Running             2h        10.255.41.2   node1

[root@master ~]# kubectl exec -it nginx-1011335894-853ql bash

root@nginx--853ql:/# nginx -v

nginx version: nginx/1.13.

root@nginx--853ql:/# php

bash: php: command not found

root@nginx--853ql:/# exit

exit

[root@master ~]# kubectl patch pod nginx-1011335894-853ql -p  '{"spec":{"containers":[{"name":"nginx","image":"docker.io/zxg/nginx-php-fpm56:latest"}]}}'

"nginx-1011335894-853ql" patched

[root@master ~]# kubectl get pod

NAME                     READY     STATUS    RESTARTS   AGE

mysql--jwrfc   /       Running             2h

nginx--853ql   /       Running             3m

nginx--pzgsj   /       Running             2h

[root@master ~]# kubectl exec nginx-1011335894-853ql -it bash

bash-4.3# php -v

PHP 5.6. (cli) (built: Dec    ::)

Copyright (c) - The PHP Group

Zend Engine v2.6.0, Copyright (c) - Zend Technologies

    with Zend OPcache v7.0.6-dev, Copyright (c) -, by Zend Technologies
六、kubectl apply
是用来使用文件或者标准输入来更改配置信息
1、编辑svc.yaml文件
vim nginx-svc.yaml
改:nodePort:
为:nodePort:
2、执行apply命令
kubectl apply -f nginx-svc.yaml
3、检查结果
kubectl get svc
[root@master ~]# vim nginx-svc.yaml

kind: Service

apiVersion: v1

metadata:

  name: nginx

  labels:

    name: nginx

spec:

  type: NodePort

  ports:

  - protocol: TCP

    nodePort:

    targetPort:

    port:

  selector:

    name: nginx

[root@master ~]# kubectl apply -f nginx-svc.yaml

service "nginx" configured

[root@master ~]# kubectl get svc

NAME         CLUSTER-IP     EXTERNAL-IP   PORT(S)        AGE

kubernetes   10.254.0.1     <none>        /TCP        6d

nginx        10.254.8.125   <nodes>       :/TCP   23h

[root@master ~]#
七、kubectl scale (规模)
用于横向扩展、是k8s或swarm这类容器编辑平台的重要功能之一
如这里把replica副本改为3
1、查看nginx运行在哪个节点
kubectl get pod -o wide
2、执行scale命令
kubectl scale --current-replicas=1 --replicas=3 deployment/nginx
3、再次查看nginx运行在哪个节点
kubectl get pod -o wide
[root@master ~]# kubectl get pod -o wide

NAME                     READY     STATUS    RESTARTS   AGE       IP            NODE

mysql--2f905   /       Running             1d        10.255.36.2   node2

nginx--9wd5h   /       Running             23h       10.255.41.2   node1

[root@master ~]# kubectl scale --current-replicas=1 --replicas=3 deployment/nginx

deployment "nginx" scaled

[root@master ~]# kubectl get pod -o wide

NAME                     READY     STATUS    RESTARTS   AGE       IP            NODE

mysql--2f905   /       Running             1d        10.255.36.2   node2

nginx-1011335894-9wd5h   1/1       Running   0          23h       10.255.41.2   node1

nginx-1011335894-scm64   1/1       Running   0          5s        10.255.36.3   node2

nginx--xtkqd   /       Running             5s        10.255.41.3   node1

[root@master ~]#
八、kubectl autoscale
用于自动扩展确认,跟scale不同的是前者还是需要手动执行,而autoscale则会根据负载进行调解,而这条命令可以对Deployment/ReplicaSet/RC进行设定,通过最小值和最大值的指定进行设定
1、设置最小2,最大5的自动设置
kubectl autoscale deployment nginx --min=2 --max=5
2、查看结果
应该是没变化,因为之前手动scale设置的3在这个2-5的区间
kubectl get pod -o wide
3、设置最小2,最大2
kubectl autoscale deployment nginx --min=2 --max=2
这里就报错了因为之前设置的是3
[root@master ~]# kubectl autoscale deployment nginx --min=2 --max=5

deployment "nginx" autoscaled

[root@master ~]# kubectl get pod -o wide

NAME                     READY     STATUS    RESTARTS   AGE       IP            NODE

mysql--2f905   /       Running             1d        10.255.36.2   node2

nginx--9wd5h   /       Running             23h       10.255.41.2   node1

nginx--scm64   /       Running             3m        10.255.36.3   node2

nginx--xtkqd   /       Running             3m        10.255.41.3   node1

[root@master ~]# kubectl autoscale deployment nginx --min= --max=

Error from server (AlreadyExists): horizontalpodautoscalers.autoscaling "nginx" already exists

[root@master ~]#
九、kubectl cordon 与uncordon
如果其中一台node坏掉或者维护,暂时不能让生成的pod在此node上运行,需要通知kubernetes让其不要创建过来,就用cordon命令,如果uncordon就是取消这个设定
1、在node2上运行cordon命令
kubectl cordon node2
2、查看pod详情,没有变化
kubectl get pod -o wide
3、查看node详情
kubectl get nodes -o wide
发现node2状态为Ready,SchedulingDisabled
3、增加relicas副本
kubectl scale --replicas=6 deployment/nginx
4、再次查看pod详情
kubectl get pod -o wide
发现都是node1建立,node2已经封锁成功
5、使用uncordon取消cordon设定
kubectl uncordon node2
[root@master ~]# kubectl cordon node2

node "node2" cordoned

[root@master ~]# kubectl get pod -o wide

NAME                     READY     STATUS    RESTARTS   AGE       IP            NODE

mysql--2f905   /       Running             1d        10.255.36.2   node2

nginx--9wd5h   /       Running             23h       10.255.41.2   node1

nginx--scm64   /       Running             9m        10.255.36.3   node2

nginx--xtkqd   /       Running             9m        10.255.41.3   node1

[root@master ~]# kubectl get nodes -o wide

NAME      STATUS                     AGE       EXTERNAL-IP

node1     Ready                      6d        <none>

node2     Ready,SchedulingDisabled   5d        <none>

[root@master ~]# kubectl scale --replicas=6 deployment/nginx

deployment "nginx" scaled

[root@master ~]# kubectl get pod -o wide

NAME                     READY     STATUS    RESTARTS   AGE       IP            NODE

mysql--2f905   /       Running             1d        10.255.36.2   node2

nginx--7jvp0   /       Running             5s        10.255.41.5   node1

nginx--8nd1q   /       Running             5s        10.255.41.6   node1

nginx--9wd5h   /       Running             23h       10.255.41.2   node1

nginx--lhtkm   /       Running             5s        10.255.41.4   node1

nginx--scm64   /       Running             11m       10.255.36.3   node2

nginx--xtkqd   /       Running             11m       10.255.41.3   node1

[root@master ~]#
[root@master ~]# kubectl uncordon node2

node "node2" uncordoned

[root@master ~]# kubectl get node -o wide

NAME      STATUS    AGE       EXTERNAL-IP

node1     Ready     6d        <none>

node2     Ready     5d        <none>

[root@master ~]#
十、kubectl drain (驱逐)
用于对某个node结点进行维护
1、drain两个作用:
1、设定此node不可以使用(cordon)
2、evict驱逐pod到他正常的node节点上
2、先删之前的nginx
kubectl delete deploy nginx
3、创建pod
kubectl create -f nginx-deployment.yaml
4、查看pod详情
kubectl get pod -o wide
5、执行drain命令 drain node2
kubectl drain node2
6、查看pod
get pod -o wide
镜像已经漂移过来了
7、查看node
node2状态为Ready,SchedulingDisabled ,完成配置
[root@master ~]# kubectl create -f nginx-deployment.yaml

deployment "nginx" created

[root@master ~]# kubectl scale --replicas=4 deployment nginx

deployment "nginx" scaled

[root@master ~]# kubectl get pod -o wide

NAME                     READY     STATUS    RESTARTS   AGE       IP            NODE

mysql--2f905   /       Running             1d        10.255.36.2   node2

nginx--4tpj5   /       Running             8s        10.255.41.3   node1

nginx--673bv   /       Running             8s        10.255.36.3   node2

nginx--hw8ld   /       Running             8s        10.255.36.4   node2

nginx--pzgsj   /       Running             28s       10.255.41.2   node1

[root@master ~]# kubectl drain node2

node "node2" cordoned

pod "nginx-1011335894-hw8ld" evicted

pod "nginx-1011335894-673bv" evicted

pod "mysql-1971774246-2f905" evicted

node "node2" drained

[root@master ~]# kubectl get pod -o wide

NAME                     READY     STATUS    RESTARTS   AGE       IP            NODE

mysql--jwrfc   /       Running             7s        10.255.41.5   node1

nginx--4tpj5   /       Running             1m        10.255.41.3   node1

nginx--d683g   /       Running             7s        10.255.41.6   node1

nginx--gs3lg   /       Running             7s        10.255.41.4   node1

nginx--pzgsj   /       Running             1m        10.255.41.2   node1

[root@master ~]# get nodes -o wide

NAME STATUS AGE EXTERNAL-IP

node1     Ready                      6d        <none>

node2     Ready,SchedulingDisabled   5d        <none>
转载请注明出处:https://www.cnblogs.com/zhangxingeng/p/11807083.html
Kubernetes3-kubectl管理Kubernetes容器平台-2的更多相关文章
- Kubernetes3-kubectl管理Kubernetes容器平台-1
一.简介 1.什么是kubectl kubectl前面其实已经用到了一些,它其实就是用于操作kubernetes集群的命令行接口,通过kubectl的各种命令实现各种功能 2.环境还是用上一偏文章 K ...
- Kubernetes 容器平台实战
一.什么是Kubernetes? Kubernetes是容器集群管理系统,是一个开源的平台,可以实现容器集群的自动化部署,自动扩缩容,维护等功能. 通过Kubernetes可以做到: 快速部署应用 快 ...
- 使用kubectl管理Kubernetes(k8s)集群:常用命令,查看负载,命名空间namespace管理
目录 一.系统环境 二.前言 三.kubectl 3.1 kubectl语法 3.2 kubectl格式化输出 四.kubectl常用命令 五.查看kubernetes集群node节点和pod负载 5 ...
- kubectl管理kubernetes集群
[root@master ~]# kubectl get nodes 查看集群节点NAME STATUS AGEnode1 Ready 25mnode2 Re ...
- Kubernetes容器集群管理环境 - 完整部署(上篇)
Kubernetes(通常称为"K8S")是Google开源的容器集群管理系统.其设计目标是在主机集群之间提供一个能够自动化部署.可拓展.应用容器可运营的平台.Kubernetes ...
- VMware Tanzu Kubernetes Grid 1.3 发布 - VMware 构建、签名和支持的开源 Kubernetes 容器编排平台的完整分发版
Tanzu Kubernetes 集群是由 VMware 构建.签名和支持的开源 Kubernetes 容器编排平台的完整分发版.可以通过使用 Tanzu Kubernetes Grid 服务在主管集 ...
- kubernetes云平台管理实战: 集群部署(一)
一.环境规划 1.架构拓扑图 2.主机规划 3.软件版本 [root@k8s-master ~]# cat /etc/redhat-release CentOS Linux release 7.4.1 ...
- Kubernetes容器集群管理环境 - Prometheus监控篇
一.Prometheus介绍之前已经详细介绍了Kubernetes集群部署篇,今天这里重点说下Kubernetes监控方案-Prometheus+Grafana.Prometheus(普罗米修斯)是一 ...
- Kubernetes容器集群管理环境 - 完整部署(中篇)
接着Kubernetes容器集群管理环境 - 完整部署(上篇)继续往下部署: 八.部署master节点master节点的kube-apiserver.kube-scheduler 和 kube-con ...
随机推荐
- Spring Boot 2.x 基础案例:整合Dubbo 2.7.3+Nacos1.1.3(配置中心)
本文原创首发于公众号:Java技术干货 1.概述 本文将Nacos作为配置中心,实现配置外部化,动态更新.这样做的优点:不需要重启应用,便可以动态更新应用里的配置信息.在如今流行的微服务应用下,将应用 ...
- ef core实现软删除
很多web程序一般的偶不会设计真的物理删除了. 基本上都是在在数据库加一个标记,就得当作已经删除了.同时在查询的时候,过滤已经标记删除的数据 ef core实现软删除是非常简单的,直接在OnModel ...
- Java的数组的作业11月06日
动手动脑 实验一:了解for循环得到棋盘结构 (1) 程序: import java.io.*; public class QiPan { //定义一个二维数组来充当棋盘 private String ...
- 关于padding被计算在width中问题——box-sizing相关
目录 盒子模型 与box-sizing有什么关系 我们为什么要开历史的"倒车" bootstrap怎么解决的 控件的box-sizing 注意甄别 前一阵子遇到一个小问题,在同样的 ...
- Mybatis入门简版(二)
一.Dao层开发的方式 以前dao层开发比较繁琐,写了接口还得写实现类,实际上用了Mybatis之后写实现类非常重复,都是重复的代码.那么此时改成另外一种简单形式. 遵循以下四个原则(名称.形参.返回 ...
- Java编程思想——第17章 容器深入研究 读书笔记(二)
五.List的功能方法 排除Collection已包含的方法外还增加了 boolean addAll(int index, Collection<? extends E> c);从索引位置 ...
- 初学 Spring MVC(基于 Spring in Action)
Spring MVC(Model-View-Controller) 当你看到本博文时,我猜你可能正面临着我已探索过的问题. 同其他博主一样,我先按照书上详细的介绍一下 Spring MVC,也是为了自 ...
- Python3字符串常见方法
目录 字符串的进阶使用 格式化输出字符串 当然除了上述方法外,还可以你使用format方法 format方法第二种用法: Python字符串与二进制的转换 字母大写 计字符a出现的次数 输出50个字符 ...
- 绕过CDN方法整理
来自文章链接:https://zhuanlan.zhihu.com/p/33440472 0x01 判断ip是否为网站真实ip 1. Nslookup: Win下使用nslookup命令进行查询,若返 ...
- [NOIp2014] luogu P1351 联合权值
哎我博 4 了. 题目描述 无向连通图 GGG 有 nnn 个点,n−1n−1n−1 条边.点从 111 到 nnn 依次编号,编号为 iii 的点的权值为 WiW_iWi,每条边的长度均为 111 ...