servlet之session添加和移除的两种方式
Java Session 介绍
一、添加、获取session
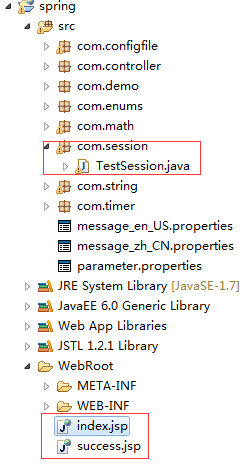
1、项目结构
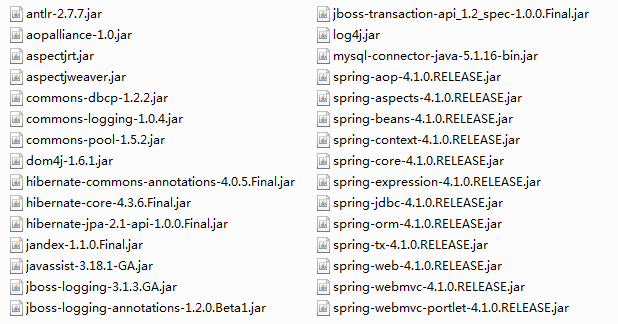
2、jar包
3、web.xml文件
<?xml version="1.0" encoding="UTF-8"?>

<web-app xmlns:xsi="http://www.w3.org/2001/XMLSchema-instance"

    xmlns="http://java.sun.com/xml/ns/javaee"

    xmlns:web="http://java.sun.com/xml/ns/javaee/web-app_2_5.xsd"

    xsi:schemaLocation="http://java.sun.com/xml/ns/javaee

    http://java.sun.com/xml/ns/javaee/web-app_3_0.xsd" id="WebApp_ID" version="3.0">

      <display-name>spring</display-name>

      <context-param>

        <param-name>contextConfigLocation</param-name>

        <param-value>/WEB-INF/spring-context.xml,/WEB-INF/applicationContext.xml</param-value>

    </context-param>

    <listener>

        <listener-class>org.springframework.web.context.ContextLoaderListener</listener-class>

    </listener>

      <!-- log4j配置文件路径 -->

    <context-param>

        <param-name>log4jConfigLocation</param-name>

        <param-value>/WEB-INF/log4j.properties</param-value>

    </context-param>

    <context-param>

        <param-name>log4jRefreshInterval</param-name>

        <param-value>6000</param-value>

    </context-param>

    <!-- 加载log4j配置文件 -->

    <listener>

        <listener-class>org.springframework.web.util.Log4jConfigListener</listener-class>

    </listener>

    <!-- springmvc配置 -->

      <servlet>

        <servlet-name>springMVC</servlet-name>

        <servlet-class>org.springframework.web.servlet.DispatcherServlet</servlet-class>

        <init-param>

            <param-name>contextConfigLocation</param-name>

            <param-value>/WEB-INF/spring-config.xml</param-value>

        </init-param>

        <load-on-startup>1</load-on-startup>

    </servlet>

    <servlet-mapping>

        <servlet-name>springMVC</servlet-name>

        <url-pattern>/</url-pattern>

    </servlet-mapping>

  <welcome-file-list>

    <welcome-file>index.html</welcome-file>

    <welcome-file>index.htm</welcome-file>

    <welcome-file>index.jsp</welcome-file>

    <welcome-file>default.html</welcome-file>

    <welcome-file>default.htm</welcome-file>

    <welcome-file>default.jsp</welcome-file>

  </welcome-file-list>

</web-app>
4、spring-config.xml文件
<?xml version="1.0" encoding="UTF-8"?>

<beans xmlns="http://www.springframework.org/schema/beans"

    xmlns:xsi="http://www.w3.org/2001/XMLSchema-instance"

    xmlns:oxm="http://www.springframework.org/schema/oxm"

    xmlns:context="http://www.springframework.org/schema/context"

    xmlns:aop="http://www.springframework.org/schema/aop"

    xmlns:tx="http://www.springframework.org/schema/tx"

    xmlns:task="http://www.springframework.org/schema/task"

    xsi:schemaLocation="http://www.springframework.org/schema/beans

       http://www.springframework.org/schema/beans/spring-beans-3.0.xsd

       http://www.springframework.org/schema/oxm

       http://www.springframework.org/schema/oxm/spring-oxm-3.0.xsd

       http://www.springframework.org/schema/context

       http://www.springframework.org/schema/context/spring-context-3.0.xsd

       http://www.springframework.org/schema/tx

        http://www.springframework.org/schema/tx/spring-tx-3.0.xsd

         http://www.springframework.org/schema/aop

         http://www.springframework.org/schema/aop/spring-aop-3.0.xsd

         http://www.springframework.org/schema/task

       http://www.springframework.org/schema/task/spring-task-3.2.xsd">

    <!--  通知spring容器通过注解的方式装配bean -->

      <context:annotation-config />

    <!--  通知spring容器采用自动扫描机制查找注解的bean -->

      <context:component-scan base-package="com.*" />

      <task:annotation-driven /> <!-- 定时器开关-->

      <bean id="agentExcelTask" class="com.timer.TimerController1"/>

    <task:scheduled-tasks>

        <task:scheduled ref="agentExcelTask" method="printstr" cron="* * 0/1000 * * ?"/>

    </task:scheduled-tasks>

    <!--  配置返回页面过滤 -->

    <bean id="viewResolver" class="org.springframework.web.servlet.view.UrlBasedViewResolver">

        <property name="viewClass"

            value="org.springframework.web.servlet.view.JstlView" />

        <property name="prefix" value="/" />

        <property name="suffix" value=".jsp" />

    </bean>

</beans>
5、TestSession.java
package com.session;

import javax.servlet.http.HttpServletRequest;

import javax.servlet.http.HttpSession;

import org.springframework.stereotype.Controller;

import org.springframework.ui.Model;

import org.springframework.web.bind.annotation.RequestMapping;

import org.springframework.web.bind.annotation.SessionAttributes;

import com.demo.User;

@Controller

@SessionAttributes("user")

public class TestSession {

    /**

     * 用servlet的HttpServletRequest添加信息到session

     */

    @RequestMapping("addSession")

    public String addSession(User user, HttpServletRequest request, Model model){

        request.getSession().setAttribute("user", user);

        //request.getSession().removeAttribute("user");//删除 session 指定属性健

        //request.getSession().invalidate();//清除所有的session,使当前 session 完全失效

        User u = (User) request.getSession().getAttribute("user");

        model.addAttribute("name", u.getName());

        model.addAttribute("password", u.getPassword());

        return "success";

    }

    /**

     * 用servlet的HttpSession添加信息到session

     */

    @RequestMapping("addSession1")

    public String addSession1(User user, HttpSession request, Model model){

        request.setAttribute("user", user);

        //request.removeAttribute("user");//移除session

        //request.invalidate();//清除所有的session,使当前 session 完全失效

        User u = (User) request.getAttribute("user");

        model.addAttribute("name", u.getName());

        model.addAttribute("password", u.getPassword());

        return "success";

    }

}
6、index.jsp
<%@ page language="java" import="java.util.*" pageEncoding="UTF-8"%>

<%@ taglib prefix="spring" uri="http://www.springframework.org/tags" %>

<%

String path = request.getContextPath();

String basePath = request.getScheme()+"://"+request.getServerName()+":"+request.getServerPort()+path+"/";

%>

<!DOCTYPE HTML PUBLIC "-//W3C//DTD HTML 4.01 Transitional//EN">

<html>

  <head>

    <base href="<%=basePath%>">

    <title>index</title>

  </head>

  <body>

    <form action="addSession1" method="post">

          用户:<input type="text" name="name"><br><br>

          密码:<input type="text" name="password"><br><br>

        <input type="submit" value="确定">

    </form>

    <!-- 使用message 标签配置需要显示的国际化文本,

           code  对应国际化文件中对应的键的名称  -->

    <span style="color: #2D2D2D;">

        <spring:message code="main.title"/>

    </span>

    <br>

    <input type="text" value="<spring:message code="main.target"/>">

  </body>

</html>
7、success.jsp
<%@ page language="java" import="java.util.*" pageEncoding="UTF-8"%>

<%

String path = request.getContextPath();

String basePath = request.getScheme()+"://"+request.getServerName()+":"+request.getServerPort()+path+"/";

%>

<!DOCTYPE HTML PUBLIC "-//W3C//DTD HTML 4.01 Transitional//EN">

<html>

  <head>

    <base href="<%=basePath%>">

    <title>success</title>

  </head>

  <body>

    ${name},success. <br>

    用户名:${name},密码:${password}

  </body>

</html>
二、设置session超时的3中方式
1. 在web容器中设置(此处以tomcat为例)
在tomcat-5.0.28\conf\web.xml中设置,以下是tomcat 5.0中的默认配置:
<session-config>

  <session-timeout>30</session-timeout>

</session-config>
Tomcat默认session超时时间为30分钟,可以根据需要修改,负数或0为不限制session失效时间。
2. 在工程的web.xml中设置
<!-- 时间单位为分钟   -->

<session-config>

      <session-timeout>15</session-timeout>

</session-config>
3. 通过java代码设置
session.setMaxInactiveInterval(30*60);//以秒为单位
三种方式优先级:1 < 2 <3
servlet之session添加和移除的两种方式的更多相关文章
- 添加登录装饰器的两种方式:FBV和CBV
1.FBV方式:添加验证装饰器 def auth(func): def deco(request, *args, **kwargs): u = request.get_signed_cookie('u ...
- spring boot集成 servlet自动注册的两种方式
有两种方式:(两种方式同时存在时,@Bean优先@ServletComponentScan实例化,生成两个对象) 1)通过@ServletComponentScan类注解 扫描 带有@WebServl ...
- SpringBoot整合Servlet的两种方式
SpringBoot整合Servlet有两种方式: 1.通过注解扫描完成Servlet组件的注册: 2.通过方法完成Servlet组件的注册: 现在简单记录一下两种方式的实现 1.通过注解扫描完成Se ...
- 【SpringBoot】03.SpringBoot整合Servlet的两种方式
SpringBoot整合Servlet的两种方式: 1. 通过注解扫描完成Servlet组件注册 新建Servlet类继承HttpServlet 重写超类doGet方法 在该类使用注解@WebServ ...
- Servlet实现重定向的两种方式
使用Servlet实现请求重定向:两种方式 1. response.setStatus(302); response.setHeader("location", "/Re ...
- springmvc和servlet在上传和下载文件(保持文件夹和存储数据库Blob两种方式)
参与该项目的文件上传和下载.一旦struts2下完成,今天springmvc再来一遍.发现springmvc特别好包,基本上不具备的几行代码即可完成,下面的代码贴: FileUpAndDown.jsp ...
- linux中添加一个用户到指定用户组的两种方式,修改一个用户到指定用户组的一种方式
添加一个用户到指定用户组: gpasswd –a 用户名 组名usermod –G 组名 用户名 //第一种:gpasswd –a 用户名 组名 [root@localhost ~]# id user ...
- Servlet访问路径的两种方式、Servlet生命周期特点、计算服务启动后的访问次数、Get请求、Post请求
Servlet访问路径的两种方式: 1:注解 即在Servlet里写一个@WebServlet @WebServlet("/myServlet") 2:配置web.xml < ...
- js如何实现动态的在表格中添加和删除行?(两种方法)
js如何实现动态的在表格中添加和删除行?(两种方法) 一.总结 1.table元素有属性和一些方法(js使用) 方法一:添加可通过在table的innerHTML属性中添加tr和td来实现 tab.i ...
随机推荐
- PHPExcel使用体会
PHPExcel使用体会 因为毕设导师智能分配系统的需要,系负责人在管理学生和导师时,希望可以使用Excel批量导入学生和导师的信息,学长的报课系统使用的是PHPExcel的类库,于是我也抽空花了2天 ...
- Nuxt.js logoVue.js 后端渲染开源库 Nuxt.js
Nuxt.js 是一个通过 Vue 用于服务端渲染的简单框架,灵感来自 Next.js. 目前尚处于开发阶段,1.0 版本即将发布 1 分钟视频演示 Nuxt 基于 ES2015,这使得代码有着更愉快 ...
- POJ 1947Rebuilding Roads(树形DP + 01背包)
题目链接 题意:给出一个树形结构,求P个节点的子树最少要去掉几条边 分析:DP[root][j] 表示 以第 root 个为根节点, 包含j 个节点需要去掉几条边.那么对于 root 这个根节点来说, ...
- [VSTS] 从零开始 Team Foundation Server 2010 安装配置详细图文教程
http://www.cnblogs.com/WilsonWu/archive/2011/11/24/2261674.html 近期公司要配TFS用于新项目的管理,公司也将逐步迁移至VSTS平台,前期 ...
- JAVA jdbc获取数据库连接
JDBC获取数据库连接的帮助类 import java.io.InputStream; import java.sql.Connection; import java.sql.DriverManage ...
- python处理中文(待补充)
字符串在Python内部的表示是unicode编码,因此,在做编码转换时,通常需要以unicode作为中间编码,即先将其他编码的字符串解码(decode)成unicode,再从unicode编码(en ...
- wcf第2步之服务端标准配置文件
服务端app.config <?xml version="1.0" encoding="utf-8" ?><configuration> ...
- curl方式创建elasticsearch的mapping
curl方式创建elasticsearch的mapping curl -XPUT 'http://192.168.1.105:9200/bank/item2/_mapping' -d '{ " ...
- Redis学习——环境搭建以及基础命令使用
0. 前言: 这篇文章旨在对redis环境的搭建以及对redis有个大概的认识. 一.redis搭建: 环境:ubuntu 14 软件包:redis-3.0.3.tar.gz 安装步骤: 1. 首先解 ...
- apache外网不能访问分析与解决方法
apache安装好以后,在本机可以用:http://localhost 或者 http://127.0.0.1进行访问,但是,在外网(相对本机来说的,局域网也算)不能访问. 这种情况可以分为两个问题, ...