利用Github免费搭建个人主页(个人博客)
之前闲着, 利用Github搭了个免费的个人主页。
涉及:
- Github注册
- Github搭建博客
- 域名选购
- 绑定域名
- 更多
一 Github注册
在地址栏输入地址:http://github.com/join
填写相关信息, 按步骤完成即可。

这样, 你就拥有了属于自己的Github账号了。 很简单吧~
GitHub · Build software better, together. So Cool!
二 Github搭建博客
配置和使用Github
以下教程主要参考beiyuu的《使用Github Pages建独立博客》写成。
配置SSH keys
我们如何让本地git项目与远程的github建立联系呢?用SSH keys。
检查SSH keys的设置
首先我们需要检查你电脑上现有的ssh key:
<code>$ <span class="built_in eye-protector-processed">cd</span> ~/. ssh 检查本机的ssh密钥

</code>
如果提示:No such file or directory 说明你是第一次使用git。
生成新的SSH Key:
<code>$ ssh<span class="attribute eye-protector-processed">-keygen</span> <span class="attribute eye-protector-processed">-t</span> rsa <span class="attribute eye-protector-processed">-C</span> <span class="string eye-protector-processed">"邮件地址@youremail.com"</span>

Generating <span class="keyword eye-protector-processed">public</span>/<span class="keyword eye-protector-processed">private</span> rsa key <span class="built_in eye-protector-processed">pair</span><span class="built_in eye-protector-processed">.</span>

Enter file <span class="keyword eye-protector-processed">in</span> which <span class="keyword eye-protector-processed">to</span> save the key (/Users/your_user_directory<span class="subst">/</span><span class="built_in eye-protector-processed">.</span>ssh/id_rsa):<span class="subst"><</span>回车就好<span class="subst">></span>

</code>
注意1: 此处的邮箱地址,你可以输入自己的邮箱地址;注意2: 此处的「-C」的是大写的「C」
然后系统会要你输入密码:
<code><span class="constant eye-protector-processed">Enter</span> passphrase (empty <span class="keyword eye-protector-processed">for</span> no passphrase)<span class="symbol">:<</span>输入加密串>

<span class="constant eye-protector-processed">Enter</span> same passphrase <span class="symbol">again:</span><再次输入加密串>

</code>
在回车中会提示你输入一个密码,这个密码会在你提交项目时使用,如果为空的话提交项目时则不用输入。这个设置是防止别人往你的项目里提交内容。
注意:输入密码的时候没有*字样的,你直接输入就可以了。
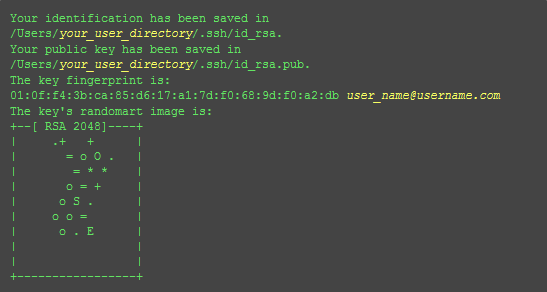
最后看到这样的界面,就成功设置ssh key了:
添加SSH Key到GitHub
在本机设置SSH Key之后,需要添加到GitHub上,以完成SSH链接的设置。
1、打开本地C:\Documents and Settings\Administrator.ssh\id_rsa.pub文件。此文件里面内容为刚才生成人密钥。如果看不到这个文件,你需要设置显示隐藏文件。准确的复制这个文件的内容,才能保证设置的成功。
2、登陆github系统。点击右上角的 Account Settings—->SSH Public keys —-> add another public keys
3、把你本地生成的密钥复制到里面(key文本框中), 点击 add key 就ok了

测试
可以输入下面的命令,看看设置是否成功,git@github.com的部分不要修改:
<code><span class="variable eye-protector-processed">$ </span>ssh -<span class="constant eye-protector-processed">T</span> git<span class="variable eye-protector-processed">@github</span>.com

</code>
如果是下面的反馈:
<code>The authenticity <span class="keyword eye-protector-processed">of</span> host <span class="comment eye-protector-processed">'github.com (207.97.227.239)' can't be established.</span>

RSA <span class="keyword eye-protector-processed">key</span> fingerprint <span class="keyword eye-protector-processed">is</span> <span class="number eye-protector-processed">16</span>:<span class="number eye-protector-processed">27</span>:ac:a5:<span class="number eye-protector-processed">76</span>:<span class="number eye-protector-processed">28</span>:<span class="number eye-protector-processed">2</span>d:<span class="number eye-protector-processed">36</span>:<span class="number eye-protector-processed">63</span>:<span class="number eye-protector-processed">1</span>b:<span class="number eye-protector-processed">56</span>:<span class="number eye-protector-processed">4</span>d:eb:df:a6:<span class="number eye-protector-processed">48.</span>

Are you sure you want <span class="keyword eye-protector-processed">to</span> <span class="keyword eye-protector-processed">continue</span> connecting (yes/no)?

</code>
不要紧张,输入yes就好,然后会看到:
<code>Hi cnfeat! You<span class="attribute eye-protector-processed">'ve</span> successfully authenticated, but GitHub does <span class="keyword eye-protector-processed">not</span> provide shell <span class="keyword eye-protector-processed">access</span>.

</code>
设置用户信息
现在你已经可以通过SSH链接到GitHub了,还有一些个人信息需要完善的。
Git会根据用户的名字和邮箱来记录提交。GitHub也是用这些信息来做权限的处理,输入下面的代码进行个人信息的设置,把名称和邮箱替换成你自己的,名字必须是你的真名,而不是GitHub的昵称。
<code>$ git config --<span class="keyword eye-protector-processed">global</span> user.name <span class="string eye-protector-processed">"cnfeat"</span><span class="comment eye-protector-processed">//用户名</span>

$ git config --<span class="keyword eye-protector-processed">global</span> user.email  <span class="string eye-protector-processed">"cnfeat@gmail.com"</span><span class="comment eye-protector-processed">//填写自己的邮箱</span>

</code>
SSH Key配置成功
本机已成功连接到github。
若有问题,请重新设置。常见错误请参考:
GitHub Help - Generating SSH Keys
GitHub Help - Error Permission denied (publickey)
使用GitHub Pages建立博客
与GitHub建立好链接之后,就可以方便的使用它提供的Pages服务,GitHub Pages分两种,一种是你的GitHub用户名建立的username.github.io这样的用户&组织页(站),另一种是依附项目的pages。
想建立个人博客是用的第一种,形如cnfeat.github.io这样的可访问的站,每个用户名下面只能建立一个。
github上建立仓库
登录后系统,在github首页,点击页面右下角「New Repository」

填写项目信息:
project name:cnfeat.github.io
description: Writing 1000 Words a Day Changed My Life
注:Github Pages的Repository名字是特定的,比如我Github账号是cnfeat,那么我Github Pages Repository名字就是cnfeat.github.io。

点击「Create Repository」 完成创建。
创建个人主页
GitHub 为每一个用户分配了一个二级域名<user-id>.github.io,用户为自己的二级域名创建主页很容易,只要在托管空间下创建一个名为<user-id>.github.io的版本库,向其master分支提交网站静态页面即可,其中网站首页为index.html。(或者从settings设置里自动设置一个默认主页。 Automatic Page Generetor)
下面以gotgithub用户为例介绍如何创建个人主页。
· 用户gotgithub创建一个名为gotgithub.github.io的Git版本库。
· 在本地克隆新建立的版本库。
· $ git clone git@github.com:gotgithub/gotgithub.github.io.git
$ cd gotgithub.github.io/
· 在版本库根目录中创建文件index.html作为首页。
$ printf "<h1>GotGitHub's HomePage</h1>It works.\n" > index.html
· 建立提交。
· $ git add index.html
$ git commit -m "Homepage test version."
· 推送到GitHub,完成远程版本库创建。
$ git push origin master
· 访问网址: http://gotgithub.github.io/ 。
最多等待分钟,GitHub就可以完成新网站的部署。网站完成部署后版本库的所有者会收到邮件通知。
还有要注意访问用户二级域名的主页要使用HTTP协议非HTTPS协议。
创建完以后, 等半个小时左右, 属于你的个人主页就配置好了。你可以通过 xxx.github.io 进行访问。其中(xxx为你的Github用户名)
三 域名选购
这里我选择的是dnspod。当然, 这样的服务商很多, 比较出名的应该是万网和dnspod。 不过建议使用dnspod, 万网那个后台简直了...
进入https://domains.dnspod.cn 选择你想要的域名, 购买即可。 我这里的.xyz域名算是最便宜的一种吧。 如果你想学习如何搭建, 建议也买这种的。 9元/年
域名购买支持支付宝。
四 绑定域名
将独立域名与GitHub Pages的空间绑定
在Repository的根目录下面,新建一个名为CNAME的文本文件,里面写入你要绑定的域名,比如colin1994.xyz
如下:

然后到dnspod中, 选择我的域名--->添加一条记录
如下:

这里记录类型选择 A. 记录值设置为对应的服务器IP。 也就是你的Github主页的IP。 (获取办法: 打开终端, 输入 ping xxx.github.io) 即可获得。
另外, 如果想指定子域名, 比如 blog.xxx.xyz 这样, 那么你可以设置如下:
主机类型 blog
记录类型 CNAME
记录值 xxx.github.io
然后到你Github中, 设置CNAME的内容为 blog.xxx.xyz
如此, 即可。
接下去, 你访问 xxx.xyz 即可自动指定到 xxx.github.xyz 访问个人主页。
五 更多
你可以在github中编辑你自己的个人主页, 想怎么玩, 看你自己。
另外附录一些不错的教程, 以供参考。
如何搭建一个独立博客——简明Github Pages与Hexo教程
一步步在GitHub上创建博客主页 全系列 by pchou(推荐)
利用Github免费搭建个人主页(个人博客)的更多相关文章
- 利用Github免费搭建个人主页(转)
搭建过程涉及: Github注册 Github搭建博客 域名选购 绑定域名 更多 一. Github注册 在地址栏输入地址:http://github.com/join填写相关信息, 按步骤完成即可 ...
- 使用GitHub+hexo搭建个人独立博客
前言 使用github pages服务搭建博客的好处有: 全是静态文件,访问速度快: 免费方便,不用花一分钱就可以搭建一个自由的个人博客,不需要服务器不需要后台: 可以随意绑定自己的域名,不仔细看的话 ...
- github+hexo搭建自己的博客网站(六)进阶配置(搜索引擎收录,优化你的url)
详细的可以查看hexo博客的演示:https://saucxs.github.io/ 绑定了域名: http://www.chengxinsong.cn hexo+github博客网站源码(可以clo ...
- github+hexo搭建自己的博客网站(七)注意事项(避免read.me,CNAME文件的覆盖,手动改github page的域名)
详细的可以查看hexo博客的演示:https://saucxs.github.io/ 绑定域名可以查看:http://www.chengxinsong.cn 可以查看在github上生成的静态文件(如 ...
- 使用Hexo + Github Pages搭建个人独立博客
使用Hexo + Github Pages搭建个人独立博客 https://linghucong.js.org/2016/04/15/2016-04-15-hexo-github-pages-blog ...
- Hexo + Github Pages搭建的个人博客
这个不算是新手的搭建流程,如果你恰巧看见这篇文章,希望你已经安装好node.git等软件,因为第一步的环境搭建准备并没有详写,默认都会了.希望能解决你的问题. 步骤: 一. 搭建环境准备 二.安装he ...
- 在Github上搭建自己的博客(Windows平台)
折腾了好久,终于在Github上搭建了自己的博客.这里面总结一下过程希望对大家能有所帮助. Github建博优缺点 和 csdn,新浪,网易相比,在Github上可以自己实现功能 和阿里云,VPS相比 ...
- github+hexo搭建自己的博客网站(一)基础入门
github提供的page,hexo提供的静态博客文档,这样可以搭建一个自己的一个博客网站. 使用github pages服务搭建博客的好处有: 全是静态文件,访问速度快: 免费方便,不用花一分钱就可 ...
- github+hexo搭建自己的博客网站(五)进阶配置(畅言实现博客的评论)
如何对如何搭建hexo+github可以查看我第一篇入门文章:http://www.cnblogs.com/chengxs/p/7402174.html 详细的可以查看hexo博客的演示:https: ...
随机推荐
- Oracle 集合操作
在 Oracle 中提供了三种类型集合操作:并(UNION).交(INTERSECT).差(MINUS) · UNION:将多个查询的结果组合到一个查询结果之中,没有重复内容 · UNION ALL: ...
- Linux下使用USB模拟ACM串口设备【转】
本文转载自:https://www.cnblogs.com/pied/p/4549614.html 这个想法之前就在脑袋里有过,最近公司产品要用到,所以多做了些了解. 1. USB 简介 USB 是 ...
- Android 在 SElinux下 如何获得对一个内核节点的访问权限【转】
本文转载自:https://blog.csdn.net/wh_19910525/article/details/45170755 Android 5.0下,因为采取了SEAndroid/SElinux ...
- 使用Kali Linux 破解无线网
用到的工具 airmon-ngairodump-ngaireplay-ngaircrack-ng 过程 123456789101112131415161718192021222324 root@lm: ...
- LeetCode——Longest Consecutive Sequence
LeetCode--Longest Consecutive Sequence Question Given an unsorted array of integers, find the length ...
- redhat6.4 数据包无法到达
由于redhat在初始化的时候,防火墙设置为icmp-host-prohibited,导致数据包无法到达. 具体iptables(所在目录/etc/sysconfig)如下: # Firewall c ...
- scala学习手记10 - 访问修饰符
scala的访问修饰符有如下几个特性: 如果不指定访问修饰符,scala默认为public: 较之Java,scala对protected的定义更加严格: scala可以对可见性进行细粒度的控制. s ...
- JSP导入包
1. <%@page import="java.util.Date, mianBao.*, z_utils.*"%> 2. 3.
- InfiniBand技术和协议架构分析
Infiniband开放标准技术简化并加速了服务器之间的连接,同时支持服务器与远程存储和网络设备的连接. IB技术的发展 1999年开始起草规格及标准规范,2000年正式发表,但发展速度不及Rapid ...
- 编写第一个springboot应用
1.1.1. 设置spring boot的parent <parent> <groupId>org.springframework.boot</groupId> ...