利用spring的ApplicationListener监听某一类事件的发生
1、ApplicationListener在使用过程中可以监听某一事件的发生,可以做出相应的处理,这个方式不常用,但是在特殊情况下面还是有用的。
2、导包pom.xml
<project xmlns="http://maven.apache.org/POM/4.0.0" xmlns:xsi="http://www.w3.org/2001/XMLSchema-instance" xsi:schemaLocation="http://maven.apache.org/POM/4.0.0 http://maven.apache.org/xsd/maven-4.0.0.xsd">

  <modelVersion>4.0.0</modelVersion>

  <groupId>com.troy</groupId>

  <artifactId>springInit</artifactId>

  <version>0.0.1-SNAPSHOT</version>

  <packaging>war</packaging>

  <dependencies>

      <dependency>

      <groupId>org.springframework</groupId>

      <artifactId>spring-webmvc</artifactId>

      <version>3.2.8.RELEASE</version>

    </dependency>

  </dependencies>

</project>
3、web.xml配置
<?xml version="1.0" encoding="UTF-8"?>

<web-app xmlns:xsi="http://www.w3.org/2001/XMLSchema-instance" xmlns="http://java.sun.com/xml/ns/javaee" xsi:schemaLocation="http://java.sun.com/xml/ns/javaee http://java.sun.com/xml/ns/javaee/web-app_2_5.xsd" version="2.5">

  <display-name>springInit</display-name>

  <welcome-file-list>

    <welcome-file>index.html</welcome-file>

    <welcome-file>index.htm</welcome-file>

    <welcome-file>index.jsp</welcome-file>

    <welcome-file>default.html</welcome-file>

    <welcome-file>default.htm</welcome-file>

    <welcome-file>default.jsp</welcome-file>

  </welcome-file-list>

  <servlet>

      <servlet-name>springmvc</servlet-name>

      <servlet-class>org.springframework.web.servlet.DispatcherServlet</servlet-class>

      <init-param>

          <param-name>contextConfigLocation</param-name>

          <param-value>classpath:spring/spring-mvc.xml</param-value>

      </init-param>

      <load-on-startup>1</load-on-startup>

  </servlet>

  <servlet-mapping>

      <servlet-name>springmvc</servlet-name>

      <url-pattern>/</url-pattern>

  </servlet-mapping>

  <filter>

      <filter-name>encodingFilter</filter-name>

      <filter-class>org.springframework.web.filter.CharacterEncodingFilter</filter-class>

      <init-param>

          <param-name>encoding</param-name>

          <param-value>UTF-8</param-value>

      </init-param>

      <init-param>

          <param-name>forceEncoding</param-name>

          <param-value>true</param-value>

      </init-param>

  </filter>

  <filter-mapping>

      <filter-name>encodingFilter</filter-name>

      <url-pattern>/</url-pattern>

  </filter-mapping>

</web-app>
4、spring-mvc.xml配置
<?xml version="1.0" encoding="UTF-8"?>

<beans xmlns="http://www.springframework.org/schema/beans"

    xmlns:xsi="http://www.w3.org/2001/XMLSchema-instance"

    xmlns:context="http://www.springframework.org/schema/context"

    xmlns:jdbc="http://www.springframework.org/schema/jdbc"

    xmlns:jee="http://www.springframework.org/schema/jee"

    xmlns:tx="http://www.springframework.org/schema/tx"

    xmlns:aop="http://www.springframework.org/schema/aop"

    xmlns:mvc="http://www.springframework.org/schema/mvc"

    xmlns:util="http://www.springframework.org/schema/util"

    xmlns:jpa="http://www.springframework.org/schema/data/jpa"

    xsi:schemaLocation="

        http://www.springframework.org/schema/beans http://www.springframework.org/schema/beans/spring-beans-3.2.xsd

        http://www.springframework.org/schema/context http://www.springframework.org/schema/context/spring-context-3.2.xsd

        http://www.springframework.org/schema/jdbc http://www.springframework.org/schema/jdbc/spring-jdbc-3.2.xsd

        http://www.springframework.org/schema/jee http://www.springframework.org/schema/jee/spring-jee-3.2.xsd

        http://www.springframework.org/schema/tx http://www.springframework.org/schema/tx/spring-tx-3.2.xsd

        http://www.springframework.org/schema/data/jpa http://www.springframework.org/schema/data/jpa/spring-jpa-1.3.xsd

        http://www.springframework.org/schema/aop http://www.springframework.org/schema/aop/spring-aop-3.2.xsd

        http://www.springframework.org/schema/mvc http://www.springframework.org/schema/mvc/spring-mvc-3.2.xsd

        http://www.springframework.org/schema/util http://www.springframework.org/schema/util/spring-util-3.2.xsd">

    <mvc:annotation-driven/>

    <context:component-scan base-package="com.troy"/>

    <bean class="com.troy.springInit.SpringListenerEvent"/>

    <bean class="com.troy.springInit.SpringListener"/>

    <bean id="initApplicationContext" class="com.troy.springInit.InitApplicationContext"/>

</beans>
5、<bean class="com.troy.springInit.SpringListener"/>在spring的作用是为了在bean加载完成过后进行初始化加载
这里可以参考:http://www.cnblogs.com/ll409546297/p/6903357.html
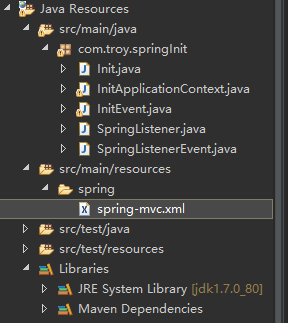
6、目录结构,因为我用初始化加载来实现某一个事件的监听,自己可以根据相应事件触发来实现
7、触发方式
1)第一步:因为事件触发需要用到ApplicationContext的publishEvent来触发事件,我这里没有ClassPathXmlApplicationContext的方式来加载配置文件,而是实现ApplicationContextAware这个接口来实现ApplicationContext的加载
public class InitApplicationContext implements ApplicationContextAware{

    public static ApplicationContext ac;

    public void setApplicationContext(ApplicationContext applicationContext) throws BeansException {

       this.ac = applicationContext;

    }

}
2)第二步编写事件:继承ApplicationEvent类会要求重写一个构造方法
public class InitEvent extends ApplicationEvent{

    public String data;

    public InitEvent(Object source) {

        super(source);

    }

    public InitEvent(Object source,String data) {

        super(source);

        this.data = data;

    }

    public String getData() {

        return data;

    }

    public void setData(String data) {

        this.data = data;

    }

    //这里我是利用spring初始化来实现方法的加载

    public static void execute(){

        ApplicationContext ac = InitApplicationContext.ac;

        System.out.println("test==================test");

        InitEvent ie = new InitEvent("test", "test");

        ac.publishEvent(ie);

    }

}
3)通过初始化的方式来触发这个事件,这个可以通过其他方式,比如servlet等方式来触发
public class SpringListener implements ApplicationListener<ContextRefreshedEvent>{

    public void onApplicationEvent(ContextRefreshedEvent event) {

        System.out.println(event.getApplicationContext());

        //判断spring容器是否加载完成

        if (event.getApplicationContext().getParent() == null) {

            Init.init();

            InitEvent.execute();

        }

    }

}
4)上面的方式也可以触发事件,但是写出来比较繁琐。我们一般通过ApplicationListener接口来实现事件的监听,这样来触发事件的产生。通过ApplicationListener的泛型机制,来监听事件的发生,这里可以针对于时间做相对处理,实现对事件的监听
public class SpringListenerEvent implements ApplicationListener<InitEvent>{

    public void onApplicationEvent(InitEvent event) {

        System.out.println("事件处理==================事件处理");

        System.out.println(event.getData());

    }

}
8、总体来说:ApplicationListener是对相应应用的监听,只是对于不同方式,通过不同方式来呈现!
利用spring的ApplicationListener监听某一类事件的发生的更多相关文章
- ApplicationListener监听使用ContextRefreshedEvent事件类型会触发多次
@Componentpublic class TestApplicationListener implements ApplicationListener<ContextRefreshedEve ...
- spring中配置监听队列的MQ
一.spring中配置监听队列的MQ相关信息注:${}是读取propertites文件的常量,这里忽略.绿色部分配置在接收和发送端都要配置. <bean id="axx" ...
- IOS之UI--自定义按钮实现代理监听点击事件
前言: Objective-C提供的按钮监听事件的方法是 不含参数的监听方法 [button实例对象 addTarget:self action:@selector(func) forControlE ...
- Android监听点击事件实现的三种方法
监听点击事件实现的三种方法:1.匿名内部类2.外部类3.直接实现接口 1.匿名内部类: package com.jereh.calculator; import android.content.Con ...
- javascript 原生方法监听DOM结构改变事件
js原生方法监听DOM结构改变事件 document.addEventListener('DOMNodeInserted',function(){alert(1)},false);document.a ...
- WPF之监听组合键事件
private void KeyDown(object sender, KeyEventArgs e) { if (e.Key== Key.Up && Keyboard.Modifie ...
- [置顶] flex4事件监听与自定义事件分发(三)
1.我们来说一下自定义事件子类.什么时候创建新的事件类以及怎么创建. (1)说一下,我们什么时候需要自定义事件类.举例说明,在flex中事件的基类是Event,而当我们点击某个按钮或者是单击某个组件的 ...
- Python——pyHook监听鼠标键盘事件
pyHook包为Windows中的全局鼠标和键盘事件提供回调. 底层C库报告的信息包括事件的时间,事件发生的窗口名称,事件的值,任何键盘修饰符等. 而正常工作需要pythoncom等操作系统的API的 ...
- 三种方式监听NGUI的事件方法
NGUI研究院之三种方式监听NGUI的事件方法(七) NGUI事件的种类很多,比如点击.双击.拖动.滑动等等,他们处理事件的原理几乎万全一样,本文只用按钮来举例. 1.直接监听事件 把下面脚本直接绑定 ...
随机推荐
- python 通过列表元素值截取列表并获取长度
def count_range_in_list(li, min, max): ctr = for x in li: if min <= x <= max: ctr += return ct ...
- Android ViewGroup等容器控件的使用
在Android中,可以自定义类,继承ViewGroup等容器类,以实现自己需要的布局显示.如果你在ViewGroup中增加了控件,却无法显示出 来,那么下面这个例子,就可以用来参考了.(主要是要实现 ...
- sqlplus环境设置
1.0 --column 命令集 改变列格式 { column column_name1 f ...
- 识别TLS加密恶意流量
利用背景流量数据(contexual flow data)识别TLS加密恶意流量 识别出加密流量中潜藏的安全威胁具有很大挑战,现已存在一些检测方法利用数据流的元数据来进行检测,包括包长度和到达间隔时间 ...
- 谈谈我对"闭包"的理解
一.什么是闭包和闭包的几种写法和用法 1.什么是闭包闭包,官方对闭包的解释是:一个拥有许多变量和绑定了这些变量的环境的表达式(通常是一个函数),因而这些变量也是该表达式的一部分.闭包的特点: 1. 作 ...
- New Concept English Two 20 52
$课文50 乘车兜风 510. I love travelling in the country, but I don't like losing my way. 我喜欢在乡间旅行,但却不愿意迷路. ...
- REST风格
1)Representational State Transfer,表述性状态转移,是一种软件架构风格 2)实现步骤 第一步:修改URL 例:http://localhost:8090/SMBMS_C ...
- 2017《Java技术》预备作业02
1.学习使用Git和码云托管代码 参考资料:如何使用Git和码云 安装Git 在码云注册账号,新建项目,名称为Java-CS01(02)XXX, 一班为CS01,二班为CS02,后三位或两位为姓名缩写 ...
- sysfs中属性文件的建立
1.device中建立属性文件 (1)函数调用关系: /**************************************************************/ device_c ...
- wpf 客户端【JDAgent桌面助手】业余开发的终于完工了。。晒晒截图
目录区域: 业余开发的wpf 客户端终于完工了..晒晒截图 wpf 客户端[JDAgent桌面助手]开发详解-开篇 wpf 客户端[JDAgent桌面助手]详解(一)主窗口 圆形菜单... wpf 客 ...