netsniff使用
1 netsniff安装与使用
首先直接下载源码包进行部署
安装一些前置包(安装完成的自动忽略)
sudo apt install pkg-config
sudo apt install libcli
sudo apt install libGeoIP
sudo apt install libsodium.c
sudo apt install ncurses
安装
cd netsniff-ng-master
./configure
make
sudo make install
进行抓包命令
sudo netsniff-ng --in any
[any]括号内是指任意网卡,当然也可以指定网卡
2 源码中的常用函数
所需要用到的函数strncmp(const char *str1, const char *str2, size_t n)
把 str1 和 str2 进行比较,最多比较前 n 个字节。
str1 -- 要进行比较的第一个字符串。
str2 -- 要进行比较的第二个字符串。
n -- 要比较的最大字符数
如果返回值 < 0,则表示 str1 小于 str2。
如果返回值 > 0,则表示 str2 小于 str1。
如果返回值 = 0,则表示 str1 等于 str2。
strcmp函数用来比较字符串(区分大小写)
int strcmp(const char *s1, const char *s2);
strcmp()首先将s1 第一个字符值减去s2 第一个字符值,若差值为0 则再继续比较下个字符,若差值不为0 则将差值返回。例如字符串"Ac"和"ba"比较则会返回字符"A"(65)和'b'(98)的差值(-33)。
例如字符串"Ac"和"ba"比较则会返回字符"A"(65)和'b'(98)的差值(-33)。
device_mtu(ctx.device_in)网卡设备输入的,获取最大输入单元
pcap_dev_to_linktype(ctx.device_in),获取物理层输入的型号
socket函数
int socket(int domain, int type, int protocol);
socket()用于创建一个socket描述符(socket descriptor),它唯一标识一个socket。这个socket描述字跟文件描述字一样,后续的操作都有用到它,把它作为参数,通过它来进行一些读写操作。
- domain:即协议域,又称为协议族(family)。常用的协议族有,AF_INET、AF_INET6、AF_LOCAL(或称AF_UNIX,Unix域socket)、AF_ROUTE等等。协议族决定了socket的地址类型,在通信中必须采用对应的地址,如AF_INET决定了要用ipv4地址(32位的)与端口号(16位的)的组合、AF_UNIX决定了要用一个绝对路径名作为地址。
- type:指定socket类型。常用的socket类型有,SOCK_STREAM、SOCK_DGRAM、SOCK_RAW、SOCK_PACKET、SOCK_SEQPACKET等等(socket的类型有哪些?)。
- protocol:故名思意,就是指定协议。常用的协议有,IPPROTO_TCP、IPPTOTO_UDP、IPPROTO_SCTP、IPPROTO_TIPC等,它们分别对应TCP传输协议、UDP传输协议、STCP传输协议、TIPC传输协议。
3 初始化工作和主要的数据结构
ctx是保存用户操作的功能结构,程序运行时根据用户的输入进行初始化操作初始化。
struct ctx {

	char *device_in, *device_out, *device_trans, *filter, *prefix;

	int cpu, rfraw, dump, print_mode, dump_dir, packet_type, lo_ifindex;

	unsigned long kpull, dump_interval, tx_bytes, tx_packets;

	size_t reserve_size;

	bool randomize, promiscuous, enforce, jumbo, dump_bpf, hwtimestamp, verbose;

	enum pcap_ops_groups pcap;

	enum dump_mode dump_mode;

	uid_t uid;

	gid_t gid;

	uint32_t link_type, magic;

	uint32_t fanout_group, fanout_type;

	uint64_t pkts_seen, pkts_recvd, pkts_drops;

	uint64_t pkts_recvd_last, pkts_drops_last, pkts_skipd_last;

	unsigned long overwrite_interval, file_number;

};
device_in输入的网络接口或者读入的数据包名,如eth0或者xxx.pcap
device_out对应device_in,为输出
filter 是否启用过滤选项,如只显示ICMP包
cpu 指定绑定的CPU
int dump; //选择终端输出或是文件输出
/* dissector */
link_type;
print_mode; 打印类型
/* 0 for automatic, > 0 for manual */
reserve_size;
packet_type;
randomize 指定为随机模式
promiscuous 网口为混杂模式,接收所有网卡包
pcap_ops_groups pcap 包类型
kpull
jumbo_support 是否指定大容量帧数
重点函数1
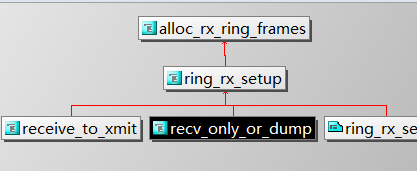
在recv_only_or_dump()函数,会初始化ring的数据结构
ring的数据结构
struct ring {

	struct iovec *frames;	//数据帧,不同于网络术语的“帧”

	struct tpacket_req layout;	//frames和block的块数页数统计

	struct sockaddr_ll s_ll;	//常见的socket数据结构

	uint8_t *mm_space;	//映射的内存空间的起始地址

	size_t mm_len;	//所有block的字节长度

} __cacheline_aligned;	//字节对齐属
struct protocol {

	/* Needs to be filled out by user */

	const unsigned int key;

	void (*print_full)(struct pkt_buff *pkt);

	void (*print_less)(struct pkt_buff *pkt);

	/* Used by program logic */

	struct protocol *next;

	void (*process)   (struct pkt_buff *pkt);

};
void ring_rx_setup(struct ring *ring, int sock, size_t size, int ifindex,

		   struct pollfd *poll, bool v3, bool jumbo_support,

		   bool verbose, uint32_t fanout_group, uint32_t fanout_type)

{

	memset(ring, 0, sizeof(*ring));

	setup_rx_ring_layout(sock, ring, size, jumbo_support, v3);

	create_rx_ring(sock, ring, verbose);

	mmap_ring_generic(sock, ring);

	alloc_rx_ring_frames(sock, ring);

	bind_ring_generic(sock, ring, ifindex, false);

	join_fanout_group(sock, fanout_group, fanout_type);

	prepare_polling(sock, poll);

}
首先是创建一个环形缓冲区static void create_rx_ring(int sock, struct ring *ring, bool verbose)
ret = setsockopt(sock, SOL_PACKET, PACKET_RX_RING, &ring->raw,layout_size);
当创建好一个原始的socket后,通过传递tpacket_req结构给通用套接字选项函数setsockopt()设置为一个环形的缓冲区,选项字段一定要是PACKET_RX_RING。
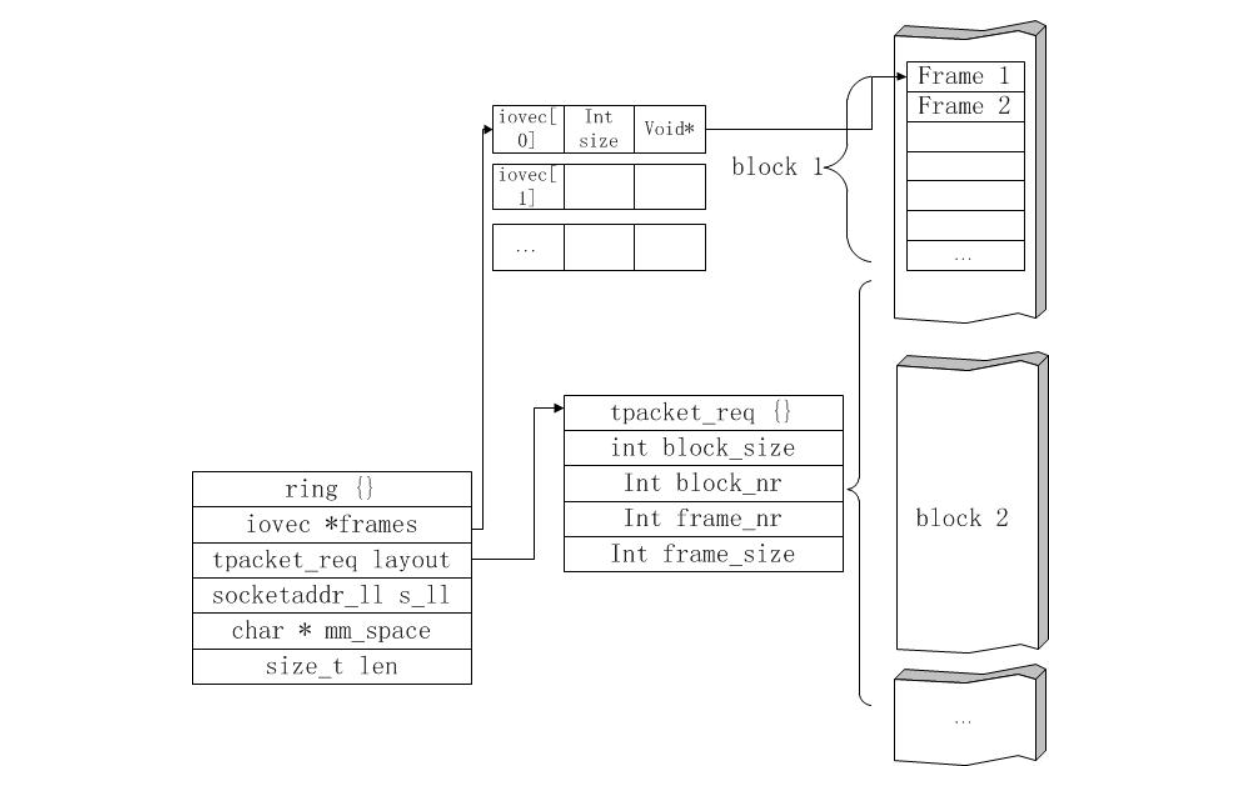
根据用户自定义或者初始化自动分配,分配的大小和数量已经在tpacket_req数据结构中。如上图所示,分配很多个block,每个block包含若干个frame,block一定是frame的整数倍,根据分配的大小和数量初始化每个指向frame的指针,下面alloc_rx_ring_frames()函数既是初始化每个指向frame的指针。
其中
static void alloc_rx_ring_frames(int sock, struct ring *ring)

{

	bool v3 = is_tpacket_v3(sock);

	alloc_ring_frames_generic(ring, rx_ring_get_num(ring, v3),

				  rx_ring_get_size(ring, v3));

}
mmap_ring_generic(sock, ring)函数则是做映射内存到用户空间
关于协议的结构体下图所示:
struct protocol {

	/* Needs to be filled out by user */

	const unsigned int key;

	void (*print_full)(struct pkt_buff *pkt);

	void (*print_less)(struct pkt_buff *pkt);

	/* Used by program logic */

	struct protocol *next;

	void (*process)   (struct pkt_buff *pkt);

};
struct pkt_buff {

	/* invariant: head <= data <= tail */

	uint8_t *head;

	uint8_t *data;

	uint8_t *tail;

	struct protocol *dissector;

	uint32_t link_type;

	struct sockaddr_ll *sll;

};
pkt_buff结构体内用了protocol类型的结构体, 并且命名为dissector。
4 数据操作部分及DPI的解析
dissector_entry_point(packet, hdr->tp_h.tp_snaplen,ctx->link_type, ctx->print_mode,&hdr->s_ll);这个函数首先通过获取linktype,从而通过使用dissector_main()函数获取协议protocol
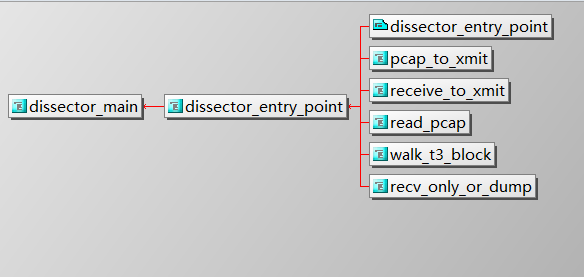
dissector_main()该函数的代码是DPI 的核心逻辑
static void  dissector_main(struct pkt_buff *pkt, struct protocol *start,struct protocol *end)

{

	struct protocol *dissector;

	if (!start)

		return;

	for (pkt->dissector = start; pkt->dissector; ) {

		if (unlikely(!pkt->dissector->process))

			break;

		dissector = pkt->dissector;

		pkt->dissector = NULL;

		dissector->process(pkt);

	}

	if (end && likely(end->process))

		end->process(pkt);

}
read_pcap()函数解析
frame_map是每一个frame的头部信息
struct frame_map {

	struct tpacket2_hdr tp_h __aligned_tpacket;

	struct sockaddr_ll s_ll __align_tpacket(sizeof(struct tpacket2_hdr));

};
所以在该函数中会定义一个struct frame_map fm; fm这样的数据结构。
__pcap_io 是一个宏定义, pcap_ops[ctx->pcap],是一个数组(数组的个数是由ctx指定)。
接下去就是根据__pcap_io 进程执行初始化等一系列操作,例如init_once_pcap、push_fhdr_pcap、prepare_access_pcap。
struct pcap_file_ops {

	void (*init_once_pcap)(bool enforce_prio);

	int (*pull_fhdr_pcap)(int fd, uint32_t *magic, uint32_t *linktype);

	int (*push_fhdr_pcap)(int fd, uint32_t magic, uint32_t linktype);

	int (*prepare_access_pcap)(int fd, enum pcap_mode mode, bool jumbo);

	ssize_t (*write_pcap)(int fd, pcap_pkthdr_t *phdr, enum pcap_type type,

			      const uint8_t *packet, size_t len);

	ssize_t (*read_pcap)(int fd, pcap_pkthdr_t *phdr, enum pcap_type type,

			     uint8_t *packet, size_t len);

	void (*prepare_close_pcap)(int fd, enum pcap_mode mode);

	void (*fsync_pcap)(int fd);

};
附件图:
netsniff使用的更多相关文章
- netsniff恶意流量识别和匹配解读
代码整体框架 流量扫描函数调用 加载配置文件的代码调用 获取扫描的条数 重点匹配函数 流量eg:'\x00\x04\x00\x01\x00\x06\x00\x16>\x10\x1d>SW\ ...
- nodejs 下载网页及相关资源文件
功能其实很见简单,通过 phantomjs.exe 采集 url 加载的资源,通过子进程的方式,启动nodejs 加载所有的资源,对于css的资源,匹配css内容,下载里面的url资源 当然功能还是很 ...
- 关于kali linux系统的简单工具
Linux系统中关于几个重要目录的原英文解释: /etc/: Contains configuration files of the installed tools /opt/: Contains M ...
- [转]基于phantomJS实现web性能监控
1.web性能监控背景描述 上期分享的<Web性能监控自动化探索之路–初识WebPageTest>从依赖webpagetest的角度给出了做性能日常检查的方案,但由于依赖结构相对复杂我们需 ...
- Phantomjs实现后端生成图片文件
目录 PhantomJS简介 了解rasterize.js 使用方法 今天,给大家分享一个Java后端利用Phantomjs实现生成图片的功能,同学们使用的时候,可以参考下! PhantomJS简介 ...
- DDOS流量攻击
0x01 环境 包含2台主机 attact 作为攻击方,使用Centos7.2 windows_server ,用于被攻击,同时抓包分析流量 ,任意版本均可.安装wireshark,用于抓包 0x02 ...
随机推荐
- VUE 如何分环境打包(开发/测试/生产)配置
前言 之前小玲一直处于更新,迭代项目的状态,开发环境.测试环境.生产环境都是前辈配置好的,自己几乎没有配置过,这次做几个新项目时,面临着上线,需要分环境打包配置,于是在网上遨游了一会会,摸索着按照网上 ...
- node.js操作MySQL数据库
MySQL数据库作为最流行的开源数据库.基本上是每个web开发者必须要掌握的数据库程序之一了. 基本使用 node.js上,最受欢迎的mysql包就是mysql模块. npm install mysq ...
- 阿里云ecs,rds,redis优惠套餐
阿里云ECS优惠套餐 阿里云RDS优惠套餐 阿里云REDIS优惠套餐 阿里云REDIS集群版 阿里云短信资源包
- Python ( 学习 基础篇第一部 )
目录 注释 注释的分类 注释的注意点 变量 变量的概念 变量的声明 变量的命名 变量的交换 变量的缓存机制 常量 进制 进制的转换 原码 反码 补码 六大数据类型 Number 的四大类 字符串 st ...
- Distcp 跨集群同步
date: 2020-10-09 17:45:00 updated: 2020-10-10 17:45:00 Distcp 跨集群同步 1. 使用方法及原理 hadoop distcp srcPath ...
- 涨知识的一个pwn题:de1ctf_2019_weapon
没做出来,wtcl,看了师傅们的wp才找到思路,收获了很多 怎么说呢,这个题很简单但是很巧妙,逆起来几乎无难度 漏洞点位于free函数,一个简单的UAF漏洞 然后接下来说说我一开始的思路 由于程序没有 ...
- 常用物联网应用层协议(1)——先说HTTP协议
概念 简介 HTTP是一个属于应用层的面向对象的协议,目前使用最为广泛的是HTTP1.1协议.当然,许多网站已经开始支持HTTP2.0,HTTP2复杂度高于HTTP1.1,我们先从HTTP1.1说起. ...
- 实在解决不了丢失vs2019之类的msvcr110.dll之类的问题
因为msvcr110.dll也是微软DirectX的一个组件 如果在下载VC运行库没用的情况下,可能是因为要运行的程序是win32的,但是电脑和下载的程序是64的,所以 下载一个win32的即可 如果 ...
- 封装APP之详解
一.什么是封装APP 封装APP又称Web APP,Web APP即是一种框架型APP开发模式(HTML5 APP 框架开发模式),该开发方式拥有跨平台的优势,该模式通常由"HTML5云网站 ...
- python gunicorn详解
Gunicorn是一个unix上被广泛使用的高性能的Python WSGI UNIX HTTP Server.和大多数的web框架兼容,并具有实现简单,轻量级,高性能等特点. gunicorn 安装 ...