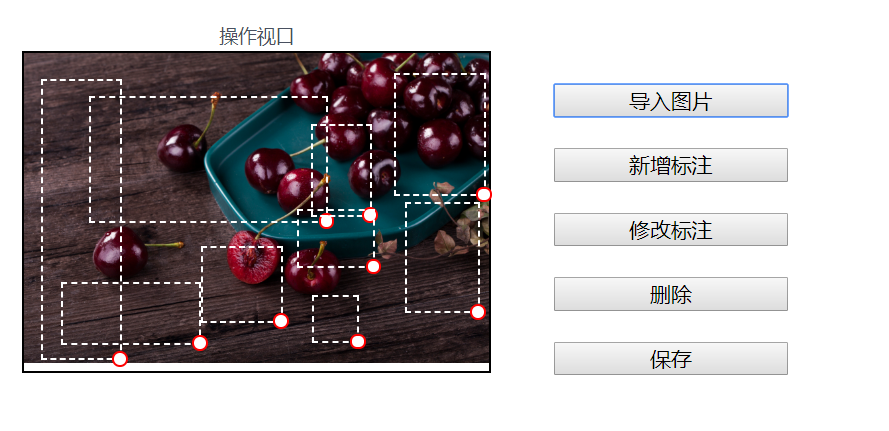
双层拖拽事件,用鼠标画矩形,拖动右下角可以再次改变矩形大小,方案一 有BUG
<template>

  <div class="mycanvas-container">

    <vue-drag-resize :isActive = 'true'/>>

    <div class="left">

      <p>展示视口</p>

      <div class="myshow">

        <img :src="mysrc" alt width="100%" />

        <!-- <div id="canvas" style="width:100%;height:100%" class="mycanvas"></div> -->

      </div>

    </div>

    <div class="center">

      <p>操作视口</p>

      <div class="myedit" ref="myedit"

      @mousedown.prevent=""

      @mousemove.prevent=""

      @mouseup.prevent=""

      @contextmenu.prevent="">

        <!-- <img src="@/assets/jia.svg" alt=""> -->

        <img :src="mysrc"  @mousedown.prevent="onMousedown" @mousemove="onMousemove" />

        <div

          class="myedit-span"

          v-for="(item, index) in mydata"

          :key="index"

          :style="getSpanStyle(item)"

          @contextmenu.prevent="onContextmenu(item, $event)">

          <div class="br"

          @mousedown.prevent="onMousedownbr(item,$event)"

          @mousemove="onMousemovebr(item,$event)"

          @mouseup="onMouseupbr(item,$event)"

          ></div>

        </div>

        <!-- <div id="canvas" style="width:100%;height:100%" class="mycanvas"></div> -->

      </div>

    </div>

    <div class="right">

      <img src alt class="mybutton" />

      <input v-show="0" ref="file" type="file" class="mybutton" @change="onChange" />

      <button class="mybutton" @click="selectFile">导入图片</button>

      <button class="mybutton">新增标注</button>

      <button class="mybutton">修改标注</button>

      <button class="mybutton">删除</button>

      <button class="mybutton">保存</button>

    </div>

    <div class="myMenu" v-show="mymenu.current" :style="mymenu.style">

      <!-- <button @click="onRemoveItem">删除</button> -->

      <ui-button type="primary" @click="onRemoveItem">删除</ui-button>

      <ui-select></ui-select>

      <select name="" id="">

        <option value="1">ceshi</option>

      </select>

    </div>

  </div>

</template>

<script>

import jiaIcon from "./jia.svg";

export default {

  data() {

    return {

      mysrc: "",

      mydata: [],

      mymenu: { current: null, style: { left: 0, top: 0 } }

    };

  },

  mounted() {

    document.addEventListener('mouseup', this.onMouseup)

    this.getData()

  },

  beforeDestroy() {

    document.removeEventListener('mouseup', this.onMouseup)

  },

  methods: {

    getData(){

      let url='/index'

      this.axios(url,{params:{status:1}}).then(data=>{

        console.log(data)

      }).catch(err => this.$Message.error(err.message))

    },

    getXY(e) {

      let rect = this.$refs.myedit.getBoundingClientRect()

      return {

        x: e.clientX - rect.left,

        y: e.clientY - rect.top

      }

    },

    // 上传图片1

    onChange(e) {

      this.mysrc = window.URL.createObjectURL(e.target.files[0]);

      e.target.value = ''

    },

    // 上传图片2,

    selectFile() {

      this.$refs.file.click();

    },

    // 矩形右下角拖动事件1

    onMousedownbr(item,e){

      e.target.removeEventListener('mousemove',this.onMousemove)

      e.target.removeEventListener('mouseup',this.onMouseup)

      this.canmove=true

      console.log(1)

      console.log(this.getXY(e))

      this.startPosbr=this.getXY(e)

      console.log(2)

      console.log(this.startPosbr)

      e.target.addEventListener('mousemove',this.onMousemovebr)

      e.target.addEventListener('mouseup',this.onMouseupbr)

    },

    onMousemovebr(item,e){

      if(this.canmove){

      let { x, y } = this.getXY(e)

      console.log(3)

      console.log(this.getXY(e))

      item.w=item.w+(x-this.startPosbr.x)

      item.h=item.h+(y-this.startPosbr.y)

      console.log(4)

      console.log(item.w)

      // Math.sqrt(9)

      // 9**.5

      }

    },

    onMouseupbr(item,e){

      this.canmove=false

      this.startPos =this.startPosbr= null;

      e.target.removeEventListener('mousemove',this.onMousemovebr)

      e.target.removeEventListener('mouseup',this.onMouseupbr)

    },

    // 矩形右下角拖动事件2

    onMousedown(e) {

      e.target.addEventListener('mousemove',this.onMousemove)

      e.target.addEventListener('mouseup',this.onMouseup)

      this.mymenu.current = null

      let { x, y } = this.getXY(e)

      this.currentItem = { x, y, w: 0, h: 0, now: Date.now() }

      this.startPos = { x, y }

      this.mydata.push(this.currentItem)

    },

    onMousemove(e) {

      if (!this.currentItem) return;

      let { x, y } = this.getXY(e)

      this.currentItem.w = Math.abs(x - this.startPos.x)

      this.currentItem.h = Math.abs(y - this.startPos.y)

    },

    onMouseup(e) {

      this.currentItem = this.startPos =this.startPosbr= null;

      // this.mydata = this.mydata.filter(_ => _.w > 10 && _.h > 10)

      e.target.removeEventListener('mousemove',this.onMousemove)

      e.target.removeEventListener('mouseup',this.onMouseup)

    },

    onContextmenu(item, e) {

      this.mymenu = {

        current: item,

        style: {

          top: e.clientY + 'px',

          left: e.clientX + 'px'

        }

      }

    },

    onRemoveItem() {

      this.mydata.splice(this.mydata.indexOf(this.mymenu.current), 1)

      this.mymenu = { ...this.mymenu, current: null }

    },

    getSpanStyle(item) {

      return {

        width: `${item.w}px`,

        height: `${item.h}px`,

        top: `${item.y}px`,

        left: `${item.x}px`

      };

    }

  }

};

</script>

<style lang="less" scoped>

// 设置绘图样式1

body {

  user-select: none;

}

.myMenu {

  position: fixed;

  top: 400px;

  left: 400px;

  width: 100px;

  padding: 8px 0;

  background-color: #fff;

  > * {

    width: 100%;

  }

}

#canvas > div {

  /* border: 2px solid green; */

  position: absolute;

  background-color: transparent;

}

#canvas > div > span {

  position: absolute;

  top: 50%;

  left: 50%;

  transform: translate(-50%, -50%);

  font-family: simsun;

  font-size: 9pt;

}

// 设置绘图样式2

.mycanvas-container {

  display: flex;

  justify-content: center;

  align-items: center;

  .left,

  .center,

  .right {

    width: 300px;

    // height: 520px;

    margin: 20px;

    p {

      text-align: center;

    }

    .myshow,

    .myedit {

      width: 300px;

      // height: 500px;

      border: 1px solid #000;

      position: relative;

      .myedit-span {

        position: absolute;

        border: 1px dashed #fff;

        // background: url("./jia.svg") no-repeat center center;

        background-size: contain;

      }

      .br,.divcenter{

        width: 10px;

        height: 10px;

        position: absolute;

        border: 1px solid #f00;

        background: #fff;

        border-radius: 50%;

        bottom:-5px;

        right:-5px;

        cursor:nwse-resize;

      }

      .divcenter{

        top:50%;

        left:50%;

        transform:translate(-5px ,-5px);

        cursor:move;

      }

      .mycanvas {

        border: 1px solid pink;

        position: absolute;

        top: 0;

        left: 0;

      }

      img {

        width: 100%;

      }

    }

  }

  .right {

    width: 150px;

    display: flex;

    justify-content: center;

    align-items: left;

    flex-direction: column;

    .mybutton {

      margin-top: 20px;

      display: block;

    }

  }

}

</style>
双层拖拽事件,用鼠标画矩形,拖动右下角可以再次改变矩形大小,方案一 有BUG的更多相关文章
- html5拖拽事件 xhr2 实现文件上传 含进度条
<!DOCTYPE html> <html> <head> <meta http-equiv="Content-Type" content ...
- 完美实现鼠标拖拽事件,解决各种小bug,基于jquery
鼠标拖拽事件是web中使用频率极高的事件,之前写过的代码包括网上的代码,总存在各种各样的问题,包括拖拽体验差,松开鼠标后拖拽效果仍存在以及代码冗余过大等 本次我才用jQuery实现一个尽可能高效的拖拽 ...
- HTML5深入学习之鼠标跟随,拖拽事件
知识点(鼠标跟随): mousedown: 当用户用鼠标点击在某一元素上就会触发该事件 mouseover: 当鼠标指针在某一元素上移动就会触发改事件 下面这个例子的效果就是鼠标点击元素后,元素跟着 ...
- JS Event 鼠标拖拽事件
<!DOCTYPE html><html> <head> <meta charset="UTF-8"> ...
- day50—JavaScript鼠标拖拽事件
转行学开发,代码100天——2018-05-05 今天通过鼠标拖拽事件复习巩固一下鼠标事件. 鼠标拖拽事件需要记住两点: 1.距离不变 2.鼠标事件(按下,移动,抬起) <div id=&quo ...
- day52—JavaScript拖拽事件的应用(自定义滚动条)
转行学开发,代码100天——2018-05-07 前面的记录里展示了JavaScript中鼠标拖拽功能,今天利用拖拽功能实现另一个应用场景——自定义滚动条(作为控制器)的用法. 常通过自定义滚动条控制 ...
- H5原生拖拽事件
使用原生js实现简单的拖拽事件 <!DOCTYPE html> <html lang="en"> <head> <meta charset ...
- HTML5 02. 多媒体控件、拖拽事件、历史记录、web存储、应用程序缓存、地理定位、网络状态
多媒体 video:是行内块(text-align: center; 对行内块适用) <figure></figure>: 多媒体标签 : <figcaption> ...
- 拖拽事件--select外边框拖拽
地图上面的搜索框要可拖拽 但是搜索框是有点击事件的,点击显隐下拉菜单,如果拖拽的事件源选择select框的话,会有样式(十字拖动符cursor:move与selelt默认点击的箭头)冲突 思索良久,就 ...
随机推荐
- 为什么CSS中的calc函数可能会不生效?
前言 在早期如果想要对某一些样式进行动态计算,绝大多数的做法都是使用JavaScript来进行,当时的CSS在面对这种场景显得有点无能为力.但是,当CSS3中新增了calc函数时,面对这种场景,Jav ...
- python tcp select 多路复用
1 #!/usr/bin/python 2 # -*- coding: UTF-8 -*- 3 # 文件名:tcpserver.py 4 5 import socket 6 import time 7 ...
- 2022春每日一题:Day 11
题目:高斯消元法 高斯消元法是一个模板,下面简单介绍其内容以及实现方法. 高斯消元是求一个求多元一次方程组的解的算法. 就是形式如下的关于x1,x2...xn的方程组的解. a11x1 + a12x2 ...
- 回溯算法经典问题总结(.NET版)
回溯算法 回溯法其实也是一种递归,本质上就是穷举,然后筛选出符合规则的数据.为了使回溯更加高效,我们根据规则要求,在穷举过程中加上条件限制(也就是剪枝). 我们什么场景下应该想到使用回溯法呢? 如何画 ...
- Bugku login1
打开是个普普通通的登录界面,盲猜是注入题,先看看源码吧,没找到什么有用的信息,那就先注册试试 注册admin就已经存在,可能待会就爆破admin的密码也可能,因为没有验证嘛 试试注册其他的 登录发现他 ...
- bugku web基础$_POST
这道题也是让what=flag就行了 直接试试通过max hackbar来进行post传入 得到flag
- 简单的sql注入1
首先查看源码找找思路 发现源码里什么都没有 再使用bp拦截下数据 多次拦截后发现我们在 输入框里输入的等下就是id= 意思是我们这里就可以直接使用get注入了 好像类似于sql-labs上的?id= ...
- (C++) 初始化列表 std::initializer_list
构造时直接使用初始化列表 T object { arg1, arg2, ... }; (1) T { arg1, arg2, ... } (2) new T { arg1, arg2, ... } ( ...
- C温故补缺(十三):可变参数
可变参数 stdarg.h 头文件提供了实现可变参数功能的函数和宏.具体步骤如下: 定义一个函数,最后一个参数为省略号,省略号前面可以设置自定义参数,一般传入参数的个数. int func(int n ...
- org.apache.poi.openxml4j.exceptions.OLE2NotOfficeXmlFileException: The supplied data appears to be in the OLE2 Format. You are calling the part of POI that deals with OOXML (Office Open XML) Documents
异常:org.apache.poi.openxml4j.exceptions.OLE2NotOfficeXmlFileException: The supplied data appears to b ...