PyTorch中的CUDA操作
CUDA(Compute Unified Device Architecture)是NVIDIA推出的异构计算平台,PyTorch中有专门的模块torch.cuda来设置和运行CUDA相关操作。本地安装环境为Windows10,Python3.7.8和CUDA 11.6,安装PyTorch最新稳定版本1.12.1如下:
pip3 install torch torchvision torchaudio --extra-index-url https://download.pytorch.org/whl/cu116
一.常见CPU和GPU操作命令
1.查看PyTorch版本
print(torch.__version__)

1.12.1+cu116
2.查看GPU设备是否可用
print(torch.cuda.is_available())

True
3.PyTorch默认使用设备是CPU
print("default device: {}".format(torch.Tensor([4,5,6]).device))

default device: cpu
4.查看所有可用的cpu设备的数量
print("available cpu devices: {}".format(torch.cuda.os.cpu_count()))

available cpu devices: 20
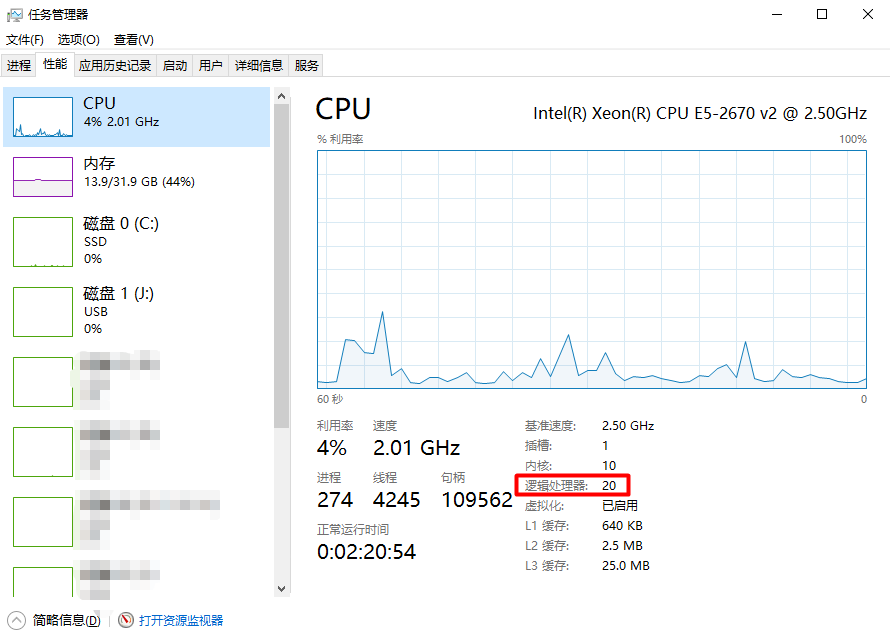
这里CPU设备数量指的是逻辑处理器的数量。
5.查看所有可用的gpu设备的数量
print("available gpu devices: {}".format(torch.cuda.device_count()))

available gpu devices: 1
6.获取gpu设备的名称
print("gpu device name: {}".format(torch.cuda.get_device_name(torch.device("cuda:0"))))

gpu device name: NVIDIA GeForce GTX 1080 Ti
7.通过device="cpu:0"指定cpu:0设备
device = torch.Tensor([1,2,3], device="cpu:0").device

print("device type: {}".format(device))

device type: cpu
8.通过torch.device指定cpu:0设备
cpu1 = torch.device("cpu:0")

print("cpu device: {}:{}".format(cpu1.type, cpu1.index))

cpu device: cpu:0
9.使用索引的方式,默认使用CUDA设备
gpu = torch.device(0)

print("gpu device: {}:{}".format(gpu.type, gpu.index))

gpu device: cuda:0
10.通过torch.device("cuda:0)指定cuda:0设备
gpu = torch.device("cuda:0")

print("gpu device: {}:{}".format(gpu.type, gpu.index))

gpu device: cuda:0
二.CPU和GPU设备上的Tensor
默认情况下创建Tensor是在CPU设备上的,但是可以通过copy_、to、cuda等方法将CPU设备中的Tensor转移到GPU设备上。当然也是可以直接在GPU设备上创建Tensor的。torch.tensor和torch.Tensor的区别是,torch.tensor可以通过device指定gpu设备,而torch.Tensor只能在cpu上创建,否则报错。
1.Tensor从CPU拷贝到GPU上
# 默认创建的tensor是在cpu上创建的

cpu_tensor = torch.Tensor([[1,4,7],[3,6,9],[2,5,8]])

print(cpu_tensor.device)

# 通过to方法将cpu_tensor拷贝到gpu上

gpu_tensor1 = cpu_tensor.to(torch.device("cuda:0"))

print(gpu_tensor1.device)

# 通过cuda方法将cpu_tensor拷贝到gpu上

gpu_tensor2 = cpu_tensor.cuda(torch.device("cuda:0"))

print(gpu_tensor2.device)

# 将gpu_tensor2拷贝到cpu上

gpu_tensor3 = cpu_tensor.copy_(gpu_tensor2)

print(gpu_tensor3.device)

print(gpu_tensor3)
输出结果如下:
cpu

cuda:0

cuda:0

cpu

tensor([[1., 4., 7.],

        [3., 6., 9.],

        [2., 5., 8.]])
主要说明下这个copy_()方法,实现如下:
def copy_(self, src, non_blocking=False):

    ......

    return _te.Tensor(*(), **{})
就是从src中拷贝元素到self的tensor中,然后返回self。以gpu_tensor3 = cpu_tensor.copy_(gpu_tensor2)为例,就是把gpu中的gpu_tensor2拷贝到cpu中的cpu_tensor中。
2.直接在GPU上创建Tensor
gpu_tensor1 = torch.tensor([[2,5,8],[1,4,7],[3,6,9]], device=torch.device("cuda:0"))

print(gpu_tensor1.device)

# 在gpu设备上创建随机数tensor

print(torch.rand((3,4), device=torch.device("cuda:0")))

# 在gpu设备上创建0值tensor

print(torch.zeros((2,5), device=torch.device("cuda:0")))
输出结果,如下:
cuda:0

tensor([[0.7061, 0.2161, 0.8219, 0.3354],

        [0.1697, 0.1730, 0.1400, 0.2825],

        [0.1771, 0.0473, 0.8411, 0.2318]], device='cuda:0')

tensor([[0., 0., 0., 0., 0.],

        [0., 0., 0., 0., 0.]], device='cuda:0')
3.CUDA Streams
Steam是CUDA命令线性执行的抽象形式,分配给设备的CUDA命令按照入队序列的顺序执行。每个设备都有一个默认的Steam,也可以通过torch.cuda.Stream()创建新的Stream。如果不同Stream中的命令交互执行,那么就不能保证命令绝对按顺序执行。下面的这个例子不同的Stream就可能会产生错误。
cuda = torch.device("cuda")

# 创建默认的stream,A就是使用的默认stream

s = torch.cuda.Stream()

A = torch.randn((1,10), device=cuda)

for i in range(100):

    # 在新的stream上对默认的stream上创建的tensor进行求和

    with torch.cuda.stream(s):

        # 存在的问题是:torch.sum()可能会在torch.randn()之前执行

        B = torch.sum(A)

        print(B)
这个例子存在的问题是torch.sum()可能会在torch.randn()之前就执行。为了保证Stream中的命令绝对按顺序执行,接下来使用Synchronize同步方法解决上面例子的问题:
cuda = torch.device("cuda")

s = torch.cuda.Stream()

A = torch.randn((1,10), device=cuda)

default_stream = torch.cuda.current_stream()

print("Default Stream: {}".format(default_stream))

# 等待创建A的stream执行完毕

torch.cuda.Stream.synchronize(default_stream)

for i in range(100):

    # 在新的stream上对默认的stream上创建的tensor进行求和

    with torch.cuda.stream(s):

        print("current stream: {}".format(torch.cuda.current_stream()))

        B = torch.sum(A)

        print(B)
解决问题的思路就是通过torch.cuda.Stream.synchronize(default_stream)等待创建A的stream执行完毕,然后再执行新的Stream中的指令。
除此之外,使用memory_cached方法获取缓存内存的大小,使用max_memory_cached方法获取最大缓存内存的大小,使用max_memory_allocated方法获取最大分配内存的大小。可以使用empty_cache方法释放无用的缓存内存。
三.固定缓冲区
缓存就是当计算机内存不足的时候,就会把内存中的数据存储到硬盘上。固定缓冲区就是说常驻内存,不能把这部分数据缓存到硬盘上。可以直接使用pin_memory方法或在Tensor上直接调用pin_memory方法将Tensor复制到固定缓冲区。为什么要做固定缓冲区呢?目的只有一个,就是把CPU上的固定缓冲区拷贝到GPU上时速度快。Tensor上的is_pinned方法可以查看该Tensor是否加载到固定缓冲区中。
from torch.utils.data._utils.pin_memory import pin_memory

x = torch.Tensor([[1,2,4], [5, 7, 9], [3, 7, 10]])

# 通过pin_memory()方法将x复制到固定缓冲区

y = pin_memory(x)

# 在tensor上直接调用pin_memory()方法将tensor复制到固定缓冲区

z = x.pin_memory()

# id()方法返回tensor的内存地址,pin_memory()返回tensor对象的拷贝,因此内存地址是不同的

print("id: {}".format(id(x)))

print("id: {}".format(id(y)))

print("id: {}".format(id(z)))

# 当tensor放入固定缓冲区后,就可以异步将数据复制到gpu设备上了

a = z.cuda(non_blocking=True)

print(a)

print("is_pinned: {}/{}".format(x.is_pinned(), z.is_pinned()))
输出结果如下所示:
id: 1605289350472

id: 1605969660408

id: 1605969660248

tensor([[ 1.,  2.,  4.],

        [ 5.,  7.,  9.],

        [ 3.,  7., 10.]], device='cuda:0')

is_pinned: False/True
说明:通过id()查看对象的内存地址。
四.自动设备感知
1.适配CPU和GPU设备
自动设备感知本质上就是有GPU时就使用GPU,没有GPU时就使用CPU,即一套代码适配CPU和GPU设备。GPU是否存在是通过torch.cuda.is_available()判断的。常见的写法如下:
device = torch.device("cpu")

if torch.cuda.is_available():

    device = torch.device("cuda")

a = torch.tensor([1,2,3], device=device)

print(a)
输出结果如下所示:
tensor([1, 2, 3], device='cuda:0')
2.模型迁移到GPU设备
在Module对象上调用to()方法可以把模型也迁移到GPU设备上,如下所示:
class LinearRegression(torch.nn.Module):

    def __init__(self):

        super(LinearRegression, self).__init__()

        self.linear = torch.nn.Linear(1, 1)

    def forward(self, x):

        return self.linear(x)

regression = LinearRegression().to(device=device)

for param in regression.parameters():

    print(param)
从上述输出参数中可以看到param都是device='cuda:0'上的tensor,所以可以说模型通过to()迁移到GPU设备上了。
参考文献:
[1]PyTorch官网:https://pytorch.org/
[2]PyTorch中文官方教程1.7:https://pytorch.apachecn.org/#/docs/1.7/README
[3]PyTorch GitHub:https://github.com/pytorch/pytorch
[4]TORCH.CUDA:https://pytorch.org/docs/stable/cuda.html
[5]CUDA SEMANTICS:https://pytorch.org/docs/stable/notes/cuda.html#cuda-semantics
[6]PyTorch深度学习实战
PyTorch中的CUDA操作的更多相关文章
- pytorch中使用cuda扩展
以下面这个例子作为教程,实现功能是element-wise add: (pytorch中想调用cuda模块,还是用另外使用C编写接口脚本) 第一步:cuda编程的源文件和头文件 // mathutil ...
- pytorch中Math operation操作:torch.ger()
torch.ger(vec1, vec2, out=None) → Tensor Outer product of vec1 and vec2. If vec1 is a vector of size ...
- 详解Pytorch中的网络构造,模型save和load,.pth权重文件解析
转载:https://zhuanlan.zhihu.com/p/53927068 https://blog.csdn.net/wangdongwei0/article/details/88956527 ...
- PyTorch中的C++扩展
今天要聊聊用 PyTorch 进行 C++ 扩展. 在正式开始前,我们需要了解 PyTorch 如何自定义module.这其中,最常见的就是在 python 中继承torch.nn.Module,用 ...
- PyTorch中的MIT ADE20K数据集的语义分割
PyTorch中的MIT ADE20K数据集的语义分割 代码地址:https://github.com/CSAILVision/semantic-segmentation-pytorch Semant ...
- PyTorch官方中文文档:PyTorch中文文档
PyTorch中文文档 PyTorch是使用GPU和CPU优化的深度学习张量库. 说明 自动求导机制 CUDA语义 扩展PyTorch 多进程最佳实践 序列化语义 Package参考 torch to ...
- PyTorch中ReLU的inplace
0 - inplace 在pytorch中,nn.ReLU(inplace=True)和nn.LeakyReLU(inplace=True)中存在inplace字段.该参数的inplace=True的 ...
- pytorch中tensorboardX的用法
在代码中改好存储Log的路径 命令行中输入 tensorboard --logdir /home/huihua/NewDisk1/PycharmProjects/pytorch-deeplab-xce ...
- Pytorch中RoI pooling layer的几种实现
Faster-RCNN论文中在RoI-Head网络中,将128个RoI区域对应的feature map进行截取,而后利用RoI pooling层输出7*7大小的feature map.在pytorch ...
随机推荐
- 对TCP粘包拆包的理解
TCP的粘包与拆包 TCP是一种字节流(byte-stream)协议,所谓流,就是没有界限的一串数据. 一个完整的包会被TCP拆为多个包进行发送,也有可能把多个小包封装成一个大的数据包发送,这就是所谓 ...
- 微信access_token缓存与更新
由于Access Token有效期只有7200秒,而每天调用获取的次数只有2000次,所以需要将Access Token进行缓存来保证不触发超过最大调用次数.另外在微信公众平台中,绝大多数高级接口都需 ...
- React + Typescript领域初学者的常见问题和技巧
React + Typescript领域初学者的常见问题和技巧 创建一个联合类型的常量 Key const NAME = { HOGE: "hoge", FUGA: "f ...
- java8 Stream新特性
import lombok.Getter; import lombok.Setter; @Setter @Getter public class Person { private String nam ...
- 【SpringBoot】快速入门
博客主页:准Java全栈开发工程师 00年出生,即将进入职场闯荡,目标赚钱,可能会有人觉得我格局小.觉得俗,但不得不承认这个世界已经不再是以一条线来分割的平面,而是围绕财富旋转的球面,成为有钱人不是为 ...
- 关于vue cli 使用iview 自定义主题遇到的坑
定制主题,这里讲变量覆盖 当你老老实实的把上面文档中的代码一一复制粘贴到项目文件中时,发现了还没装less,所以你就 npm install less –savenpm install less-lo ...
- cve-2021-42287和cve-2021-42278漏洞复现
一.漏洞概述 cve-2021-42287 : 由于Active Directory没有对域中计算机与服务器账号进行验证,经过身份验证的攻击 者利用该漏洞绕过完全限制,可将域中普通用户权限提升为域管理 ...
- 我看谁还说程序员不会P图?拜托~4行python代码就够~
我们平时使用一些图像处理软件时,经常会看到其对图像的亮度.对比度.色度或者锐度进行调整.你是不是觉得这种技术的底层实现很高大上? 其实最基础的实现原理,用 Python 实现只需要几行代码,学会后你也 ...
- Java TIF、JPG、PNG等图片转换
代码如下: public static void main(String[] args) { try { BufferedImage bufferegImage = ImageIO.read(new ...
- 强化学习-学习笔记5 | AlphaGo
本文不是论文阅读笔记,只是一个学习笔记,重在理解,在严谨程度上可能稍差. AlphaGo 论文指路: Mastering the game of Go with deep neural network ...