Spring Boot2(002):手动创建第1个SpringBoot2简单应用——“HelloWorld” web 工程
本文主要介绍如何 手动创建第1个 SpringBoot2 简单应用——“HelloWorld” web 工程。具体可参考 springboot 官方文档中的 11. Developing Your First Spring Boot Application。目录结构如下:
PS: 2020-04-08更新,并附上helloworld工程代码地址
1、开发环境配置说明
首先列一下自己的一些开发环境信息:
win10 + JDK 1.8.0_111 + Apache Maven 3.3.9 + idea2019.1/Eclipse Mars.2 Release (4.5.2) + 阿里云maven镜像(https://maven.aliyun.com/repository/public)
需要注意的是,如果在命令行使用 maven 而且不指定配置文件的话,则用的是 maven 默认的镜像,地址:https://repo.maven.apache.org/maven2 ,建议通过参数【-s setting.xml的全路径】指定 maven 的配置文件,使用指定的镜像仓库和本地仓库。
对于 JDK 和 maven ,先要确保没问题,命令分别为 java -version 和 mvn -v :

2、创建 springboot2 简单工程
2.1、创建相关目录和 pom 文件
首先就是先创建工程所需要的目录以及 pom.xml 文件,例如,我这里创建了 springboot2-example-helloworld 作为工程项目来使用,内部结构如下:

当然还有个 pom.xml 文件,如下:
<?xml version="1.0" encoding="UTF-8"?>

<project xmlns="http://maven.apache.org/POM/4.0.0" xmlns:xsi="http://www.w3.org/2001/XMLSchema-instance"

xsi:schemaLocation="http://maven.apache.org/POM/4.0.0 https://maven.apache.org/xsd/maven-4.0.0.xsd">

    <modelVersion>4.0.0</modelVersion>

    <groupId>com.wpbxin</groupId>

    <artifactId>springboot2-example-helloworld</artifactId>

    <version>0.0.1-SNAPSHOT</version>

    <parent>

        <groupId>org.springframework.boot</groupId>

        <artifactId>spring-boot-starter-parent</artifactId>

        <version>2.1.5.RELEASE</version>

    </parent>

    <!-- Additional lines to be added here... -->

</project>
然后使用命令 mvn package (注意:在 springboot2-example-helloworld 目录下)运行下确保打包正常(这里没有指定配置文件,使用的默认的 maven 镜像:https://repo.maven.apache.org/maven2 ,下载速度相对来说应该会慢点,稍微缓一缓休息下,正常就行,一次不行再来一遍。建议通过参数【-s setting.xml的全路径】指定 maven 的配置文件,使用指定的镜像仓库和本地仓库。例如:mvn package -s C:\your-maven-path\apache-maven-3.3.9\conf\settings-aliyun.xml):

注意:如果打包时遇到了错误:“sun.security.validator.ValidatorException: PKIX path building failed: sun.security.provider.certpath.SunCertPathBuilderException: unable to find valid certification path to requested target” ,可以参考笔者的另一篇说明:Maven:sun.security.validator.ValidatorException: PKIX path building failed: sun.security.provider.certpath.SunCertPathBuilderException: unable to find valid certification path to requested target,还有可能 Maven:java.lang.RuntimeException: Unexpected error: java.security.InvalidAlgorithmParameterException: the trustAnchors parameter must be non-empty,可以解决相关问题。
2.2、添加依赖
springboot 提供了很多的“Starters”来添加相关的 jar 包依赖,案例中的 spring-boot-starter-parent 是一个比较特殊的 parent pom ,它提供了很多有用的默认配置,但是没有任何的 jar 直接依赖。这里可以运行下 mvn dependency:tree 查看下当前工程的依赖,可以发现 spring-boot-starter-parent 并没有提供任何依赖。

这里我们要创建的是 web 工程,需要有 web 相关的依赖,因此 pom.xml 中添加如下配置:
    <dependencies>

        <dependency>

            <groupId>org.springframework.boot</groupId>

            <artifactId>spring-boot-starter-web</artifactId>

        </dependency>

    </dependencies>
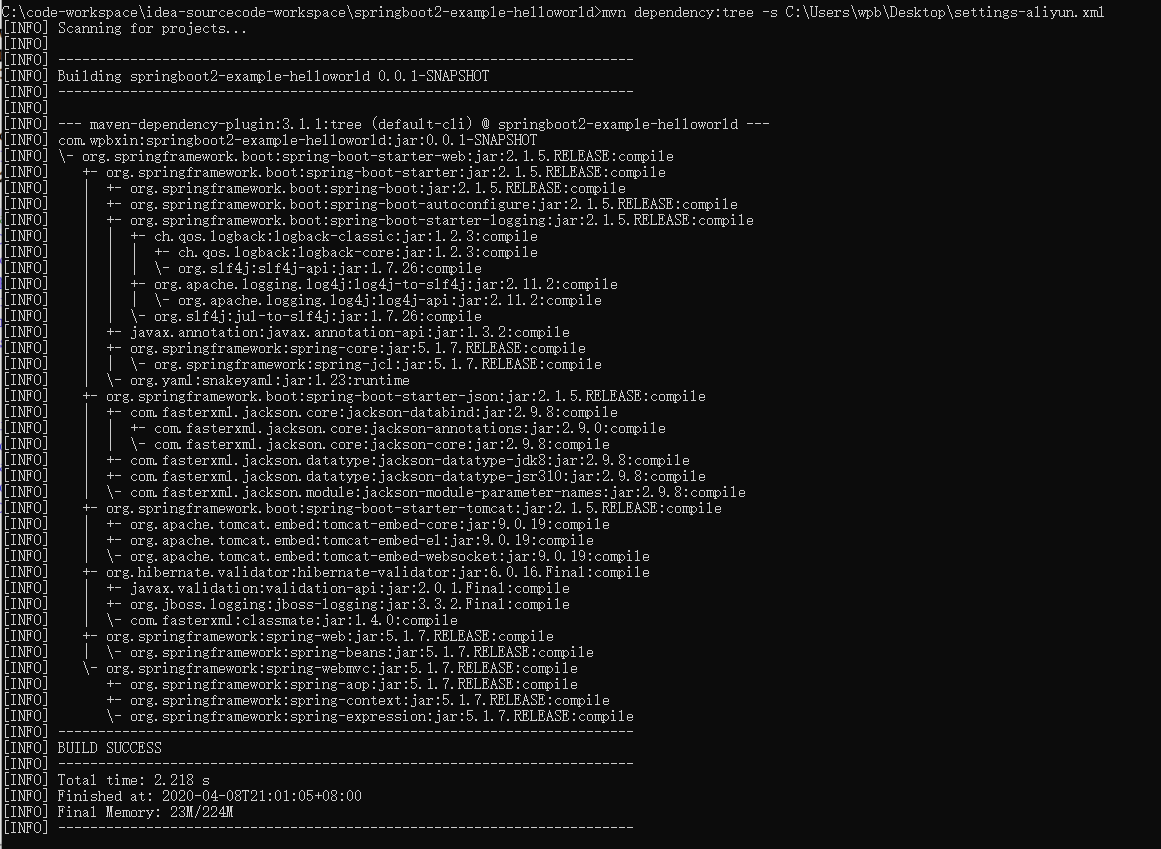
再来一遍 mvn dependency:tree (截图的是已经下载完后的),这下可以看出 spring 全家桶差不多出来了,而且还有内嵌的 tomcat :
2.3、添加“Hello World”代码
HelloWorld Java类:
package com.wpbxin;

import org.springframework.boot.*;

import org.springframework.boot.autoconfigure.*;

import org.springframework.web.bind.annotation.*;

@RestController

@EnableAutoConfiguration

public class HelloWorldExample {

    @RequestMapping("/")

    String home() {

        return "Hello World!";

    }

    public static void main(String[] args) {

        SpringApplication.run(HelloWorldExample.class, args);

    }

}
2.4、运行“Hello World” web 工程
通过命令 mvn spring-boot:run 来运行(期间笔者又遇到了 PKIX 的错误,重新来几遍就没问题了,很可能是网络问题):
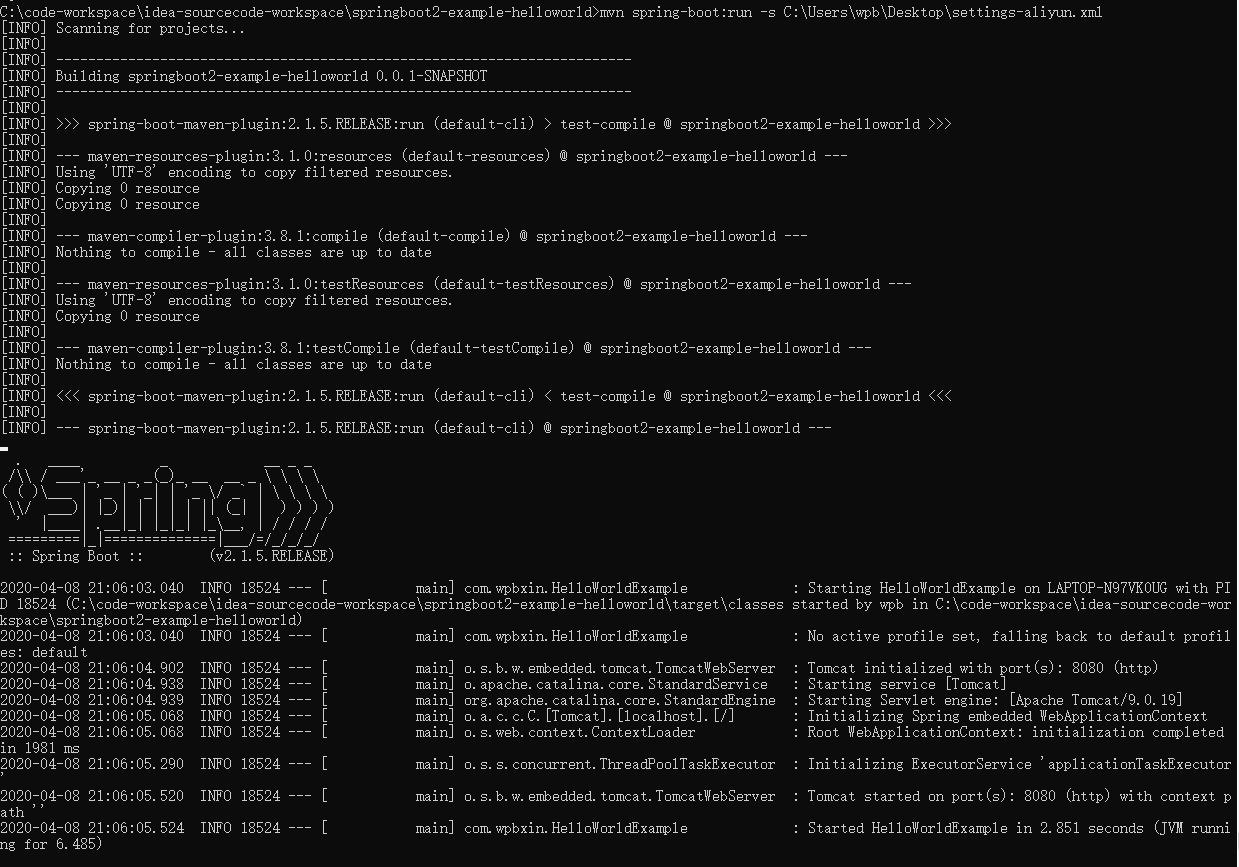
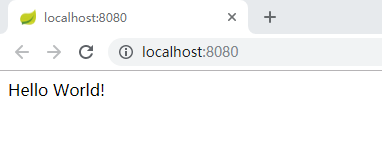
看到打出来了 Spring 的标识就正常了,然后访问 http://localhost:8080/ 正常:
然后按 ctrl -c 结束:

2.5、创建可运行的jar
pom.xml 中增加配置:
    <build>

        <plugins>

            <plugin>

                <groupId>org.springframework.boot</groupId>

                <artifactId>spring-boot-maven-plugin</artifactId>

            </plugin>

        </plugins>

    </build>
再次执行 mvn package :

这时候 target 目录下会有个文件 springboot2-example-helloworld-0.0.1-SNAPSHOT.jar.original 和相关的jar 包(大概10MB左右):

通过 jar -tvf target\springboot2-example-helloworld-0.0.1-SNAPSHOT.jar 查看内部所有文件和引用:

这次通过 jar -jar 来运行 jar 包,也是正常:

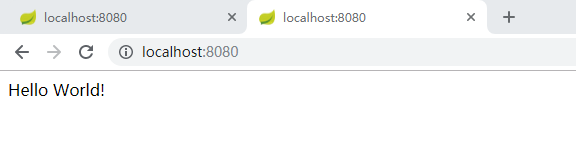
访问 http://localhost:8080/ ,OK
同样是通过 CTRL-c 来结束运行:

至此,整合了springboot2 的 “Hello World” web 工程便可正常使用了。
2.6、“HelloWorld” web 工程链接和 maven 的配置
本文使用的工程参考github链接:springboot2-example-helloworld
使用的 maven 的setting.xml 如下:
<?xml version="1.0" encoding="UTF-8"?>

<settings xmlns="http://maven.apache.org/SETTINGS/1.0.0"

          xmlns:xsi="http://www.w3.org/2001/XMLSchema-instance"

          xsi:schemaLocation="http://maven.apache.org/SETTINGS/1.0.0 http://maven.apache.org/xsd/settings-1.0.0.xsd">

  <!-- localRepository

   | The path to the local repository maven will use to store artifacts.

   | Default: ${user.home}/.m2/repository

  <localRepository>/path/to/local/repo</localRepository>

  -->

  <localRepository>C:\cs-softwares\maven-repo</localRepository>

  <mirrors>

    <mirror>

      <id>alimaven</id>

      <name>aliyun maven</name>

      <mirrorOf>central</mirrorOf>

      <!-- 阿里云公共代理库使用指南:https://help.aliyun.com/document_detail/102512.html?spm=a2c40.aliyun_maven_repo.0.0.36183054oSYFKS -->

      <!-- <url>https://maven.aliyun.com/nexus/content/groups/public</url> -->

      <url>https://maven.aliyun.com/repository/public</url>

    </mirror>

    <!-- 默认的maven仓库-2019-10-26:https://repo.maven.apache.org/maven2 -->

  </mirrors>

  <profiles>

    <!-- 阿里云私服 -->

    <profile>

        <id>alimaven-profile</id>

        <activation>

            <activeByDefault>true</activeByDefault>

            <jdk>1.8</jdk>

        </activation>

        <properties>

            <maven.compiler.source>1.8</maven.compiler.source>

            <maven.compiler.target>1.8</maven.compiler.target>

            <maven.compiler.compilerVersion>1.8</maven.compiler.compilerVersion>

        </properties>

        <repositories>

            <repository>

                <id>alimaven</id>

                <url>https://maven.aliyun.com/repository/public</url>

                <releases>

                    <enabled>true</enabled>

                </releases>

            </repository>

        </repositories>

    </profile>

  </profiles>

  <activeProfiles>

    <activeProfile>alimaven-profile</activeProfile>

  </activeProfiles>

</settings>
Spring Boot2(002):手动创建第1个SpringBoot2简单应用——“HelloWorld” web 工程的更多相关文章
- Spring Boot2(003):简要回顾“HelloWorld” web 工程
1.注解: @RestController 和 @RequestMapping HelloWorldExample 中的第1个注解 @RestController 是一个被熟知的原型注解(stereo ...
- Spring Boot2(007):关于Spring beans、依赖注入 和 @SpringBootApplication 注解
一.关于Spring beans 和 依赖注入(Dependency Injection) spring boot 和 Spring 全家桶无缝衔接,开发过程中可以很轻松地使用 Spring 全家桶的 ...
- Spring Boot2(006):关于配置类(Configuration Classes)和配置(Configuration)
一.配置类(Configuration Classes) Spring Boot 支持基于 xml 的配置,但更偏向于使用基于 Java 的配置,通常建议使用定义有 main 方法的主 @Config ...
- Spring Boot2(005):关于代码结构
spring boot 对于工程代码结构并没有特殊得要求,但以下几个有用的最佳实践建议参考参考: 1.不鼓励而且应该避免使用 default 包 没有 package 声明的类被认为是在 defaul ...
- Spring Boot2(004):关于 Build Systems (构建系统)
Spring Boot Ref 建议使用 maven 或者 gradle 来进行依赖管理和应用构建. 一.Dependency Management(依赖管理) Spring Boot 的每个版本都会 ...
- 使用IDEA创建Spring boot项目,继承mybaits。并进行简单的数据库查询操作
本文讲的是使用IEDA创建Spring boot项目,对于环境安装需要自行准备,如JDK1.8.Maven 3.3.IDEA编译器.Mysql5.7等需事前准备好. 1.创建Spring boot项目 ...
- 构建第一个Spring Boot2.0应用之项目创建(一)
1.开发环境 IDE: JAVA环境: Tomcat: 2.使用Idea生成spring boot项目 以下是使用Idea生成基本的spring boot的步骤. (1)创建工程第一步 (2)创建工 ...
- Spring Boot2 系列教程(二)创建 Spring Boot 项目的三种方式
我最早是 2016 年底开始写 Spring Boot 相关的博客,当时使用的版本还是 1.4.x ,文章发表在 CSDN 上,阅读量最大的一篇有 43W+,如下图: 2017 年由于种种原因,就没有 ...
- Spring Boot2.0 整合 Kafka
Kafka 概述 Apache Kafka 是一个分布式流处理平台,用于构建实时的数据管道和流式的应用.它可以让你发布和订阅流式的记录,可以储存流式的记录,并且有较好的容错性,可以在流式记录产生时就进 ...
随机推荐
- Lesson 2 Spare that spider
How much of each year do spiders killing insects? Why, you may wonder, should spiders be our friends ...
- 第二单元总结:基于synchronize锁的简单多线程设计
单元统一的多线程设计策略 类的设计 电梯 每部电梯为一个线程. 电梯从调度器接收原子指令,知晓自己的状态(内部的人/服务的人.运行方向.所在楼层) 原子指令包括且仅包括: 向上走一层 / 向下走一层 ...
- vue - 动态绑定 class
<template> <div class="todo-item" :class="{'is-complete':todo.completed}&q ...
- 043、Java中逻辑运算之实现位与操作
01.代码如下: package TIANPAN; /** * 此处为文档注释 * * @author 田攀 微信382477247 */ public class TestDemo { public ...
- 7.9 规划Varnish缓存
./varnishlog -i VCL_LOG
- 树莓派—raspbian软件源
零.一键换源 2018.05.18更新:新的默认源为raspbian.raspberrypi.org 因此一键换源相应改为 sudo sed -i 's#://raspbian.raspberrypi ...
- 京东云与AI 10 篇论文被AAAI 2020 收录,京东科技实力亮相世界舞台
美国时间2月7-12日,AAAI 2020大会在纽约正式拉开序幕,AAAI作为全球人工智能领域的顶级学术会议,每年评审并收录来自全球最顶尖的学术论文,这些学术研究引领着技术的趋势和未来.京东云与AI在 ...
- 从零到Django大牛的的进阶之路01
搭建 创建虚拟环境 mkvirtualenv django_py3_1.11 -p python3 安装Django pip install django==1.11.11 创建工程 django-a ...
- P1006 换个格式输出整数
这道题相较于上一题来说就简单了许多.看题. 怎么感觉这道题有点类似P1002写出这个数.流程差不多,思路大致是先求出每一位上的数,然后根据 百十个 的顺序输出结果.题目比较简单,不做赘述,贴代码 代码 ...
- uni-app实现弹窗遮罩
<template> <view> <view class="systemboxItem" @click="showSystemDialog ...