Nginx静态网站的部署
静态网站的部署
首先先看一下nginx/conf/nginx.conf 配置文件内的信息:
#user  nobody;

worker_processes  1;

#error_log  logs/error.log;

#error_log  logs/error.log  notice;

#error_log  logs/error.log  info;

#pid        logs/nginx.pid;

events {

    worker_connections  1024;

}

http {

    include       mime.types;

    default_type  application/octet-stream;

    #log_format  main  '$remote_addr - $remote_user [$time_local] "$request" '

    #                  '$status $body_bytes_sent "$http_referer" '

    #                  '"$http_user_agent" "$http_x_forwarded_for"';

    #access_log  logs/access.log  main;

    sendfile        on;

    #tcp_nopush     on;

    #keepalive_timeout  0;

    keepalive_timeout  65;

    #gzip  on;

    #下面这个server就是默认的主机信息

    #listen 端口, server_name 主机名称, location-root 网站根目录,location-index 网站默认页面

    server {

        listen       80;

        server_name  localhost;

        #charset koi9-r;

        #access_log  logs/host.access.log  main;

        location / {

            root   html;

            index  index.html index.htm;

        }

        #error_page  404              /404.html;

        # redirect server error pages to the static page /50x.html

        #

        error_page   500 502 503 504  /50x.html;

        location = /50x.html {

            root   html;

        }

        # proxy the PHP scripts to Apache listening on 127.0.0.1:80

        #

        #location ~ \.php$ {

        #    proxy_pass   http://127.0.0.1;

        #}

        # pass the PHP scripts to FastCGI server listening on 127.0.0.1:9000

        #

        #location ~ \.php$ {

        #    root           html;

        #    fastcgi_pass   127.0.0.1:9000;

        #    fastcgi_index  index.php;

        #    fastcgi_param  SCRIPT_FILENAME  /scripts$fastcgi_script_name;

        #    include        fastcgi_params;

        #}

        # deny access to .htaccess files, if Apache's document root

        # concurs with nginx's one

        #

        #location ~ /\.ht {

        #    deny  all;

        #}

    }

    #我们以后自己配置虚拟主机的话 就在这个地方新添加server即可

    # another virtual host using mix of IP-, name-, and port-based configuration

    #

    #server {

    #    listen       8000;

    #    listen       somename:8080;

    #    server_name  somename  alias  another.alias;

    #    location / {

    #        root   html;

    #        index  index.html index.htm;

    #    }

    #}

    # HTTPS server

    #

    #server {

    #    listen       443 ssl;

    #    server_name  localhost;

    #    ssl_certificate      cert.pem;

    #    ssl_certificate_key  cert.key;

    #    ssl_session_cache    shared:SSL:1m;

    #    ssl_session_timeout  5m;

    #    ssl_ciphers  HIGH:!aNULL:!MD5;

    #    ssl_prefer_server_ciphers  on;

    #    location / {

    #        root   html;

    #        index  index.html index.htm;

    #    }

    #}

}
nginx.conf
所以我们部署静态网站,把静态的html页面相关放到html这个目录下即可,当然也可以自己定义目录,修改配置文件即可
那么如果我们想在一个nginx上部署多个网站(不同端口),应该怎么做呢?
配置虚拟主机
虚拟主机,也叫“网站空间”,就是把一台运行在互联网上的物理服务器划分成多个“虚拟”服务器。虚拟主机技术极大的促进了网络技术的应用和普及。同时虚拟主机的租用服务也成了网络时代的一种新型经济形式。
一、端口绑定(以web1,web2两个网站为例)
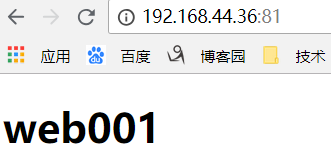
1,将网站web1(web1网站的所有静态文件,比如web001.html),web2,分别上传到/usr/local/nginx/web1和/usr/local/nginx/web2下
2,修改nginx/conf/nginx.conf 配置文件:(添加两个server信息)
    server {

        listen       81;

        server_name  localhost;

        location / {

            root   web1;

            index  web001.html;

        }

    }

    server {

        listen       82;

        server_name  localhost;

        location / {

            root   web2;

            index  web002.html;

        }

    }
3,重启nginx
./nginx -s reload
4,用浏览器访问ip+port
二、域名绑定
我们上面部署的静态网站目前只能通过ip+port访问,那么如果想通过域名访问呢?
答案很简单,只需要修改我们刚才添加到配置文件中的server信息中的server_name:
    server {

        listen       80;

        server_name  web1.zy.com;

        location / {

            root   web1;

            index  web001.html;

        }

    }

    server {

        listen       80;

        server_name  web2.zy.com;

        location / {

            root   web2;

            index  web002.html;

        }

    }
前提是你需要有这个域名,并将这个域名指向了这个ip。
Nginx静态网站的部署的更多相关文章
- 【URLOS应用开发基础】10分钟制作一个nginx静态网站环境应用
URLOS开发者功能已上线有一段时间了,目前通过部分开发者的使用体验来看,不得不说URLOS在服务器软件开发效率方面确实有着得天独厚的优势,凭借docker容器技术与其良好的应用生态环境,URLOS必 ...
- nginx 静态网站配置
/************************************************************************************** * nginx 静态网站 ...
- 腾讯云,搭建nginx静态网站服务器
搭建Http静态服务器环境 任务时间:15min ~ 30min 搭建静态网站,首先需要部署环境.下面的步骤,将告诉大家如何在服务器上通过 Nginx 部署 HTTP 静态服务. 安装 Nginx 在 ...
- Git+Gitlab+Ansible的roles实现一键部署Nginx静态网站(一)--技术流ken
前言 截止目前已经写了<Ansible基础认识及安装使用详解(一)--技术流ken>,<Ansible常用模块介绍及使用(二)--技术流ken><Ansible剧本介绍及 ...
- Git+Gitlab+Ansible的roles实现一键部署Nginx静态网站(4)
前言 截止目前已经写了<Ansible基础认识及安装使用详解(一)–技术流ken>,<Ansible常用模块介绍及使用(二)–技术流ken><Ansible剧本介绍及使用 ...
- nginx静态资源分离部署
修改nginx.conf文件,用于nginx处理静态资源. 主要配置如下(在server配置中加入location配置即可): server { listen 80; server_name 123. ...
- 基于CentOS搭建Nginx 静态网站
系统要求: CentOS 7.2 64 位操作系统 一. 安装 Nginx(在 CentOS 上,可直接使用 yum 来安装 Nginx) yum install nginx -y 安装完成后,使用 ...
- 云服务器搭建 Nginx 静态网站
第一步:安装 Nginx 在 CentOS 上,可直接使用 yum 来安装 Nginx(当然也可以通过下载压缩包.解压.编译的方式安装,不过太麻烦了) yum install nginx -y 第二步 ...
- 搭建 Nginx 静态网站
示例代码:/etc/nginx/nginx.conf user nginx;worker_processes auto;error_log /var/log/nginx/error.log;pid / ...
随机推荐
- Every derived table must have its own alias
完整错误信息如下: Every derived table must have its own alias 三月 28, 2017 10:20:46 上午 org.apache.catalina.co ...
- 目标跟踪之相关滤波:CF及后续改进篇
一. 何为相关滤波? Correlation Filter 最早应用于信号处理,用来描述两个信号之间的相关性,或者说相似性(有点像早期的概率密度),先来看定义: 对于两个数据 f 和 g,则两个信号的 ...
- mono developer 无法启动 可以试试如下插件包.
http://download.xamarin.com/GTKforWindows/Windows/gtk-sharp-2.12.22.msi 我以前装的旧版unity 再装了新的版本以后 mono ...
- 【英语】Bingo口语笔记(86) - stand系列
- Robot Framework接口测试(2)--http请求之get
本来打算把http发送请求的get和post方法都介绍一下的,结果发现篇幅有点长,文本编辑也变得混乱,所以这里先介绍一下get方法,下一次再post.其实这些方法大家可以看一下源码里面的介绍只需要在代 ...
- 给UIButton设置阴影及动画组
//设置“开启旅程”按钮 UIButton *startBtn = self.startBtn; CGFloat btnW = ; CGFloat btnH = ; CGFloat btnX = (s ...
- 几个开源faas 框架
funktion open source event based lambda programming for kubernetes 官方地址: funktion.fabric8.io serverl ...
- alpine docker 镜像 时区问题
1. 时区处理 RUN apk update && apk add curl bash tree tzdata \ && cp -r -f /usr/share/zon ...
- Maven依赖调解
引用来自maven实战中的一段话.
- 为什么 FastAdmin 的插件不全部免费?
为什么 FastAdmin 的插件不全部免费? 主要还是有以下几个原因. 支持开发者. 为了支付网站空间费和 CDN 费. 有收入后可以更好的开发 FastAdmin.