C# 文件/文件夹压缩
一、ZipFile
ZipFile类用于选择文件或文件夹进行压缩生成压缩包。
常用属性:
| 属性 | 说明 |
| Count | 文件数目(注意是在ComitUpdat之后才有) |
| Password | 压缩包密码 |
| Size | 压缩包占用空间大小 |
| Name | 压缩包名称,默认输出是文件路径 |
| ZipEntry | 压缩包里的文件,通过索引[]访问 |
其常用方法如下:
| 方法 | 说明 |
| Add | 添加要进行压缩的文件 |
| AddDirectory | 添加文件夹(不会压缩文件夹里的文件) |
| Delete | 删除文件或文件夹 |
| BeginUpdate | 开始修改压缩包 |
| CommitUpdate | 提交修改 |
| SetComment | 添加注释 |
示例1(创建压缩文件):

using (ZipFile zip = ZipFile.Create(@"D:\test.zip"))
{
zip.BeginUpdate();
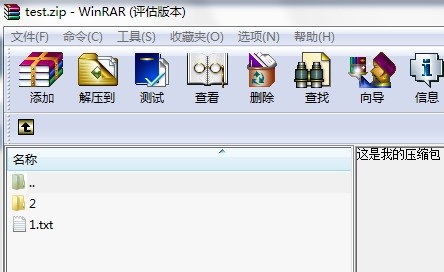
zip.SetComment("这是我的压缩包");
zip.Add(@"D:\1.txt"); //添加一个文件
zip.AddDirectory(@"D:\2"); //添加一个文件夹(这个方法不会压缩文件夹里的文件)
zip.Add(@"D:\2\2.txt"); //添加文件夹里的文件
zip.CommitUpdate();
}
这样生成的压缩包是包含子文件夹,子文件夹也是包含子文件的。
其中,注释如下:
示例2:修改压缩包
  using (ZipFile zip = new ZipFile(@"D:\test.zip"))

      {

          zip.BeginUpdate();

          zip.Add(@"D:\2.txt");

          zip.CommitUpdate();

      }
留意这个示例和上面的有什么不同,上面的是Create方法创建的ZipFile对象,而这里是直接读。因此,如果压缩包里面有文件,则不会改动原来的压缩文件,而是往会里面添加一个。这样就相当于压缩包的修改,而上面是压缩包的创建。
示例3:读取压缩包里的文件:
  using (ZipFile zip = new ZipFile(@"D:\test.zip"))

      {

          foreach (ZipEntry z in zip)

          {

              Console.WriteLine(z);

          }

          ZipEntry z1 = zip[0];

          Console.WriteLine(z1.Name);

     }
二、FastZip
这个类就两个方法:
| 方法 | 说明 |
| CreateZip | 压缩目录 |
| ExtractZip | 解压缩目录 |
1、FastZip用于快速压缩目录,示例如下:
//快速压缩目录,包括目录下的所有文件

(new FastZip()).CreateZip(@"D:\test.zip", @"D:\test\", true, "");
这个是递归压缩的。但是局限性就是只能压缩文件夹。
否则报如下错误:

2、快速解压缩目录
//快速解压

(new FastZip()).ExtractZip(@"D:\test.zip", @"D:\解压目录\", "");
三、ZipOutputStream与ZipEntry
- ZipOutputStream:相当于一个压缩包;
- ZipEntry:相当于压缩包里的一个文件;
以上两个类是SharpZipLib的主类,最耐玩的就是这两个类。
ZipOutputStream常用属性:
| 属性 | 说明 |
| IsFinished | ZipOutputStream是否已结束 |
ZipOutputStream常用方法:
| 方法 | 说明 |
| CloseEntry | 关闭入口,关闭之后不允许再对ZipOutputStream进行操作 |
| Finish | 结束写入 |
| GetLevel | 读取压缩等级 |
| PutNextEntry | 往ZipOutputStream里写入一个ZipEntry |
| SetComment | 压缩包的注释 |
| SetLevel | 设置压缩等级,等级越高文件越小 |
| Write | 写入文件内容 |
使用ZipOutputStream创建一个压缩包并往里面写入一个文件的示例:
        static void Main(string[] args)

        {

            using (ZipOutputStream s = new ZipOutputStream(File.Create(@"D:\123.zip")))

            {

                s.SetLevel(6);  //设置压缩等级,等级越高压缩效果越明显,但占用CPU也会更多using (FileStream fs = File.OpenRead(@"D:\1.txt"))

                {

                    byte[] buffer = new byte[4 * 1024];  //缓冲区,每次操作大小

                    ZipEntry entry = new ZipEntry(Path.GetFileName(@"改名.txt"));     //创建压缩包内的文件

                    entry.DateTime = DateTime.Now;  //文件创建时间

                    s.PutNextEntry(entry);          //将文件写入压缩包

                    int sourceBytes;

                    do

                    {

                        sourceBytes = fs.Read(buffer, 0, buffer.Length);    //读取文件内容(1次读4M,写4M)

                        s.Write(buffer, 0, sourceBytes);                    //将文件内容写入压缩相应的文件

                    } while (sourceBytes > 0);

                }

                s.CloseEntry();

            }

            Console.ReadKey();

        }
以上示例仅仅能够压缩文件,要压缩文件夹就要使用递归的方式,循环子目录并压缩子目录里的文件。
示例2:文件夹压缩,保持原文件夹架构:
    class Program

    {

        static void Main(string[] args)

        {

            string Source = @"D:\test";

            string TartgetFile = @"D:\test.zip";

            Directory.CreateDirectory(Path.GetDirectoryName(TartgetFile));

            using (ZipOutputStream s = new ZipOutputStream(File.Create(TartgetFile)))

            {

                s.SetLevel(6);

                Compress(Source, s);

                s.Finish();

                s.Close();

            }

            Console.ReadKey();

        }

        /// <summary>

        /// 压缩

        /// </summary>

        /// <param name="source">源目录</param>

        /// <param name="s">ZipOutputStream对象</param>

        public static void Compress(string source, ZipOutputStream s)

        {

            string[] filenames = Directory.GetFileSystemEntries(source);

            foreach (string file in filenames)

            {

                if (Directory.Exists(file))

                {

                    Compress(file, s);  //递归压缩子文件夹

                }

                else

                {

                    using (FileStream fs = File.OpenRead(file))

                    {

                        byte[] buffer = new byte[4 * 1024];

                        ZipEntry entry = new ZipEntry(file.Replace(Path.GetPathRoot(file),""));     //此处去掉盘符,如D:\123\1.txt 去掉D:

                        entry.DateTime = DateTime.Now;

                        s.PutNextEntry(entry);

                        int sourceBytes;

                        do

                        {

                            sourceBytes = fs.Read(buffer, 0, buffer.Length);

                            s.Write(buffer, 0, sourceBytes);

                        } while (sourceBytes > 0);

                    }

                }

            }

        }

    }
附上解压缩方法:
        /// <summary>

        /// 解压缩

        /// </summary>

        /// <param name="sourceFile">源文件</param>

        /// <param name="targetPath">目标路经</param>

        public bool Decompress(string sourceFile, string targetPath)

        {

            if (!File.Exists(sourceFile))

            {

                throw new FileNotFoundException(string.Format("未能找到文件 '{0}' ", sourceFile));

            }

            if (!Directory.Exists(targetPath))

            {

                Directory.CreateDirectory(targetPath);

            }

            using (ZipInputStream s = new ZipInputStream(File.OpenRead(sourceFile)))

            {

                ZipEntry theEntry;

                while ((theEntry = s.GetNextEntry()) != null)

                {

                    string directorName = Path.Combine(targetPath, Path.GetDirectoryName(theEntry.Name));

                    string fileName = Path.Combine(directorName, Path.GetFileName(theEntry.Name));

                    // 创建目录

                    if (directorName.Length > 0)

                    {

                        Directory.CreateDirectory(directorName);

                    }

                    if (fileName != string.Empty)

                    {

                        using (FileStream streamWriter = File.Create(fileName))

                        {

                            int size = 4096;

                            byte[] data = new byte[ 4 * 1024];

                            while (true)

                            {

                                size = s.Read(data, 0, data.Length);

                                if (size > 0)

                                {

                                    streamWriter.Write(data, 0, size);

                                }

                                else break;

                            }

                        }

                    }

                }

            }

            return true;

        }
ZipEntry就没什么好说的了,都是一些属性,指示一下,实际用到的很少。
框架地址:http://www.icsharpcode.net/OpenSource/SharpZipLib/Download.aspx
C# 文件/文件夹压缩的更多相关文章
- 【C#公共帮助类】WinRarHelper帮助类,实现文件或文件夹压缩和解压,实战干货
关于本文档的说明 本文档使用WinRAR方式来进行简单的压缩和解压动作,纯干货,实际项目这种压缩方式用的少一点,一般我会使用第三方的压缩dll来实现,就如同我上一个压缩类博客,压缩的是zip文件htt ...
- SharpZipLib 文件/文件夹压缩
一.ZipFile ZipFile类用于选择文件或文件夹进行压缩生成压缩包. 常用属性: 属性 说明 Count 文件数目(注意是在ComitUpdat之后才有) Password 压缩包密码 Siz ...
- linux压缩文件(夹) zip uzip命令的用法
压缩文件(夹) # 压缩列举的文件,格式如下: zip 压缩包名称 文件1 文件2 文件3 ... # 压缩test.txt, a.out文件,并取名为abc.zip $ zip abc.zip te ...
- C#压缩、解压缩文件(夹)(rar、zip)
主要是使用Rar.exe压缩解压文件(夹)(*.rar),另外还有使用SevenZipSharp.dll.zLib1.dll.7z.dll压缩解压文件(夹)(*.zip).需要注意的几点如下: 1.注 ...
- 使用ICSharpZipLib将文件夹压缩为zip文件
序言: 在我接触Git和SVN之前,我最常用的保存数据的办法就是把文件夹压缩成一个zip文件,添加上时间戳.下面是我在学习C#的文件操作之后做的一个练习,使用开源的ICSharpZipLib来 ...
- C# 文件/文件夹压缩解压缩
项目上用到的,随手做个记录,哈哈. 直接上代码: using System; using System.Data; using System.Configuration; using System.C ...
- SharpCompress的压缩文件解压和文件夹压缩
1.前言 最近做一个功能需要用到对压缩文件的解压,就找到了这个SharpCompress不错,还能解压rar的文件.但是网上的资料和我拿到的SharpCompress.dll的方法有些出入,所以我就自 ...
- springMVC实现基本文件夹压缩下载功能
将文件夹压缩后下载: @Slf4j public class Test { private static final String BASE_PATH = "/root/doc/" ...
- C#文件或文件夹压缩和解压
C#文件或文件夹压缩和解压方法有很多,本文通过使用ICSharpCode.SharpZipLib.dll来进行压缩解压 1.新建一个winform项目,选择项目右键 管理NuGet程序包,搜索ICSh ...
随机推荐
- 2013第49周三IE9文档模式
今天完善了原有模块的代码和注释,然后继续之前新模块的开发,并写了两边的service接口,除了因为邮件中有部分问题让我分心外,专心下来写代码的感觉真好,今天基本上没遇到多少让我新感悟的技术问题,就总结 ...
- CDT+Eclipse代码自动提示
1.查看GCC的版本:$gcc -v————————————————————————gcc version 4.4.6 20110731 (Red Hat 4.4.6-3) (GCC)———————— ...
- MVC后台绑定dropdownList
public ActionResult Index() { List<SelectListItem> items = new List<Se ...
- 《Java程序员面试笔试宝典》之Static关键字有哪些作用
static关键字主要有两种作用:第一,只想为某特定数据类型或对象分配单一的存储空间,而与创建对象的个数无关.第二,希望某个方法或属性与类而不是对象关联在一起,也就是说,在不创建对象的情况下就可以通过 ...
- 【转】Linux系统性能分析命令
作为一名linux系统管理员,最主要的工作是优化系统配置,使应用在系统上以最优的状态运行,但是由于硬件问题.软件问题.网络环境等的复杂性和多变性,导致对系统的优化变得异常复杂,如何定位性能问题出在哪个 ...
- poj 2385 Apple Catching(dp)
Description It and ) in his field, each full of apples. Bessie cannot reach the apples when they are ...
- Hadoop集群启动之后,datanode节点未正常启动的问题
Hadoop集群启动之后,用JPS命令查看进程发现datanode节点上,只有TaskTracker进程.如下图所示 master的进程: 两个slave的节点进程 发现salve节点上竟然没有dat ...
- 1. GDAL与OpenCV2.X数据转换(适合多光谱和高光谱等多通道的遥感影像)
一.前言 GDAL具有强大的图像读写功能,但是对常用图像处理算法的集成较少,OpenCV恰恰具有较强的图像处理能力,因此有效的结合两者对图像(遥感影像)的处理带来了极大的方便.那么如何实现GDAL与o ...
- 微信网页授权获取code链接
本公众号授权 "https://open.weixin.qq.com/connect/oauth2/authorize?appid=" + appid + "&r ...
- startActivityForResult中回调setResult注意事项
读 http://www.cnblogs.com/lijunamneg/archive/2013/02/05/2892616.html 有感 文中提出了一个核心问题: Android activity ...