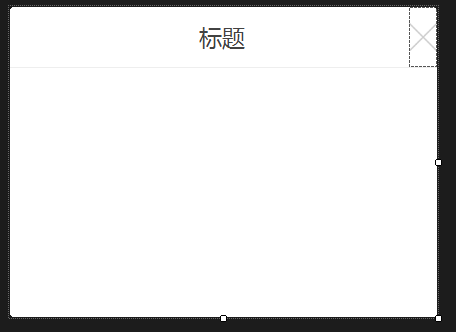
(二十四)c#Winform自定义控件-单标题窗体
官网
前提
入行已经7,8年了,一直想做一套漂亮点的自定义控件,于是就有了本系列文章。
GitHub:https://github.com/kwwwvagaa/NetWinformControl
码云:https://gitee.com/kwwwvagaa/net_winform_custom_control.git
如果觉得写的还行,请点个 star 支持一下吧
欢迎前来交流探讨: 企鹅群568015492 idkey=6e08741ef16fe53bf0314c1c9e336c4f626047943a8b76bac062361bab6b4f8d">
目录
https://www.cnblogs.com/bfyx/p/11364884.html
准备工作
这个窗体继承子基类窗体FrmBase,如果你对FrmBase还不了解,请移步 (十七)c#Winform自定义控件-基类窗体 查看
开始
添加Form,命名FrmWithTitle,继承自FrmBase
代码较少,直接全部代码
 // 版权所有  黄正辉  交流群:568015492   QQ:623128629

 // 文件名称:FrmWithTitle.cs

 // 创建日期:2019-08-15 16:05:30

 // 功能描述:FrmWithTitle

 // 项目地址:https://gitee.com/kwwwvagaa/net_winform_custom_control

 using System;

 using System.Collections.Generic;

 using System.ComponentModel;

 using System.Data;

 using System.Drawing;

 using System.Linq;

 using System.Text;

 using System.Windows.Forms;

 namespace HZH_Controls.Forms

 {

     [Designer("System.Windows.Forms.Design.ParentControlDesigner, System.Design", typeof(System.ComponentModel.Design.IDesigner))]

     public partial class FrmWithTitle : FrmBase

     {

         [Description("窗体标题"), Category("自定义")]

         public string Title

         {

             get

             {

                 return lblTitle.Text;

             }

             set

             {

                 lblTitle.Text = value;

             }

         }

         private bool _isShowCloseBtn = false;

         [Description("是否显示右上角关闭按钮"), Category("自定义")]

         public bool IsShowCloseBtn

         {

             get

             {

                 return _isShowCloseBtn;

             }

             set

             {

                 _isShowCloseBtn = value;

                 btnClose.Visible = value;

                 if (value)

                 {

                     btnClose.Location = new Point(this.Width - btnClose.Width - , );

                     btnClose.BringToFront();

                 }

             }

         }

         public FrmWithTitle()

         {

             InitializeComponent();

         }

         private void btnClose_MouseDown(object sender, MouseEventArgs e)

         {

             this.Close();

         }

         private void FrmWithTitle_Shown(object sender, EventArgs e)

         {

             if (IsShowCloseBtn)

             {

                 btnClose.Location = new Point(this.Width - btnClose.Width - , );

                 btnClose.BringToFront();

             }

         }

         private void btnClose_MouseDown_1(object sender, MouseEventArgs e)

         {

             this.Close();

         }

         private void FrmWithTitle_VisibleChanged(object sender, EventArgs e)

         {

         }

     }

 }
 namespace HZH_Controls.Forms

 {

     partial class FrmWithTitle

     {

         /// <summary>

         /// Required designer variable.

         /// </summary>

         private System.ComponentModel.IContainer components = null;

         /// <summary>

         /// Clean up any resources being used.

         /// </summary>

         /// <param name="disposing">true if managed resources should be disposed; otherwise, false.</param>

         protected override void Dispose(bool disposing)

         {

             if (disposing && (components != null))

             {

                 components.Dispose();

             }

             base.Dispose(disposing);

         }

         #region Windows Form Designer generated code

         /// <summary>

         /// Required method for Designer support - do not modify

         /// the contents of this method with the code editor.

         /// </summary>

         private void InitializeComponent()

         {

             System.ComponentModel.ComponentResourceManager resources = new System.ComponentModel.ComponentResourceManager(typeof(FrmWithTitle));

             this.lblTitle = new System.Windows.Forms.Label();

             this.ucSplitLine_H1 = new HZH_Controls.Controls.UCSplitLine_H();

             this.btnClose = new System.Windows.Forms.Panel();

             this.SuspendLayout();

             //

             // lblTitle

             //

             this.lblTitle.BackColor = System.Drawing.Color.Transparent;

             this.lblTitle.Dock = System.Windows.Forms.DockStyle.Top;

             this.lblTitle.Font = new System.Drawing.Font("微软雅黑", 17F);

             this.lblTitle.Location = new System.Drawing.Point(, );

             this.lblTitle.Name = "lblTitle";

             this.lblTitle.Size = new System.Drawing.Size(, );

             this.lblTitle.TabIndex = ;

             this.lblTitle.Text = "标题";

             this.lblTitle.TextAlign = System.Drawing.ContentAlignment.MiddleCenter;

             //

             // ucSplitLine_H1

             //

             this.ucSplitLine_H1.BackColor = System.Drawing.Color.FromArgb(((int)(((byte)()))), ((int)(((byte)()))), ((int)(((byte)()))));

             this.ucSplitLine_H1.Dock = System.Windows.Forms.DockStyle.Top;

             this.ucSplitLine_H1.Location = new System.Drawing.Point(, );

             this.ucSplitLine_H1.Name = "ucSplitLine_H1";

             this.ucSplitLine_H1.Size = new System.Drawing.Size(, );

             this.ucSplitLine_H1.TabIndex = ;

             this.ucSplitLine_H1.TabStop = false;

             //

             // btnClose

             //

             this.btnClose.Anchor = ((System.Windows.Forms.AnchorStyles)((System.Windows.Forms.AnchorStyles.Top | System.Windows.Forms.AnchorStyles.Right)));

             this.btnClose.BackgroundImage = global::HZH_Controls.Properties.Resources.dialog_close;

             this.btnClose.BackgroundImageLayout = System.Windows.Forms.ImageLayout.Zoom;

             this.btnClose.Location = new System.Drawing.Point(, );

             this.btnClose.MaximumSize = new System.Drawing.Size(, );

             this.btnClose.Name = "btnClose";

             this.btnClose.Size = new System.Drawing.Size(, );

             this.btnClose.TabIndex = ;

             this.btnClose.Visible = false;

             this.btnClose.MouseDown += new System.Windows.Forms.MouseEventHandler(this.btnClose_MouseDown_1);

             //

             // FrmWithTitle

             //

             this.AutoScaleMode = System.Windows.Forms.AutoScaleMode.None;

             this.BackColor = System.Drawing.Color.White;

             this.ClientSize = new System.Drawing.Size(, );

             this.Controls.Add(this.btnClose);

             this.Controls.Add(this.ucSplitLine_H1);

             this.Controls.Add(this.lblTitle);

             this.Icon = ((System.Drawing.Icon)(resources.GetObject("$this.Icon")));

             this.IsFullSize = false;

             this.IsShowMaskDialog = true;

             this.IsShowRegion = true;

             this.Name = "FrmWithTitle";

             this.Redraw = true;

             this.ShowIcon = false;

             this.ShowInTaskbar = false;

             this.Text = "FrmWithTitle";

             this.Shown += new System.EventHandler(this.FrmWithTitle_Shown);

             this.VisibleChanged += new System.EventHandler(this.FrmWithTitle_VisibleChanged);

             this.ResumeLayout(false);

         }

         #endregion

         private System.Windows.Forms.Label lblTitle;

         private Controls.UCSplitLine_H ucSplitLine_H1;

         private System.Windows.Forms.Panel btnClose;

     }

 }
用处及效果
最后的话
如果你喜欢的话,请到 https://gitee.com/kwwwvagaa/net_winform_custom_control 点个星 星吧
(二十四)c#Winform自定义控件-单标题窗体的更多相关文章
- (二十)c#Winform自定义控件-有后退的窗体
前提 入行已经7,8年了,一直想做一套漂亮点的自定义控件,于是就有了本系列文章. 开源地址:https://gitee.com/kwwwvagaa/net_winform_custom_control ...
- (二十七)c#Winform自定义控件-多输入窗体
前提 入行已经7,8年了,一直想做一套漂亮点的自定义控件,于是就有了本系列文章. 开源地址:https://gitee.com/kwwwvagaa/net_winform_custom_control ...
- Bootstrap<基础二十四> 缩略图
Bootstrap 缩略图.大多数站点都需要在网格中布局图像.视频.文本等.Bootstrap 通过缩略图为此提供了一种简便的方式.使用 Bootstrap 创建缩略图的步骤如下: 在图像周围添加带有 ...
- (C/C++学习笔记) 二十四. 知识补充
二十四. 知识补充 ● 子类调用父类构造函数 ※ 为什么子类要调用父类的构造函数? 因为子类继承父类,会继承到父类中的数据,所以子类在进行对象初始化时,先调用父类的构造函数,这就是子类的实例化过程. ...
- 学习笔记:CentOS7学习之二十四:expect-正则表达式-sed-cut的使用
目录 学习笔记:CentOS7学习之二十四:expect-正则表达式-sed-cut的使用 24.1 expect实现无交互登录 24.1.1 安装和使用expect 24.2 正则表达式的使用 24 ...
- 二十四、Struts2中的UI标签
二十四.Struts2中的UI标签 Struts2中UI标签的优势: 数据回显 页面布局和排版(Freemark),struts2提供了一些常用的排版(主题:xhtml默认 simple ajax) ...
- WCF技术剖析之二十四: ServiceDebugBehavior服务行为是如何实现异常的传播的?
原文:WCF技术剖析之二十四: ServiceDebugBehavior服务行为是如何实现异常的传播的? 服务端只有抛出FaultException异常才能被正常地序列化成Fault消息,并实现向客户 ...
- VMware vSphere 服务器虚拟化之二十四 桌面虚拟化之手动池管理物理机
VMware vSphere 服务器虚拟化之二十四 桌面虚拟化之手动池管理物理机 VMwareView手动池可以管理物理计算机 说明: 环境基于实验二十三 1.准备一台Windows 7的物理计算机名 ...
- Bootstrap入门(二十四)data属性
Bootstrap入门(二十四)data属性 你可以仅仅通过 data 属性 API 就能使用所有的 Bootstrap 插件,无需写一行 JavaScript 代码.这是 Bootstrap 中的一 ...
随机推荐
- 基于SpringCloud的微服务架构实战案例项目,以一个简单的购物流程为示例
QuickStart 基于SpringCloud体系实现,简单购物流程实现,满足基本功能:注册.登录.商品列表展示.商品详情展示.订单创建.详情查看.订单支付.库存更新等等. 每个业务服务采用独立的M ...
- ESXI好好研究
之前几周在公司要搭建一个平台,因为服务器不够用,所以需要要一台服务器上装虚拟机.有人说用ESXI装虚拟机,并且不用装操作系统,我当时还纳闷儿了,不装操作系统,直接装虚机?这里我有点孤陋寡闻了,其实ES ...
- redis集群(单机6节点实现)
Redis集群搭建与简单使用 1.介绍安装环境与版本: 1)Redis使用的是Redis-3.2.8版本. 2)用一台虚拟机模拟6个节点,三个master节点,三个slave节点.虚拟机使用CentO ...
- Java 类加载之匿名类和主类相互依赖问题
Qestion /** * ClassInitializedOrder for : Java Classload Order Test * * @author <a href="mai ...
- panic: time: missing Location in call to Time.In
docker容器发布go项目出现以下问题: panic: time: missing Location in call to Time.In COPY --from=build /usr/share/ ...
- redis 发布与订阅原理分析
前言:用了redis也有一段时间了,但是发布与订阅的使用频率也不高,趁着这次空闲,深究下redis的发布与订阅模式. 一.订阅频道和信息发布 功能说明:Redis 的 SUBSCRIBE 命令可以让客 ...
- C#3.0新增功能09 LINQ 基础03 LINQ 和泛型类型
连载目录 [已更新最新开发文章,点击查看详细] LINQ 查询基于 .NET Framework 版本 2.0 中引入的泛型类型. 无需深入了解泛型即可开始编写查询. 但是,可能需要了解 2 个 ...
- 实现通过COM组件方式实现java调用C#写的DLL文件的完整demo
最近因为工作需要,客户那边工程师使用的是JAVA语言开发的程序,我们这边平台中是用C#语言开发的,因为有些操作必须统一,所以我在网上查找解决方法,自己也实践过,在这里做个笔记吧,分享一下. 声明:下面 ...
- Java秒杀系统实战系列~构建SpringBoot多模块项目
摘要:本篇博文是“Java秒杀系统实战系列文章”的第二篇,主要分享介绍如何采用IDEA,基于SpringBoot+SpringMVC+Mybatis+分布式中间件构建一个多模块的项目,即“秒杀系统”! ...
- 使用Docker运行SQL Server
现在.net core已经跨平台了,大家也都用上了linux用上了docker.跟.net经常配套使用的SQL SERVER以前一直是windows only,但是从SQL Server 2017开始 ...