
nginx+apache动静分离/负载均衡
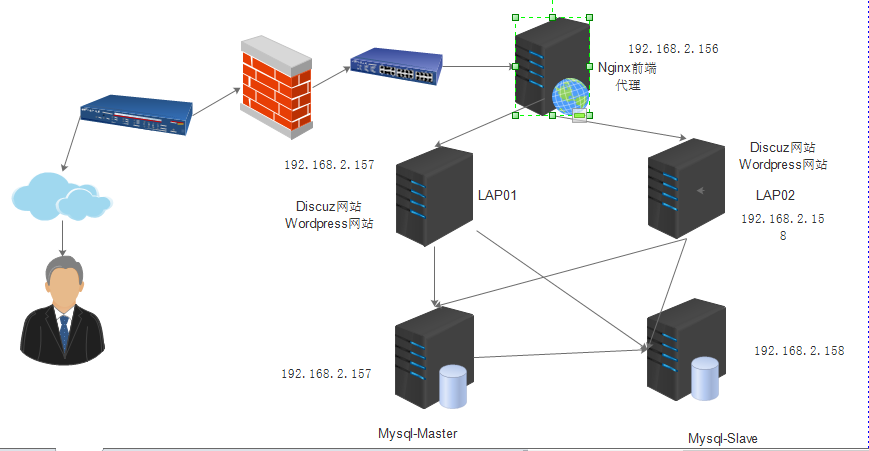
【主从】
【Mysql-Master】

log-bin=mysql-bin

server-id =

MariaDB [(none)]> grant replication slave on *.* to 'slave'@'192.168.2.158' identified by '123.com';

MariaDB [(none)]> flush privileges;

MariaDB [(none)]> show master status;

+------------------+----------+--------------+------------------+

| File | Position | Binlog_Do_DB | Binlog_Ignore_DB |

+------------------+----------+--------------+------------------+

| mysql-bin. |  | | |

+------------------+----------+--------------+------------------+

【Mysql-slave】

server-id =

MariaDB [(none)]> slave stop;

Query OK,  rows affected,  warning (0.00 sec)

MariaDB [(none)]> change master to

-> master_host='192.168.2.157',

-> master_user='slave',

-> master_password='123.com',

-> master_log_file='mysql-bin.000001',

-> master_log_pos=;

Query OK,  rows affected (0.09 sec)

MariaDB [(none)]> slave start;

Query OK,  rows affected (0.00 sec)
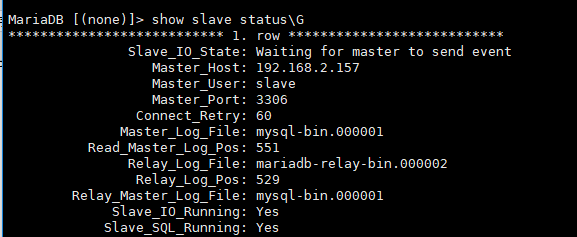
主从成功~
【两台服务器站点虚拟主机配置】
# vim /etc/httpd/conf/httpd.conf
ServerRoot "/etc/httpd"

Listen

AddType     application/x-httpd-php  .php

Include conf.modules.d/*.conf

User apache

Group apache

ServerAdmin root@localhost

<Directory />

    AllowOverride none

    Require all denied

</Directory>

DocumentRoot "/var/www/html"

<Directory "/var/www">

    AllowOverride None

    Require all granted

</Directory>

<Directory "/var/www/html">

    Options Indexes FollowSymLinks

    AllowOverride None

    Require all granted

</Directory>

<IfModule dir_module>

    DirectoryIndex index.php index.html

</IfModule>

<Files ".ht*">

    Require all denied

</Files>

ErrorLog "logs/error_log"

LogLevel warn

<IfModule log_config_module>

    LogFormat "%h %l %u %t \"%r\" %>s %b \"%{Referer}i\" \"%{User-Agent}i\"" combined

    LogFormat "%h %l %u %t \"%r\" %>s %b" common

    <IfModule logio_module>

      LogFormat "%h %l %u %t \"%r\" %>s %b \"%{Referer}i\" \"%{User-Agent}i\" %I %O" combinedio

    </IfModule>

    CustomLog "logs/access_log" combined

</IfModule>

<IfModule alias_module>

    ScriptAlias /cgi-bin/ "/var/www/cgi-bin/"

</IfModule>

<Directory "/var/www/cgi-bin">

    AllowOverride None

    Options None

    Require all granted

</Directory>

<IfModule mime_module>

    TypesConfig /etc/mime.types

    AddType application/x-compress .Z

    AddType application/x-gzip .gz .tgz

    AddType text/html .shtml

    AddOutputFilter INCLUDES .shtml

</IfModule>

AddDefaultCharset UTF-8

<IfModule mime_magic_module>

    MIMEMagicFile conf/magic

</IfModule>

EnableSendfile on

IncludeOptional conf.d/*.conf

Include  conf/vhosts.conf
mkdir -p /var/www/html/dz.bxy.net/
mkdir -p /var/www/html/wps.bxy.net/
#vim /etc/httpd/conf/vhosts.conf
<VirtualHost *:>

    ServerAdmin admin@amsilence.com

    DocumentRoot "/var/www/html/dz.bxy.net/"

    ServerName dz.bxy.net

    ErrorLog "/etc/httpd/logs/www-error_log"

    CustomLog "/etc/httpd/logs/www-access_log" common

</VirtualHost>

NameVirtualHost *:

<VirtualHost *:>

    ServerAdmin admin@amsilence.com

    DocumentRoot "/var/www/html/wps.bxy.net"

    ServerName wps.bxy.net

    ErrorLog "/etc/httpd/logs/www-error_log"

    CustomLog "/etc/httpd/logs/www-access_log" common

</VirtualHost>
192.168.2.157站点
【Discuz和workpress部署】
# cd /var/www/html/
#wget http://download.comsenz.com/DiscuzX/3.1/Discuz_X3.1_SC_UTF8.zip
#wget https://cn.wordpress.org/wordpress-4.9.4-zh_CN.tar.gz
#unzip Discuz_X3.1_SC_UTF8.zip -d Discuz/
[root@localhost Discuz]# mv upload/* .
[root@localhost Discuz]# chmod o+x uc_server/ config/ uc_client/
MariaDB [(none)]> create database DiscuzDB charset=utf8;
MariaDB [(none)]> grant all on DiscuzDB.* to 'discuz'@'%' identified by '123.com';
MariaDB [(none)]> flush privileges
hosts解析:因为要通过域名连接数据库地址,那么我们需要将数据库的IP地址和自定义域名解析



【wordpress网站部署】
#tar zxvf wordpress-4.9.4-zh_CN.tar.gz -C wordpress/

【数据库授权】
MariaDB [(none)]> create database wpsDB charset=utf8;
MariaDB [(none)]> grant all on *.* to 'wpsuser'@'%' identified by '123.com';
MariaDB [(none)]> flush privileges;
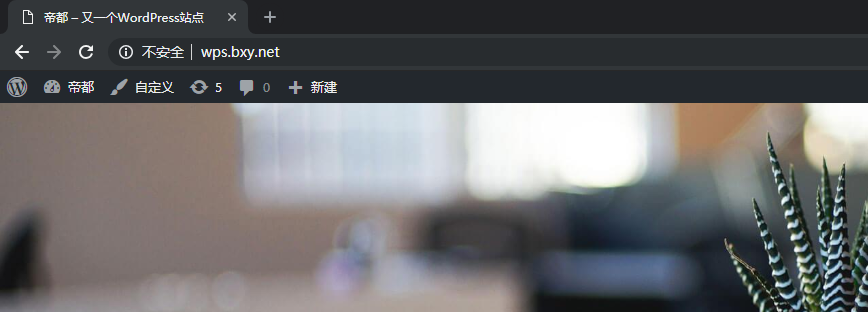
host解析:我们将wordpress域名解析到2.157主库ip地址跟后面即可

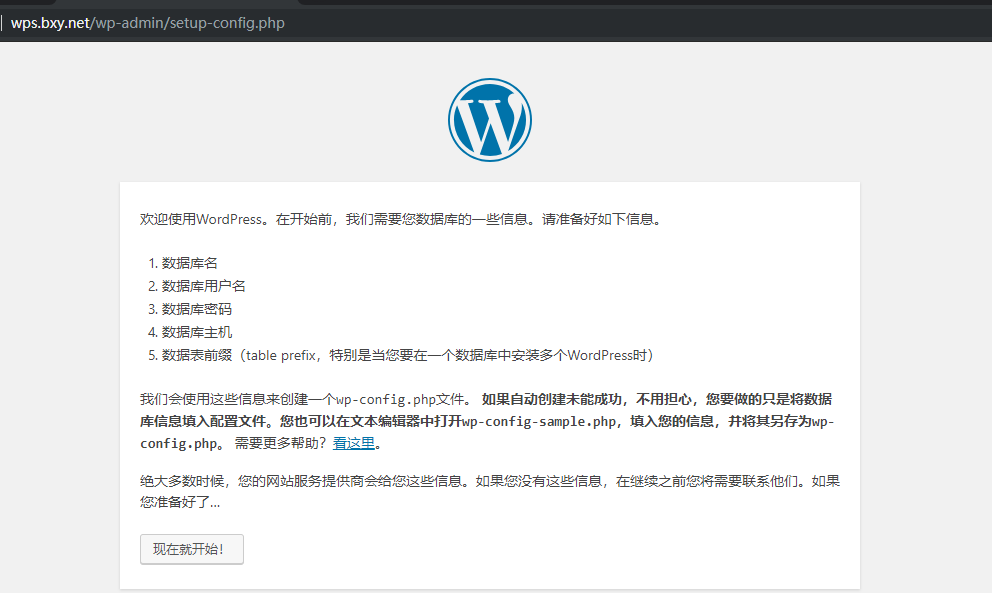
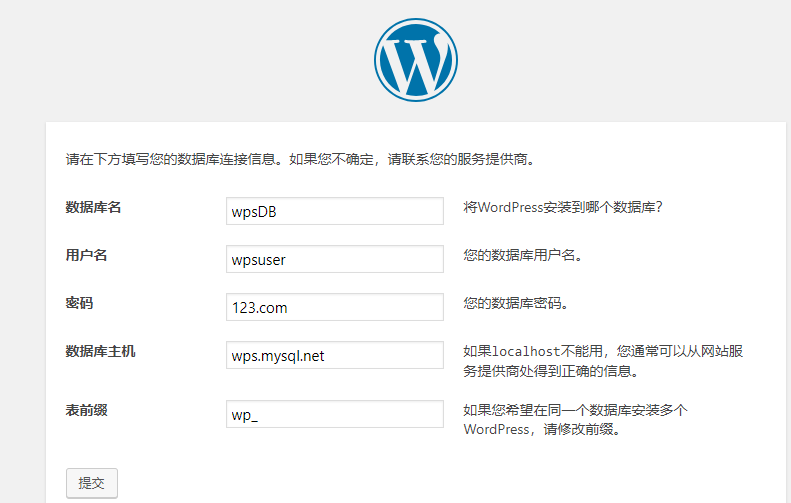

[root@lamp-master wps.bxy.net]# vim wp-config.php
<?php

/**

 * WordPress基础配置文件。

 *

 * 这个文件被安装程序用于自动生成wp-config.php配置文件,

 * 您可以不使用网站,您需要手动复制这个文件,

 * 并重命名为“wp-config.php”,然后填入相关信息。

 *

 * 本文件包含以下配置选项:

 *

 * * MySQL设置

 * * 密钥

 * * 数据库表名前缀

 * * ABSPATH

 *

 * @link https://codex.wordpress.org/zh-cn:%E7%BC%96%E8%BE%91_wp-config.php

 *

 * @package WordPress

 */

// ** MySQL 设置 - 具体信息来自您正在使用的主机 ** //

/** WordPress数据库的名称 */

define('DB_NAME', 'wpsDB');

/** MySQL数据库用户名 */

define('DB_USER', 'wpsuser');

/** MySQL数据库密码 */

define('DB_PASSWORD', '123.com');

/** MySQL主机 */

define('DB_HOST', 'wps.mysql.net');

/** 创建数据表时默认的文字编码 */

define('DB_CHARSET', 'utf8mb4');

/** 数据库整理类型。如不确定请勿更改 */

define('DB_COLLATE', '');

/**#@+

 * 身份认证密钥与盐。

 *

 * 修改为任意独一无二的字串!

 * 或者直接访问{@link https://api.wordpress.org/secret-key/1.1/salt/

 * WordPress.org密钥生成服务}

 * 任何修改都会导致所有cookies失效,所有用户将必须重新登录。

 *

 * @since 2.6.0

 */

define('AUTH_KEY',         'kXeW~n6gq[_u;k=49+z=Am9a15F@D)|?8~SKt(A0K,^!U/u4yOvb ]6J._LJ!KPg');

define('SECURE_AUTH_KEY',  'ui|@1SGGC!Wpi)lMdBuh^~.ueevR$ar]B_X8#|&&U.z4YGH02RVSK(`8X2hho)Xm');

define('LOGGED_IN_KEY',    'cd)V9bEPLk4|Q=Z<Ri_Sfp*nvg/Ui+BgHXGL./o@AUP!dMRE=PYV7nJ_&ijK*#y~');

define('NONCE_KEY',        ':-sd O<^pJvN. ;:SuxaSx5kd%W`.Y.z_xN6Nc@zhz&d_^SM*X4(K@&;aQo2wAko');

define('AUTH_SALT',        'O[@Bx|zqp@7{^NF2Q,N6y4d]9&|+Qy$qB6zknzm4tkiOqa4Si5;)/lst@&;!r8%;');

define('SECURE_AUTH_SALT', '~ r8gh?MF$I-)I~9kCC0>p(|nx7vF34<^ZN~AS~lb1Tzx-0SEvf3V1vi0+kQS#>_');

define('LOGGED_IN_SALT',   '-CgDBdxb$N9Kw:MI+>c5WUxW,W141KP-6/tDV!I5s]m/H:#ltw(dP?0Ar]0cz]Yw');

define('NONCE_SALT',       'ze9RdLoKcC-Bsl%<n6VjzDVz#Gu(h&t ^UkuqIpAz<$kN.7Cm|4p|{!Cyg[lOia;');

/**#@-*/

/**

 * WordPress数据表前缀。

 *

 * 如果您有在同一数据库内安装多个WordPress的需求,请为每个WordPress设置

 * 不同的数据表前缀。前缀名只能为数字、字母加下划线。

 */

$table_prefix  = 'wp_';

/**

 * 开发者专用:WordPress调试模式。

 *

 * 将这个值改为true,WordPress将显示所有用于开发的提示。

 * 强烈建议插件开发者在开发环境中启用WP_DEBUG。

 *

 * 要获取其他能用于调试的信息,请访问Codex。

 *

 * @link https://codex.wordpress.org/Debugging_in_WordPress

 */

define('WP_DEBUG', false);

/**

 * zh_CN本地化设置:启用ICP备案号显示

 *

 * 可在设置→常规中修改。

 * 如需禁用,请移除或注释掉本行。

 */

define('WP_ZH_CN_ICP_NUM', true);

/* 好了!请不要再继续编辑。请保存本文件。使用愉快! */

/** WordPress目录的绝对路径。 */

if ( !defined('ABSPATH') )

    define('ABSPATH', dirname(__FILE__) . '/');

/** 设置WordPress变量和包含文件。 */

require_once(ABSPATH . 'wp-settings.php');
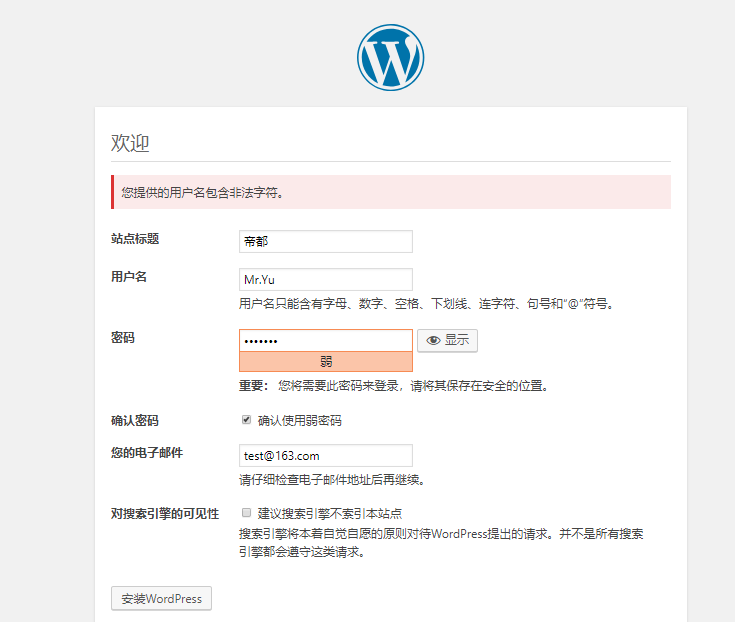
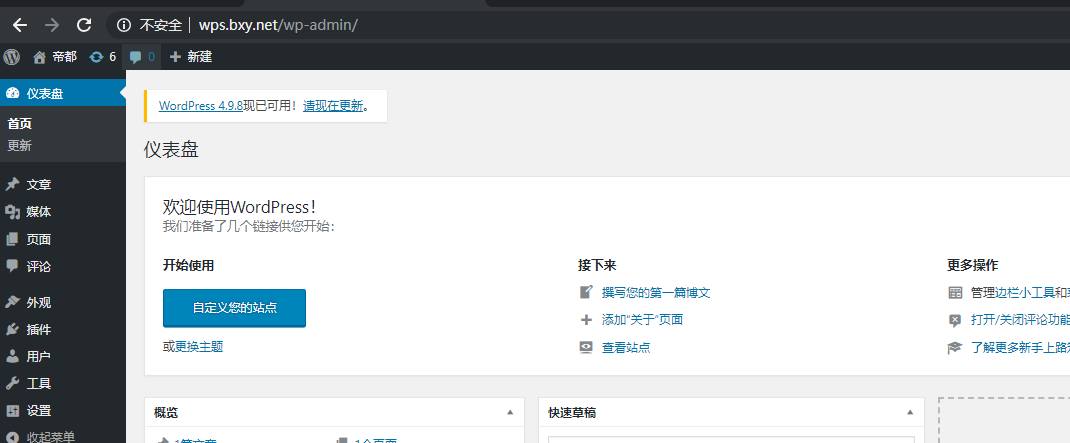
到此为止,2.157服务器上的两个网站已经全部发布完成,接下来,将该站点上的内容全部同步到2.158上,为后续的负载均衡做准备
rsync -aP --delete /var/www/html/dz.bxy.net/ root@192.168.2.158:/var/www/html/dz.bxy.net/
rsync -aP --delete /var/www/html/wps.bxy.net/ root@192.168.2.158:/var/www/html/wps.bxy.net/
同理2.158也需要做本地hosts域名解析

两条命令搞定,2.158只需要将httpp虚机主机搭建起来,配置好与之相同的虚拟主机即可,然后将2.157部署的好网站源码同步过去即可,不需要重新解压~
【Nginx前端负载均衡+动静分离】
user nginx;

worker_processes auto;

error_log /var/log/nginx/error.log;

pid /run/nginx.pid;

include /usr/share/nginx/modules/*.conf;

events {

    worker_connections 1024;

}

http {

    log_format  main  '$remote_addr - $remote_user [$time_local] "$request" '

                      '$status $body_bytes_sent "$http_referer" '

                      '"$http_user_agent" "$http_x_forwarded_for"';

    access_log  /var/log/nginx/access.log  main;

    sendfile            on;

    tcp_nopush          on;

    tcp_nodelay         on;

    keepalive_timeout   65;

    types_hash_max_size 2048;

    include             /etc/nginx/mime.types;

    default_type        application/octet-stream;

    include /etc/nginx/conf.d/*.conf;

    server {

        listen       80 default_server;

        listen       [::]:80 default_server;

        server_name  _;

        root         /usr/share/nginx/html;

        include /etc/nginx/default.d/*.conf;

        location / {

        }

        error_page 404 /404.html;

            location = /40x.html {

        }

        error_page 500 502 503 504 /50x.html;

            location = /50x.html {

        }

    }

include vhosts/*.conf;

}
[root@dz nginx]# mkdir -p /etc/nginx/vhosts/
[root@dz nginx]# egrep -v "#|^$" /etc/nginx/vhosts/upstream.conf

upstream httpd_webapp{

    server 192.168.2.157;

    server 192.168.2.158;

}
[root@dz nginx]# egrep -v "#|^$" /etc/nginx/vhosts/wps.conf

server {

listen ;

server_name wps.bxy.net;

location /  {

proxy_set_header Host $host;

proxy_set_header X-Real-IP $remote_addr;

proxy_set_header X-Forwarded-For $proxy_add_x_forwarded_for;

proxy_pass http://httpd_webapp;

              }

location ~ .*\.(html|htm|gif|jpg|jpeg|bmp|png|ico|txt|js|css)$ {

       root /var/www/html/wps.bxy.net;

      expires 3d;

}

}
[root@dz nginx]# egrep -v "#|^$" /etc/nginx/vhosts/dz.conf

server {

listen ;

server_name dz.bxy.net;

location /  {

proxy_set_header Host $host;

proxy_set_header X-Real-IP $remote_addr;

proxy_set_header X-Forwarded-For $proxy_add_x_forwarded_for;

proxy_pass http://httpd_webapp;

              }

location ~ .*\.(html|htm|gif|jpg|jpeg|bmp|png|ico|txt|js|css)$ {

       root /var/www/html/dz.bxy.net;

      expires 3d;

}

}

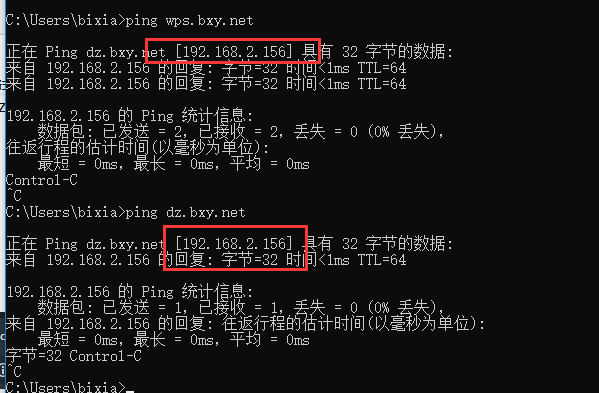
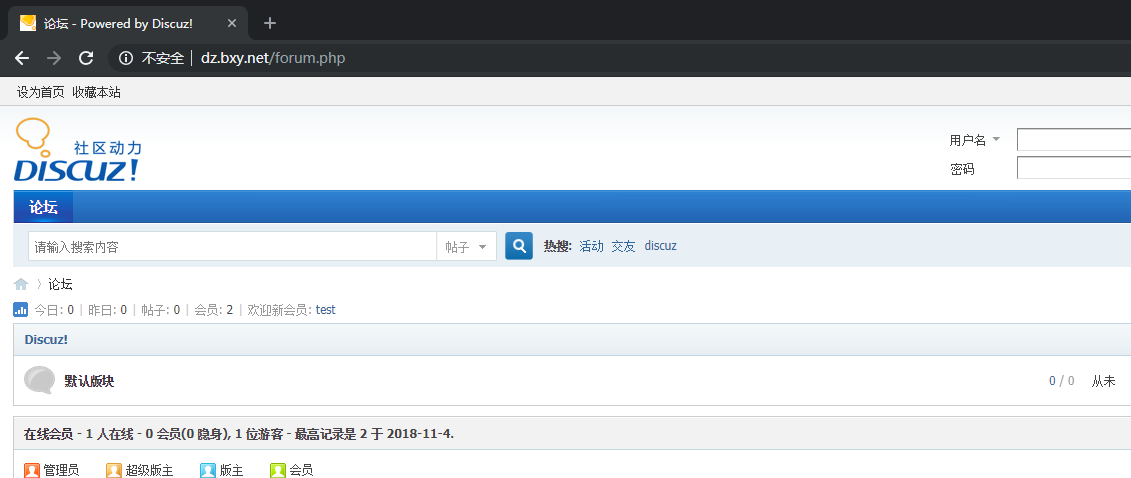
nginx+apache动静分离/负载均衡的更多相关文章
- Nginx网络架构实战学习笔记(三):nginx gzip压缩提升网站速度、expires缓存提升网站负载、反向代理实现nginx+apache动静分离、nginx实现负载均衡
文章目录 nginx gzip压缩提升网站速度 expires缓存提升网站负载 反向代理实现nginx+apache动静分离 nginx实现负载均衡 nginx gzip压缩提升网站速度 网页内容的压 ...
- 15 nginx反向代理实现nginx+apache动静分离
一:nginx反向代理实现nginx+apache动静分离-------------概念--------------------------- nginx反向代理服务器+负载均衡 用nginx做反向代 ...
- Nginx+Apache动静分离
Nginx的静态处理能力很强,但是动态处理能力不足,因此,在企业中常用动静分离技术.动静分离技术其实是采用代理的方式,在server{}段中加入带正则匹配的location来指定匹配项 针对PHP的动 ...
- Nginx动静分离负载均衡
前期准备 使用Debian环境.安装Nginx(默认安装),一个web项目,安装tomcat(默认安装)等. Nginx.conf配置 # 定义Nginx运行的用户 和 用户组 如果对应服务器暴露在外 ...
- [nginx] - 使用nginx实现反向代理,动静分离,负载均衡,session共享
反向代理概念 先说正向代理,比如要访问youtube,但是不能直接访问,只能先找个FQ软件,通过FQ软件才能访问youtube. FQ软件就叫做正向代理.所谓的反向代理,指的是用户要访问youtube ...
- Nginx 笔记与总结(15)nginx 实现反向代理 ( nginx + apache 动静分离)
在 nginx 中,proxy 用来实现反向代理,upstream 用来实现负载均衡. 例如有两台服务器,nginx 服务器作为代理服务器,执行 .html 文件,apache 服务器上执行 .php ...
- 使用nginx实现动静分离的负载均衡集群
一.概述: LB负载均衡集群分两类: LVS (四层)和 nginx或haproxy (七层) 客户端通过访问分发器的VIP来访问网站 |现在应用更复杂,比如现在网站页面有: .php .html . ...
- nginx反向代理,负载均衡,动静分离,rewrite地址重写介绍
一.rewrite地址重写 地址转发后客户端浏览器地址栏中的地址显示是不变的,而地址重写后地址栏中的地址会变成正确的地址. 在一次地址转发过程中只会产生一次网络请求,而一次地址重写产生两次请求. 地址 ...
- Nginx+Tomcat+Redis实现负载均衡、资源分离、session共享
Nginx+Tomcat+Redis实现负载均衡.资源分离.session共享 CentOS安装Nginx http://centoscn.com/CentosServer/www/2013/0910 ...
随机推荐
- [洛谷P4234] 最小差值生成树
题目类型:\(LCT\)动态维护最小生成树 传送门:>Here< 题意:求一棵生成树,其最大边权减最小边权最小 解题思路 和魔法森林非常像.先对所有边进行排序,每次加边的时候删除环上的最小 ...
- 【系统】libevent库学习
Libevent库 是一个用C语言开发的.轻量级的开源高性能事件通知库,主要功能特点如下: 事件驱动(event-driven),高性能; 注册事件分优先级: 支持 I/O,定时器和信号等事件信息: ...
- Python网络编程(3)——SocketServer模块与简单并发服务器
主要类型 该模块有四个比较主要的类,其中常用的是 TCPServer 和 UDPServer. 1. TCPServer 2. UDPServer 3. UnixStreamServer,类似于TCP ...
- Excel将一列数据变为两列
如下表可将第一列分散到第二列和第三列 A B C 1 =OFFSET($A$1,(ROW(A1)-1)*2+COLUMN(A1)-1,) &"" =OFFSET($A$2, ...
- wp系统笔记
1.了解了justified-image-grid是wp插件,继而查看wp,wp是一个免费建站系统.内置主题和插件.博客,CMS,企业站等.php+mysql 环境至少5.0以上 2.在zh-word ...
- Springboot 4.Springboot 集成SwaggerUi
SwaggerUi就是自动生成接口文档的这么一个类似于插件的工具,可以直接访问接口. 首先打开pom文件,将插件引进来,然后增加一个属性<properties>,用来设置版本号的,然后直接 ...
- 转:Mac操作技巧 | "键盘侠"必备快捷键
看到一篇网友整理的比较好的“Mac操作技巧 | "键盘侠"必备快捷键”,转载过来分享给大家!希望能有帮助. 更多专题,可关注小编[磨人的小妖精],查看我的文章,也可上[风云社区 S ...
- 基于USB网卡适配器劫持DHCP Server嗅探Windows NTLM Hash密码
catalogue . DHCP.WPAD工作过程 . python Responder . USB host/client adapter(USB Armory): 包含DHCP Server . ...
- SpringBoot项目@RestController使用 redirect 重定向无效
Spring MVC项目中页面重定向一般使用return "redirect:/other/controller/";即可. 而Spring Boot当我们使用了@RestCont ...
- Fiddler--Filters
本篇主要介绍Fiddler中Filters(过滤器)选项功能. 先看看Filters的界面: 一.模块一 当勾选“Use Filters”,Filters才开始工作:否则Filters中的设置内容将无 ...