Nginx - 安装并启动Nginx
1 - 安装Nginx
官网步骤:http://nginx.org/en/linux_packages.html#RHEL-CentOS
[Anliven@h202 ~]$ sudo vim /etc/yum.repos.d/nginx.repo

[Anliven@h202 ~]$

[Anliven@h202 ~]$ cat /etc/yum.repos.d/nginx.repo

[nginx-stable]

name=nginx stable repo

baseurl=http://nginx.org/packages/centos/$releasever/$basearch/

gpgcheck=1

enabled=1

gpgkey=https://nginx.org/keys/nginx_signing.key

module_hotfixes=true

[nginx-mainline]

name=nginx mainline repo

baseurl=http://nginx.org/packages/mainline/centos/$releasever/$basearch/

gpgcheck=1

enabled=0

gpgkey=https://nginx.org/keys/nginx_signing.key

module_hotfixes=true

[Anliven@h202 ~]$

[Anliven@h202 ~]$ sudo yum -y install nginx

Loaded plugins: fastestmirror, langpacks

Determining fastest mirrors

 * base: mirrors.aliyun.com

 * extras: mirrors.163.com

 * updates: mirror.bit.edu.cn

......

......

......

  Verifying  : 1:nginx-1.16.1-1.el7.ngx.x86_64                                           1/1

Installed:

  nginx.x86_64 1:1.16.1-1.el7.ngx

Complete!

[Anliven@h202 ~]$
2 - 配置Nginx
2.1 修改默认配置
配置文件: /etc/nginx/conf.d/default.conf
[Anliven@h202 ~]$ cd /etc/nginx/conf.d/

[Anliven@h202 conf.d]$ pwd

/etc/nginx/conf.d

[Anliven@h202 conf.d]$ ll

total 4

-rw-r--r-- 1 root root 1093 Aug 13 23:02 default.conf

[Anliven@h202 conf.d]$

[Anliven@h202 conf.d]$ sudo vim default.conf

[Anliven@h202 conf.d]$ cat default.conf |grep -v "#" |grep -Ev "^$"

server {

    listen       80;

    server_name  192.168.16.202;

    location / {

        root   /usr/share/nginx/html;

        index  index.html index.htm;

    }

    location = /favicon.ico {

        log_not_found off;

        access_log off;

    }

    error_page   500 502 503 504  /50x.html;

    location = /50x.html {

        root   /usr/share/nginx/html;

    }

}

[Anliven@h202 conf.d]$
2.2 修改Nginx配置文件
/etc/nginx/nginx.conf中user参数,修改为root
[Anliven@h202 ~]$ sudo vim /etc/nginx/nginx.conf

[Anliven@h202 ~]$

[Anliven@h202 ~]$ cat /etc/nginx/nginx.conf  |grep -v "#" |grep -Ev "^$"

user  root;

worker_processes  1;

error_log  /var/log/nginx/error.log warn;

pid        /var/run/nginx.pid;

events {

    worker_connections  1024;

}

http {

    include       /etc/nginx/mime.types;

    default_type  application/octet-stream;

    log_format  main  '$remote_addr - $remote_user [$time_local] "$request" '

                      '$status $body_bytes_sent "$http_referer" '

                      '"$http_user_agent" "$http_x_forwarded_for"';

    access_log  /var/log/nginx/access.log  main;

    sendfile        on;

    keepalive_timeout  65;

    include /etc/nginx/conf.d/*.conf;

}

[Anliven@h202 ~]$
2.3 确认防火墙状态并重启服务
[Anliven@h202 ~]$ sudo firewall-cmd --zone=public --permanent --add-port=80/tcp

success

[Anliven@h202 ~]$ sudo firewall-cmd --reload

success

[Anliven@h202 ~]$ sudo firewall-cmd --list-all

public (active)

  target: default

  icmp-block-inversion: no

  interfaces: enp0s3 enp0s8

  sources:

  services: ssh dhcpv6-client

  ports: 80/tcp

  protocols:

  masquerade: no

  forward-ports:

  source-ports:

  icmp-blocks:

  rich rules:

[Anliven@h202 ~]$

[Anliven@h202 ~]$ cat /etc/selinux/config |grep "SELINUX=" |grep -v "#"

SELINUX=disabled

[Anliven@h202 ~]$

[Anliven@h202 ~]$ sudo service nginx restart

Redirecting to /bin/systemctl restart nginx.service

[Anliven@h202 ~]$
3 - 访问页面
在/usr/share/nginx/目录下的index.html文件,就是关于nginx介绍的页面
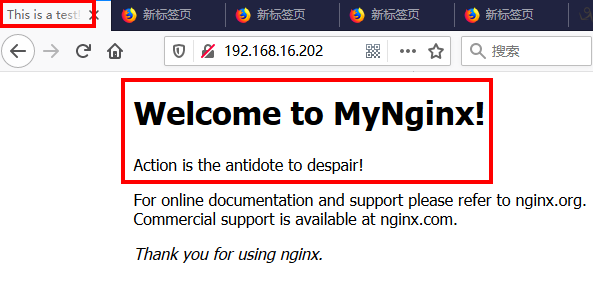
3.1 访问Nginx介绍页面

3.2 修改Nginx介绍页面
[Anliven@h202 html]$ pwd

/usr/share/nginx/html

[Anliven@h202 html]$

[Anliven@h202 html]$ sudo vim index.html

[Anliven@h202 html]$ cat index.html

<!DOCTYPE html>

<html>

<head>

<title>This is a test!</title>

<style>

    body {

        width: 35em;

        margin: 0 auto;

        font-family: Tahoma, Verdana, Arial, sans-serif;

    }

</style>

</head>

<body>

<h1>Welcome to MyNginx!</h1>

<p>Action is the antidote to despair!</p>

<p>For online documentation and support please refer to

<a href="http://nginx.org/">nginx.org</a>.<br/>

Commercial support is available at

<a href="http://nginx.com/">nginx.com</a>.</p>

<p><em>Thank you for using nginx.</em></p>

</body>

</html>

[Anliven@h202 html]$
刷新浏览器页面
Nginx - 安装并启动Nginx的更多相关文章
- linux系统下nginx安装目录和nginx.conf配置文件目录
linux系统下nginx安装目录和nginx.conf配置文件目录 1.查看nginx安装目录 输入命令 # ps -ef | grep nginx 返回结果包含安装目录 root 26 ...
- linux 安装与启动nginx
linux系统为Centos 64位 一.去http://nginx.org/download/上下载相应的版本下载nginx-1.8.0.tar.gz(注:还有更高版本的). 二.解压 tar -z ...
- linux centos-7.2-64bit 安装配置启动nginx
1.安装依赖包yum -y install openssl openssl-develyum install pcre*yum install openssl*yum install zlib yum ...
- nginx 安装、启动、重启、关闭 (linux系统命令行)
前言: 最近在部署我的hexo静态博客到腾讯云服务器上,用到了很多nginx的知识,在此做下总结: 刚接触的linux服务器上,nginx配置乱的有点令人发指,就把老的卸载了重新装一下. 1.卸载 y ...
- Nginx 安装与启动
安装 第一种安装方式:CentOS 7下配置 yum 安装 Nginx. 按照官方的安装实例:https://www.nginx.com/resources/admin-guide/ 第一步,在/et ...
- mac系统下安装和启动nginx
1.在线安装 localhost:nginx-1.17.1 mhx$ sudo brew install nginx 2.查看是否安装成功 localhost:nginx-1.17.1 mhx$ ng ...
- 002.Nginx安装及启动
一 Nginx yum安装 1.1 前置准备 1 [root@nginx01 ~]# systemctl status firewalld.service #检查防火墙 2 [root@nginx01 ...
- Nginx安装及配置文件nginx.conf详解
1.安装Nginx 在安装Nginx之前,需确保系统已经安装了gcc. openssl-devel. pcre-devel和zlib-devel软件库. 下面是Nginx安装过程: wget http ...
- Nginx安装与配置文件nginx.conf详解
引用“http://ixdba.blog.51cto.com/2895551/790611” 1.安装Nginx在安装Nginx之前,需确保系统已经安装了gcc. openssl-devel. pcr ...
随机推荐
- nuxt 项目设置缩进为4个空格
1..editorconfig 文件下的indent_size: 2更改为indent_size: 4 2..prettierrc 文件 { "singleQuote": true ...
- IE浏览器兼容性问题输出
1.时间函数 var startTime=new Date(a); var endTime=new Date(b); 如果a,b的时间格式是:“2017-08-01,需要将格式转换成“2017/08/ ...
- PID动图——很形象
p是控制现在,i是纠正曾经,d是管控未来! pid的公式: 其中Kp为比例带,TI为积分时间,TD为微分时间.PID控制的基本原理就是如此. pid的原理和代码,在木南创智的博客园中有很好的教程:ht ...
- OpenCV应用(3) 简单轮廓匹配的小例子
具体应用 https://blog.csdn.net/kyjl888/article/details/85060883 OpenCV中提供了几个与轮廓相关的函数: findContours():从二值 ...
- LeetCode 934. Shortest Bridge
原题链接在这里:https://leetcode.com/problems/shortest-bridge/ 题目: In a given 2D binary array A, there are t ...
- Bounding Box回归
简介 Bounding Box非常重要,在rcnn, fast rcnn, faster rcnn, yolo, r-fcn, ssd,到今年cvpr最新的yolo9000都会用到. 先看图 对于上图 ...
- MP实战系列(十九)之批量新增
批量操作在实际开发中也应用非常多,例如批量下发优惠券.批量添加用户等. 以MyBatis为例,通常实现批量操作,有这么几种方式? 第一,单条插入sql语句,进行for循环遍历,基准条件是根据前端传过的 ...
- select多选左移右移的实现
<html> <head> <meta http-equiv="Content-Type" content="text/html; char ...
- Sql Server 2008 R2安装教程
作者:骄阳似火_2018 来源:CSDN 原文:https://blog.csdn.net/weixin_42773514/article/details/87008537 版权声明:本文为博主原创文 ...
- Java编程思想之九 接口
接口和内部为我们提供了一种将接口与实现分离的更加结构化的方法. 抽象类和抽象方法 创建一个抽象类是希望通过这个通用接口操纵一系列类. Java提供了一个叫做抽象方法的机制,这种方法是不完整的:仅声明而 ...