Mybatis学习——基本增删改查(CRUD)
Eclipse+Mybatis+MySql
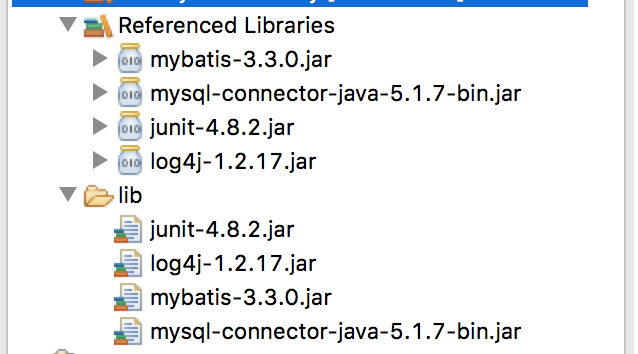
1.所需jar
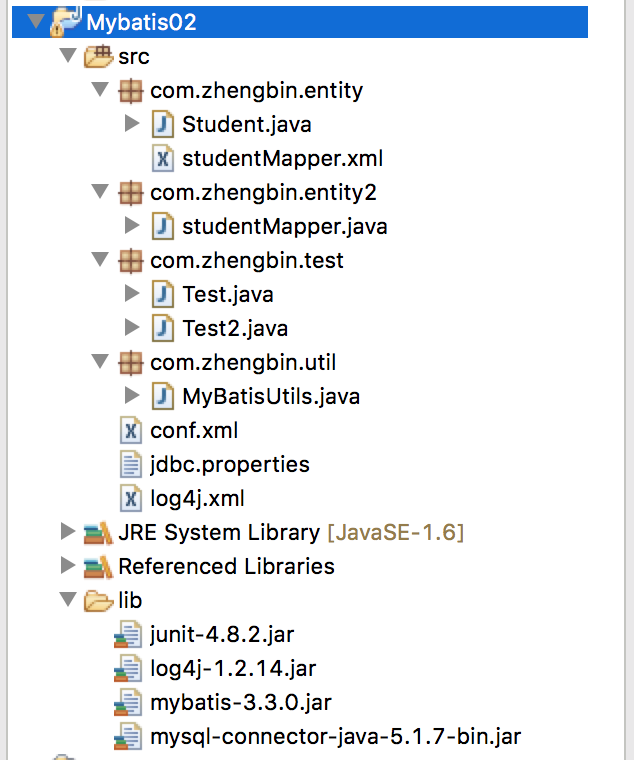
2.项目目录
3.源代码
 package com.zhengbin.entity;

 public class Student {

     private int id;

     private String name;

     private double score;

     @Override

     public String toString() {

         return "Student [id=" + id + ", name=" + name + ", score=" + score + "]";

     }

     public int getId() {

         return id;

     }

     public void setId(int id) {

         this.id = id;

     }

     public String getName() {

         return name;

     }

     public void setName(String name) {

         this.name = name;

     }

     public double getScore() {

         return score;

     }

     public void setScore(double score) {

         this.score = score;

     }

     public Student(int id, String name, double score) {

         super();

         this.id = id;

         this.name = name;

         this.score = score;

     }

     // *注意这个必须加

     public Student() {

         super();

     }

 }
Student.java
 <?xml version="1.0" encoding="UTF-8" ?>

 <!DOCTYPE mapper PUBLIC "-//mybatis.org//DTD Mapper 3.0//EN" "http://mybatis.org/dtd/mybatis-3-mapper.dtd">

 <!-- 每个映射文件的namespace应该是唯一的 -->

 <mapper namespace="com.zhengbin.entity.studentMapper">

     <!-- parameterType 参数表示需要参数的类型 -->

     <!-- resultType 参数表示返回结果的类型,该可以写为实体包的全路径,或者在conf.xml配置文件中,声明实体的别名 -->

     <select id="getStudent" parameterType="int" resultType="Student">

         select * from student where id=#{id}

     </select>

     <select id="getAllStudent" resultType="Student">

         select * from student

     </select>

     <insert id="addStudent" parameterType="Student">

         insert into student(name,score) values(#{name},#{score})

     </insert>

     <update id="updateStudent" parameterType="Student">

         update student set name=#{name},score=#{score} where id=#{id}

     </update>

     <delete id="deleteStudent" parameterType="int">

         delete from student where id=#{id}

     </delete>

 </mapper>
studentMapper.xml
 package com.zhengbin.entity2;

 import org.apache.ibatis.annotations.Select;

 import com.zhengbin.entity.Student;

 public interface studentMapper {

     @Select("select * from student where id=#{id}")

     public Student testGet(int id);

 }
studentMapper.java
 package com.zhengbin.test;

 import java.util.List;

 import org.apache.ibatis.session.SqlSession;

 import org.apache.ibatis.session.SqlSessionFactory;

 import com.zhengbin.entity.Student;

 import com.zhengbin.util.MyBatisUtils;

 public class Test {

     @org.junit.Test

     public void testGet(){

         SqlSessionFactory sessionFactory = MyBatisUtils.getFactory();

         // 参数为TRUE,相当于session.commit();

         SqlSession session = sessionFactory.openSession(true);

         // 读取映射文件

         String statement = "com.zhengbin.entity.studentMapper" + ".getStudent";

         Student s = session.selectOne(statement,5);

         System.out.println(s);

         session.close();

     }

     @org.junit.Test

     public void testGetAll(){

         SqlSessionFactory sessionFactory = MyBatisUtils.getFactory();

         // 参数为TRUE,相当于session.commit();

         SqlSession session = sessionFactory.openSession(true);

         // 读取映射文件

         String statement = "com.zhengbin.entity.studentMapper" + ".getAllStudent";

         List<Student> list = session.selectList(statement);

         System.out.println(list);

         session.close();

     }

     @org.junit.Test

     public void testAdd(){

         SqlSessionFactory sessionFactory =  MyBatisUtils.getFactory();

         SqlSession session = sessionFactory.openSession(true);

         String statement = "com.zhengbin.entity.studentMapper" + ".addStudent";

         Student s = new Student();

         s.setName("zhengB");

         s.setScore(95.9);

         int insert = session.insert(statement, s);

         System.out.println(insert);

         session.close();

     }

     @org.junit.Test

     public void testUpdate(){

         SqlSessionFactory sessionFactory = MyBatisUtils.getFactory();

         SqlSession session = sessionFactory.openSession(true);

         String statement = "com.zhengbin.entity.studentMapper" + ".updateStudent";

         Student s = new Student();

         s.setId(14);

         s.setName("zhengbin");

         s.setScore(96);

         int update = session.update(statement, s);

         System.out.println(update);

         session.close();

     }

     @org.junit.Test

     public void testDelete(){

         SqlSessionFactory sessionFactory = MyBatisUtils.getFactory();

         SqlSession session = sessionFactory.openSession(true);

         String statement = "com.zhengbin.entity.studentMapper" + ".deleteStudent";

         int delete = session.delete(statement,21);

         System.out.println(delete);

         session.close();

     }

 }
Test.java
 package com.zhengbin.test;

 import org.apache.ibatis.session.SqlSession;

 import org.apache.ibatis.session.SqlSessionFactory;

 import com.zhengbin.entity.Student;

 import com.zhengbin.entity2.studentMapper;

 import com.zhengbin.util.MyBatisUtils;

 public class Test2 {

     @org.junit.Test

     public void testGet(){

         SqlSessionFactory sessionFactory = MyBatisUtils.getFactory();

         SqlSession session = sessionFactory.openSession(true);

         studentMapper mapper = session.getMapper(studentMapper.class);

         Student s = mapper.testGet(14);

         System.out.println(s);

         session.close();

     }

 }
Test2.java
 package com.zhengbin.util;

 import java.io.InputStream;

 import org.apache.ibatis.session.SqlSessionFactory;

 import org.apache.ibatis.session.SqlSessionFactoryBuilder;

 public class MyBatisUtils {

     public static SqlSessionFactory getFactory(){

         String resource = "conf.xml";

         InputStream is = MyBatisUtils.class.getClassLoader().getResourceAsStream(resource);

         SqlSessionFactory sessionFactory = new SqlSessionFactoryBuilder().build(is);

         return sessionFactory;

     }

 }
MyBatisUtils.java
 <?xml version="1.0" encoding="UTF-8"?>

 <!DOCTYPE configuration PUBLIC "-//mybatis.org//DTD Config 3.0//EN" "http://mybatis.org/dtd/mybatis-3-config.dtd">

 <configuration>

     <!-- 数据库配置文件 -->

      <properties resource="jdbc.properties"/>

      <!-- 取别名 -->

      <typeAliases>

          <!-- 方式一、为类取别名 -->

          <!-- <typeAlias type="com.zhengbin.entity.Student" alias="_Student"/> -->

          <!-- 方式二、自动以类名为别名 -->

          <package name="com.zhengbin.entity"/>

      </typeAliases>

     <!--

         development : 开发模式

         work : 工作模式

      -->

     <environments default="development">

         <environment id="development">

             <transactionManager type="JDBC" />

             <dataSource type="POOLED">

                 <property name="driver" value="${driver}" />

                 <property name="url" value="${url}" />

                 <property name="username" value="${username}" />

                 <property name="password" value="${password}" />

             </dataSource>

         </environment>

     </environments>

     <mappers>

         <!-- 这是一个路径的结构,不是包的结构 -->

         <mapper resource="com/zhengbin/entity/studentMapper.xml"/>

         <mapper class="com.zhengbin.entity2.studentMapper"/>

     </mappers>

 </configuration>
conf.xml
 driver=com.mysql.jdbc.Driver

 url=jdbc:mysql://localhost:3307/student

 username=root

 password=950906
jdbc.properties
 <?xml version="1.0" encoding="UTF-8" ?>

 <!DOCTYPE log4j:configuration SYSTEM "log4j.dtd">

 <log4j:configuration xmlns:log4j="http://jakarta.apache.org/log4j/">

     <appender name="STDOUT" class="org.apache.log4j.ConsoleAppender">

         <layout class="org.apache.log4j.PatternLayout">

             <param name="ConversionPattern" value="%-5p %d{MM-dd HH:mm:ss,SSS} %m (%F:%L) \n" />

         </layout>

     </appender>

     <logger name="java.sql">

         <level value="debug" />

     </logger>

     <logger name="org.apache.ibatis">

         <level value="debug" />

     </logger>

     <root>

         <level value="debug" />

         <appender-ref ref="STDOUT" />

     </root>

 </log4j:configuration>
log4j.xml
4.遇到的问题
(1)奇怪的junit:如果新建一个class,名为Test则可能出现不能使用注解@Test的情况,此时用@org.junit.Test即可,或者更改class名,不以Test开头 好奇葩
(2)实体类必须要加superclass,否则报错,因为MyBatis无法通过配置文件找到实体类
Mybatis学习——基本增删改查(CRUD)的更多相关文章
- 基于SSM之Mybatis接口实现增删改查(CRUD)功能
国庆已过,要安心的学习了. SSM框架以前做过基本的了解,相比于ssh它更为优秀. 现基于JAVA应用程序用Mybatis接口简单的实现CRUD功能: 基本结构: (PS:其实这个就是用的Mapper ...
- Mybatis实现简单增删改查
Mybatis的简单应用 学习内容: 需求 环境准备 代码 总结: 学习内容: 需求 使用Mybatis实现简单增删改查(以下是在IDEA中实现的,其他开发工具中,代码一样) jar 包下载:http ...
- IDEA SpringBoot-Mybatis-plus 实现增删改查(CRUD)
上一篇: IDEA SpringBoot-Mybatis实现增删改查(CRUD) 下一篇:Intellij IDEA 高效使用教程 (插件,实用技巧) 最好用的idea插件大全 一.前言 Mybati ...
- MyBatis简单的增删改查以及简单的分页查询实现
MyBatis简单的增删改查以及简单的分页查询实现 <? xml version="1.0" encoding="UTF-8"? > <!DO ...
- Mybatis入门之增删改查
Mybatis入门之增删改查 Mybatis如果操作成功,但是数据库没有更新那就是得添加事务了.(增删改都要添加)----- 浪费了我40多分钟怀疑人生后来去百度... 导入包: 引入配置文件: sq ...
- MyBatis -- 对表进行增删改查(基于注解的实现)
1.MyBatis对数据库表进行增/删/改/查 前一篇使用基于XML的方式实现对数据库的增/删/改/查 以下我们来看怎么使用注解的方式实现对数据库表的增/删/改/查 1.1 首先须要定义映射sql的 ...
- Spring Boot 使用Mybatis注解开发增删改查
使用逆向工程是遇到的错误 错误描述 org.apache.ibatis.binding.BindingException: Invalid bound statement (not found): c ...
- idea+spring4+springmvc+mybatis+maven实现简单增删改查CRUD
在学习spring4+springmvc+mybatis的ssm框架,idea整合简单实现增删改查功能,在这里记录一下. 原文在这里:https://my.oschina.net/finchxu/bl ...
- ssm 框架实现增删改查CRUD操作(Spring + SpringMVC + Mybatis 实现增删改查)
ssm 框架实现增删改查 SpringBoot 项目整合 一.项目准备 1.1 ssm 框架环境搭建 1.2 项目结构图如下 1.3 数据表结构图如下 1.4 运行结果 二.项目实现 1. Emplo ...
随机推荐
- java socket编程基础(转)
一,网络编程中两个主要的问题 一个是如何准确的定位网络上一台或多台主机,另一个就是找到主机后如何可靠高效的进行数据传输. 在TCP/IP协议中IP层主要负责网络主机的定位,数据传输的路由,由IP地址可 ...
- PHPer 为什么会被 Javaer 鄙视?
最近看了知乎上的一个话题 「在工作中,为什么 Java 程序员常常瞧不起 PHP 程序员?」 个人从业多年,用过的后端语言 ASP.ASP.NET.Java.PHP.Node.js.Python,如果 ...
- change Username for SVN(Subclipse) in Eclipse
Subclipse does not own the information about users and passwords (credentials), so there is no way f ...
- gcd 最大公约数 模版!
1: #define ll long long ll gcd(ll a,ll b) { ) { return b; }else { return gcd(b % a,a); } } 2: int64 ...
- POJ 1330 Nearest Common Ancestors(求最近的公共祖先)
题意:给出一棵树,再给出两个节点a.b,求离它们最近的公共祖先.方法一: 先用vector存储某节点的子节点,fa数组存储某节点的父节点,最后找出fa[root]=0的根节点root. 之后 ...
- 如何正确学习JavaScript
不要这样学习JavaScript 不要一开始就埋头在成堆的JavaScript在线教程里 ,这是最糟糕的学习方法.或许在看过无数个教程后会有点成效,但这样不分层次结构地学习一个东西实在是十分低效,在实 ...
- lintcode 中等题:Letter Combinations of a Phone Number 电话号码的字母组合
题目 电话号码的字母组合 给一个数字字符串,每个数字代表一个字母,请返回其所有可能的字母组合. 下图的手机按键图,就表示了每个数字可以代表的字母. 样例 给定 "23" 返回 [& ...
- 欧拉工程第61题:Cyclical figurate numbers
---恢复内容开始--- 题目链接 从三角数开始,循环到八角数,再到三角数,求这6个数的和 这个比较复杂,代码在网上找的 Java: package project61; import java.ut ...
- Linux资源监控命令/工具(综合)
目录: ps pstree pidof top free uptime ifuser lsof mpstat vmstst pidstat iostat iotop watch sar 1.ps 1) ...
- 简单的自绘CListBox,重载虚MeasureItem和DrawItem这两个虚函数
[cpp] view plain copy //例如CNewListBox继承自CListBox,重载虚MeasureItem和DrawItem这两个虚函数,代码如下: void CNewListBo ...