docker部署flask+uwsgi+nginx+postgresql,解耦拆分到多个容器,实现多容器互访
本人承诺,本博客内容,亲测有效。
dockerfile文件,
FROM centos:7

RUN mkdir /opt/flask_app

COPY ./show_data_from_jira /opt/flask_app/show_data_from_jira

RUN mkdir /opt/flask_app/show_data_from_jira/uwsgi_log

COPY ./dist /opt/flask_app/dist

WORKDIR /opt/flask_app

RUN yum makecache

RUN yum -y install python3

RUN yum -y install gcc && yum -y install python36-devel

RUN pip3 install uwsgi -i https://pypi.tuna.tsinghua.edu.cn/simple

RUN yum -y install epel-release

RUN yum -y install nginx

RUN yum -y install vim

RUN pip3 install -r ./show_data_from_jira/requirements.txt -i https://pypi.tuna.tsinghua.edu.cn/simple

RUN yum clean all

RUN mv /etc/nginx/nginx.conf /etc/nginx/nginx.conf-bak

COPY .nginx.conf /etc/nginx/nginx.conf

EXPOSE 8080

#ENTRYPOINT uwsgi --ini /opt/flask_app/show_data_from_jira/config.ini && nginx -g "daemon off;"  写绝对路径也行,
#workdir相对路径也行

ENTRYPOINT uwsgi --ini ./show_data_from_jira/config.ini && nginx -g "daemon off;"
dockerfile文件最后一行是容器的启动命令。容器就相当于一个process,如果这个process运行结束,那么容器也会自动existed。当dockerfile生成镜像之后,用这个dockerfile生成的镜像来run容器,得到的容器如果不停地existed,每每start之后,就立即existed,请注意,多半是这里dockerfile启动容器命令有问题。这是我整个过程中,最大的坑,因为本身对于docker理解不够,这是盲区。
uwsgi配置文件,
[uwsgi]

# port

#http = 0.0.0.0:8001

http = 0.0.0.0:8090

# project dir path

chdir = /opt/flask_app/show_data_from_jira

#chdir = /opt/flask_app

# wsgi file

module = manage:app

# processes count

processes = 4

# main thread

master = true

# each process got 2 threads

threads = 2

# save log files
# logto = %(chdir)/uwsgi_log/uwsgi.log  # 这是另一种日志路径写法,单纯设置日志保存路径而已。
# 下面daemonize参数,有两层意思,设置日志保存路径,同时让uwsgi后台运行。如果要把后台代码拆分到单独的容器中,那么,该容器的uwsgi就是唯一的进程,
# 就不能后台运行,否则,容器会自动existed,因为没有前台进程在运行。

daemonize = %(chdir)/uwsgi_log/uwsgi.log
# save main process number

pidfile = %(chdir)/uwsgi_log/uwsgi.pid

# log file max size of each log file

log-maxsize = 100000

# start request log

disable-logging = true

# set broken connect timeout

harakiri = 60

# fix lazy load

lazy = true

lazy-apps = true
nginx配置文件,
# For more information on configuration, see:

#   * Official English Documentation: http://nginx.org/en/docs/

#   * Official Russian Documentation: http://nginx.org/ru/docs/

user nginx;

worker_processes auto;

error_log /var/log/nginx/error.log;

pid /run/nginx.pid;

# Load dynamic modules. See /usr/share/doc/nginx/README.dynamic.

include /usr/share/nginx/modules/*.conf;

events {

    worker_connections 1024;

}

http {

    log_format  main  '$remote_addr - $remote_user [$time_local] "$request" '

                      '$status $body_bytes_sent "$http_referer" '

                      '"$http_user_agent" "$http_x_forwarded_for"';

    access_log  /var/log/nginx/access.log  main;

    sendfile            on;

    tcp_nopush          on;

    tcp_nodelay         on;

    keepalive_timeout   65;

    types_hash_max_size 4096;

    include             /etc/nginx/mime.types;

    default_type        application/octet-stream;

    # Load modular configuration files from the /etc/nginx/conf.d directory.

    # See http://nginx.org/en/docs/ngx_core_module.html#include

    # for more information.

    include /etc/nginx/conf.d/*.conf;

    server {

        listen       8080;

        listen       [::]:80;

        server_name  localhost;

        root         /usr/share/nginx/html;

        charset utf-8;

        gzip on;

        location / {

            root /opt/flask_app/dist;

            autoindex on;

            try_files $uri $uri/ /index.html;

            index index.php index.html index.htm;

        }

        # Load configuration files for the default server block.

        include /etc/nginx/default.d/*.conf;

        error_page 404 /404.html;

        location = /404.html {

        }

        location /api/{

            proxy_pass http://127.0.0.1:8090;  # 可以替换成容器IP+容器开放端口

            proxy_send_timeout 600;

            proxy_read_timeout 120;

            proxy_connect_timeout 90;

        }

        location /static/{

            root /opt/flask_app/dist;

            expires 30d;

            autoindex on;

        }

        error_page 500 502 503 504 /50x.html;

        location = /50x.html {

        }

    }

# Settings for a TLS enabled server.

#

#    server {

#        listen       443 ssl http2;

#        listen       [::]:443 ssl http2;

#        server_name  _;

#        root         /usr/share/nginx/html;

#

#        ssl_certificate "/etc/pki/nginx/server.crt";

#        ssl_certificate_key "/etc/pki/nginx/private/server.key";

#        ssl_session_cache shared:SSL:1m;

#        ssl_session_timeout  10m;

#        ssl_ciphers HIGH:!aNULL:!MD5;

#        ssl_prefer_server_ciphers on;

#

#        # Load configuration files for the default server block.

#        include /etc/nginx/default.d/*.conf;

#

#        error_page 404 /404.html;

#            location = /40x.html {

#        }

#

#        error_page 500 502 503 504 /50x.html;

#            location = /50x.html {

#        }

#    }

}
数据库配置,
POSTGRES_USER = "postgres"

POSTGRES_PWD = ""

#POSTGRES_HOST = "localhost"

POSTGRES_HOST = "172.17.0.5"  # 这里的IP就是要访问的另一个容器的虚拟IP地址,我的多个容器都是在本地运行,容器自动会分配一个虚拟IP,
#容器之间互相访问,就用虚拟IP+容器开放端口即可(开放端口就是“-p 宿主机端口:容器开放端口”,也是dockerfile “expose 参数值)”

POSTGRES_PORT = 5432

POSTGRES_DB = "jira_test"
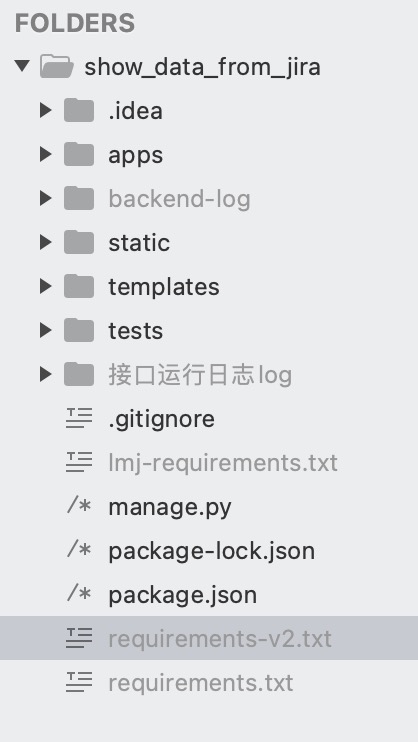
后端代码目录结构,
requirements文件内容,根据我这里贴出来的目录结构,requirements.txt文件是在后端代码里面的,不需要在dockerfile里面拷贝。
Flask==2.0.3

Flask_Cors==3.0.10

Flask_WTF==1.0.1

pandas==1.4.3

psycopg2==2.9.3

psycopg2_binary==2.7.4

SQLAlchemy==1.4.39
这里是postgresql安装教程,我自己就是按照这个教程一步一步安装的,我选择的是源码安装,用wget下载tar包,手动一步步操作的。
下面这些都是整个docker部署过程中,遇到的一些bug的总结:
centos8版本,从2021年开始红帽公司不再维护其镜像源,国内应该有替代的镜像源,需要找教程配置。我直接用的centos:7,这一版还能正常用。
把文件从宿主机拷贝到容器里面:docker cp /root/lmj-work/test.txt containerID:/root/test;
把文件从容器里面拷贝到宿主机:docker cp containerID:/root/test/test.txt /root/lmj-work/
用容器“2c6e8675a377”反向生成镜像,docker commit deploy1 deploy:1;

docker run -d -p 8002:8080 --name flask_uwsgi_nginx_v1  flask-uwsgi-nginx:v72

docker logs flask_uwsgi_nginx_v1

docker inspect flask_uwsgi_nginx_v1

netstat -AaLlnW|grep 8002

awk 'NR>35 && NR<55 {print $0}' /etc/nginx/nginx.conf

sed -n '35,55p' /etc/nginx/nginx.conf

# docker nginx 日志存放地址:/var/log/nginx    nginx配置文件:/etc/nginx/nginx.conf


#容器安装psycopg2失败,要安装下面这个包
pip3 install psycopg2-binary==2.7.4


# 'ascii' codec can't decode byte 0xe8 in position 0: ordinal not in range(128)  数据库报错报错,编码错误,修改数据库编码命令如下

sudo -u postgres psql -c "SHOW SERVER_ENCODING" jira_test

update pg_database set encoding = pg_char_to_encoding('UTF8') where datname = 'jira_test';

su postgres  password:123; su root  password:centos

client-postgresql:sql -h localhost -p port -u username
postgresql数据库,数据导入导出:
a、copy tb_pdc_rel to '/Users/dream-mac/Desktop/南天-work/开发跟踪矩阵/导出数据-项目搭建测试数据-lmj/tb_pdc_rel_export.csv' delimiter ',' csv header;
b、copy tb_pdc_rel from '/home/postgres/tb_pdc_rel.csv' delimiter ',' csv header;
centos容器安装uwsgi报错:
#include <Python.h>

                        ^

    compilation terminated.

    ----------------------------------------

ERROR: Command errored out with exit status 1

solution[#] yum install gcc && yum install python36-devel && pip3 install uwsgi
docker部署flask+uwsgi+nginx+postgresql,解耦拆分到多个容器,实现多容器互访的更多相关文章
- 阿里云部署 Flask + uWSGI + Nginx
一.引言 今天入手了一台阿里云服务器,是centeros 7.5版本.本文解决的是 Flask 的部署问题.假设你的Flask的应用已经完成,现在只是部署的问题,本文以部署我的二次开发微信订阅号的项目 ...
- 基于docker部署flask+gunicorn+nginx
nginx安装在/etc/下,项目映射在docker中的/var/www/下 1.创建docker容器将端口映射出来,将docker外的项目映射到docker中 #docker run -it -p ...
- python部署-Flask+uwsgi+Nginx
一.Flask部分(app.py) flask即Python代码:部分参考代码如下,相信很多人如果看到这篇文章一定有flask的代码能力. from app import create_app fro ...
- 用docker部署flask+gunicorn+nginx
说来惭愧,写了好几个flask django项目都是在原型阶段直接python app.py 运行的,涉及到部署用nginx和gunicorn 都是让别人帮我部署的,据说好像说很麻烦的样子,我就没自己 ...
- 写给新手看的Flask+uwsgi+Nginx+Ubuntu部署教程
学习 Flask,写完一个 Flask 应用需要部署的时候,就想着折腾自己的服务器.根据搜索的教程照做,对于原理一知半解,磕磕碰碰,只要运行起来了,谢天谢地然后不再折腾了,到下一次还需要部署时,这样的 ...
- Flask+uwsgi+Nginx+Ubuntu部署
学了一段时间flask,可是一直没有做过部署, 于是想着怎么部署呢, 想想,先吧服务给搞通吧,于是呢 就先想着去吧服务给搞起来,这里选择的是Flask+uwsgi+Nginx+Ubuntu, Pyth ...
- Flask+uwsgi+Nginx+Ubuntu部署教程
学习 Flask,写完一个 Flask 应用需要部署的时候,就想着折腾自己的服务器.根据搜索的教程照做,对于原理一知半解,磕磕碰碰,只要运行起来了,谢天谢地然后不再折腾了,到下一次还需要部署时,这样的 ...
- 阿里云部署 Flask + WSGI + Nginx 详解
抵不住朋友的诱惑,今天终于入手了一台阿里云服务器,是Ubuntu 1.4 32位版本,最初考虑是用来尝尝鲜只是买了个最低配的,价格算起来与在国外买个空间的价格相当吧(可能一年才贵100多),但用起来感 ...
- flask+uwsgi+nginx+docker-compose部署
简单介绍 Flask这里就不多阐述了,已经是很流行的一个轻量级python框架了,对于小.中型项目特别适合.这里用docker的compose编排部署.uwsgi 简单的说明下,uWSGI是一个Web ...
- 使用Flask+uwsgi+Nginx部署Flask正式环境
环境准备 在开始正式讲解之前,我们将首先进行环境准备. Step1:安装Python,pip以及nginx: sudo apt-get update sudo apt-get install pyth ...
随机推荐
- NuxtJS踩坑日记,一步一步爬出我自己挖的坑。
NuxtJS 2 errors and 2 warnings potentially fixable with the `--fix` option. 第二种报错 Error: No build ...
- Echarts自适应屏幕,无需刷新网页,可根据屏幕大小完美展现,内有详细代码注释,我可真是个小机灵~~O(∩_∩)O哈哈~
Echarts自适应屏幕,无需刷新网页,可根据屏幕大小完美展现 效果如图 随意拖拉,无惧检验 ~ ~ ~ ~ 下面上代码 里边有详细解释 <template> <div class= ...
- Tomcat 解决一些基本配置问题。
解决Tomcat进入manger管理界面需要账号密码问题 第一步,打开Tomcat的conf文件夹 进入tomcat-users.xml文件 在 标签里面复制以下内容 <role rolenam ...
- QT 5 中文乱码,试试在PRO文件加入这几行代码
msvc{ QMAKE_CFLAGS += /utf-8 QMAKE_CXXFLAGS += /utf-8 }
- Linux 安装 CentOS7
1.linux 下载 http://mirrors.aliyun.com/centos/7/isos/x86_64/ centos-7-isos-x86_64安装包下载_开源镜像站-阿里云 (aliy ...
- day09-2-验证以及国际化
验证以及国际化 1.概述 (1)概述 对于输入的数据(比如表单数据),进行必要的验证,并给出相应的提示信息 对于验证表单数据,SpringMVC 提供了很多使用的注解,这些注解由 JSR 303验证框 ...
- 深度优先搜索算法-dfs讲解
迷宫问题 有一个迷宫: S**. .... ***T (其中字符S表示起点,字符T表示终点,字符*表示墙壁,字符.表示平地.你需要从S出发走到T,每次只能向上下左右相邻的位置移动,不能走出地图,也不能 ...
- Cookie参数、Header参数
FastAPI Cookie参数 定义Cookie参数与定义Query和Path参数一样. 第一个值是默认值,还可以传递所有验证参数或注释参数: from typing import Optional ...
- [AHOI2002]黑白瓷砖
\(\text{Solution}\) 根据 \(Polya\) 定理推算 记总砖数为 \(m = \frac{n(n+1)}2\) 考虑旋转,不动点数均为为 \(2^{\frac{m+2}3}\) ...
- JZOJ 1495. 宝石
题目大意 用边长为 \(k\) 的正方形在平面内覆盖,求它能覆盖的最大点权和 思路 \(60\) 分:其实很容易想到按它们的横坐标先后排序,然后单调队列维护.复杂度 \(O(n k \log k)\) ...