SpringBoot 集成mongodb(2)多数据源配置
github:https://github.com/xiaozhuanfeng/mongoProj
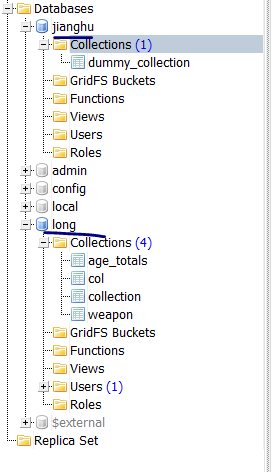
现MongoDB有两个数据库:
pom.xml:
<!-- mongodb 配置 -->

        <dependency>

            <groupId>org.springframework.boot</groupId>

            <artifactId>spring-boot-starter-data-mongodb</artifactId>

        </dependency>

        <dependency>

            <groupId>org.projectlombok</groupId>

            <artifactId>lombok</artifactId>

        </dependency>

        <dependency>

            <groupId>org.springframework.boot</groupId>

            <artifactId>spring-boot-autoconfigure</artifactId>

            <version>RELEASE</version>

        </dependency>

        <dependency>

            <groupId>org.springframework.boot</groupId>

            <artifactId>spring-boot-configuration-processor</artifactId>

            <optional>true</optional>

        </dependency>
Lombok - 是一个可以通过简单的注解形式来帮助我们简化消除一些必须有但显得很臃肿的Java代码的工具,通过使用对应的注解,可以在编译源码的时候生成对应的方法。简单试了以下这个工具还挺好玩的,加上注解我们就不用手动写 getter\setter、构建方式类似的代码了。
spring-boot-autoconfigure - 就是spring boot的自动化配置
注意这里Idea还可以设置Lombok插件:
https://blog.csdn.net/qq_37433657/article/details/83275051
配置文件:
#primary 数据源

mongodb.primary.host=192.168.0.102

mongodb.primary.port=27017

mongodb.primary.database=long

mongodb.secondary.host=192.168.0.102

mongodb.secondary.port=27017

mongodb.secondary.database=jianghu
1、配置两个数据库的数据源
package com.example.demo.config;

import lombok.Data;

import org.springframework.boot.autoconfigure.mongo.MongoProperties;

import org.springframework.boot.context.properties.ConfigurationProperties;

import org.springframework.stereotype.Component;

@Component

@Data

@ConfigurationProperties(prefix = "mongodb")

public class MultipleMongoProperties {

    private MongoProperties primary = new MongoProperties();

    private MongoProperties secondary = new MongoProperties();

    //安装Lombok插件,@Data

   /* public MongoProperties getPrimary() {

        return primary;

    }

    public MongoProperties getSecondary() {

        return secondary;

    }*/

}
2、配置不同包路径下使用不同的数据源
package com.example.demo.config;

import org.springframework.context.annotation.Configuration;

import org.springframework.data.mongodb.repository.config.EnableMongoRepositories;

@Configuration

@EnableMongoRepositories(basePackages = "com.example.demo.repository.primary", mongoTemplateRef = PrimaryMongoConfig.MONGO_TEMPLATE)

public class PrimaryMongoConfig {

    protected static final String MONGO_TEMPLATE = "primaryMongoTemplate";

}
package com.example.demo.config;

import org.springframework.context.annotation.Configuration;

import org.springframework.data.mongodb.repository.config.EnableMongoRepositories;

@Configuration

@EnableMongoRepositories(basePackages = "com.example.demo.repository.secondary",

        mongoTemplateRef = SecondaryMongoConfig.MONGO_TEMPLATE)

public class SecondaryMongoConfig {

    protected static final String MONGO_TEMPLATE = "secondaryMongoTemplate";

}
3、读取对应的配置信息并且构造对应的MongoTemplate
package com.example.demo.config;

import com.mongodb.MongoClient;

import org.springframework.beans.factory.annotation.Autowired;

import org.springframework.beans.factory.annotation.Qualifier;

import org.springframework.boot.autoconfigure.mongo.MongoProperties;

import org.springframework.context.annotation.Bean;

import org.springframework.context.annotation.Configuration;

import org.springframework.context.annotation.Primary;

import org.springframework.data.mongodb.MongoDbFactory;

import org.springframework.data.mongodb.core.MongoTemplate;

import org.springframework.data.mongodb.core.SimpleMongoDbFactory;

@Configuration

public class MultipleMongoConfig {

    @Autowired

    private MultipleMongoProperties mongoProperties;

    @Primary

    @Bean(name = PrimaryMongoConfig.MONGO_TEMPLATE)

    public MongoTemplate primaryMongoTemplate() throws Exception {

        return new MongoTemplate(primaryFactory(this.mongoProperties.getPrimary()));

    }

    @Bean

    @Qualifier(SecondaryMongoConfig.MONGO_TEMPLATE)

    public MongoTemplate secondaryMongoTemplate() throws Exception {

        return new MongoTemplate(secondaryFactory(this.mongoProperties.getSecondary()));

    }

    @Bean

    @Primary

    public MongoDbFactory primaryFactory(MongoProperties mongo) throws Exception {

        return new SimpleMongoDbFactory(new MongoClient(mongo.getHost(), mongo.getPort()),

                mongo.getDatabase());

    }

    @Bean

    public MongoDbFactory secondaryFactory(MongoProperties mongo) throws Exception {

        return new SimpleMongoDbFactory(new MongoClient(mongo.getHost(), mongo.getPort()),

                mongo.getDatabase());

    }

}
4、新增实体类
对应DB=long的col集合
package com.example.demo.dto;

import lombok.AllArgsConstructor;

import lombok.Data;

import lombok.NoArgsConstructor;

import org.springframework.data.mongodb.core.mapping.Document;

@Data

@AllArgsConstructor

@NoArgsConstructor

@Document(collection = "col")

public class Human {

    private String name;

    private int age;

    private String gender;

    @Override

    public String toString() {

        return "Human{" +

                "name='" + name + '\'' +

                ", age=" + age +

                ", gender='" + gender + '\'' +

                '}';

    }

}
对应DB=jianghu 的wuxia集合
package com.example.demo.dto;

import lombok.AllArgsConstructor;

import lombok.Data;

import lombok.NoArgsConstructor;

import org.springframework.data.mongodb.core.mapping.Document;

@Data

@AllArgsConstructor

@NoArgsConstructor

@Document(collection = "wuxia")

public class Swordsman {

    private String name;

    private String age;

    private String skill;

    @Override

    public String toString() {

        return "Swordsman{" +

                "name='" + name + '\'' +

                ", age='" + age + '\'' +

                ", skill='" + skill + '\'' +

                '}';

    }

}
5、对应的Repository
package com.example.demo.repository.primary;

import com.example.demo.dto.Human;

import org.springframework.data.mongodb.repository.MongoRepository;

public interface PrimaryRepository extends MongoRepository<Human, String> {

}
package com.example.demo.repository.secondary;

import com.example.demo.dto.Swordsman;

import org.springframework.data.mongodb.repository.MongoRepository;

public interface SecondaryRepository extends MongoRepository<Swordsman, String> {

}
测试类:
package com.example.demo;

import com.example.demo.dto.Human;

import com.example.demo.dto.Swordsman;

import com.example.demo.repository.primary.PrimaryRepository;

import com.example.demo.repository.secondary.SecondaryRepository;

import org.junit.Test;

import org.junit.runner.RunWith;

import org.springframework.beans.factory.annotation.Autowired;

import org.springframework.boot.test.context.SpringBootTest;

import org.springframework.test.context.junit4.SpringRunner;

import java.util.List;

@RunWith(SpringRunner.class)

@SpringBootTest

public class MultipleMongoTest {

    @Autowired

    private PrimaryRepository primaryRepository;

    @Autowired

    private SecondaryRepository secondaryRepository;

    @Test

    public void test1(){

        List<Human> primaries = this.primaryRepository.findAll();

        for (Human primary : primaries) {

            System.out.println(primary.toString());

        }

        List<Swordsman> secondaries = this.secondaryRepository.findAll();

        for (Swordsman secondary : secondaries) {

            System.out.println(secondary.toString());

        }

    }

}
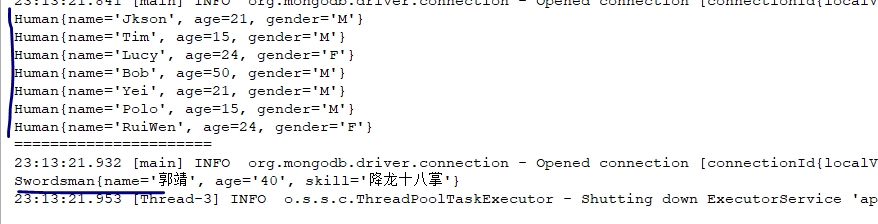
测试结果:
SpringBoot 集成mongodb(2)多数据源配置的更多相关文章
- SpringBoot 集成mongodb(1)单数据源配置
新项目要用到mongodb,于是在个人电脑上的虚拟环境linux上安装了下mongodb,练习熟悉下. 1.虚拟机上启动mongodb. 首先查看虚拟机ip地址,忘了哈~~ 命令行>ifconf ...
- springboot集成activiti6.0多数据源的配置
最近公司开始开发springboot的项目,需要对工作流进行集成.目前activiti已经发布了7.0的版本,但是考虑到6.0版本还是比较新而且稳定的,决定还是选择activiti6.0的版本进行集成 ...
- springboot 集成mongodb
环境依赖 在pom文件引入spring-boot-starter-data-mongodb依赖: <dependency> <groupId>org.springframewo ...
- springboot集成mongoDB 异常认证
1.springboot连接mongoDB 出现异常认证 异常详情: com.mongodb.MongoSecurityException: Exception authenticating Mong ...
- 使用springboot + druid + mybatisplus完成多数据源配置
一. 简介 1. 版本 springboot版本为2.0.3.RELEASE,mybatisplus版本为2.1.9, druid版本为1.1.9,swagger版本为2.7.0 2. 项目地址 ...
- SpringBoot集成MongoDB之导入导出和模板下载
前言 自己很对自己在项目中集成MongoDb做的导入导出以及模板下载的方法总结如下,有不到之处敬请批评指正! 1.pom.xml依赖引入 <!-- excel导入导出 --> <de ...
- Springboot 2.x下多数据源配置
本文同样适用于2.x版本下Mybatis的多数据源配置 项目中经常会遇到一个项目需要访问多个数据源的情况,多数情况下可以参考这个教程进行配置. 不过该教程适合springboot1.x版本,由于2.x ...
- springboot集成mongodb实现动态切换数据源
主要实现原理,利用spring的aop 在切入点执行db操作之前 将数据库切换: 本例子采用aop在controller进行拦截 拦截到MongoTemplate.class 切换数据源后重新放回去 ...
- SpringBoot集成MongoDB
前言 之前写了各种nosql数据库的比较,以及相关理论,现在我在本地以springboot+MongoDB框架,探究了具体的运行流程,下面总结一下,分享给大家. 运行前准备 安装并启动MongoDB应 ...
随机推荐
- C# 静态方法 静态属性 调用静态方法
C#的类中可以包含两种方法:静态方法和非静态方法. 使用了static 修饰符的方法为静态方法,反之则是非静态方法. 静态方法是一种 特殊的成员方法,它不属于类的某一个具体的实例,而是属于类本身.所以 ...
- JS 的 Browser对象
Window对象 closed innerHeight 窗口文档显示区的高度,包括滚动条 outerHeight 窗口总高度,包括工具条和滚动条 open() close() alert( ...
- reactV16理解
在 V16 版本中引入了 Fiber 机制.这个机制一定程度上的影响了部分生命周期的调用,并且也引入了新的 2 个 API 来解决问题. 在之前的版本中,如果你拥有一个很复杂的复合组件,然后改动了最上 ...
- C#批量将数据插入SQLServer数据库
Database db = CreateDatabase(); var varConnnection = db.CreateConnection(); //获取连 ...
- iOS开发之详解剪贴板
关于UIMenuController的用法例子 今天终于搞明白了UIMenuController显示的相关内容,把源代码分享给大家! 要正常显示菜单,必须做到以下几点:1. -(BOOL)canBec ...
- linux 深入应用 NFS
以下实验大家用主机名来区分服务器端和客户端, 服务器端为 NFS_Server ip-192.168.1.4: 客户端为 NFS_Client ip-192.168.1.5: 实例一 将/tmp 分享 ...
- Myabtis中批量更新update多字段
在mybatis中批量更新多个字段 推荐使用如下操作: 方式1:在Dao层接口中: void updateBatch(@Param("list")List<Student&g ...
- 表单-angular
模板表单: <form #myform="ngForm" (ngSubmit)="onsubmit(myform.value)" > <div ...
- 【学习笔记】Minkowski和
这还是个被我咕了N久的玩意 Minkowski和是一个奇怪的玩意 他长这样 $S={a+b \| a \in A , b \in B}$ AB可以是点集也可是向量集(显然) 他可以处理一些奇怪的东西 ...
- 阅读《Effective Java》每条tips的理解和总结(2)(持续更新)
15. 使类和成员的可访问性最小化 一个好用的类的属性必须要隐藏起来,干净的将它与类的api分离开来,类之间只通过api相互使用,降低他们之间的耦合性.为了做到这一点,建议根据情况选择尽可能低的访问级 ...