使用 dynamic 类型让 ASP.NET Core 实现 HATEOAS 结构的 RESTtful API
上一篇写的是使用静态基类方法的实现步骤: http://www.cnblogs.com/cgzl/p/8726805.html
使用dynamic (ExpandoObject)的好处就是可以动态组建返回类型, 之前使用的是ViewModel, 如果想返回结果的话, 肯定需要把ViewModel所有的属性都返回, 如果属性比较多, 就有可能造成性能和灵活性等问题. 而使用ExpandoObject(dynamic)就可以解决这个问题.
返回一个对象
返回一个dynamic类型的对象, 需要把所需要的属性从ViewModel抽取出来并转化成dynamic对象, 这里所需要的属性通常是从参数传进来的, 例如针对下面的CustomerViewModel类, 参数可能是这样的: "Name, Company":
using System;

using SalesApi.Core.Abstractions.DomainModels;

namespace SalesApi.ViewModels

{

    public class CustomerViewModel: EntityBase

    {

        public string Company { get; set; }

        public string Name { get; set; }

        public DateTimeOffset EstablishmentTime { get; set; }

    }

}
还需要一个Extension Method可以把对象按照需要的属性转化成dynamic类型:
using System;

using System.Collections.Generic;

using System.Dynamic;

using System.Reflection;

namespace SalesApi.Shared.Helpers

{

    public static class ObjectExtensions

    {

        public static ExpandoObject ToDynamic<TSource>(this TSource source, string fields = null)

        {

            if (source == null)

            {

                throw new ArgumentNullException("source");

            }

            var dataShapedObject = new ExpandoObject();

            if (string.IsNullOrWhiteSpace(fields))

            {

                // 所有的 public properties 应该包含在ExpandoObject里

                var propertyInfos = typeof(TSource).GetProperties(BindingFlags.IgnoreCase | BindingFlags.Public | BindingFlags.Instance);

                foreach (var propertyInfo in propertyInfos)

                {

                    // 取得源对象上该property的值

                    var propertyValue = propertyInfo.GetValue(source);

                    // 为ExpandoObject添加field

                    ((IDictionary<string, object>)dataShapedObject).Add(propertyInfo.Name, propertyValue);

                }

                return dataShapedObject;

            }

            // field是使用 "," 分割的, 这里是进行分割动作.

            var fieldsAfterSplit = fields.Split(',');

            foreach (var field in fieldsAfterSplit)

            {

                var propertyName = field.Trim();

                // 使用反射来获取源对象上的property

                // 需要包括public和实例属性, 并忽略大小写.

                var propertyInfo = typeof(TSource).GetProperty(propertyName, BindingFlags.IgnoreCase | BindingFlags.Public | BindingFlags.Instance);

                if (propertyInfo == null)

                {

                    throw new Exception($"没有在‘{typeof(TSource)}’上找到‘{propertyName}’这个Property");

                }

                // 取得源对象property的值

                var propertyValue = propertyInfo.GetValue(source);

                // 为ExpandoObject添加field

                ((IDictionary<string, object>)dataShapedObject).Add(propertyInfo.Name, propertyValue);

            }

            return dataShapedObject;

        }

    }

}
注意: 这里的逻辑是如果没有选择需要的属性的话, 那么就返回所有合适的属性.
然后在CustomerController里面:
首先创建为对象添加link的方法:
        private IEnumerable<LinkViewModel> CreateLinksForCustomer(int id, string fields = null)

        {

            var links = new List<LinkViewModel>();

            if (string.IsNullOrWhiteSpace(fields))

            {

                links.Add(

                    new LinkViewModel(_urlHelper.Link("GetCustomer", new { id = id }),

                    "self",

                    "GET"));

            }

            else

            {

                links.Add(

                    new LinkViewModel(_urlHelper.Link("GetCustomer", new { id = id, fields = fields }),

                    "self",

                    "GET"));

            }

            links.Add(

                new LinkViewModel(_urlHelper.Link("DeleteCustomer", new { id = id }),

                "delete_customer",

                "DELETE"));

            links.Add(

                new LinkViewModel(_urlHelper.Link("CreateCustomer", new { id = id }),

                "create_customer",

                "POST"));

            return links;

        }
针对返回一个对象, 添加了本身的连接, 添加的连接 以及 删除的连接.
然后修改Get和Post的Action:
        [HttpGet]

        [Route("{id}", Name = "GetCustomer")]

        public async Task<IActionResult> Get(int id, string fields)

        {

            var item = await _customerRepository.GetSingleAsync(id);

            if (item == null)

            {

                return NotFound();

            }

            var customerVm = Mapper.Map<CustomerViewModel>(item);

            var links = CreateLinksForCustomer(id, fields);

            var dynamicObject = customerVm.ToDynamic(fields) as IDictionary<string, object>;

            dynamicObject.Add("links", links);

            return Ok(dynamicObject);

        }

        [HttpPost(Name = "CreateCustomer")]

        public async Task<IActionResult> Post([FromBody] CustomerViewModel customerVm)

        {

            if (customerVm == null)

            {

                return BadRequest();

            }

            if (!ModelState.IsValid)

            {

                return BadRequest(ModelState);

            }

            var newItem = Mapper.Map<Customer>(customerVm);

            _customerRepository.Add(newItem);

            if (!await UnitOfWork.SaveAsync())

            {

                return StatusCode(, "保存时出错");

            }

            var vm = Mapper.Map<CustomerViewModel>(newItem);

            var links = CreateLinksForCustomer(vm.Id);

            var dynamicObject = vm.ToDynamic() as IDictionary<string, object>;

            dynamicObject.Add("links", links);

            return CreatedAtRoute("GetCustomer", new { id = dynamicObject["Id"] }, dynamicObject);

        }
红色部分是相关的代码. 创建links之后把vm对象按照需要的属性转化成dynamic对象. 然后往这个dynamic对象里面添加links属性. 最后返回该对象.
下面测试一下.
POST:
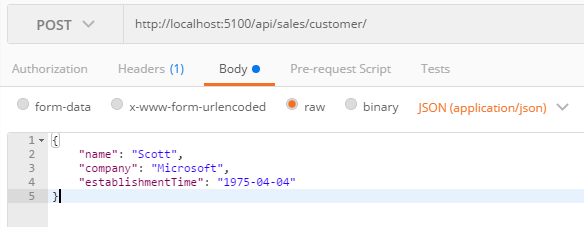
结果:

由于POST方法里面没有选择任何fields, 所以返回所有的属性.
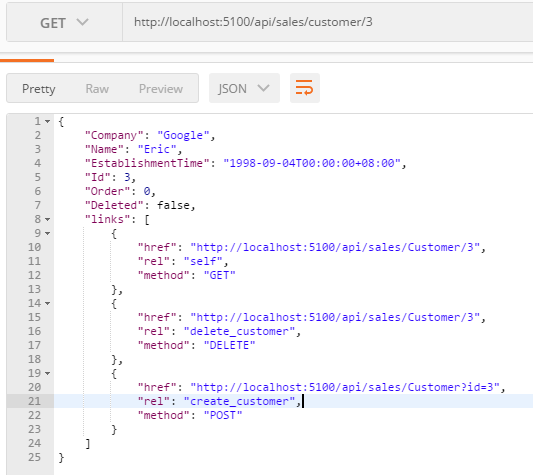
下面试一下GET:
再试一下GET, 选择几个fields:

OK, 效果都如预期.
但是有一个问题, 因为返回的json的Pascal case的(只有dynamic对象返回的是Pascal case, 其他ViewModel现在返回的都是camel case的), 而camel case才是更好的选择 .
所以在Startup里面可以这样设置:
            services.AddMvc(options =>

            {

                options.ReturnHttpNotAcceptable = true;

                // the default formatter is the first one in the list.

                options.OutputFormatters.Remove(new XmlDataContractSerializerOutputFormatter());

                // set authorization on all controllers or routes

                var policy = new AuthorizationPolicyBuilder()

                    .RequireAuthenticatedUser()

                    .Build();

                options.Filters.Add(new AuthorizeFilter(policy));

            })

            .AddJsonOptions(options =>

            {

                options.SerializerSettings.ContractResolver = new CamelCasePropertyNamesContractResolver();

            })

            .AddFluetValidations();
然后再试试:

OK.
返回集合
首先编写创建links的方法:
        private IEnumerable<LinkViewModel> CreateLinksForCustomers(string fields = null)

        {

            var links = new List<LinkViewModel>();

            if (string.IsNullOrWhiteSpace(fields))

            {

                links.Add(

                   new LinkViewModel(_urlHelper.Link("GetAllCustomers", new { fields = fields }),

                   "self",

                   "GET"));

            }

            else

            {

                links.Add(

                   new LinkViewModel(_urlHelper.Link("GetAllCustomers", new { }),

                   "self",

                   "GET"));

            }

            return links;

        }
这个很简单.
然后需要针对IEnumerable<T>类型创建把ViewModel转化成dynamic对象的Extension方法:
using System;

using System.Collections.Generic;

using System.Dynamic;

using System.Reflection;

namespace SalesApi.Shared.Helpers

{

    public static class IEnumerableExtensions

    {

        public static IEnumerable<ExpandoObject> ToDynamicIEnumerable<TSource>(this IEnumerable<TSource> source, string fields)

        {

            if (source == null)

            {

                throw new ArgumentNullException("source");

            }

            var expandoObjectList = new List<ExpandoObject>();

            var propertyInfoList = new List<PropertyInfo>();

            if (string.IsNullOrWhiteSpace(fields))

            {

                var propertyInfos = typeof(TSource).GetProperties(BindingFlags.Public | BindingFlags.Instance);

                propertyInfoList.AddRange(propertyInfos);

            }

            else

            {

                var fieldsAfterSplit = fields.Split(',');

                foreach (var field in fieldsAfterSplit)

                {

                    var propertyName = field.Trim();

                    var propertyInfo = typeof(TSource).GetProperty(propertyName, BindingFlags.IgnoreCase | BindingFlags.Public | BindingFlags.Instance);

                    if (propertyInfo == null)

                    {

                        throw new Exception($"Property {propertyName} wasn't found on {typeof(TSource)}");

                    }

                    propertyInfoList.Add(propertyInfo);

                }

            }

            foreach (TSource sourceObject in source)

            {

                var dataShapedObject = new ExpandoObject();

                foreach (var propertyInfo in propertyInfoList)

                {

                    var propertyValue = propertyInfo.GetValue(sourceObject);

                    ((IDictionary<string, object>)dataShapedObject).Add(propertyInfo.Name, propertyValue);

                }

                expandoObjectList.Add(dataShapedObject);

            }

            return expandoObjectList;

        }

    }

}
注意: 反射的开销很大, 注意性能.
然后修改GetAll方法:
        [HttpGet(Name = "GetAllCustomers")]

        public async Task<IActionResult> GetAll(string fields)

        {

            var items = await _customerRepository.GetAllAsync();

            var results = Mapper.Map<IEnumerable<CustomerViewModel>>(items);

            var dynamicList = results.ToDynamicIEnumerable(fields);

            var links = CreateLinksForCustomers(fields);

            var dynamicListWithLinks = dynamicList.Select(customer =>

            {

                var customerDictionary = customer as IDictionary<string, object>;

                var customerLinks = CreateLinksForCustomer(

                    (int)customerDictionary["Id"], fields);

                customerDictionary.Add("links", customerLinks);

                return customerDictionary;

            });

            var resultWithLink = new {

                Value = dynamicListWithLinks,

                Links = links

            };

            return Ok(resultWithLink);

        }
红色部分是相关代码.
测试一下:
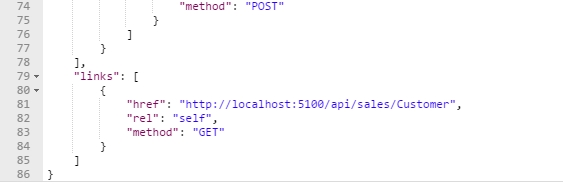
不选择属性:

选择部分属性:
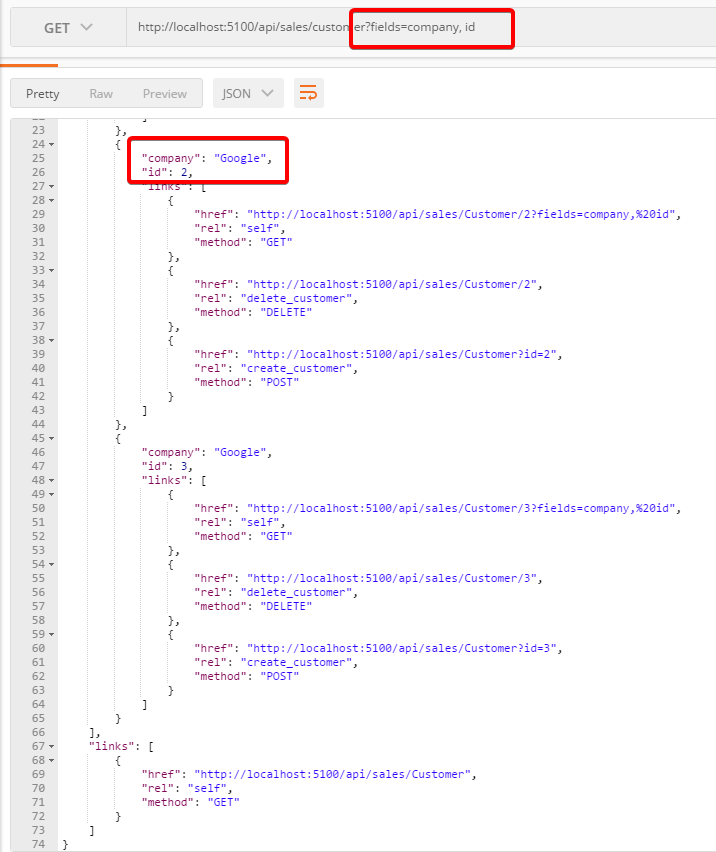
OK.
HATEOAS这部分就写到这.
其实 翻页的逻辑很适合使用HATEOAS结构. 有空我再写一个翻页的吧.
使用 dynamic 类型让 ASP.NET Core 实现 HATEOAS 结构的 RESTtful API的更多相关文章
- 使用 dynamic 类型让 ASP.NET Core 实现 HATEOAS 结构的 RESTful API
上一篇写的是使用静态基类方法的实现步骤: http://www.cnblogs.com/cgzl/p/8726805.html 使用dynamic (ExpandoObject)的好处就是可以动态组 ...
- 【ASP.NET Core】体验一下 Mini Web API
在上一篇水文中,老周给大伙伴们简单演示了通过 Socket 编程的方式控制 MPD (在树莓派上).按照计划,老周还想给大伙伴们演示一下使用 Web API 来封装对 MPD 控制.思路很 Easy, ...
- 使用Http-Repl工具测试ASP.NET Core 2.2中的Web Api项目
今天,Visual Studio中没有内置工具来测试WEB API.使用浏览器,只能测试http GET请求.您需要使用Postman,SoapUI,Fiddler或Swagger等第三方工具来执行W ...
- ASP.NET Core项目目录结构介绍
我们下面通过在Visual Studio 2017中创建一个空的Web应用程序来详细说明下asp.net core项目目录结构: 1.项目结构说明 (1).依赖项 这里主要分两部分SDK, 目前这两部 ...
- ASP.NET Core 中文文档 第二章 指南(2)用 Visual Studio 和 ASP.NET Core MVC 创建首个 Web API
原文:Building Your First Web API with ASP.NET Core MVC and Visual Studio 作者:Mike Wasson 和 Rick Anderso ...
- ASP.NET Core的身份认证框架IdentityServer4--(2)API跟WEB端配置
API配置 可以使用ASP.NET Core Web API模板.同样,我们建议您控制端口并使用与之前一样的方法来配置Kestrel和启动配置文件.端口配置为http://localhost:5001 ...
- 为什么 web 开发人员需要迁移到. NET Core, 并使用 ASP.NET Core MVC 构建 web 和 webservice/API
2018 .NET开发者调查报告: .NET Core 是怎么样的状态,这里我们看到了还有非常多的.net开发人员还在观望,本文给大家一个建议.这仅代表我的个人意见, 我有充分的理由推荐.net 程序 ...
- 在ASP.NET Core MVC中构建简单 Web Api
Getting Started 在 ASP.NET Core MVC 框架中,ASP.NET 团队为我们提供了一整套的用于构建一个 Web 中的各种部分所需的套件,那么有些时候我们只需要做一个简单的 ...
- 在ASP.NET Core 2.2 中创建 Web API并结合Swagger
一.创建 ASP.NET Core WebApi项目 二.添加 三. ----------------------------------------------------------- 一.创建项 ...
随机推荐
- C语言引用另一个源文件中定义的数组
C语言中是可以引用另外一个源文件的全局数组的,但是不能引用局部数组. 引用方式举例如下: 设a.c文件有有数据定义 int array1[10]; 现有b.c文件中想访问a.c中的array1数组 ...
- Python的多线程GIL浅谈
来源知乎:https://www.zhihu.com/question/23474039/answer/269526476 在介绍Python中的线程之前,先明确一个问题,Python中的多线程是假的 ...
- vmware虚拟机各个版本的安装破解(附安装包和注册机)
VMware 是平时我们常用的虚拟机软件,特别是我们平时想试试其他的系统,比如说linux系统的时候但是又不想安装双系统,那么这个时候我们就可以试试这款虚拟软 件,如果你的电脑配置(主要是内存)够好的 ...
- 设计模式——状态模式(C++实现)
/////////context.cpp #include "context.h" void STContext::ChangeState(STState* pstState) { ...
- php 制作圆形图片
function createRoundImg($imgpath) { $ext = pathinfo($imgpath); $src_img = null; switch ($ext['extens ...
- hi-nginx-1.3.4编译安装
hi-nginx既是 web 服务器,也是 application 服务器.它开源在https://github.com/webcpp/hi-nginx 它是NGINX的超集,因此与编译NGINX稍有 ...
- oracle session数激增排查过程
我们的生产系统使用的是oracle 11G RAC,昨天突然收到微信告警通知session数达到450个,平时的session数在200个左右. select username,status,mach ...
- 【Python】 命名空间与LEGB规则
命名空间与LEGB规则 之前隐隐约约提到过一些关于Python赋值语句的特殊性的问题,这个问题的根源就在于Python中的变量的命名空间机制和之前熟悉的C也好java也好都不太一样. ■ 命名空间 所 ...
- 【Python】 sys和os模块
sys sys模块能使程序访问于python解释器联系紧密的变量和函数 ● sys中的一些函数和变量 argv 命令行参数构成的列表 path 查找所有可用模块所在的目录名的列表 platform 查 ...
- 【Python】 linux中python命令的命令行参数
Python命令行参数 原文地址:http://blog.163.com/weak_time/blog/static/25852809120169333247925/ Python的命令行参数,提供了 ...