
Spring Cloud04: RestTemplate的使用
上一篇我们已经学会了如何创建一个服务提供者,那么这一篇我们来创建一个服务消费者,实现思路是先通过Spring boot搭建一个微服务应用,再通过Eureka Client把它注册到注册中心Eureka Server,成为一个服务消费者。那么服务消费者如何调用服务提供者的接口呢,那么我们首先要来介绍一个组件RestTemplate的使用。
一、什么是RestTemplate
RestTemplate 是 Spring 框架提供的基于 REST 的服务组件,底层是对 HTTP 请求及响应进⾏了封装, 提供了很多访问 RETS 服务的⽅法,可以简化代码开发。
二、如何使用RestTemplate
1.创建一个maven工程作为子服务
<dependency>

    <groupId>org.springframework.cloud</groupId>

    <artifactId>spring-cloud-starter-netflix-eureka-client</artifactId>

    <version>2.0.2.RELEASE</version>

</dependency>
2.创建application.yml,代码如下
server:

  port: 8080

spring:

  application:

    name: consumer

eureka:

  client:

    service-url:

      defaultZone: http://localhost:8761/eureka/

  instance:

    prefer-ip-address: true
2.创建与服务提供者相同的实体类,代码如下
package com.frr.entity;

import lombok.AllArgsConstructor;

import lombok.Data;

import lombok.NoArgsConstructor;

@Data //生成Getter,Setter,equals,canEqual,hasCode,toString等方法

@AllArgsConstructor //添加一个构造函数,该构造函数含有所有已声明字段属性参数

@NoArgsConstructor //创建一个无参构造函数

public class Student {

	private long id;

	private String name;

	private int age;

}
3.创建controller,并且在方法中调用服务提供者的接口,代码如下
package com.frr.controller;

import java.util.Collection;

import org.springframework.beans.factory.annotation.Autowired;

import org.springframework.web.bind.annotation.DeleteMapping;

import org.springframework.web.bind.annotation.GetMapping;

import org.springframework.web.bind.annotation.PathVariable;

import org.springframework.web.bind.annotation.PostMapping;

import org.springframework.web.bind.annotation.PutMapping;

import org.springframework.web.bind.annotation.RequestBody;

import org.springframework.web.bind.annotation.RequestMapping;

import org.springframework.web.bind.annotation.RestController;

import org.springframework.web.client.RestTemplate;

import com.frr.entity.Student;

@RestController

@RequestMapping("/consumer")

public class RestTemplateController {

	@Autowired

	private RestTemplate restTemplate;

	@GetMapping("/findAll")

	@SuppressWarnings("unchecked")

	public Collection<Student> findAll(){

		return restTemplate.getForEntity("http://localhost:8010/student/findAll", Collection.class).getBody();

	}

	@SuppressWarnings("unchecked")

	@GetMapping("/findAll2")

	public Collection<Student> findAll2(){

		return restTemplate.getForObject("http://localhost:8010/student/findAll",Collection.class);

	}

	@GetMapping("/findById/{id}")

	public Student findById(@PathVariable("id") long id){

		return	restTemplate.getForEntity("http://localhost:8010/student/findById/{id}",Student.class,id).getBody();

	}

	@GetMapping("/findById2/{id}")

	public Student findById2(@PathVariable("id") long id){

		return	restTemplate.getForObject("http://localhost:8010/student/findById/{id}",Student.class,id);

	}

	@PostMapping("/save")

	public void save(@RequestBody Student student){

		restTemplate.postForEntity("http://localhost:8010/student/save",student,null).getBody();

	}

	@PostMapping("/save2")

	public void save2(@RequestBody Student student){

		restTemplate.postForObject("http://localhost:8010/student/save",student,null);

	}

	@PutMapping("/update")

	public void update(@RequestBody Student student){

		restTemplate.put("http://localhost:8010/student/update",student);

	}

	@DeleteMapping("/deleteById/{id}")

	public void deleteById(@PathVariable("id") long id){

		restTemplate.delete("http://localhost:8010/student/deleteById/{id}",id);

	}

}
4.创建启动类,需要注意的是,需要在启动类里将RestTemplate的实例进行注入的,这里采用@Bean的方式,代码如下
package com.frr;

import org.springframework.boot.SpringApplication;

import org.springframework.boot.autoconfigure.SpringBootApplication;

import org.springframework.context.annotation.Bean;

import org.springframework.web.client.RestTemplate;

@SpringBootApplication

public class RestTemplateApplication {

	public static void main(String[] args) throws Exception {

		SpringApplication.run(RestTemplateApplication.class, args);

	}

	@Bean

	public RestTemplate restTemplate(){

		return new RestTemplate();

	}

}
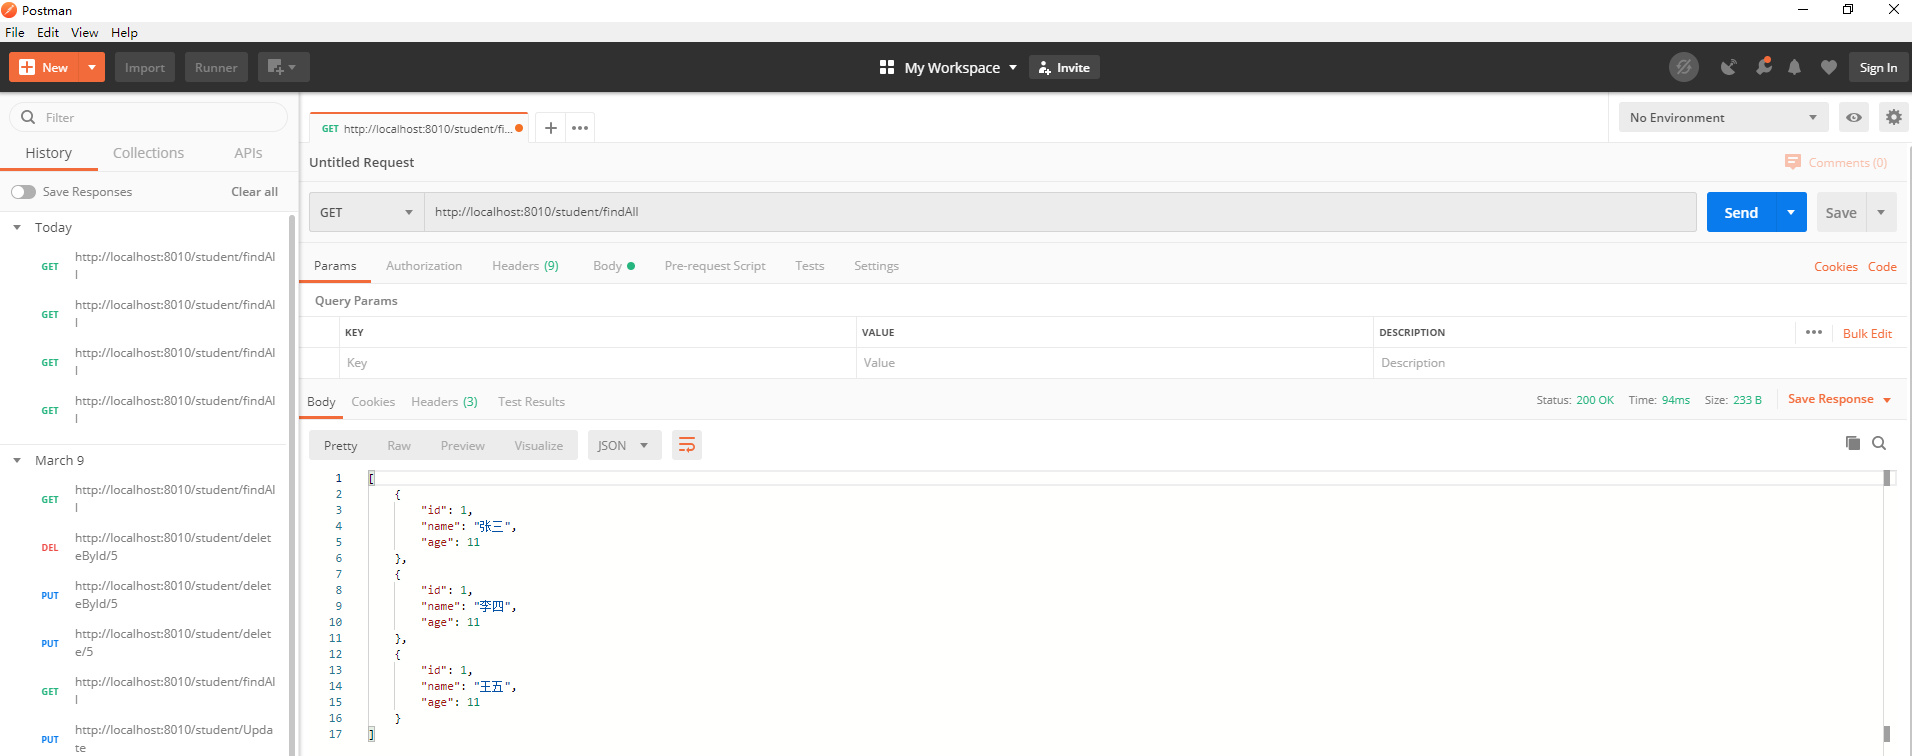
5.依次启动注册中心、服务提供者、服务消费者,利用Postman工具测试,不同的请求可获得相同的数据返回
* 8010服务提供者findAll接口返回数据如下
* 8080服务消费者findAll接口返回数据如下
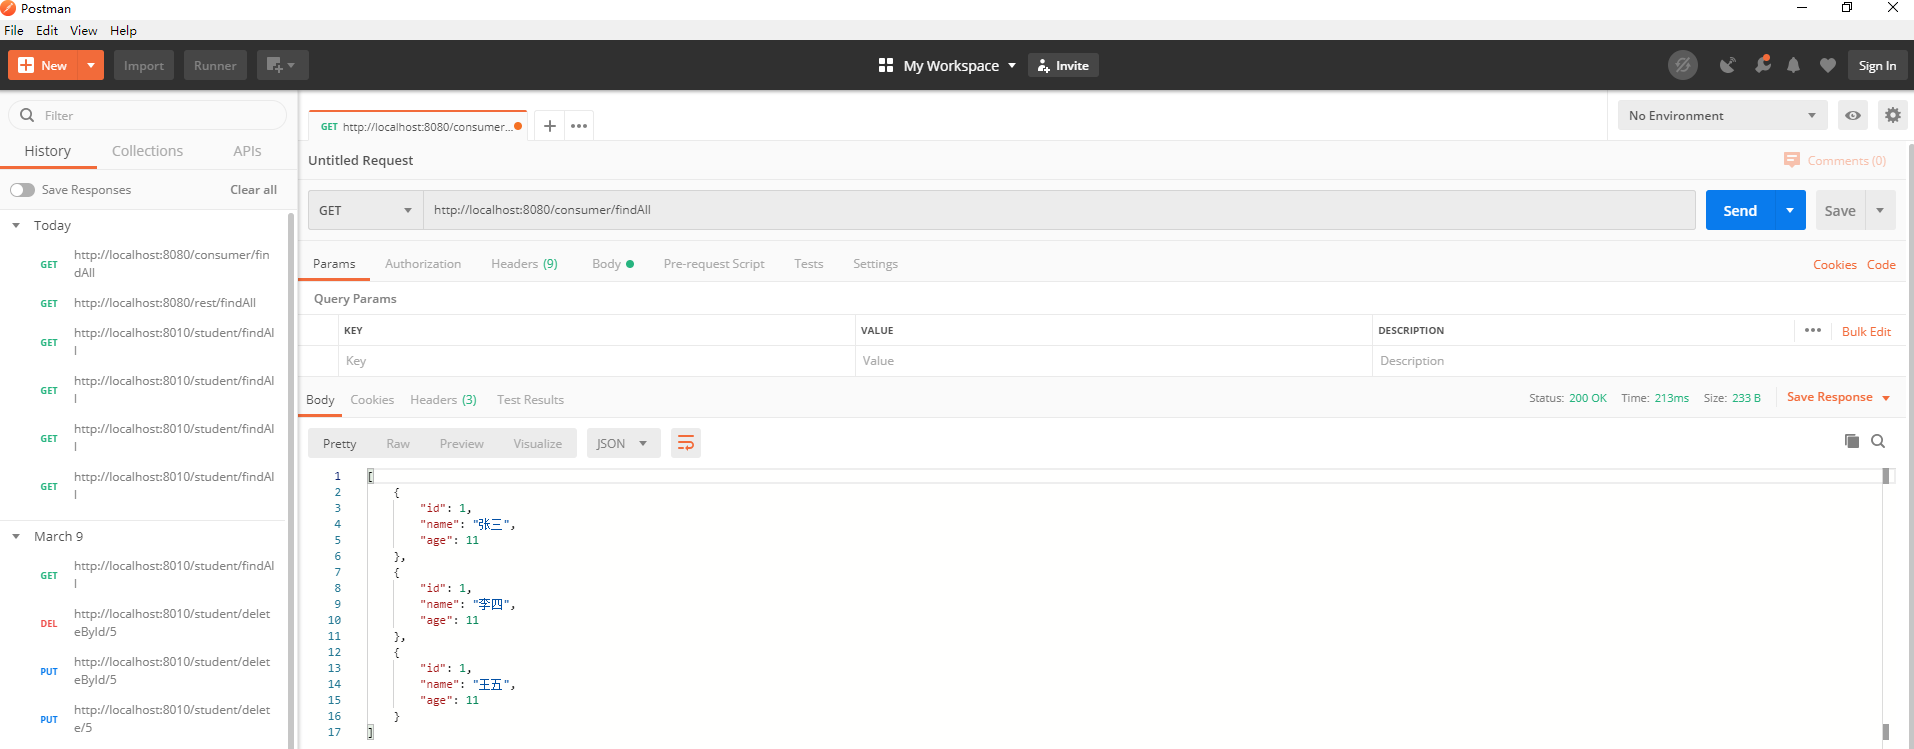
*结论:数据返回一致,服务消费者成功调用服务提供者的接口!
6.总结
服务提供者和服务消费者从代码的层面来看,是没有太大区别的,他们本身都是Spring boot的工程,我们在此基础上,通过Spring Cloud的一些组件,让他们拥有了不同的身份。服务提供者提供了对外访问的接口,服务消费者也提供了对外访问的接口,只不过接口内部是在调用其他服务的接口,所以从某种意义上讲,服务消费者也是一个服务提供者,其他服务也可以掉用服务消费者的服务。因此,服务之间没有绝对的提供者与消费者,它们之间是可以相互调用的!
Spring Cloud04: RestTemplate的使用的更多相关文章
- 对Spring 的RestTemplate进行包装
Spring的RestTemplate及大地简化了REST Client的开发,但每次还要编写大量的模板代码,代码不够简洁.我对他进行了一次包装,采用接口来声明REST接口,使用Annotation对 ...
- Spring’s RestTemplate
Spring’s RestTemplate /** * After the word document is generated in memory we can upload it to the s ...
- 还不知道spring的RestTemplate的妙用吗
为什么要使用RestTemplate? 随着微服务的广泛使用,在实际的开发中,客户端代码中调用RESTful接口也越来越常见.在系统的遗留代码中,你可能会看见有一些代码是使用HttpURLConnec ...
- Spring的RestTemplate
Spring提供了一个RestTemplate模板工具类,对基于Http的客户端进行了封装,并且实现了对象与json的序列化和反序列化,非常方便.RestTemplate并没有限定Http的客户端类型 ...
- Spring中RestTemplate进行Http调用
Spring中的RestTemplate类源自spring-web,http调用中设置超时时间.设置连接池管理等非常重要,保证了系统的可用性,避免了长时间连接不上或者等待数据返回,拖垮系统. 现贴出工 ...
- spring的RestTemplate使用指南
前言:现在restful接口越来越广泛,而如今很多接口摒弃了传统的配置复杂的webService开发模式,在java领域只需要很简单的springMvc就可以声明为一个控制器,再加上service层, ...
- Spring中RestTemplate的使用方法
一.REST 在互联网中,我们会通过请求url来对网络上的资源做增删改查等动作,这里的请求包含两部分:动词,主要包括增.删.改.查:名词,就是网络中的各种资源.传统的非REST风格的请求方式是把动词和 ...
- Spring boot ----RestTemplate学习笔记
****spring boot-----restTemplate 封装了HttpURLConnection,HttpClient,Netty等接口访问实现库 restTemplet包含以下部分 Htt ...
- 使用Spring的RestTemplate进行接口调用
引自:http://www.zimug.com/ 1.常见的http服务的通信方式 经常使用的方式有HttpClient.OkHttp.RestTemplate.其中RestTemplate是一种更优 ...
随机推荐
- 后渗透阶段之基于MSF的内网主机探测
当我们通过代理可以进入某内网,需要对内网主机的服务进行探测.我们就可以使用MSF里面的内网主机探测模块了. 在这之前,先修改 /etc/proxychains.conf ,加入我们的代理. 然后 pr ...
- 多种方法实现实现全排列 + sort调用标准函数库函数的简述
全排列:所有不同顺序的元素组组成的一个集合.这里使用使用递归实现全排列. 使用递归算算法呢,首先我们先找一下结束的条件:我们要对一组元素(这里使用数字举例)实现全排列,临界条件就是递归到只有一个元素的 ...
- Govern Service 基于 Redis 的服务治理平台
Govern Service 基于 Redis 的服务治理平台(服务注册/发现 & 配置中心) Govern Service 是一个轻量级.低成本的服务注册.服务发现. 配置服务 SDK,通过 ...
- Go的Waitgroup和锁
学 Go 的时候知道 Go 语言支持并发,最简单的方法是通过 go 关键字开启 goroutine 即可.可在工作中,用的是 sync 包的 WaitGroup,然而这样还不够,当多个 gorouti ...
- 【软工】个人项目作业——个人软件流程(PSP)
[软工]个人项目作业--个人软件流程(PSP) 项目 内容 班级:北航2020春软件工程 006班(罗杰.任健 周五) 博客园班级博客 作业:设计程序求几何对象的交点集合 个人项目作业 个人课程目标 ...
- computed和watch的区别
严格上来说,计算属性能够实现的效果,watch都可以实现.只是有时候watch写起来比较麻烦. 但是watch能够实现的效果computed不一定能够实现. 1:watch内部可以包含异步操作,com ...
- 通过Dapr实现一个简单的基于.net的微服务电商系统(十四)——开发环境容器调试小技巧
之前有很多同学提到如何做容器调试,特别是k8s环境下的容器调试,今天就讲讲我是如何调试的.大家都知道在vs自带的创建项目模板里勾选docker即可通过F5启动docker容器调试.但是对于启动在k8s ...
- Bash技巧:使用 set 内置命令帮助调试 shell 脚本
Bash技巧:使用 set 内置命令帮助调试 shell 脚本 霜鱼片发布于 2020-02-03 在 bash 中,可以使用 set 内置命令设置和查看 shell 的属性.这些属性会影响 sh ...
- 解决 Ubuntu 无法使用 root 用户进行 ssh 远程登陆
解决 Ubuntu 无法使用 root 用户进行 ssh 远程登陆 操作系统 Ubuntu 20.04.2 LTS 一.修改sshd配置文件 //打开 /etc/ssh/sshd_config 配置文 ...
- 编译安装rsyslog
安装gcc-c++ 615 yum -y install gcc c++ 616 yum -y install gcc-c++ 安装libestr.libee wget http://libestr. ...