
68-Flutter中极光推送的使用
1、申请极光账号和建立应用
极光推送的官方网址为:https://www.jiguang.cn/
注册好后,进入'服务中心',然后再进入'开发者平台',点击创建应用。
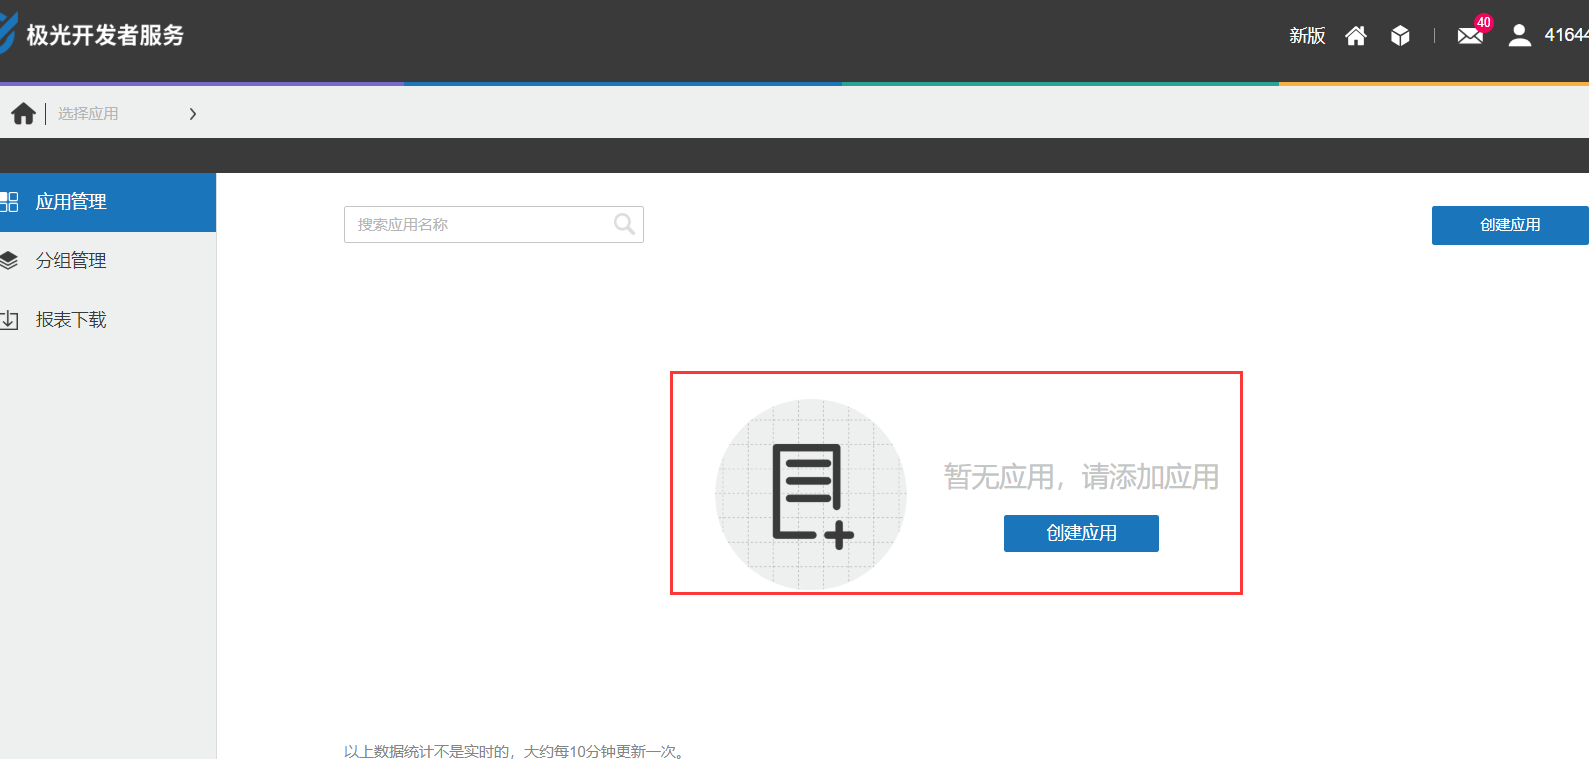
这时候会出现新页面,让你填写“应用名称”和上传“应用图标”。
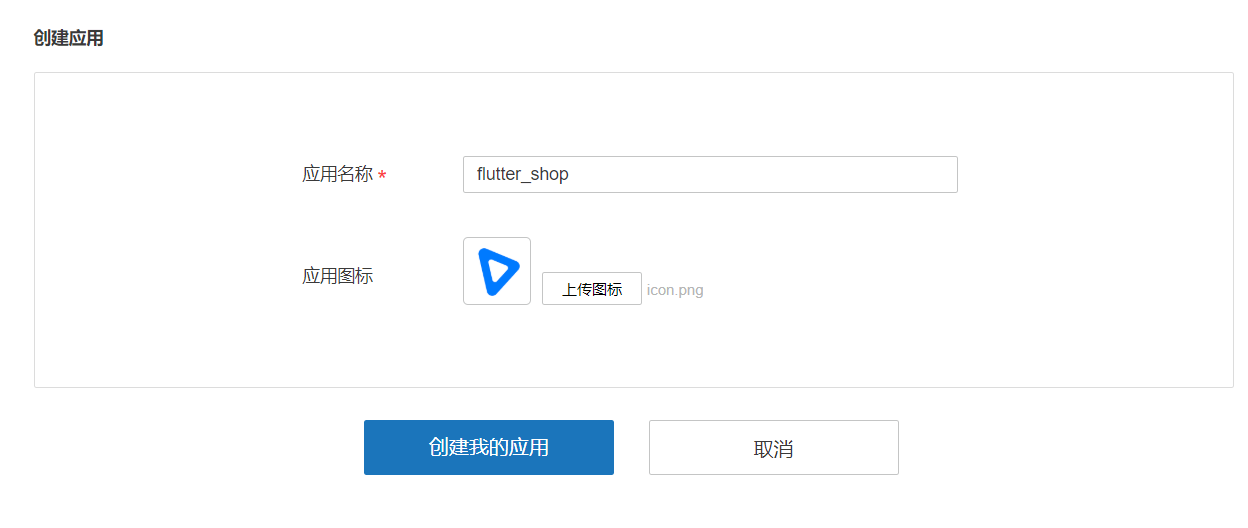
创建完成,极光平台就会给我们两个key。
- appKey : 移动客户端使用的key
- Master Secret : 服务端使用的key
我们这里只做移动端不做服务端,所以只需要appKey。得到这个Key也算是极光平台操作完了
2、加入dependencies依赖
github网址:https://github.com/jpush/jpush-flutter-plugin
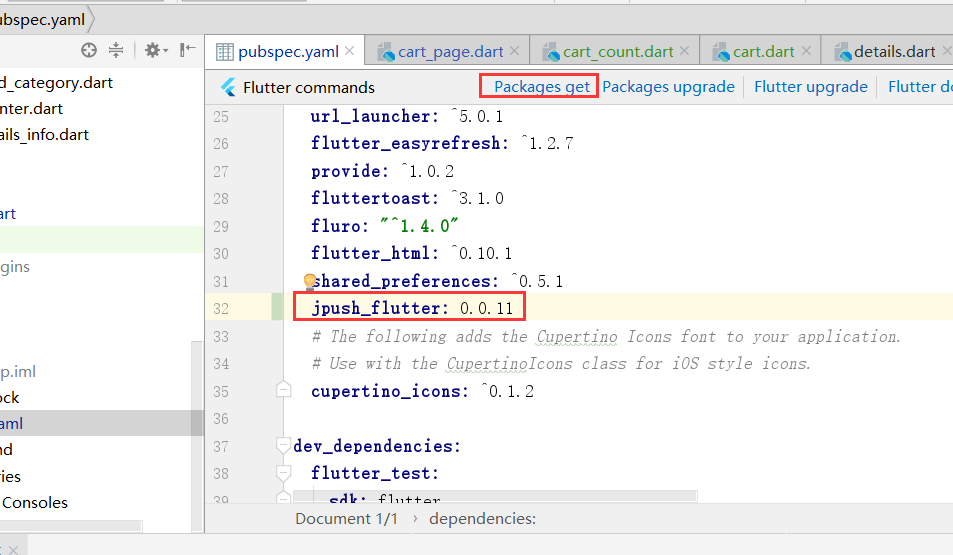
要使用极光推送插件必须先下载包,要下载包就需要先添加依赖,直接把下面的代码加入pubspec.yaml文件中。
jpush_flutter: 0.0.11
写完代码后,选择Android Studio右上角的Packages get进行下载,下载完成后进行操作。
3、build.gradle添加可以和cpu型号代码
打开android/app/src/build.gradle文件,加入如下代码:
defaultConfig {
    applicationId "sscai.club.flutter_shop"
    minSdkVersion 16
    targetSdkVersion 28
    versionCode flutterVersionCode.toInteger()
    versionName flutterVersionName
    testInstrumentationRunner "android.support.test.runner.AndroidJUnitRunner"

    /*新加入的*/
    ndk {
        /*选择要添加的对应 cpu 类型的 .so 库。
        abiFilters 'armeabi', 'armeabi-v7a', 'x86', 'x86_64', 'mips', 'mips64'// 'arm64-v8a',
        /*还可以添加
    }

    manifestPlaceholders = [
        JPUSH_PKGNAME: applicationId,
        JPUSH_APPKEY : "这里写入你自己申请的Key哦", /*NOTE: JPush 上注册的包名对应的 Appkey.*/
        JPUSH_CHANNEL: "developer-default", /*暂时填写默认值即可.*/
    ]
    /*新加入的*/
}
详细请参考:https://github.com/jpush/jpush-flutter-plugin
4、主要代码编写
在 main.dart 中引入依赖
import 'package:flutter/material.dart';
import 'dart:async';

import 'package:flutter/services.dart';
import 'package:jpush_flutter/jpush_flutter.dart';
编写initPlatformState方法
Future<void> initPlatformState() async {
    String platformVersion;

    try {
      /*监听响应方法的编写*/
      jpush.addEventHandler(
          onReceiveNotification: (Map<String, dynamic> message) async {
            print(">>>>>>>>>>>>>>>>>flutter 接收到推送: $message");
            setState(() {
              debugLable = "接收到推送: $message";
            });
          }
      );

    } on PlatformException {
      platformVersion = '平台版本获取失败,请检查!';
    }

    if (!mounted){
      return;
    }

    setState(() {
      debugLable = platformVersion;
    });
}
编写build的视图
@override
  Widget build(BuildContext context) {
    return new MaterialApp(
      home: new Scaffold(
        appBar: new AppBar(
          title: const Text('极光推送'),
        ),
        body: new Center(
            child: new Column(
                children:[
                  new Text('结果: $debugLable\n'),
                  new RaisedButton(
                      child: new Text(
                          '点击发送推送消息\n',
                      ),
                      onPressed: () {
                        /*三秒后出发本地推送*/
                        var fireDate = DateTime.fromMillisecondsSinceEpoch(DateTime.now().millisecondsSinceEpoch + 3000);
                        var localNotification = LocalNotification(
                          id: 234,
                          title: '我是推送测试标题',
                          buildId: 1,
                          content: '看到了说明已经成功了',
                          fireTime: fireDate,
                          subtitle: '一个测试',
                        );
                        jpush.sendLocalNotification(localNotification).then((res) {
                          setState(() {
                            debugLable = res;
                          });
                        });
                      }),
                ]
            )
        ),
      ),
    );
  }
main.dart 完整代码:
import 'package:flutter/material.dart';
import 'dart:async';

import 'package:flutter/services.dart';
import 'package:jpush_flutter/jpush_flutter.dart';

void main() => runApp(new MyApp());

class MyApp extends StatefulWidget {
  @override
  _MyAppState createState() => new _MyAppState();
}

class _MyAppState extends State<MyApp> {
  String debugLable = 'Unknown';   /*错误信息*/
  final JPush jpush = new JPush(); /* 初始化极光插件*/
  @override
  void initState() {
    super.initState();
    initPlatformState();  /*极光插件平台初始化*/
  }

  Future<void> initPlatformState() async {
    String platformVersion;

    try {
      /*监听响应方法的编写*/
      jpush.addEventHandler(
          onReceiveNotification: (Map<String, dynamic> message) async {
            print(">>>>>>>>>>>>>>>>>flutter 接收到推送: $message");
            setState(() {
              debugLable = "接收到推送: $message";
            });
          }
      );

    } on PlatformException {
      platformVersion = '平台版本获取失败,请检查!';
    }

    if (!mounted){
      return;
    }

    setState(() {
      debugLable = platformVersion;
    });
  }

  /*编写视图*/
  @override
  Widget build(BuildContext context) {
    return new MaterialApp(
      home: new Scaffold(
        appBar: new AppBar(
          title: const Text('极光推送'),
        ),
        body: new Center(
            child: new Column(
                children:[
                  new Text('结果: $debugLable\n'),
                  new RaisedButton(
                      child: new Text(
                          '点击发送推送消息\n',
                      ),
                      onPressed: () {
                        /*三秒后出发本地推送*/
                        var fireDate = DateTime.fromMillisecondsSinceEpoch(DateTime.now().millisecondsSinceEpoch + 3000);
                        var localNotification = LocalNotification(
                          id: 234,
                          title: '我是推送测试标题',
                          buildId: 1,
                          content: '看到了说明已经成功了',
                          fireTime: fireDate,
                          subtitle: '一个测试',
                        );
                        jpush.sendLocalNotification(localNotification).then((res) {
                          setState(() {
                            debugLable = res;
                          });
                        });
                      }),
                ]
            )
        ),
      ),
    );
  }
}
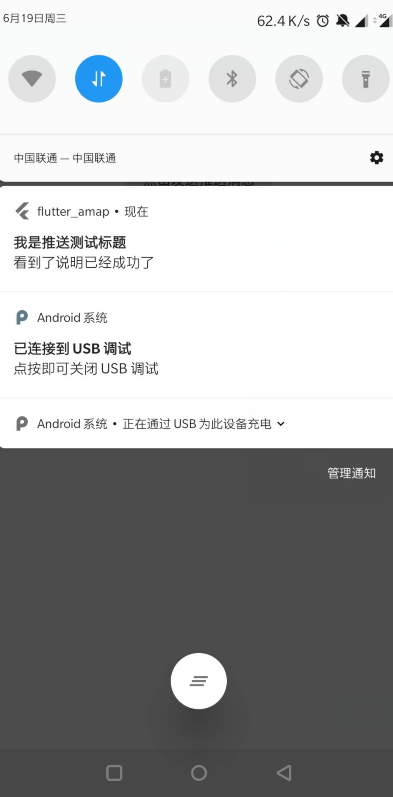
效果图:
4、扩展几个方法
收到推送提醒
监听addReceiveNotificationListener方法:
/*
* 收到推送提醒
* */
  void _ReceiveNotification() async {
    FlutterJPush.addReceiveNotificationListener(
        (JPushNotification notification) {
      setState(() {
        /// 收到推送
        print("收到推送提醒: $notification");
      });
    });
  }
打开推送提醒
监听 addReceiveNotificationListener方法:
 /*
  * 打开推送提醒
  * */
  void _OpenNotification() async {
    FlutterJPush.addReceiveOpenNotificationListener(
        (JPushNotification notification) {
      setState(() {
        print("打开了推送提醒: $notification");
      });
    });
  }
监听接收自定义消息
一般项目这个方法会用的比较多吧!!!
监听 addReceiveCustomMsgListener方法:
  /*
  * 监听接收自定义消息
  * */
  void _ReceiveCustomMsg() async {
    FlutterJPush.addReceiveCustomMsgListener((JPushMessage msg) {
      setState(() {
        print("收到推送消息提醒: $msg");
      });
    });
  }
68-Flutter中极光推送的使用的更多相关文章
- Flutter中极光推送的使用----jpush_flutter
原文地址:https://www.cnblogs.com/niceyoo/p/11095994.html 1.申请极光账号和建立应用 极光推送的官方网址为:https://www.jiguang.cn ...
- ionic中极光推送的集成
1.到极光官网注册账号,新建应用获得appkey. 详见:https://www.jiguang.cn/app/list 2.引入jpush插件 详见:https://github.com/jpush ...
- Flutter接入极光推送
(1)搜索 https://pub.dartlang.org/packages/jpush_flutter ,安装插件,并且按照官方配置 /android/app/build.gradle andro ...
- JPush Flutter Plugin(Futter推送-极光推送)
https://pub.flutter-io.cn/packages/jpush_flutter JPush's officially supported Flutter plugin (Androi ...
- 在ionic/cordova中使用极光推送插件(jpush)
Stpe1:创建一个项目(此处使用的是tab类型的项目,创建方式可参照我前一篇如何离线创建Ionic1项目) Stpe2:修改项目信息 打开[config.xml]修改下图内容:
- Ionic项目中使用极光推送
Ionic项目中使用极光推送-android 对于Ionic项目中使用消息推送服务,Ionic官方提供了ngCordova项目,这个里面的提供了用angularjs封装好的消息推送服务(官方文档) ...
- Ionic项目中使用极光推送-android
对于Ionic项目中使用消息推送服务,Ionic官方提供了ngCordova项目,这个里面的提供了用angularjs封装好的消息推送服务(官方文档),使用的是GitHub上的 PushPlugin ...
- 添加极光推送以及在ios中的问题
项目为 ionic1 + angular1 1.添加极光推送插件 用cordova进行添加 cordova plugin add jpush-phonegap-plugin --variable AP ...
- Ionic2中使用第三方插件极光推送
不同于Ionic1中插件的调用,Ionic2提供了Ionic Native.Ionic Native封装了一些常见的插件(如:Camera.Barcode Scanner等),这些插件的使用方式在官方 ...
随机推荐
- Docker 搭建简单 LVS
LVS简介 LVS(Linux Virtual Server)即Linux虚拟服务器,是由章文嵩博士主导的开源负载均衡项目,目前LVS已经被集成到Linux内核模块中.该项目在Linux内核中实现了基 ...
- Java学习:方法的使用与注意事项
方法的使用与注意事项 定义一个方法的格式:public static void 方法名称(){ 方法体 } 如何调用方法,格式: 方法名称(): 方法名称的命名规则和变量一样,使用小驼峰. 方法体:也 ...
- c#高效准确的条形码、线性条码、QR二维码读写类库-SharpBarcode介绍
SharpBarcode是一款支持.NET(C#,VB)的高效易用的条形码.QR二维码的读取和生成类库. 主要功能: 1.支持几乎所有常见类型的线性条形码和QR二维码的读取,高效读取,准确率高. 2. ...
- C++之拷贝控制 (Copy Control)
只有2种成员 值成员: 指针成员: 依实现可分为raw pointer / shared_ptr; 现在,仅考虑第③种:资源对象共享 角度来考虑拷贝控制 类的两种语义:值语义.似指针 编译器提供的de ...
- 掌握算法&数据结构的正确方式
- mybatis日志,打印sql语句,输出sql
mybatis日志,打印sql语句,输出sql<?xml version="1.0" encoding="UTF-8" ?><!DOCTYPE ...
- 创建你自己定制的vuejs plugin扩展app的功能
什么是vuejs plugin插件 vuejs plugin插件是一个向你的app注入新的全局功能的强大但又简约的方式.从概念上来说,vue plugin非常简单,它就是一个包含了install方法的 ...
- scxml 图像展示器 (基于C++ MFC GDI tinyxpath的实现)
以前的时候学习新东西没有总结的习惯,周末把以前研究的东西翻了翻,稍微总结下. Scxml是w3c出来的基于状态机的对话脚本语言标准,具体内容可以谷歌到,这里讲述自己开发的一个把scxml转化为可交互图 ...
- 第一阶段:Java基础 1.JAVA开发介绍---2. JVM、JRE、JDK之间的关系
JDK :英文名称(Java Development Kit),Java 开发工具包,是针对 Java 开发员的产品.jdk 是整个 Java 开发的核心,包括了Java运行环境JRE.Java工具和 ...
- 【转载】C#的DataTable类Clone及Copy方法的区别
在C#中的Datatable类中,Clone方法和Copy方法都可以用来复制当前的DataTable对象,但DataTable类中的Clone方法和Copy方法还是有区别的,Clone方法只复制结构信 ...