Centos610安装Nexus
1.下载Nexus
地址: https://pan.baidu.com/s/1D5AI6zmuRBSMK0k7j41VuQ
提取码: q50j
选择02-nexus
2.新建nexus账号
useradd nexus
重置密码
passwd nexus
123456
3.更改文件属性
chown -R nexus:nexus /opt/nexus/nexus-2.14.15-01/
chown -R nexus:nexus /opt/nexus/sonatype-work/
4.修改端口
cd /opt/nexus/nexus-2.14.15-01/conf
vi nexus.properties
#

# Sonatype Nexus (TM) Open Source Version

# Copyright (c) -present Sonatype, Inc.

# All rights reserved. Includes the third-party code listed at http://links.sonatype.com/products/nexus/oss/attributions.

#

# This program and the accompanying materials are made available under the terms of the Eclipse Public License Version 1.0,

# which accompanies this distribution and is available at http://www.eclipse.org/legal/epl-v10.html.

#

# Sonatype Nexus (TM) Professional Version is available from Sonatype, Inc. "Sonatype" and "Sonatype Nexus" are trademarks

# of Sonatype, Inc. Apache Maven is a trademark of the Apache Software Foundation. M2eclipse is a trademark of the

# Eclipse Foundation. All other trademarks are the property of their respective owners.

#

# Sonatype Nexus

# ==============

# This is the most basic configuration of Nexus.

# Jetty section

application-port=

application-host=192.168.125.139

nexus-webapp=${bundleBasedir}/nexus

nexus-webapp-context-path=/nexus

# Nexus section

nexus-work=${bundleBasedir}/../sonatype-work/nexus

runtime=${bundleBasedir}/nexus/WEB-INF

# orientdb buffer size in megabytes

storage.diskCache.bufferSize=
5.修改环境变量
vi /etc/profile
新增如下配置
#set nexus enviroment

 NEXUS_HOME=/opt/nexus/nexus-2.14.-

 PATH=$PATH:$NEXUS_HOME/bin

 export NEXUS_HOME
刷新生效
source /etc/profile
6.开机启动
# vi /etc/rc.d/rc.local
# set nexus auto-run when open system
su - nexus -c '/opt/nexus/nexus-2.14.15-01/bin/nexus start'
#复制脚本cp /opt/nexus/nexus-2.14.15-01/bin/nexus /etc/init.d/nexus
#添加系统服务:chkconfig --add nexus
#设置启动级别为345:chkconfig --levels 345 nexus on
#查看是否添加成功:chkconfig --list|grep nexus
#vi /etc/init.d/nexus
#第一行 设置启动账号
#RUN_AS_USER="root"
#将NEXUS_HOME=".."修改为NEXUS_HOME="/opt/nexus/nexus-2.14.15-01/"
#重启 reboot查看nexus是否启动,ps –ef|grep nexus
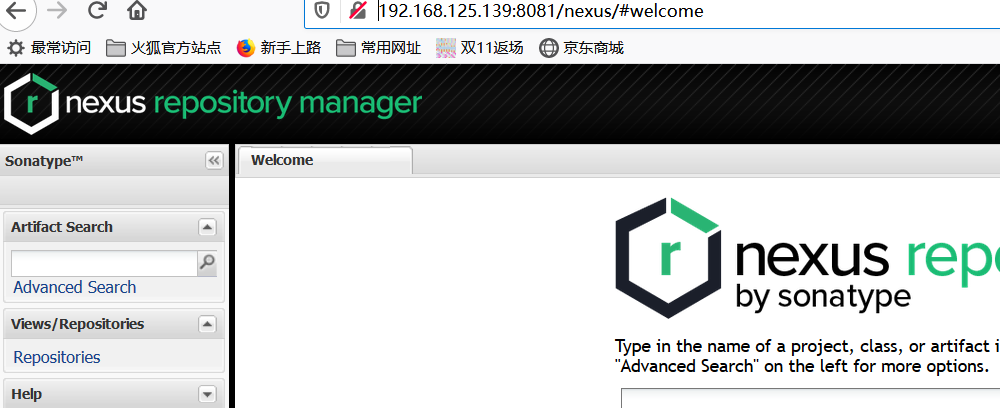
7.系统访问验证
http://192.168.125.139:8081/nexus

9.修改账号
默认账号 admin/admin123
请修改登录密码
10.重启再次验证
居然启动失败了,切换nexus账号输入 nexus console 执行一半失败了
经过日志分析2个原因:
a./opt/nexus/目录下面的有文件的所有这发生了变化,既文件的所属和权限发生了变化
b./opt/nexus/sonatype-work/nexus/conf/nexus.xml 删除该文件,运行时会自动生成
c.vi /etc/hosts 添加 127.0.0.1 机器名
经过以上分析修正后,执行正常了。
Centos610安装Nexus的更多相关文章
- CentOS安装Nexus(Maven私有库)详细配置及上传本地jar到私服
Nexus原理 Maven的原理就是将jar从远程中央仓库下载到PC磁盘的本地仓库,当本地仓库没有发现需要的jar就会去Maven默认的远程中央仓库Maven Central(由Apache维护)中寻 ...
- 在Windows上安装Nexus 3.2.0-01
在Windows上安装Nexus 环境: Windows 7 apache-maven-3.3.9 JDK 1.8 下载Nexus: https://sonatype-download.globa ...
- 在CMD命令下安装nexus报错和启动的问题
安装问题问题描述: 在控制台(cmd)下执行nexus install命令安装nexus服务的时候报错: wrapper | OpenSCManager failed - 拒绝访问. (0x5) 同时 ...
- CentOS 7下安装nexus 3
安装nexus 3的几个注意事项: 1.nexus 3和nexus 2不一样,nexus 2可以搜索Maven主仓库的包,但在nexus 3不能,只能搜索缓存过的包. 2.安装时关心的点在于运行环境, ...
- Linux环境安装Nexus
Linux环境安装Nexus Nexus可以做Maven私服,私服不是Maven的核心概念,它仅仅是一种衍生出来的特殊的Maven仓库.有三种专门的Maven仓库管理软件可以用来帮助大家建立私服: N ...
- Maven nexus 安装nexus私服出现的两个问题
1. 在win10中安装nexus时提示:wrapper | OpenSCManager failed - 拒绝访问. (0x5) 主要是没有权限.需要以管理员的身份运行 如果你是直接点击 start ...
- (十一)maven之安装nexus私服
安装nexus私服 前面的文章中对项目引入jar依赖包的时候,maven一般先是在本地仓库找对应版本的jar依赖包,如果在本地仓库中找不到,就上中央仓库中下载到本地仓库. 然而maven默认提供的中央 ...
- 在Windows上安装Nexus
在Windows上安装Nexus 学习了:https://www.cnblogs.com/yucongblog/p/6696736.html 下载地址:https://sonatype-downloa ...
- Maven nexus 安装nexus : wrapper | OpenSCManager failed - 拒绝访问。 (0x5)
在win7中安装nexus时提示:wrapper | OpenSCManager failed - 拒绝访问. (0x5) 主要是没有权限.需要以管理员的身份运行 如果你是直接点击 start-nex ...
随机推荐
- dp--C - Mysterious Present
C - Mysterious Present Peter decided to wish happy birthday to his friend from Australia and send hi ...
- can总线中什么是远程帧
所谓“远程帧”是一个传统翻译上的误区.Remote Frame实际上它的意义是“遥控帧”,发起方发起特定ID的远程帧,并且只发送ID部分,那么与其ID相符的终端设备就有义务在后半段的数据部分接管总线控 ...
- 第三十七篇 入门机器学习——Numpy基础
No.1. 查看numpy版本 No.2. 为了方便使用numpy,在导入时顺便起个别名 No.3. numpy.array的基本操作:创建.查询.修改 No.4. 用dtype查看当前元素的数据类型 ...
- Java-POJ1008-Maya Calendar
题意:两种纪年方法的转换 水题,根据题目翻译成代码就可以了 居然WA了一次,避坑,output要先输出数据组数,痛心疾首啊!本来可以一次AC的. package poj.ProblemSet; imp ...
- 使用ResponseBodyAdvice统一包装响应返回String的时候出现java.lang.ClassCastException: com.xxx.dto.common.ResponseResult cannot be cast to java.lang.String
代码如下: @Override public ResponseResult<Object> beforeBodyWrite(Object returnValue, MethodParame ...
- Centos7 切换 yum 源
# yum install lrzsz修改CentOS默认yum源为mirrors.aliyun.com1.首先备份系统自带yum源配置文件/etc/yum.repos.d/CentOS-Base.r ...
- Go网络编程TCP
1. 服务端 package main import ( "bufio" "fmt" "net" "os" " ...
- python2.7 字符处理小节
unicode是字符集 utf-8,gbk是编码方式,将字符集编码为机器识别的字节码 #encoding: utf-8 s = "中文" #unicode的utf-8编码,\xE4 ...
- xml配置文件中对于Shiro 权限管理filterChainDefinitions过滤器配置
博客转载:http://blog.csdn.net/userrefister/article/details/47807075 /** * Shiro-1.2.2内置的FilterChain * @s ...
- SparkStreaming个人记录
一.SparkStreaming概述 SparkStreaming是一种构建在Spark基础上的实时计算框架,它扩展了Spark处理大规模流式数据的能力,以吞吐量高和容错能力强著称. SparkStr ...
