LVM磁盘创建与扩容
以虚拟机为例
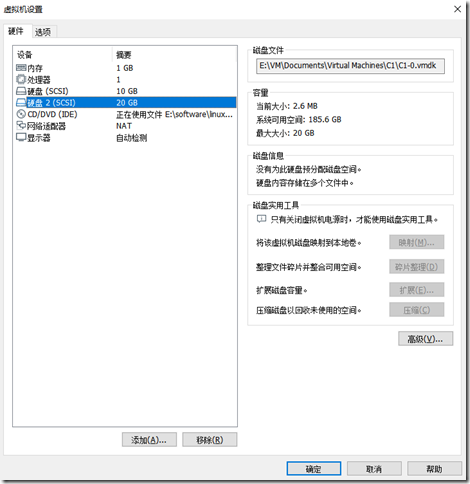
1、在虚拟机上添加新磁盘,点击虚拟机→设置->添加,最后如下图。
2、进入系统fdisk -l,查看当前磁盘信息
[root@master shell]# fdisk -l

Disk /dev/sda: 10.7 GB, 10737418240 bytes, 20971520 sectors

Units = sectors of 1 * 512 = 512 bytes

Sector size (logical/physical): 512 bytes / 512 bytes

I/O size (minimum/optimal): 512 bytes / 512 bytes

Disk label type: dos

Disk identifier: 0x000af178

   Device Boot      Start         End      Blocks   Id  System

/dev/sda1   *        2048     2099199     1048576   83  Linux

/dev/sda2         2099200    20971519     9436160   8e  Linux LVM

Disk /dev/mapper/centos-root: 8585 MB, 8585740288 bytes, 16769024 sectors

Units = sectors of 1 * 512 = 512 bytes

Sector size (logical/physical): 512 bytes / 512 bytes

I/O size (minimum/optimal): 512 bytes / 512 bytes

Disk /dev/mapper/centos-swap: 1073 MB, 1073741824 bytes, 2097152 sectors

Units = sectors of 1 * 512 = 512 bytes

Sector size (logical/physical): 512 bytes / 512 bytes

I/O size (minimum/optimal): 512 bytes / 512 bytes

[root@master shell]#
发现没有读到我们新添加的磁盘,我们重启下虚拟机。
如果不想重启,或者是生产上的服务器,不允许重启,可以使用partprobe,在线更新分区表。
# partprobe在线更新分区信息表,获取最新的磁盘信息

[root@master ~]# partprobe
重新使用fdisk -l命令查看,发现多了一块21.5GB的/dev/sdb磁盘
# fdisk -l 重新查看一下

[root@master ~]# df -Th

Filesystem              Type      Size  Used Avail Use% Mounted on

devtmpfs                devtmpfs  475M     0  475M   0% /dev

tmpfs                   tmpfs     487M     0  487M   0% /dev/shm

tmpfs                   tmpfs     487M  7.5M  479M   2% /run

tmpfs                   tmpfs     487M     0  487M   0% /sys/fs/cgroup

/dev/mapper/centos-root xfs       8.0G  4.8G  3.3G  60% /

/dev/sda1               xfs      1014M  167M  848M  17% /boot

tmpfs                   tmpfs      98M     0   98M   0% /run/user/0

[root@master ~]# fdisk -l

Disk /dev/sda: 10.7 GB, 10737418240 bytes, 20971520 sectors

Units = sectors of 1 * 512 = 512 bytes

Sector size (logical/physical): 512 bytes / 512 bytes

I/O size (minimum/optimal): 512 bytes / 512 bytes

Disk label type: dos

Disk identifier: 0x000af178

   Device Boot      Start         End      Blocks   Id  System

/dev/sda1   *        2048     2099199     1048576   83  Linux

/dev/sda2         2099200    20971519     9436160   8e  Linux LVM

Disk /dev/sdb: 21.5 GB, 21474836480 bytes, 41943040 sectors

Units = sectors of 1 * 512 = 512 bytes

Sector size (logical/physical): 512 bytes / 512 bytes

I/O size (minimum/optimal): 512 bytes / 512 bytes

Disk /dev/mapper/centos-root: 8585 MB, 8585740288 bytes, 16769024 sectors

Units = sectors of 1 * 512 = 512 bytes

Sector size (logical/physical): 512 bytes / 512 bytes

I/O size (minimum/optimal): 512 bytes / 512 bytes

Disk /dev/mapper/centos-swap: 1073 MB, 1073741824 bytes, 2097152 sectors

Units = sectors of 1 * 512 = 512 bytes

Sector size (logical/physical): 512 bytes / 512 bytes

I/O size (minimum/optimal): 512 bytes / 512 bytes
3、fdisk在新的磁盘上创建分区
[root@master ~]# fdisk /dev/sdb     # 注意,这里的sdb是不带数字的

Welcome to fdisk (util-linux 2.23.2).

Changes will remain in memory only, until you decide to write them.

Be careful before using the write command.

Device does not contain a recognized partition table

Building a new DOS disklabel with disk identifier 0xe1f69387.

Command (m for help): n       # new新建分区

Partition type:

   p   primary (0 primary, 0 extended, 4 free)

   e   extended

Select (default p): p     # 选择主分区

Partition number (1-4, default 1): 1       # 分区编号,直接回车,选择默认的1就好

First sector (2048-41943039, default 2048):         # 设置起始扇区,直接回车,选择默认的

Using default value 2048

Last sector, +sectors or +size{K,M,G} (2048-41943039, default 41943039):    # 设置结束扇区,直接回车,默认选择到磁盘的最后一个扇区。

Using default value 41943039             # 默认分区的容量就是整个磁盘的容量

Partition 1 of type Linux and of size 20 GiB is set

Command (m for help): p        # print打印当前设置好的磁盘信息(注意,此时还没物理生效)

Disk /dev/sdb: 21.5 GB, 21474836480 bytes, 41943040 sectors

Units = sectors of 1 * 512 = 512 bytes

Sector size (logical/physical): 512 bytes / 512 bytes

I/O size (minimum/optimal): 512 bytes / 512 bytes

Disk label type: dos

Disk identifier: 0xe1f69387

   Device Boot      Start         End      Blocks   Id  System

/dev/sdb1            2048    41943039    20970496   83  Linux

Command (m for help): t        # 输入t,修改磁盘格式为LVM格式

Selected partition 1

Hex code (type L to list all codes): 8e     # 输入8e,8e代表LVM格式

Changed type of partition 'Linux' to 'Linux LVM'

Command (m for help): p       # 再次打印磁盘信息

Disk /dev/sdb: 21.5 GB, 21474836480 bytes, 41943040 sectors

Units = sectors of 1 * 512 = 512 bytes

Sector size (logical/physical): 512 bytes / 512 bytes

I/O size (minimum/optimal): 512 bytes / 512 bytes

Disk label type: dos

Disk identifier: 0xe1f69387

   Device Boot      Start         End      Blocks   Id  System

/dev/sdb1            2048    41943039    20970496   8e  Linux LVM

Command (m for help): w      # w开始保存设置的磁盘分区信息,此时才是真正作用生效了。

The partition table has been altered!

Calling ioctl() to re-read partition table.

Syncing disks.
4、创建pv
创建LVM概念中的物理卷。
注意:这里要选带数字编号的磁盘,这里的/dev/sdb1就是上面我们用fdisk创建好的磁盘分区,1表示我们的分区编号,上面设置的是1,所以这里就是sdb1
[root@master ~]# pvscan     # 查看当前系统上的物理卷信息

  PV /dev/sda2   VG centos          lvm2 [<9.00 GiB / 0    free]

  Total: 1 [<9.00 GiB] / in use: 1 [<9.00 GiB] / in no VG: 0 [0   ]

[root@master ~]# pvcreate /dev/sdb1     # 创建物理卷,注意这里的磁盘尾号sdb1必须带数字

  Physical volume "/dev/sdb1" successfully created.

[root@master ~]# pvscan

  PV /dev/sda2   VG centos          lvm2 [<9.00 GiB / 0    free]

  PV /dev/sdb1                      lvm2 [<20.00 GiB]

  Total: 2 [<29.00 GiB] / in use: 1 [<9.00 GiB] / in no VG: 1 [<20.00 GiB]
5、将pv加入vg组,扩容vg
pv是物理卷,vg是卷组,多个pv组成一个vg,然后vg里面去构建逻辑卷组lv
如果系统没有vg,则创建vg组。
[root@master ~]# vgdisplay

[root@master ~]# vgscan

  Reading volume groups from cache.

# vgcreate 后面可以接多个磁盘,比如vgcreate vgdata /dev/xvde1 /dev/xvde2,因为这里只有一块,所以就用一个

[root@master ~]# vgcreate vgdata /dev/xvde1   # 创建vg,vg名字设置为vgdata,/dev/xvde1是我们上面创建的pv卷的名字

  Volume group "vgdata" successfully created

[root@master ~]# vgscan

  Reading volume groups from cache.

  Found volume group "vgdata" using metadata type lvm2

[root@master ~]# vgdisplay

  --- Volume group ---

  VG Name               vgdata

  System ID

  Format                lvm2

  Metadata Areas        1

  Metadata Sequence No  1

  VG Access             read/write

  VG Status             resizable

  MAX LV                0

  Cur LV                0

  Open LV               0

  Max PV                0

  Cur PV                1

  Act PV                1

  VG Size               <300.00 GiB

  PE Size               4.00 MiB

  Total PE              76799

  Alloc PE / Size       0 / 0

  Free  PE / Size       76799 / <300.00 GiB

  VG UUID               bY9vpW-ALyF-YDxB-WCjj-Tlvg-04Jp-DWXdkm

[root@master ~]#
如果有vg,则扩容
[root@master ~]# vgdisplay

  --- Volume group ---

  VG Name               centos

  System ID

  Format                lvm2

  Metadata Areas        1

  Metadata Sequence No  3

  VG Access             read/write

  VG Status             resizable

  MAX LV                0

  Cur LV                2

  Open LV               2

  Max PV                0

  Cur PV                1

  Act PV                1

  VG Size               <9.00 GiB

  PE Size               4.00 MiB

  Total PE              2303

  Alloc PE / Size       2303 / <9.00 GiB

  Free  PE / Size       0 / 0

  VG UUID               YSauT8-zhj2-05Yc-c4rb-VNqs-OjrX-ZB8eeE

[root@master ~]# vgextend centos /dev/sdb1   # centos是原来就已经存在的卷组名字,/dev/sdb1是我们刚刚创建的pv名字

  Volume group "centos" successfully extended

[root@master ~]# vgdisplay

  --- Volume group ---

  VG Name               centos

  System ID

  Format                lvm2

  Metadata Areas        2

  Metadata Sequence No  4

  VG Access             read/write

  VG Status             resizable

  MAX LV                0

  Cur LV                2

  Open LV               2

  Max PV                0

  Cur PV                2

  Act PV                2

  VG Size               28.99 GiB

  PE Size               4.00 MiB

  Total PE              7422

  Alloc PE / Size       2303 / <9.00 GiB

  Free  PE / Size       5119 / <20.00 GiB

  VG UUID               YSauT8-zhj2-05Yc-c4rb-VNqs-OjrX-ZB8eeE
6、扩容LV
如果LV逻辑卷不存在,则创建
[root@yzjgxh2529638940 ~]# lvcreate -n lvdata -L 300G vgdata

  Volume group "vgdata" has insufficient free space (76799 extents): 76800 required.

# 一般无法用到300G,所以稍微小一点就好了

[root@yzjgxh2529638940 ~]# lvcreate -n lvdata -L 299G vgdata

  Logical volume "lvdata" created.

[root@yzjgxh2529638940 ~]# lvscan

  ACTIVE            '/dev/vgdata/lvdata' [299.00 GiB] inherit

[root@yzjgxh2529638940 ~]#

# 格式化该逻辑分区

[root@yzjgxh2529638940 ~]# mkfs.xfs /dev/vgdata/lvdata

meta-data=/dev/vgdata/lvdata     isize=512    agcount=4, agsize=19595264 blks

         =                       sectsz=512   attr=2, projid32bit=1

         =                       crc=1        finobt=0, sparse=0

data     =                       bsize=4096   blocks=78381056, imaxpct=25

         =                       sunit=0      swidth=0 blks

naming   =version 2              bsize=4096   ascii-ci=0 ftype=1

log      =internal log           bsize=4096   blocks=38272, version=2

         =                       sectsz=512   sunit=0 blks, lazy-count=1

realtime =none                   extsz=4096   blocks=0, rtextents=0

[root@yzjgxh2529638940 ~]#
如果LV逻辑卷存在,则扩容
[root@master ~]# lvscan

  ACTIVE            '/dev/centos/swap' [1.00 GiB] inherit

  ACTIVE            '/dev/centos/root' [<8.00 GiB] inherit

[root@master ~]# lvextend -L +19.5G /dev/centos/root

  Size of logical volume centos/root changed from <8.00 GiB (2047 extents) to <27.50 GiB (7039 extents).

  Logical volume centos/root successfully resized.
7、resize使文件系统生效(重要)
[root@master ~]# df -Th

Filesystem              Type      Size  Used Avail Use% Mounted on

devtmpfs                devtmpfs  475M     0  475M   0% /dev

tmpfs                   tmpfs     487M     0  487M   0% /dev/shm

tmpfs                   tmpfs     487M  7.5M  479M   2% /run

tmpfs                   tmpfs     487M     0  487M   0% /sys/fs/cgroup

/dev/mapper/centos-root xfs       8.0G  4.8G  3.3G  60% /

/dev/sda1               xfs      1014M  167M  848M  17% /boot

tmpfs                   tmpfs      98M     0   98M   0% /run/user/0

# ext3,ext4使用resize2fs

[root@master ~]# resize2fs /dev/centos/root

resize2fs 1.42.9 (28-Dec-2013)

resize2fs: Bad magic number in super-block while trying to open /dev/centos/root

Couldn't find valid filesystem superblock.

# 这里需要扩容的是xfs,所以用xfs_growfs命令

[root@master ~]# xfs_growfs /dev/centos/root

meta-data=/dev/mapper/centos-root isize=512    agcount=4, agsize=524032 blks

         =                       sectsz=512   attr=2, projid32bit=1

         =                       crc=1        finobt=0 spinodes=0

data     =                       bsize=4096   blocks=2096128, imaxpct=25

         =                       sunit=0      swidth=0 blks

naming   =version 2              bsize=4096   ascii-ci=0 ftype=1

log      =internal               bsize=4096   blocks=2560, version=2

         =                       sectsz=512   sunit=0 blks, lazy-count=1

realtime =none                   extsz=4096   blocks=0, rtextents=0

data blocks changed from 2096128 to 7207936

[root@master ~]# df -Th

Filesystem              Type      Size  Used Avail Use% Mounted on

devtmpfs                devtmpfs  475M     0  475M   0% /dev

tmpfs                   tmpfs     487M     0  487M   0% /dev/shm

tmpfs                   tmpfs     487M  7.5M  479M   2% /run

tmpfs                   tmpfs     487M     0  487M   0% /sys/fs/cgroup

/dev/mapper/centos-root xfs        28G  4.8G   23G  18% /

/dev/sda1               xfs      1014M  167M  848M  17% /boot

tmpfs                   tmpfs      98M     0   98M   0% /run/user/0
8、挂载
# 创建挂载的目录

[root@yzjgxh2529638940 ~]# mkdir /data

# 开始挂载

[root@yzjgxh2529638940 ~]# mount /dev/vgdata/lvdata /data/

[root@yzjgxh2529638940 ~]# df -Th

Filesystem                Type      Size  Used Avail Use% Mounted on

/dev/xvda2                xfs        36G  2.1G   34G   6% /

devtmpfs                  devtmpfs   32G     0   32G   0% /dev

tmpfs                     tmpfs      32G   24K   32G   1% /dev/shm

tmpfs                     tmpfs      32G   18M   32G   1% /run

tmpfs                     tmpfs      32G     0   32G   0% /sys/fs/cgroup

tmpfs                     tmpfs     6.3G     0  6.3G   0% /run/user/0

/dev/mapper/vgdata-lvdata xfs       299G   33M  299G   1% /data

# 加入开机自动挂载

[root@yzjgxh2529638940 ~]# vim /etc/fstab

#

# /etc/fstab

# Created by anaconda on Thu May  9 01:56:05 2019

#

# Accessible filesystems, by reference, are maintained under '/dev/disk'

# See man pages fstab(5), findfs(8), mount(8) and/or blkid(8) for more info

#

UUID=a83f4fdc-2ea1-4fec-a1e2-a42016ce0afe /                       xfs     defaults        0 0

UUID=9e33bd6f-c68c-41c7-95c8-703f4fe8c3d4 swap                    swap    defaults        0 0

/dev/vgdata/lvdata                        /data                   xfs     defaults        0 0
到此,LVM扩容完成。
LVM磁盘创建与扩容的更多相关文章
- lvm之创建/扩容/缩容/快照及关闭的全部流程操作记录
基本介绍Linux用户安装Linux 操作系统时遇到的一个最常见的难以决定的问题就是如何正确地给评估各分区大小,以分配合适的硬盘空间.随着 Linux的逻辑盘卷管理功能的出现,这些问题都迎刃而解, l ...
- lvm分区创建和扩容
shell> fdisk /dev/xvdb #### 选择磁盘 Command (m for help): m #### 帮助 Command action a toggle a bootab ...
- LVM磁盘管理实战案例
前言:这是关于centos/linux上的LVM磁盘上的扩容,缩减,磁盘类型等收集做的案例 至于ubuntu系统的磁盘扩容参考:https://www.jianshu.com/p/5dcfcec687 ...
- 【转载】CentOS LVM磁盘扩容
转自:http://blog.sina.com.cn/s/blog_8882a6260101cpfs.html EXSI5.1主机有一个linux虚拟机,系统是centos运行httpd服务,因为是多 ...
- Linux:lvm磁盘分区,动态扩容
一.lvm磁盘分区: 1,查看新增的磁盘,需要使用root权限 fdisk -l 看到有一个新增的100G磁盘 2,对磁盘进行分区 fdisk /dev/xvdb 1,输入:n 表示创建一个新的分区( ...
- 03.LinuxCentOS系统root目录LVM磁盘扩容
根目录LVM扩容操作步骤: [root@centos7 ~]# df -lh文件系统 容量 已用 可用 已用% 挂载点/dev/mapper/centos-root 50G 7.7G 43G 6% / ...
- lvm 磁盘扩容
LVM磁盘管理 一.LVM简介 LVM是 Logical Volume Manager(逻辑卷管理)的简写,它由Heinz Mauelshagen在Linux 2.4内核上实现.LVM将一个或多个硬盘 ...
- VMware CentOS LVM磁盘扩容
一. 在虚拟机上增加磁盘空间 如下图. 增加完后会有提示 "磁盘已成功扩展.您必须从客户机操作系统内部对磁盘重新进行分区和扩展文件系统.是继续完成以下步骤才算成功. 二.调整虚拟机磁盘LVM ...
- LVM磁盘管理
http://www.cnblogs.com/gaojun/archive/2012/08/22/2650229.html Linux LVM硬盘管理及LVM扩容 LVM磁盘管理 一.LVM简介... ...
随机推荐
- jQuery实现打开网页自动弹出遮罩层或点击弹出遮罩层功能示例
本文实例讲述了jQuery实现打开网页自动弹出遮罩层或点击弹出遮罩层功能.分享给大家供大家参考,具体如下: 弹出层:两种方式 一是打开网页就自动弹出层二是点击弹出 <!DOCTYPE html ...
- hdu 3887 Counting Offspring(DFS序【非递归】+树状数组)
题意: N个点形成一棵树.给出根结点P还有树结构的信息. 输出每个点的F[i].F[i]:以i为根的所有子结点中编号比i小的数的个数. 0<n<=10^5 思路: 方法一:直接DFS,进入 ...
- hdu 2586 How far away? (LCA模板)
题意: N个点,形成一棵树,边有长度. M个询问,每个询问(a,b),询问a和b的距离 思路: 模板题,看代码.DFS预处理算出每个结点离根结点的距离. 注意: qhead[maxn],而不是qhea ...
- Typora使用教程
Typora简介 Typorn 是一款轻便简洁的Markdown编辑器,支持及时渲染技术,这也是与其他Markdown编辑器最显著的区别.及时渲染使得你写Markdown就像是写Word文档一样流畅自 ...
- ansible安装和批量执行命令
yum install -y ansible 编辑 /etc/ansible/hosts 文件 # This is the default ansible 'hosts' file.## It sho ...
- 检查redis是否正常运行
[XX@XXX]$ ps -ef | grep redisXX 8047 1 0 10:06 ? 00:00:03 redis-server *:6379XX 9983 9802 0 11:2 ...
- Jetbrains 系 IDE 编辑器的代码提示功能
著名的 Jetbrains 可谓编程界的一大福音,众多有名代码编辑器比如 ItelliJ IDEA.PHPStorm.WebStorm.PyCharm 等,均出自这家公司麾下. 对于中国的Java开发 ...
- 【接口】HttpClient 处理get和post请求(二)(2019-07-14 18:41)
一.环境准备 1.导入httpClient依赖包 <dependency> <groupId>org.apache.httpcomponents</groupId> ...
- 稳了!我准备了1个晚上的CMS垃圾收集器
面试官:今天还是来聊聊CMS垃圾收集器呗? 候选者:嗯啊... 候选者:如果用Seria和Parallel系列的垃圾收集器:在垃圾回收的时,用户线程都会完全停止,直至垃圾回收结束! 候选者:CMS的全 ...
- 【AI测试】人工智能 (AI) 测试--开篇
人工智能测试 什么是人工智能,人工智能是怎么测试的.可能是大家一开始最想了解的.大家看图中关于人工智能的定义.通俗点来说呢,就是 让机器实现原来只有人类才能完成的任务:比如看懂照片,听懂说话,思考等等 ...