SpringBoot------集成MyBatis
1.pom.xml文件添加MyBatis和MySQL等依赖
<project xmlns="http://maven.apache.org/POM/4.0.0" xmlns:xsi="http://www.w3.org/2001/XMLSchema-instance"

  xsi:schemaLocation="http://maven.apache.org/POM/4.0.0 http://maven.apache.org/maven-v4_0_0.xsd">

  <modelVersion>4.0.0</modelVersion>

  <groupId>cn.itsource</groupId>

  <artifactId>springboot-shop</artifactId>

  <packaging>war</packaging>

  <version>0.0.1-SNAPSHOT</version>

  <name>springboot-shop Maven Webapp</name>

  <url>http://maven.apache.org</url>

  <!-- 如果添加了Parent,则dependency中可以不加入version,会自动匹配parent的版本 -->

  <parent>

      <groupId>org.springframework.boot</groupId>

      <artifactId>spring-boot-starter-parent</artifactId>

      <version>1.5.9.RELEASE</version>

  </parent>

  <properties>

      <java.version>1.8</java.version>

      <project.build.sourceEncoding>UTF-8</project.build.sourceEncoding>

    <maven.compiler.encoding>UTF-8</maven.compiler.encoding>

  </properties>

  <dependencies>

    <dependency>

          <groupId>org.springframework.boot</groupId>

          <artifactId>spring-boot-starter-web</artifactId>

      </dependency>

      <dependency>

          <groupId>javax.servlet</groupId>

          <artifactId>javax.servlet-api</artifactId>

          <scope>provided</scope>

      </dependency>

      <!-- 添加servlet依赖 -->

      <dependency>

          <groupId>javax.servlet</groupId>

          <artifactId>jstl</artifactId>

      </dependency>

      <!-- 添加tomcat依赖 -->

      <dependency>

          <groupId>org.springframework.boot</groupId>

          <artifactId>spring-boot-starter-tomcat</artifactId>

          <scope>provided</scope>

      </dependency>

      <dependency>

          <groupId>org.apache.tomcat.embed</groupId>

        <artifactId>tomcat-embed-jasper</artifactId>

      </dependency>

      <!-- 添加json解析依赖 -->

      <dependency>

          <groupId>com.alibaba</groupId>

          <artifactId>fastjson</artifactId>

          <version>1.2.15</version>

      </dependency>

      <!-- 添加mysql依赖 -->

      <dependency>

          <groupId>mysql</groupId>

          <artifactId>mysql-connector-java</artifactId>

      </dependency>

      <!-- 添加mybatis依赖 -->

      <!-- 这里用1.3.1版本 -->

      <dependency>

          <groupId>org.mybatis.spring.boot</groupId>

          <artifactId>mybatis-spring-boot-starter</artifactId>

          <version>1.3.1</version>

      </dependency>

      <!-- 添加mybatis分页依赖 -->

      <!-- GitHub地址:https://github.com/paeghelper/Mybatis-PageHelper -->

      <dependency>

          <groupId>com.github.pagehelper</groupId>

          <artifactId>pagehelper</artifactId>

          <version>4.1.0</version>

      </dependency>

      <!-- 添加spring-data-jpa依赖 -->

      <dependency>

          <groupId>org.springframework.boot</groupId>

          <artifactId>spring-boot-starter-data-jpa</artifactId>

      </dependency>

      <!-- 引入spring-data-jpa依赖,则不需要引入jdbc

      <dependency>

          <groupId>org.springframework.boot</groupId>

          <artifactId>spring-boot-starter-jdbc</artifactId>

      </dependency>

      -->

      <!-- 使用thymeleaf -->

      <dependency>

          <groupId>org.springframework.boot</groupId>

          <artifactId>spring-boot-starter-thymeleaf</artifactId>

      </dependency>

      <!-- 使用devtool热部署插件(推荐) -->

      <dependency>

          <groupId>org.springframework.boot</groupId>

          <artifactId>spring-boot-devtools</artifactId>

          <optional>true</optional>

          <scope>true</scope>

      </dependency>

  </dependencies>

  <build>

    <finalName>myshop</finalName>

    <!-- 热部署插件 -->

    <plugins>

        <plugin>

            <groupId>org.springframework.boot</groupId>

            <artifactId>spring-boot-maven-plugin</artifactId>

            <configuration>

                <!-- 这里得设置为true -->

                <fork>true</fork>

            </configuration>

        </plugin>

    </plugins>

  </build>

</project>
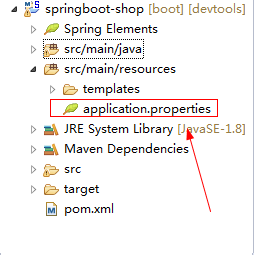
2.修改application.properties的MySQL配置
server.port=8080

spring.mvc.view.prefix=/WEB-INF/jsp/

spring.mvc.view.suffix=.jsp

#thymeleaf

#spring.thymeleaf.prefix=classpath:/templates/

#spring.thymeleaf.suffix=.html

#spring.thymeleaf.mode=HTML5

#spring.thymeleaf.encoding=UTF-8

#spring.thymeleaf.content-type=text/html; charset=utf-8

#spring.thymeleaf.cache=false

#jpa

spring.datasource.url=jdbc:mysql://localhost:3306/shop?useUnicode=true&characterEncoding=utf-8&useSSL=false

spring.datasource.username=root

spring.datasource.password=123456

spring.datasource.driver-class-name=com.mysql.jdbc.Driver

spring.datasource.tomcat.max-active=20

spring.datasource.tomcat.max-idle=8

spring.datasource.tomcat.min-idle=8

spring.datasource.tomcat.initial-size=10

spring.jpa.database=MYSQL

spring.jpa.show-sql=true

spring.jpa.hibernate.ddl-auto=update

spring.jpa.hibernate.naming.strategy=org.hibernate.cfg.ImprovedNamingStrategy

spring.jpa.properties.hibernate.dialect=org.hibernate.dialect.MySQL5Dialect
3.添加测试类
package myshop.bean;

import javax.persistence.Entity;

import javax.persistence.GeneratedValue;

import javax.persistence.GenerationType;

import javax.persistence.Id;

import org.hibernate.annotations.GenericGenerator;

@Entity

public class UserInfo {

    @Id

    @GeneratedValue(strategy=GenerationType.AUTO)

    private int id;

    private String username;

    private String password;

    public int getId() {

        return id;

    }

    public void setId(int id) {

        this.id = id;

    }

    public String getUsername() {

        return username;

    }

    public void setUsername(String username) {

        this.username = username;

    }

    public String getPassword() {

        return password;

    }

    public void setPassword(String password) {

        this.password = password;

    }

}
4. 添加MyBatisMapper
package myshop.mapper;

import java.util.List;

import myshop.bean.UserInfo;

import org.apache.ibatis.annotations.Insert;

import org.apache.ibatis.annotations.Options;

import org.apache.ibatis.annotations.Select;

public interface MyBatisMapper {

    //#{name}是参数占位符

    @Select("select * from user_info where username = #{username}")

    public List<UserInfo> likeName(String username);

    @Select("select * from user_info where id = #{id}")

    public UserInfo getById(int id);

    @Select("select name from user_info where id = #{id}")

    public String getNameById(int id);

    /*

     * 获取自增长id

     *

     * */

    @Insert("insert into user_info(username,password) values(#{username},#{password})")

    @Options(useGeneratedKeys=true,keyProperty="id",keyColumn="id")

    public void save(UserInfo userInfo);

}
5.添加MyBatisService
package myshop.service;

import java.util.List;

import org.springframework.beans.factory.annotation.Autowired;

import org.springframework.stereotype.Service;

import org.springframework.transaction.annotation.Transactional;

import myshop.bean.UserInfo;

import myshop.mapper.MyBatisMapper;

@Service

public class MyBatisService {

    @Autowired

    private MyBatisMapper myBatisMapper;

    public List<UserInfo> likeName(String username)

    {

        return myBatisMapper.likeName(username);

    }

    /*

     * 添加事物

     *

     * */

    @Transactional

    public void save(UserInfo userInfo)

    {

        myBatisMapper.save(userInfo);

    }

}
6.添加MyBatisController
package myshop.controller;

import java.util.List;

import org.springframework.beans.factory.annotation.Autowired;

import org.springframework.web.bind.annotation.RequestMapping;

import org.springframework.web.bind.annotation.RestController;

import com.github.pagehelper.PageHelper;

import myshop.bean.UserInfo;

import myshop.service.MyBatisService;

@RestController

public class MyBatisController {

     @Autowired

     private MyBatisService myBatisService;

     @RequestMapping("/likeName")

     public List<UserInfo> likeName(String username)

     {

         PageHelper.startPage(1,2);

         return myBatisService.likeName(username);

     }

     @RequestMapping("/save")

     public UserInfo save()

     {

         UserInfo userInfo = new UserInfo();

         userInfo.setUsername("天心");

         userInfo.setPassword("123456");

         myBatisService.save(userInfo);

         return userInfo;

     }

}
7.添加启动类
package myshop;

import org.mybatis.spring.annotation.MapperScan;

import org.springframework.boot.SpringApplication;

import org.springframework.boot.autoconfigure.SpringBootApplication;

import org.springframework.boot.autoconfigure.web.HttpMessageConverters;

import org.springframework.context.annotation.Bean;

import org.springframework.http.converter.HttpMessageConverter;

import com.alibaba.fastjson.serializer.SerializerFeature;

import com.alibaba.fastjson.support.config.FastJsonConfig;

import com.alibaba.fastjson.support.spring.FastJsonHttpMessageConverter;

/*

 * 扫描该包下相应的class,主要是MyBatis的持久化类

 *

 * */

@SpringBootApplication

@MapperScan("myshop.mapper")

public class App {

    public HttpMessageConverters fastJsonHttpMessageConverter()

    {

        FastJsonHttpMessageConverter fastConverter = new FastJsonHttpMessageConverter();

        FastJsonConfig fastConfig = new FastJsonConfig();

        fastConfig.setSerializerFeatures(SerializerFeature.PrettyFormat);

        fastConverter.setFastJsonConfig(fastConfig);

        HttpMessageConverter<?> converts = fastConverter;

        return new HttpMessageConverters(converts);

    }

    public static void main(String[] args) {

        // TODO Auto-generated method stub

        SpringApplication.run(App.class, args);

    }

}
8.添加数据库shop和表user_info
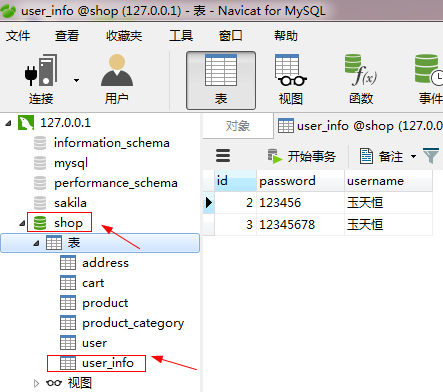
9.运行,访问地址即可
http://localhost:8080/likeName?username=玉天恒
SpringBoot------集成MyBatis的更多相关文章
- springboot集成mybatis(二)
上篇文章<springboot集成mybatis(一)>介绍了SpringBoot集成MyBatis注解版.本文还是使用上篇中的案例,咱们换个姿势来一遍^_^ 二.MyBatis配置版(X ...
- springboot集成mybatis(一)
MyBatis简介 MyBatis本是apache的一个开源项目iBatis, 2010年这个项目由apache software foundation迁移到了google code,并且改名为MyB ...
- SpringBoot 集成Mybatis 连接Mysql数据库
记录SpringBoot 集成Mybatis 连接数据库 防止后面忘记 1.添加Mybatis和Mysql依赖 <dependency> <groupId>org.mybati ...
- SpringBoot Mybatis整合(注解版),SpringBoot集成Mybatis(注解版)
SpringBoot Mybatis整合(注解版),SpringBoot集成Mybatis(注解版) ================================ ©Copyright 蕃薯耀 2 ...
- SpringBoot集成Mybatis并具有分页功能PageHelper
SpringBoot集成Mybatis并具有分页功能PageHelper 环境:IDEA编译工具 第一步:生成测试的数据库表和数据 SET FOREIGN_KEY_CHECKS=0; ...
- Springboot集成mybatis(mysql),mail,mongodb,cassandra,scheduler,redis,kafka,shiro,websocket
https://blog.csdn.net/a123demi/article/details/78234023 : Springboot集成mybatis(mysql),mail,mongodb,c ...
- BindingException: Invalid bound statement (not found)问题排查:SpringBoot集成Mybatis重点分析
重构代码,方法抛出异常:BindingException: Invalid bound statement (not found) 提示信息很明显:mybatis没有提供某方法 先不解释问题原因和排查 ...
- SpringBoot集成Mybatis配置动态数据源
很多人在项目里边都会用到多个数据源,下面记录一次SpringBoot集成Mybatis配置多数据源的过程. pom.xml <?xml version="1.0" encod ...
- SpringBoot集成Mybatis实现多表查询的两种方式(基于xml)
下面将在用户和账户进行一对一查询的基础上进行介绍SpringBoot集成Mybatis实现多表查询的基于xml的两种方式. 首先我们先创建两个数据库表,分别是user用户表和account账户表 ...
- SpringBoot集成MyBatis的Bean配置方式
SpringBoot集成MyBatis的Bean配置方式 SpringBoot是一款轻量级开发的框架,简化了很多原先的xml文件配置方式,接下来就介绍一下如何不适用XML来配置Mybatis spri ...
随机推荐
- .Net程序帮助文档制作
一,准备工作 1,首先介绍一款VS的代码注释插件GhostDoc 你也许认为我们在代码中敲入///就能自动生成xml注释,但这种注释是没有说明文字的.而GhostDoc可以生成一些简单的说明文字,如果 ...
- android开发(29) 自定义曲线,可拖动,无限加载
项目需要 做一个曲线,该曲线的数据时不断加载的.如下图,当不断向左拖动时,图形曲线要随着拖动移动,并在拖动到边界时需要加载更多数据. 先看步骤: 1.在Activity里放一个surfaceView ...
- mysql archive存储引擎导入数据报duplicate key
DROP TABLE IF EXISTS `test`;CREATE TABLE `test` ( `id` int(10) unsigned NOT NULL AUTO_INCREMENT, `ve ...
- fiddler手机端抓包
1. 买个360随身wifi,插在台式机上生成热点,手机连上自己的wifi 如果电脑与手机本就在一个局域网,省略这一步 2. 在fiddler中如下设置: 3. 查看电脑无线连接属性 4. 在手机上设 ...
- MySQL 5.7主从复制从零开始设置及全面详解——实现多线程并行同步,解决主从复制延迟问题!
MySQL 5.7主从复制从零开始设置及全面详解——实现多线程并行同步,解决主从复制延迟问题!2017年06月15日 19:59:44 蓝色-鸢尾 阅读数:2062版权声明:本文为博主原创文章,如需转 ...
- 理解javascript中的回调函数(callback)【转】
在JavaScrip中,function是内置的类对象,也就是说它是一种类型的对象,可以和其它String.Array.Number.Object类的对象一样用于内置对象的管理.因为function实 ...
- Python __str__函数
class Cat: def __init__(self,_name): self.name = _name def __str__(self): return "i am %s" ...
- Java相对路径/绝对路径总结
Version:0.9 StartHTML:-1 EndHTML:-1 StartFragment:00000099 EndFragment:00019826 Java相对路径/绝对路径总结(2) 修 ...
- Eclipse中配置resin 4.x
开发web项目时,你还困扰在,反复启动web容器的痛苦中么?也许会有人说,用调试模式.但是如果涉及到配置文件或者service类,还是不得不重启web容器吧,而且偶尔会出现抽风情况,没生效的情况(这时 ...
- C++ 查询某个变量的类型
#include <typeinfo> int iii = 100; printf("%s\n",typeid(iii).name());//类型 详见:http:// ...