
python perlin noise
python 利用 noise 生成纹理。
# -*- coding: utf-8 -*-

"""

Created on Mon Apr 23 20:04:41 2018

@author: shiyi

"""

import random, math

import cv2

import numpy as np

"""

Texture generation using Perlin noise

"""

class NoiseUtils:

    def __init__(self, imageSize):

        self.imageSize = imageSize

        self.gradientNumber = 256

        self.grid = [[]]

        self.gradients = []

        self.permutations = []

        self.img = {}

        self.__generateGradientVectors()

        self.__normalizeGradientVectors()

        self.__generatePermutationsTable()

    def __generateGradientVectors(self):

        for i in range(self.gradientNumber):

            while True:

                x, y = random.uniform(-1, 1), random.uniform(-1, 1)

                if x * x + y * y < 1:

                    self.gradients.append([x, y])

                    break

    def __normalizeGradientVectors(self):

        for i in range(self.gradientNumber):

            x, y = self.gradients[i][0], self.gradients[i][1]

            length = math.sqrt(x * x + y * y)

            self.gradients[i] = [x / length, y / length]

    # The modern version of the Fisher-Yates shuffle

    def __generatePermutationsTable(self):

        self.permutations = [i for i in range(self.gradientNumber)]

        for i in reversed(range(self.gradientNumber)):

            j = random.randint(0, i)

            self.permutations[i], self.permutations[j] = \

                self.permutations[j], self.permutations[i]

    def getGradientIndex(self, x, y):

        return self.permutations[(x + self.permutations[y % self.gradientNumber]) % self.gradientNumber]

    def perlinNoise(self, x, y):

        qx0 = int(math.floor(x))

        qx1 = qx0 + 1

        qy0 = int(math.floor(y))

        qy1 = qy0 + 1

        q00 = self.getGradientIndex(qx0, qy0)

        q01 = self.getGradientIndex(qx1, qy0)

        q10 = self.getGradientIndex(qx0, qy1)

        q11 = self.getGradientIndex(qx1, qy1)

        tx0 = x - math.floor(x)

        tx1 = tx0 - 1

        ty0 = y - math.floor(y)

        ty1 = ty0 - 1

        v00 = self.gradients[q00][0] * tx0 + self.gradients[q00][1] * ty0

        v01 = self.gradients[q01][0] * tx1 + self.gradients[q01][1] * ty0

        v10 = self.gradients[q10][0] * tx0 + self.gradients[q10][1] * ty1

        v11 = self.gradients[q11][0] * tx1 + self.gradients[q11][1] * ty1

        wx = tx0 * tx0 * (3 - 2 * tx0)

        v0 = v00 + wx * (v01 - v00)

        v1 = v10 + wx * (v11 - v10)

        wy = ty0 * ty0 * (3 - 2 * ty0)

        return (v0 + wy * (v1 - v0)) * 0.5 + 1

    def makeTexture(self, texture = None):

        if texture is None:

            texture = self.cloud

        noise = {}

        max = min = None

        for i in range(self.imageSize):

            for j in range(self.imageSize):

                value = texture(i, j)

                noise[i, j] = value

                if max is None or max < value:

                    max = value

                if min is None or min > value:

                    min = value

        for i in range(self.imageSize):

            for j in range(self.imageSize):

                self.img[i, j] = (int) ((noise[i, j] - min) / (max - min) * 255 )

    def fractalBrownianMotion(self, x, y, func):

        octaves = 12

        amplitude = 1.0

        frequency = 1.0 / self.imageSize

        persistence = 0.5

        value = 0.0

        for k in range(octaves):

            value += func(x * frequency, y * frequency) * amplitude

            frequency *= 2

            amplitude *= persistence

        return value

    def cloud(self, x, y, func = None):

        if func is None:

            func = self.perlinNoise

        return self.fractalBrownianMotion(8 * x, 8 * y, func)

    def wood(self, x, y, noise = None):

        if noise is None:

            noise = self.perlinNoise

        frequency = 1.0 / self.imageSize

        n = noise(4 * x * frequency, 4 * y * frequency) * 10

        return n - int(n)

    def marble(self, x, y, noise = None):

        if noise is None:

            noise = self.perlinNoise

        frequency = 1.0 / self.imageSize

        n = self.fractalBrownianMotion(8 * x, 8 * y, self.perlinNoise)

        return (math.sin(16 * x * frequency + 4 * (n - 0.5)) + 1) * 0.5

if __name__ == "__main__":

    imageSize = 512

    noise = NoiseUtils(imageSize)

    noise.makeTexture(texture = noise.cloud)

    img = np.zeros((512, 512))

    pixels = img.copy()

    for i in range(0, imageSize):

       for j in range(0, imageSize):

            c = noise.img[i, j]

            pixels[i, j] = c

    pixels = pixels.astype('uint8')

    cv2.imwrite('Noise.png', pixels)

    # cv2.imshow("Noise", pixels)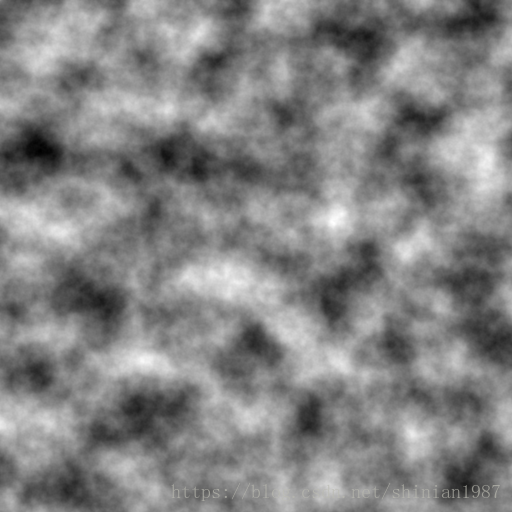
python perlin noise的更多相关文章
- Perlin Noise 及其应用
Perlin Noise 可以用来表现自然界中无法用简单形状来表达的物体的形态,比如火焰.烟雾.表面纹路等.要生成 Perlin Noise 可以使用工具离线生成,也可以使用代码运行时生成.最简单常用 ...
- 【Ray Tracing The Next Week 超详解】 光线追踪2-4 Perlin noise
Preface 为了得到更好的纹理,很多人采用各种形式的柏林噪声(该命名来自于发明人 Ken Perlin) 柏林噪声是一种比较模糊的白噪声的东西:(引用书中一张图) 柏林噪声是用来生成一些看似杂乱 ...
- 利用perlin noise 生成 wood texture
%%% Perlin Noise %%% Wood_texture clc; clear all; close all; addpath('E:\PhotoShop Algortihm\Image P ...
- OpenCV——Perlin Noise
// define head function #ifndef PS_ALGORITHM_H_INCLUDED #define PS_ALGORITHM_H_INCLUDED #include < ...
- python 不同版本下载资源
Unofficial Windows Binaries for Python Extension Packages by Christoph Gohlke, Laboratory for Fluore ...
- 利用Perlin nosie 完毕(PS 滤镜—— 分成云彩)
%%%% Cloud %%%% 利用perlin noise生成云彩 clc; clear all; close all; addpath('E:\PhotoShop Algortihm\Image ...
- 利用Perlin nosie 完成(PS 滤镜—— 分成云彩)
%%%% Cloud %%%% 利用perlin noise生成云彩 clc; clear all; close all; addpath('E:\PhotoShop Algortihm\Image ...
- GraphicsLab Project 之 Curl Noise
作者:i_dovelemon 日期:2020-04-25 主题:Perlin Noise, Curl Noise, Finite Difference Method 引言 最近在研究流体效果相关的模拟 ...
- 翻译: 星球生成 II
翻译: 星球生成 II 本文翻译自Planet Generation - Part II 译者: FreeBlues 以下为译文: 概述 在前一章 我解释了如何为星球创建一个几何球体. 在本文中, 我 ...
随机推荐
- Codeforces Beta Round #95 (Div. 2) D. Subway dfs+bfs
D. Subway A subway scheme, classic for all Berland cities is represented by a set of n stations conn ...
- Mac OS下 selenium 驱动safari日志
/Library/Java/JavaVirtualMachines/jdk1.8.0_171.jdk/Contents/Home/bin/java "-javaagent:/Applicat ...
- MongoDB(课时17 更新函数)
3.4.3 数据更新操作 MongoDB数据存的是副本数据, 最终的数据还要保存在传统的数据库里,所以如果关系型数据库里数据变了,最好的方法是删除里面的MongoDB数据重新插入. 在MongoDB里 ...
- js audio 播放音乐
<!DOCTYPE html> <html> <head> <meta charset="utf-8"> <title> ...
- 基于 Flutter 以两种方式实现App主题切换
概述 App主题切换已经成为了一种流行的用户体验,丰富了应用整体UI视觉效果.例如,白天夜间模式切换.实现该功能的思想其实不难,就是将涉及主题的资源文件进行全局替换更新.说到这里,我想你肯定能联想到一 ...
- English trip -- VC(情景课) 7 B Clothing 服装
xu言: 不要使用中式的思维去思考西方的语义!!!切记切记 words a tie 领带 a blouse 女士衬衣 a sweater 毛衣 a skirt 短裙 a jacket 夹 ...
- 『Glob』常用方法记录
glob.glob(file) 返回匹配的文件 glob.glob(./flower_photos/tulips/*.jpg) Out[1]:<br># ['./flower_photos ...
- HDU-4849 Wow! Such City! (单源最短路)
Problem Description Doge, tired of being a popular image on internet, is considering moving to anoth ...
- laravel中的DB facade实现数据的CURD
/* $students=DB::select("select * from student"); var_dump($students);*/ //新增数据: /*$bool=D ...
- 微信小程序跨页面获取数据示例
index.wxml <navigator class="navs" url="{{urls}}"> 中国 </navigator> i ...