
Yum搭建LNMP环境(动、静、库分离)(week4_day5)--技术流ken
前言
本篇博客使用yum来搭建lnmp环境,将采用动态,静态以及数据库分开安装的方式即nginx,php,mysql.会被分开安装在不同的服务器之上,搭建出来一套lnmp环境,并部署wordpress进行测试。
LNMP准备环境
centos7
firewalld关闭状态
selinux关闭状态
nginx服务器IP:192.168.43.174
php、php-fpm、php-mysql服务器IP: 192.168.43.175
MySQL服务器IP:192.168.43.176
LNMP搭建
第一步:php、php-fpm、php-mysql服务器搭建
下载用于和数据库通信的php-mysql,支持php文件的php以及实现fastcgi的php-fpm
[root@server ~]# yum install php-mysql php php-fpm -y
第二步:配置php-fpm文件
主要修改12行处为本机的IP地址,24行处修改为nginx端的IP地址,保证本机有apache用户
 ; Start a new pool named 'www'.

   [www]

   ; The address on which to accept FastCGI requests.

   ; Valid syntaxes are:

   ;   'ip.add.re.ss:port'    - to listen on a TCP socket to a specific address on

   ;                            a specific port;

   ;   'port'                 - to listen on a TCP socket to all addresses on a

   ;                            specific port;

  ;   '/path/to/unix/socket' - to listen on a unix socket.

  ; Note: This value is mandatory.

  listen = 192.168.43.175:9000      ##这里修改为本机的IP地址

  ; Set listen() backlog. A value of '-1' means unlimited.

  ; Default Value: -

  ;listen.backlog = -

  ; List of ipv4 addresses of FastCGI clients which are allowed to connect.

  ; Equivalent to the FCGI_WEB_SERVER_ADDRS environment variable in the original

  ; PHP FCGI (5.2.+). Makes sense only with a tcp listening socket. Each address

  ; must be separated by a comma. If this value is left blank, conne; must be separated by a comma. If this value is left blank, connections will be

  ; accepted from any ip address.

  ; Default Value: any

  listen.allowed_clients = 192.168.43.174  ##修改为nginx端的IP地址

  ; Set permissions for unix socket, if one is used. In Linux, read/write

  ; permissions must be set in order to allow connections from a web server. Many

  ; BSD-derived systems allow connections regardless of permissions.

  ; Default Values: user and group are set as the running user

  ;                 mode is set to

  ;listen.owner = nobody

  ;listen.group = nobody

  ;listen.mode =

  ; Unix user/group of processes

  ; Note: The user is mandatory. If the group is not set, the default user's group

  ;       will be used.

  ; RPM: apache Choosed to be able to access some dir as httpd

  user = apache   #确保有apache用户

  ; RPM: Keep a group allowed to write in log dir.

  group = apache  #确保有apache组

...
检查是否有apache用户,如果没有需要下载httpd服务,或者自建apache用户即可
[root@server ~]# id apache

uid=(apache) gid=(apache) groups=(apache)
第三步:启动php-fpm服务
监听本机的9000端口
[root@server ~]# systemctl restart php-fpm

[root@server ~]# ss -tnl | grep

LISTEN               192.168.43.175:                     *:*
第四步:下载nginx
在192.168.43.174服务器上面下载nginx
[root@proxy ~]# yum install nginx -y
第五步:配置nginx
添加如下一个location,fastcgi_pass执行刚才配置的php服务器端
[root@proxy ~]# vim /etc/nginx/nginx.conf

...

 server {

        listen       ;

        server_name  _;

        root         /var/www/html;

       index index.html index.php;

        # Load configuration files for the default server block.

    #    include /etc/nginx/default.d/*.conf;

        location ~ \.php$ {

        fastcgi_pass 192.168.43.175:9000;

        include fastcgi.conf;

        }

....
第六步:检查nginx配置
[root@proxy ~]# nginx -t

nginx: the configuration file /etc/nginx/nginx.conf syntax is ok

nginx: configuration file /etc/nginx/nginx.conf test is successful
第七步:启动nginx
检查无误后启动nginx
[root@proxy ~]# systemctl restart nginx

[root@proxy ~]# ss -tnl | lsof -i :

COMMAND  PID  USER   FD   TYPE DEVICE SIZE/OFF NODE NAME

nginx     root    6u  IPv4       0t0  TCP *:http (LISTEN)

nginx    nginx    6u  IPv4       0t0  TCP *:http (LISTEN)
第八步:下载mysql
在mysql服务器端下载数据库
[root@agent ~]# yum install mariadb-server -y
第九步:启动数据库
[root@agent ~]# systemctl restart mariadb
第十步:建立数据库及用户
创建一个wordpress数据库,新建一个wordpress用户
[root@agent ~]# mysql -uroot -p123

Welcome to the MariaDB monitor.  Commands end with ; or \g.

Your MySQL connection id is

Server version: 5.7.-log MySQL Community Server (GPL)

Copyright (c) , , Oracle, MariaDB Corporation Ab and others.

Type 'help;' or '\h' for help. Type '\c' to clear the current input statement.

MySQL [(none)]> create database wordpress;

Query OK,  row affected (0.06 sec)

MySQL [(none)]> grant all on wordpress.* to wordpress@'%' identified by '';

Query OK,  rows affected,  warning (0.07 sec)

MySQL [(none)]> flush privileges;

Query OK,  rows affected (0.02 sec)
经过以上十步lnmp环境就已经搭建完成
LNMP环境部署wordpress进行测试
第一步:nginx服务器端准备wordpress文件
[root@proxy ~]# cd /var/www/html/

[root@proxy html]# ls

[root@proxy html]# rz

[root@proxy html]# ls

wordpress-3.3.-zh_CN.zip

[root@proxy html]# yum install unzip -y
[root@proxy html]# unzip wordpress-3.3.1-zh_CN.zip
第二步:php服务器端也要准备wordpress文件
至于为什么也要在php服务器端准备wordpress文件是因为nginx文件里面的配置,相当于动静分离架构,动态文件即php文件会来php服务器端来找
[root@server ~]# cd /var/www/html/

[root@server html]# ls

[root@server html]# rz

[root@server html]# ls

wordpress-3.3.-zh_CN.zip

[root@proxy html]# yum install unzip -y

[root@server html]# unzip wordpress-3.3.-zh_CN.zip

[root@server html]# ls

wordpress  wordpress-3.3.-zh_CN.zip
第三步:浏览器测试
在浏览器输入nginx服务器的ip地址
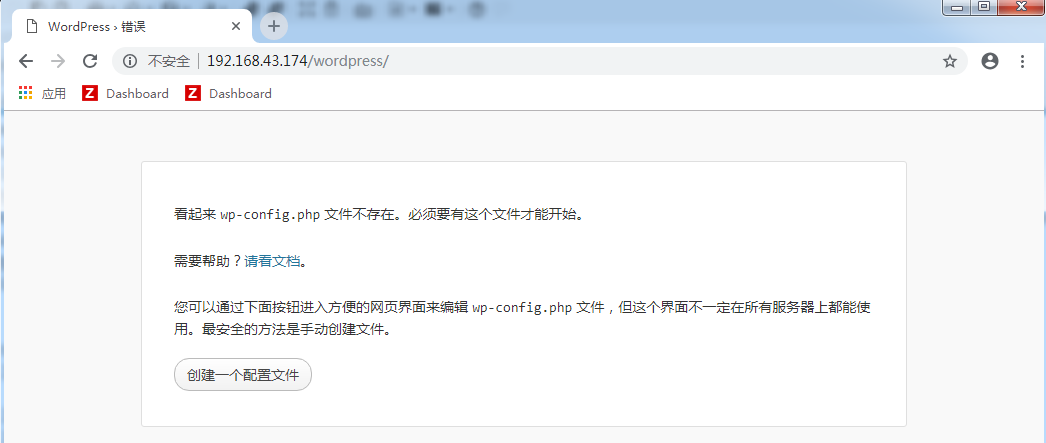
点击创建一个配置文件
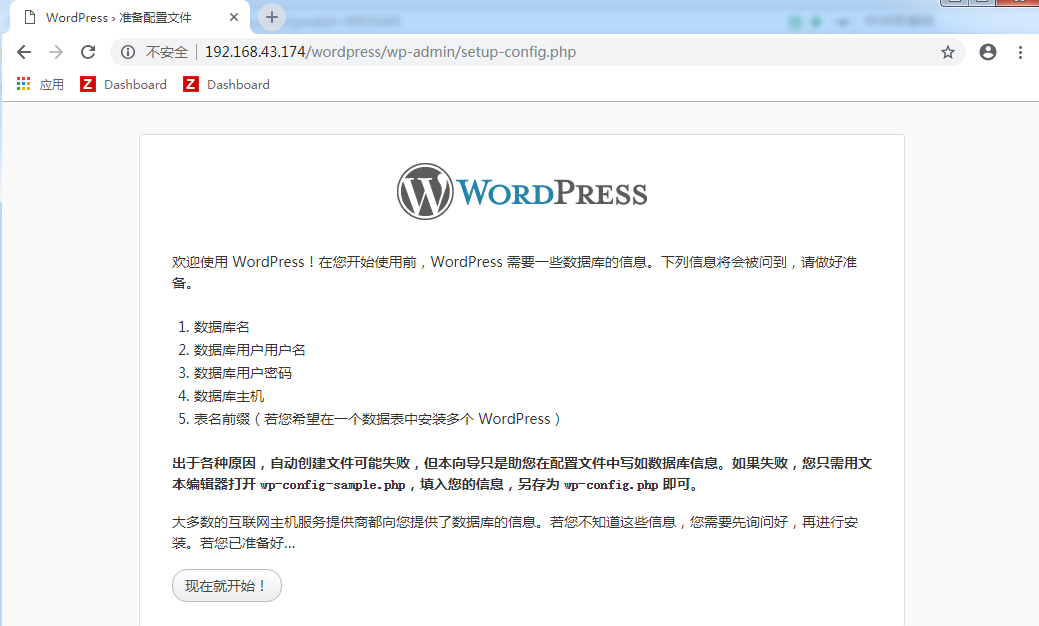
点击现在就开始
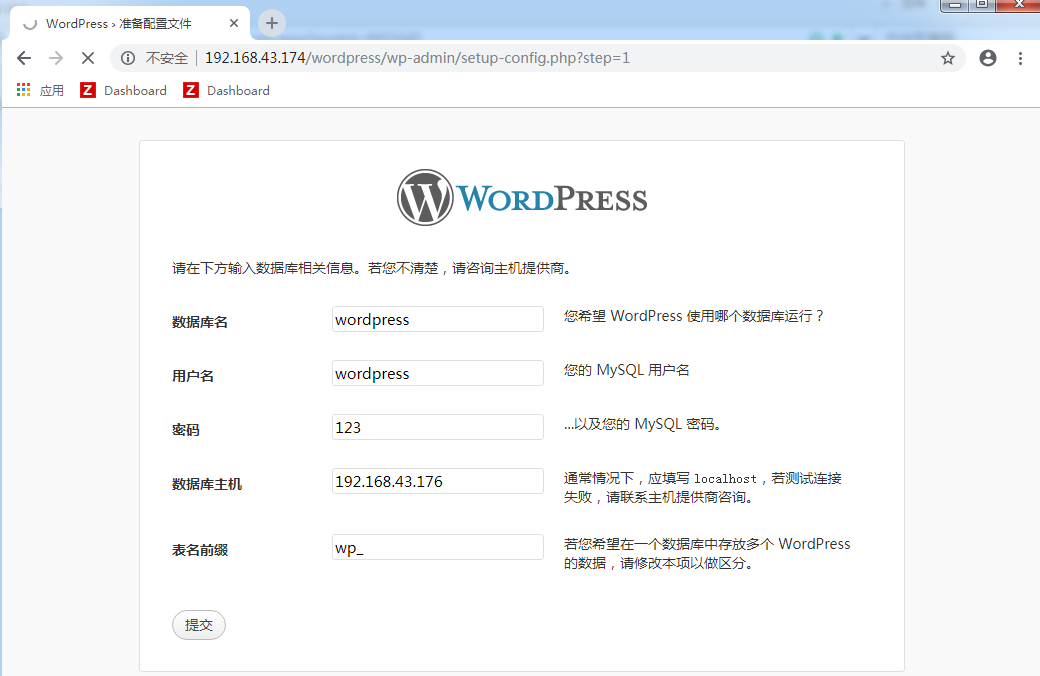
输入之前创建的数据库信息及用户信息,点击提交
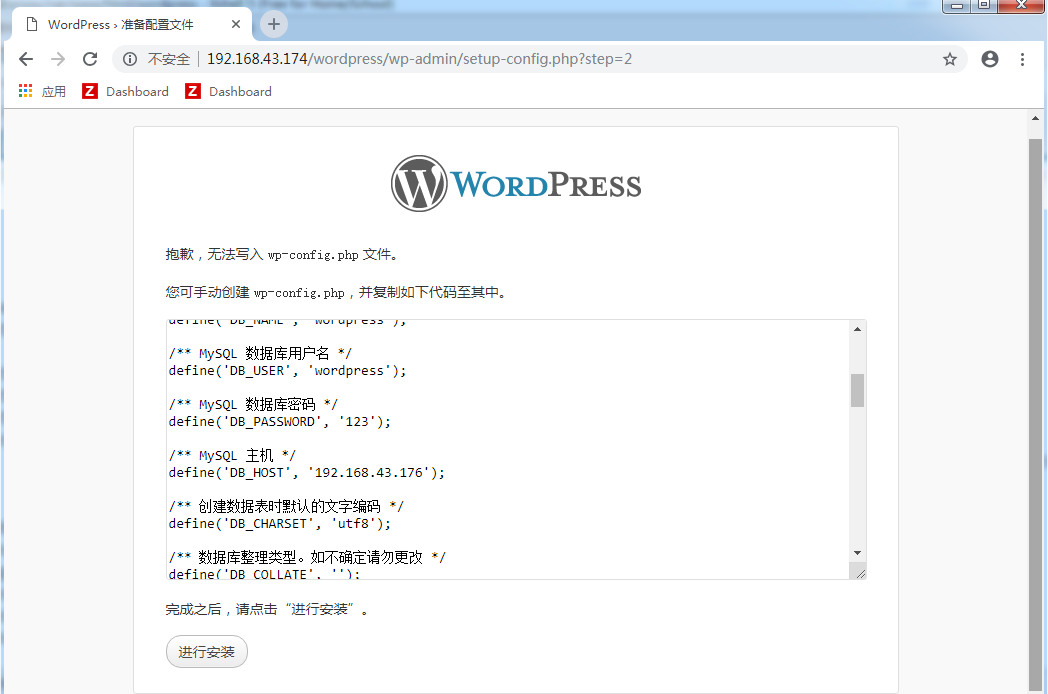
提示创建失败,只能进行手工创建(nginx服务器端及php服务器端执行下面同样的操作)
[root@proxy html]# cd wordpress

[root@proxy wordpress]# cp wp-config-sample.php wp-config.php

[root@proxy wordpress]# vim wp-config.php

// ** MySQL 设置 - 具体信息来自您正在使用的主机 ** //

/** WordPress 数据库的名称 */

define('DB_NAME', 'wordpress');

/** MySQL 数据库用户名 */

define('DB_USER', 'wordpress');

/** MySQL 数据库密码 */

define('DB_PASSWORD', '');

/** MySQL 主机 */

define('DB_HOST', '192.168.43.176');

/** 创建数据表时默认的文字编码 */

define('DB_CHARSET', 'utf8');
再次打开浏览器进行测试
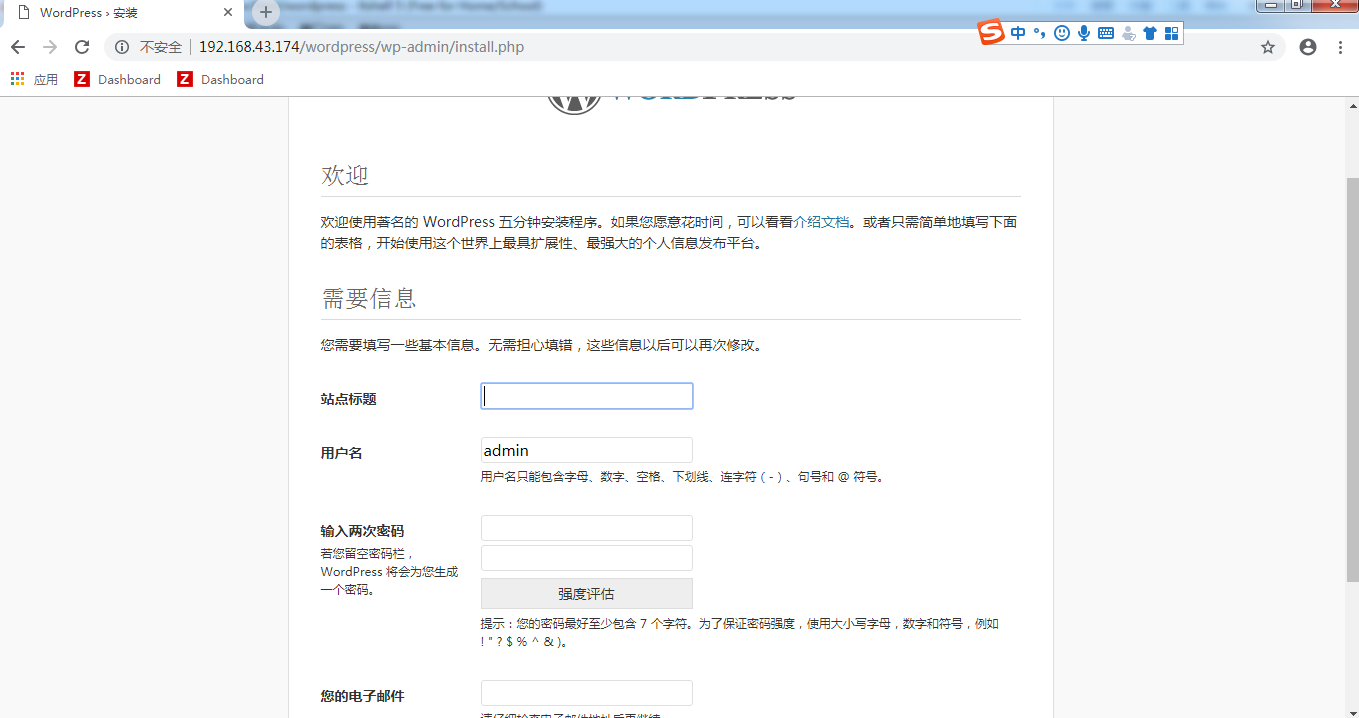
根据提示输入以上信息,点击下面的安装


输入账号和密码进行登录即可
至此LNMP服务搭建完成
Yum搭建LNMP环境(动、静、库分离)(week4_day5)--技术流ken的更多相关文章
- centos7 yum搭建lnmp环境及配置wordpress超详细教程
yum安装lnmp环境是最方便,最快捷的一种方法.源码编译安装需要花费大量的人类时间,当然源码编译可以个性化配置一些其它功能.目前来说,yum安装基本满足我们搭建web服务器的需求. 本文是我根据近期 ...
- Centos 7 下yum搭建lnmp环境(yum安装方式)
我们都知道linux下安装软件主要有三种方式: 1.源码编译安装,即下载软件源代码,利用gcc g++ make 等编译工具进行编译安装: 此方式的优点:可以指定软件版本,可选择性好:编译时可以手动指 ...
- yum 搭建lnmp环境详细步骤
1.关闭防火墙[root@CentOS ~]# chkconfig iptables off 2.关闭selinuxvi /etc/sysconfig/selinux//将SELINUX=enforc ...
- CentOS6下yum搭建LNMP环境
1.关闭防火墙[root@CentOS ~]# chkconfig iptables off 2.关闭selinuxvi /etc/sysconfig/selinux //将SELINUX=enfor ...
- Vmware搭建LNMP环境(Centos7+Nginx+Mysql+PHP7.1.8)
参考:1.Linux学习之CentOS(一)----在VMware虚拟机中安装CentOS 7(图文教程) 2.Centos7搭建LNMP环境 3.MySQL5.7修改默认root密码 4.CentO ...
- 阿里云体验实验室 教你如何《快速搭建LNMP环境》
## 体验平台简介 面向开发者和中小企业打造的一站式.全云端的开发平台,打开浏览器就可以开发.调试.上线,所测即所得,并结合无服务器的模式,重新定义云原生时代的研发工作方法论.旨在降低开发者上手成本和 ...
- CentOS6.6搭建LNMP环境
CentOS6.6搭建LNMP环境 1.设置yum源,本地安装依赖包 1 yum -y install gcc gcc-c++ automake autoconf libtool make 2.下载依 ...
- CentOS 7 源码搭建LNMP环境
搭建 LNMP 环境 源码包版本 : CentOS Linux 7 nginx-1.15.1.tar.gz mysql-boost-5.7.21.tar.gz php-7.2.7.tar.gz ...
- WIN10 vagrant和virtualbox虚拟机和一键搭建lnmp环境配置thinkphp虚拟主机
版本:win10系统 virtualbox:5.1.26 vagrant :1.9.7 centos 7.0 xshell/git 首先下载好对应版本的软件 配置vagrant和virtualbox ...
随机推荐
- Exp3 免杀原理与实践_05齐帅
Exp3 免杀原理与实践 20154305_齐帅 想要弄懂免杀,一定得先把基础问题弄明白啊~~ 一.基础问题回答 (1)杀软是如何检测出恶意代码的? - -检测特征码: 依靠分析总结出计算机病毒中常出 ...
- Thread,ThreadPool,Task
线程分为前台和后台.比如我们直接new一个Thread这就是前台线程. 前台线程一定会执行. 比如我们创建2个线程:1号,2号,同时执行,假设1号是主线程,1执行完了,依旧会等待2执行完成,整个程序才 ...
- XSS攻击 CSRF攻击
XSS攻击: 跨站脚本攻击(Cross Site Scripting),为不和层叠样式表(Cascading Style Sheets, CSS)的缩写混淆, 故将跨站脚本攻击缩写为XSS.恶意攻击者 ...
- ‘params’一个奇妙的东西
params关键字表示函数的参数是可变个数的,即可变的方法参数,例如Console.WriteLine( "{0},{1} ",i,j); 就像DELPHI 里 WRITELN 函 ...
- 11、OpenCV实现图像的灰度变换
1.灰度变换的基本概念 灰度变换指对图像的单个像素进行操作,主要以对比度和阈值处理为目的.其变换形式如下: s=T(r) 其中,T是灰度变换函数:r是变换前的灰度:s是变换后的像素.图像灰度变换的有以 ...
- 4-Django开发post、get接口
一.创建django应用程序 方法一:创建django项目时直接创建应用程序 方法二:命令行创建 1.进入manage.py所在目录 2.执行常见命令:python manage.py startap ...
- unity API 之EventSystem.current.IsPointerOverGameObject()
命名空间 :UnityEngine.EventSystems 官方描述: public bool IsPointerOverGameObject(); public bool IsPointerOve ...
- String字符串相加常见面试题
String name1="jack"; String name2="jack"; System.out.println(name1==name2); // t ...
- Hashtable 为什么不叫 HashTable?
前几天在写<HashMap 和 Hashtable 的 6 个区别>这篇文章的时候,差点把 Hashtable 写成了 HashTable,后来看源码证实了是:Hashtable,小写的 ...
- css、css3总结
关于figure元素和figcaption元素的解释与应用: https://www.w3cplus.com/html5/quick-tip-the-right-way-to-use-figure-a ...