SpringBoot学习9:springboot整合thymeleaf
1、创建maven项目,添加项目所需依赖
<!--springboot项目依赖的父项目-->

    <parent>

        <groupId>org.springframework.boot</groupId>

        <artifactId>spring-boot-starter-parent</artifactId>

        <version>2.0.0.RELEASE</version>

    </parent>

    <dependencies>

        <!--注入springboot启动器-->

        <dependency>

            <groupId>org.springframework.boot</groupId>

            <artifactId>spring-boot-starter-web</artifactId>

        </dependency>

        <!--注入springboot对thymeleaf视图技术的支持-->

        <dependency>

            <groupId>org.springframework.boot</groupId>

            <artifactId>spring-boot-starter-thymeleaf</artifactId>

        </dependency>

    </dependencies>
2、创建controller
package com.bjsxt.controller;

import org.springframework.stereotype.Controller;

import org.springframework.ui.Model;

import org.springframework.web.bind.annotation.RequestMapping;

/**

 * Created by Administrator on 2019/2/8.

 */

@Controller

public class IndexController {

    @RequestMapping("/toIndex")

    public String toIndex(Model model){

        model.addAttribute("msg","index页面");

        return "index";

    }

}
3、创建thymeleaf模版文件index.html
目录位置:src/main/resources/templates
templates:该目录是安全的。意味着该目录下的内容是不允许外界直接访问的。
<!DOCTYPE html>

<html lang="en">

<head>

    <meta charset="UTF-8">

    <title>thymeleaf</title>

</head>

<body>

    <span th:text="${msg}"></span>

    <hr>

    <span th:text="hello"></span>

</body>

</html>
4、创建启动器,启动在浏览器中访问
package com.bjsxt;

import org.springframework.boot.SpringApplication;

import org.springframework.boot.autoconfigure.SpringBootApplication;

/**

 * Created by Administrator on 2019/2/8.

 */

@SpringBootApplication

public class App {

    public static void main(String[] args){

        SpringApplication.run(App.class,args);

    }

}
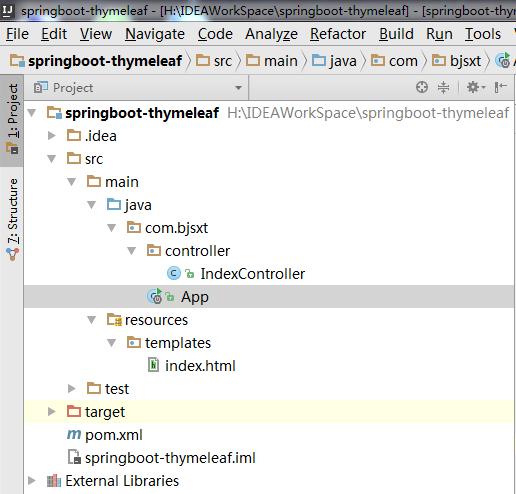
目录结构
SpringBoot学习9:springboot整合thymeleaf的更多相关文章
- SpringBoot学习- 4、整合JWT
SpringBoot学习足迹 1.Json web token(JWT)是为了网络应用环境间传递声明而执行的一种基于JSON的开发标准(RFC 7519),该token被设计为紧凑且安全的,特别适用于 ...
- SpringBoot学习- 3、整合MyBatis
SpringBoot学习足迹 1.下载安装一个Mysql数据库及管理工具,同类工具很多,随便找一个都可以,我在windows下做测试项目习惯使用的是haosql 它内部集成了MySql-Front管理 ...
- SpringBoot学习- 5、整合Redis
SpringBoot学习足迹 SpringBoot项目中访问Redis主要有两种方式:JedisPool和RedisTemplate,本文使用JedisPool 1.pom.xml添加dependen ...
- 【Java Web开发学习】Spring4整合thymeleaf视图解析
[Java Web开发学习]Spring4整合thymeleaf视图解析 目录 1.简单介绍2.简单例子 转载:https://www.cnblogs.com/yangchongxing/p/9111 ...
- SpringBoot学习- 8、整合Shiro
SpringBoot学习足迹 Shiro是什么,引自百度百科:Apache Shiro是一个强大且易用的Java安全框架,执行身份验证.授权.密码和会话管理.使用Shiro的易于理解的API,您可以快 ...
- springboot学习笔记-4 整合Druid数据源和使用@Cache简化redis配置
一.整合Druid数据源 Druid是一个关系型数据库连接池,是阿里巴巴的一个开源项目,Druid在监控,可扩展性,稳定性和性能方面具有比较明显的优势.通过Druid提供的监控功能,可以实时观察数据库 ...
- springboot学习笔记-3 整合redis&mongodb
一.整合redis 1.1 建立实体类 @Entity @Table(name="user") public class User implements Serializable ...
- springboot学习四:整合mybatis
在application.properties加入配置 ## Mybatis 配置 mybatis.typeAliasesPackage=org.spring.springboot.domain my ...
- springboot学习三:整合jsp
在pom.xml加入jstl <!--springboot tomcat jsp 支持开启--> <dependency> <groupId>org.apache. ...
- 十一、springboot(六)整合Thymeleaf
1.添加jar包依赖 <dependency> <groupId>org.springframework.boot</groupId> <artifactId ...
随机推荐
- 统计学howto
统计之都 http://cos.name/ 让你拥有超能力:程序员应该掌握的统计学公式 Statistical Formulas For Programmers http://www.evanmill ...
- WSGI学习系列Pecan
Pecan Introduce Pecan是一个轻量级的基于Python的Web框架, Pecan的目标并不是要成为一个“full stack”的框架, 因此Pecan本身不支持类似Session和D ...
- Clouder Manager安装时出现please remove the following file: /etc/cloudera-scm-server/db.properties问题解决(图文详解)
问题详情 bigdata@ubuntucmbigdata1:/opt/softwares/cm-$ sudo ./cloudera-manager-installer.bin This install ...
- pat1094. The Largest Generation (25)
1094. The Largest Generation (25) 时间限制 200 ms 内存限制 65536 kB 代码长度限制 16000 B 判题程序 Standard 作者 CHEN, Yu ...
- php 可逆的加密算法
代码: <?php class Test { private $authCodeKey = 'khUvFB9pijNyCYMGZdzqeKalyg7dh'; function authCode( ...
- Day7下
T1 我直接就用的LCA ,可能慢点.反正数据试过了. T2 期望dp不会啊. T3 好麻烦.
- Linux访问https报错
今天用Linux(CentOS)拉Git仓库时,报了个错unable to access 'https://github.com/Wind4/vlmcsd.git/': SSL connect err ...
- c# 字符串大小写混合转换
我是个.net萌新,在大学是计算机应用专业 学的比较杂 出来准备走net方向 培训了两个月了 今天被出了一道上机题 题本来是挺简单的 输入一个字符 如果是大写则转换为小写 如果是小写则转换为大 ...
- 将Android工程打成jar包之后对资源的调用。
Android工程不能完整的打包成jar包.这个主要是R文件导致的,但是我们可以将除了资源文件中的所有东西都打到jar包中.Activity.View等等类. 提供jar包的同时,还需要提供资源文件. ...
- vsftpd配置
yum -y install vsftpd useradd upload -s /sbin/nologin passwd upload mkdir /data/upload chown -R upol ...