Quartz2D复习(三) --- 涂鸦
和上一篇手势解锁不一样,手势解锁只画了一条路径,从触摸开始--》触摸移动--》触摸结束 ,然后路径完成了,渲染出来就是手势解锁了;
这次涂鸦想做到的效果是可以画很多次线段或弧,每次又可以设置不同的宽度和颜色,然后还要有撤销、清屏、橡皮擦的功能,那就需要画很多条路径了,然后每条路径有自己的颜色和宽度,那么
UIBezierPath类也实现不了,需要自定义一个类,继承自UIBezierPath,然后再增加自己的颜色和宽度属性。
效果截图:
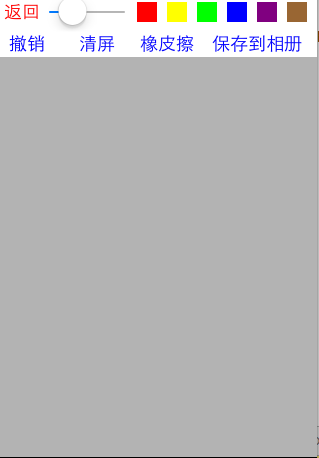 涂鸦了
涂鸦了  橡皮擦擦除
橡皮擦擦除 
保存到相册
代码:
1、自定义PaintingBezierPath类继承自UIBezierPath类,增加一个自定义路径颜色的属性;自定义构造函数,设置颜色和路径宽度
PaintingBezierPath.h文件代码:
#import <UIKit/UIKit.h>

@interface PaintingBezierPath : UIBezierPath

@property (nonatomic, retain) UIColor *color; //线段的颜色

- (instancetype)initWithColor: (UIColor *)color WithWidth: (CGFloat)width WithStartPoint: (CGPoint)startPoint;

@end
PaintingBezierPath.m文件代码:
 //

 //  PaintingBezierPath.m

 //  tan_iosTwo

 //

 //  Created by xiaom on 15/7/22.

 //

 //  为了自定义每个轨迹的宽度和颜色,需要增加一个自定义方法

 #import "PaintingBezierPath.h"

 @implementation PaintingBezierPath

 - (instancetype)initWithColor:(UIColor *)color WithWidth:(CGFloat)width WithStartPoint:(CGPoint)startPoint{

     if (self = [super init]){

         self.color = color;

         self.lineWidth = width;

         self.lineJoinStyle = kCGLineJoinRound;

         self.lineCapStyle = kCGLineCapRound;

         [self moveToPoint:startPoint];

     }

     return self;

 }

 @end
2、自定义view, 用来展示涂鸦,名称为:PaintingView
PaintingView.h文件代码:
#import <UIKit/UIKit.h>

@interface PaintingView : UIView

@property (nonatomic, assign) CGFloat lineWidth; //涂鸦的线段宽度

@property (nonatomic, strong) UIColor *lineColor; //涂鸦的线段颜色

- (void)cancelPainting; //撤销涂鸦

- (void)clearScreen; //清屏

- (void)saveImgToAlbum; //保存相片到到手机相册里

@end
PaintingView.m文件代码:
 //  绘画, 涂鸦

 #import "PaintingView.h"

 #import "PaintingBezierPath.h"

 @interface PaintingView()

 @property (nonatomic, retain) NSMutableArray *paths; //涂鸦路径数组

 @property (nonatomic, retain) PaintingBezierPath *currentPath; //当前正在绘制的path

 @end

 @implementation PaintingView

 //代码创建对象会调用: 使用

 - (instancetype)initWithFrame:(CGRect)frame{

     if (self = [super initWithFrame:frame]){

         //NSLog(@"frame...%s", __func__);

     }

     return self;

 }

 //xib创建会调用

 - (instancetype)initWithCoder:(NSCoder *)aDecoder{

     if (self = [super initWithCoder:aDecoder]){

         //NSLog(@"coder.. %s", __func__);

     }

     return self;

 }

 //监听触摸开始 ,方法继承自UIResponder

 - (void)touchesBegan:(NSSet *)touches withEvent:(UIEvent *)event{

     PaintingBezierPath *path = [[PaintingBezierPath alloc] initWithColor:self.lineColor WithWidth:self.lineWidth WithStartPoint:[self currentPoint:touches]];

     [self.paths addObject:path]; //将路径记录到数组中

     self.currentPath = path;

     [self setNeedsDisplay];  //调用方法,重新绘制

 }

 //监听触摸移动中

 - (void)touchesMoved:(NSSet *)touches withEvent:(UIEvent *)event{

     //追踪每次路径的移动过程

     [self.currentPath addLineToPoint:[self currentPoint:touches]];

     [self setNeedsDisplay]; //调用方法,重新绘制

 }

 //获取view对象中的当前位置

 - (CGPoint)currentPoint: (NSSet *)touches{

     UITouch *touch = [touches anyObject];

     return [touch locationInView:self];

 }

 //次方法是UIView的分类@interface UIView(UIViewRendering)中添加的方法

 //setNeedsDisplay方法也是此分类中的方法

 - (void)drawRect:(CGRect)rect{

     for (int i = ; i < self.paths.count; i++) {

         PaintingBezierPath *path = [self.paths objectAtIndex:i];

         [path.color set];

         [path stroke];  //渲染

     }

 }

 #pragma mark - 自定义方法实现

 //撤销

 - (void)cancelPainting{

     [self.paths removeLastObject]; //移除最后一个路径对象

     [self setNeedsDisplay]; //重新绘制

 }

 //清屏

 - (void)clearScreen{

     [self.paths removeAllObjects]; //移除所有路径

     self.lineColor = nil; //颜色赋空

     [self setNeedsDisplay]; //重新绘制

 }

 //保存图片到相册

 - (void)saveImgToAlbum{

     //1、开启图形上下文

     UIGraphicsBeginImageContextWithOptions(self.bounds.size, NO, 0.0);

     //2、获取当前上下文

     CGContextRef ctr = UIGraphicsGetCurrentContext();

     //3、渲染当前View的图层到上下文中

     [self.layer renderInContext:ctr];

     //4、获取新图片

     UIImage *newImg = UIGraphicsGetImageFromCurrentImageContext();

     //5、关闭图形上下文

     UIGraphicsEndImageContext();

     //6、保存图片到相册中

     UIImageWriteToSavedPhotosAlbum(newImg, self, @selector(image:didFinishSavingWithError:contextInfo:), nil);

 }

 //保存图片到相册完成之后的处理

 - (void)image:(UIImage *)image didFinishSavingWithError:(NSError *)error contextInfo:(void *)contextInfo{

     UILabel *lbl = [[UILabel alloc] initWithFrame:CGRectMake(, , , )];

     [lbl setBackgroundColor:[UIColor blackColor]];

     lbl.textAlignment = NSTextAlignmentCenter;

     lbl.textColor = [UIColor yellowColor];

     if (error){ //保存失败

         lbl.text = @"保存失败";

     }

     else{ //保存成功

         lbl.text = @"保存成功";

     }

     [self addSubview:lbl];

     [UIView animateWithDuration:2.0 animations:^{

         lbl.alpha = 0.1;

     } completion:^(BOOL finished) {

         [lbl removeFromSuperview];

     }];

 }

 //设置对象默认属性值

 - (CGFloat)lineWidth{

     if (_lineWidth < ){

         _lineWidth = ;

     }

     return _lineWidth;

 }

 - (UIColor *)lineColor{

     if (_lineColor == nil){

         _lineColor = [UIColor blackColor];

     }

     return _lineColor;

 }

 - (NSMutableArray *)paths{

     if (_paths == nil){

         _paths = [[NSMutableArray alloc] init];

     }

     return _paths;

 }

 /*

 // Only override drawRect: if you perform custom drawing.

 // An empty implementation adversely affects performance during animation.

 - (void)drawRect:(CGRect)rect {

     // Drawing code

 }

 */

 @end
3、自定义控制器展示PaintingView
DoodleViewController.h文件:
#import <UIKit/UIKit.h>

@interface DoodleViewController : UIViewController

@end
DoodleViewController.m
 //  信手涂鸦

 #import "DoodleViewController.h"

 #import "PaintingView.h"

 @interface DoodleViewController ()

 @property (nonatomic, retain) PaintingView *paintV; //涂鸦的画板

 @end

 @implementation DoodleViewController

 - (void)viewDidLoad {

     [super viewDidLoad];

     // Do any additional setup after loading the view.

     [self.view setBackgroundColor:[UIColor whiteColor]];

     //自定义View涂鸦

     PaintingView *v = [[PaintingView alloc] initWithFrame:CGRectMake(, , , )];

     [v setBackgroundColor:[UIColor grayColor]];

     [v setAlpha:0.6];

     [self.view addSubview:v];

     self.paintV = v;

     [self addReturnBtn];    //添加返回按钮

     [self addDoodleSetWidthAndColor]; //增加设置涂鸦的宽度和颜色设置

 }

 //添加返回按钮

 - (void)addReturnBtn{

     UIButton *returnBtn = [[UIButton alloc] initWithFrame:CGRectMake(, , , )];

     [returnBtn setTitle:@"返回" forState:UIControlStateNormal];

     [returnBtn addTarget:self action:@selector(returnPrePage) forControlEvents:UIControlEventTouchUpInside];

     [returnBtn setTitleColor:[UIColor redColor] forState:UIControlStateNormal];

     [self.view addSubview:returnBtn];

 }

 //添加涂鸦宽度设置和颜色设置

 - (void)addDoodleSetWidthAndColor{

     //1、增加UISlider用来设置可调节宽度

     UISlider *slider = [[UISlider alloc] initWithFrame:CGRectMake(, , , )];

     slider.maximumValue = 15.0f; //最大值

     slider.value = 3.0f;    //默认为1

     self.paintV.lineWidth = slider.value;

     [slider addTarget:self action:@selector(setLineWidth:) forControlEvents:UIControlEventValueChanged]; //绑定值改变事件

     [self.view addSubview:slider];

     //2、添加颜色选择按钮

     NSArray *colors = @[[UIColor redColor], [UIColor yellowColor], [UIColor greenColor], [UIColor blueColor], [UIColor purpleColor], [UIColor brownColor]];

     for (int i = ; i < colors.count; i++) {

         CGFloat x =   +  * i;

         UIButton *colorBtn = [[UIButton alloc] initWithFrame:CGRectMake(x, , , )];

         [colorBtn setBackgroundColor:[colors objectAtIndex:i]];

         [colorBtn addTarget:self action:@selector(setLineColor:) forControlEvents:UIControlEventTouchUpInside];

         [self.view addSubview:colorBtn];

     }

     //第二行

     //3、添加撤销按钮

     UIButton *cancelBtn = [[UIButton alloc] initWithFrame:CGRectMake(, , , )];

     [cancelBtn setTitleColor:[UIColor blueColor] forState:UIControlStateNormal];

     [cancelBtn setTitle:@"撤销" forState:UIControlStateNormal];

     [cancelBtn addTarget:self action:@selector(cancelPainting) forControlEvents:UIControlEventTouchUpInside];

     [self.view addSubview:cancelBtn];

     //4、清屏按钮

     UIButton *clearScreenBtn = [[UIButton alloc] initWithFrame:CGRectMake(, , , )];

     [clearScreenBtn setTitleColor:[UIColor blueColor] forState:UIControlStateNormal];

     [clearScreenBtn setTitle:@"清屏" forState:UIControlStateNormal];

     [clearScreenBtn addTarget:self action:@selector(clearScreen) forControlEvents:UIControlEventTouchUpInside];

     [self.view addSubview:clearScreenBtn];

     //5、添加一个橡皮擦

     UIButton *brushBtn = [[UIButton alloc] initWithFrame:CGRectMake(, , , )];

     [brushBtn setTitle:@"橡皮擦" forState:UIControlStateNormal];

     [brushBtn setTitleColor:[UIColor blueColor] forState:UIControlStateNormal];

     [brushBtn addTarget:self action:@selector(brush) forControlEvents:UIControlEventTouchUpInside];

     [self.view addSubview:brushBtn];

     //6、保存到相册按钮

     UIButton *saveBtn = [[UIButton alloc] initWithFrame:CGRectMake(, , , )];

     [saveBtn setTitle:@"保存到相册" forState:UIControlStateNormal];

     [saveBtn setTitleColor:[UIColor blueColor] forState:UIControlStateNormal];

     [saveBtn addTarget:self action:@selector(saveImgToAlbum) forControlEvents:UIControlEventTouchUpInside];

     [self.view addSubview:saveBtn];

 }

 //调节宽度

 - (void)setLineWidth:(UISlider *)sender{

     [self.paintV setLineWidth:sender.value];

 }

 //调节颜色

 - (void)setLineColor: (UIButton *)sender{

     [self.paintV setLineColor:sender.backgroundColor];

 }

 //设置橡皮擦

 - (void)brush{

     self.paintV.lineColor = self.paintV.backgroundColor;

     if (self.paintV.lineWidth < ) self.paintV.lineWidth = ;

 }

 //撤销

 - (void)cancelPainting{

     [self.paintV cancelPainting];

 }

 //清屏

 - (void)clearScreen{

     [self.paintV clearScreen];

 }

 //保存图片到相册

 - (void)saveImgToAlbum{

     [self.paintV saveImgToAlbum];

 }

 //返回上一页

 - (void)returnPrePage{

     [self dismissViewControllerAnimated:YES completion:nil];

 }

 - (void)didReceiveMemoryWarning {

     [super didReceiveMemoryWarning];

     // Dispose of any resources that can be recreated.

 }

 /*

 #pragma mark - Navigation

 // In a storyboard-based application, you will often want to do a little preparation before navigation

 - (void)prepareForSegue:(UIStoryboardSegue *)segue sender:(id)sender {

     // Get the new view controller using [segue destinationViewController].

     // Pass the selected object to the new view controller.

 }

 */

 @end
Quartz2D复习(三) --- 涂鸦的更多相关文章
- Quartz2D复习(一)--- 基础知识 / 绘制线段圆弧 / 图片水印 / 截图
1.Quartz 2D是一个二维绘图引擎,同时支持ios和Mac系统: Quart2D的API是纯C语言的,API来自于Core Graphics框架: 2.Quartz 2D可以绘制图形(线段/三 ...
- C#复习三(Day 22)
哈哈,又到了总结的时间了.今天还是在继续复习C#的基础语法.这次总结主要以一下小程序为主. Split()的运用 123-456---789-----123-2把类似的字符串中重复符号去掉,得到123 ...
- SQL复习三(子查询)
子查询 子查询就是嵌套查询,即select中包含这select,如果一条语句中存在着两个,或者两个以上的select,那么就是子查询语句了. 子查询出现的位置 where后,作为条件的一部分: fro ...
- Linux 复习三
第三章Linux使用进阶 一.磁盘管理和文件系统 1.磁盘的基本概念:磁头(head).柱面(cylinder).扇区(sector) Linux系统中所有的设备被抽象成文件,存储在/dev目录下 设 ...
- C# 基础复习 三 XML操作
XML 可扩展标记语言(所有标签都是自己定义,没有固定格式) 如果要给XML规定格式,可以使用dtd (dtd是什么?你不会自己百度吗) XML主要用来存储数据 XML的要求: 根节点只能有一 ...
- 记录一次Quartz2D学习(三)
在(二)内,讲到了几何图形的绘制,这次就讲文本与图片的绘制 3 图片与文本 3.1 文本绘制 - (void)drawRect:(CGRect)rect { NSString * str = @&qu ...
- Quartz2D复习(四) --- 图层CALayer和动画CAAnimation
1.CALayer 1).在ios中,能看得见摸得着的东西基本上都是UIView, 比如按钮.文本标签.文本输入框.图标等,这些都是UIView 2).UIView之所以能显示在屏幕上,完全是因为它内 ...
- Quartz2D复习(二) --- 手势解锁
这次支付宝手机客户端升级,把手势解锁那个功能去掉了,引起很多人的抱怨,觉得少了手势解锁的保护,个人信息容易泄漏了... 那么手势解锁功能是怎么是实现的呢,这里使用Quart2D来简单模拟一下, 先看下 ...
- java IO复习(三)
package com.zyw.io; import java.io.File; import java.io.FilenameFilter; import java.util.ArrayList; ...
随机推荐
- Windows Azure Virtual Network (7) 设置Azure Virtual Machine固定公网IP (Virtual IP Address, VIP) (2)
<Windows Azure Platform 系列文章目录> 本文介绍的是,当用户在创建Azure Virtual Machine的时候,忘记绑定公网IP,需要重新绑定公网IP的具体操作 ...
- Windows Azure Service Bus (3) 队列(Queue) 使用VS2013开发Service Bus Queue
<Windows Azure Platform 系列文章目录> 在之前的Azure Service Bus中,我们已经介绍了Service Bus 队列(Queue)的基本概念. 在本章中 ...
- iOS平台快速发布HT for Web拓扑图应用
iOS平台一直是封闭的生态圈,iOS开发者要缴纳年费加入开发者计划才可进行iOS平台的APP开发测试,所开发的APP需要上传到App Store经过苹果审核以后才可对外发布.如果要开发企业内部应用,则 ...
- ADO.NET封装的SqlHelper
参照别人的方法,顺便再次复习下ADO.NET的相关知识.为自己的类库做准备. namespace Common.SqlHelper { /// <summary> /// ADO.NET- ...
- 【c#搬砖记】用Docx导出word格式的docx文件
DocX开源网址:http://docx.codeplex.com/ 1.引入DocX.dll 调用ReplaceText()方法替换模板中的字符.只支持docx格式的word文档 using (Do ...
- Yii2框架打包成Phar包报错的经历
以yii2为例 打包文件过程比较简单,但打包好以后简单测试yii命令,一直报错: PHP Fatal error: Uncaught yii\base\InvalidParamException: T ...
- SoapUI 使用笔记
1. 构建项目 安装完成后 右键Project --> New SOAP Project 在弹出的 New SOAP Project框中输入名字 和 webservice服务地址(example ...
- Think_php入口文件配置
think_php的入口模式有两种方式 1,一个入口文件对应一个项目应用 2,一个入口文件对应所有项目应用 默认情况,入口文件只需要require thinkphp文件夹就可以.比如thinkphp文 ...
- 【转】MyEclipse 2015优化技巧
MyEclipse 2015优化技巧 MyEclipse 2015优化速度方案仍然主要有这么几个方面:去除无需加载的模块.取消冗余的配置.去除不必要的检查.关闭更新. 第一步: 去除不需要加载的模块 ...
- get/post时中文乱码问题的解决办法
1.文章1 最近遇到一个问题:用get方法传递中文有问题,用post没有问题. 问题简单的描述是这样的: <a href="userGroup.jsp?userGroupName=&l ...