Spring Boot2(十三):整合定时任务发送邮件
一、前言
主要玩一下SpringBoot的定时任务和发送邮件的功能。定时发送邮件,这在实际生成环境下主要用户系统性能监控时,当超过设定的阙值,就发送邮件通知预警功能。这里只通过简单的写个定时结合邮件通知进行学习。
二、准备
添加maven依赖
<dependency>

	<groupId>org.springframework.boot</groupId>

	<artifactId>spring-boot-starter</artifactId>

</dependency>

<dependency>

	<groupId>org.springframework.boot</groupId>

	<artifactId>spring-boot-starter-test</artifactId>

	<scope>test</scope>

</dependency>

<!--mail邮件-->

<dependency>

	<groupId>org.springframework.boot</groupId>

	<artifactId>spring-boot-starter-mail</artifactId>

</dependency>

<!--thymeleaf前端模板-->

<dependency>

	<groupId>org.springframework.boot</groupId>

	<artifactId>spring-boot-starter-thymeleaf</artifactId>

</dependency>
配置文件application.yml
spring:

  mail:

    #邮箱服务器地址

    host: smtp.qq.com

    username: hulang6666@qq.com

    password: **********

    default-encoding: UTF-8

mail:

  #以谁来发送邮件

  fromMail:

    addr: hulang6666@qq.com
这里的spring.mail.password为你的邮箱开启smtp服务需要设置客户端授权码,此处的password为你的验证密码。注意不是你的qq登录密码。
这里需要注意的一点是spring.mail.host为邮箱服务地址
常见的邮件服务器扩展
(SMTP、POP3)地址、端口如下:
gmail(google.com)
POP3服务器地址:pop.gmail.com(SSL启用 端口:995)
SMTP服务器地址:smtp.gmail.com(SSL启用 端口:587)
Foxmail:
POP3服务器地址:pop.foxmail.com(端口:110)
SMTP服务器地址:smtp.foxmail.com(端口:25)
sina.com:
POP3服务器地址:pop3.sina.com.cn(端口:110)
SMTP服务器地址:smtp.sina.com.cn(端口:25)
163.com:
POP3服务器地址:pop.163.com(端口:110)
SMTP服务器地址:smtp.163.com(端口:25)
QQ邮箱
POP3服务器地址:pop.qq.com(端口:110)
SMTP服务器地址:smtp.qq.com(端口:25)
QQ企业邮箱
POP3服务器地址:pop.exmail.qq.com(端口:995)
SMTP服务器地址:smtp.exmail.qq.com(端口:587/465)
HotMail
POP3服务器地址:pop.live.com(端口:995)
SMTP服务器地址:smtp.live.com(端口:587)
sohu.com:
POP3服务器地址:pop3.sohu.com(端口:110)
SMTP服务器地址:smtp.sohu.com(端口:25)
三、邮件服务
我们使用html模板并且带有附件的例子。
MailService
public interface MailService {

    void sendHtmlMail(String to, String subject, String content, String filePath);

}
MailServiceImpl
@Component

public class MailServiceImpl implements MailService {

    private final Logger logger = LoggerFactory.getLogger(this.getClass());

    @Resource

    private JavaMailSender mailSender;

    @Value("${mail.fromMail.addr}")

    private String from;

    /**

     * 发送html邮件

     * @param to

     * @param subject

     * @param content

     */

    @Override

    public void sendHtmlMail(String to, String subject, String content, String filePath) {

        MimeMessage message = mailSender.createMimeMessage();

        try {

            //true表示需要创建一个multipart message

            MimeMessageHelper helper = new MimeMessageHelper(message, true);

            helper.setFrom(from);

            helper.setTo(to);

            helper.setSubject(subject);

            helper.setText(content, true);

            // 判断是否带有附件

            if (filePath != null) {

                FileSystemResource file = new FileSystemResource(new File(filePath));

                String fileName = filePath.substring(filePath.lastIndexOf(File.separator));

                helper.addAttachment(fileName, file);

            }

            mailSender.send(message);

            logger.info("html邮件发送成功");

        } catch (MessagingException e) {

            logger.error("发送html邮件时发生异常!", e);

        }

    }

}
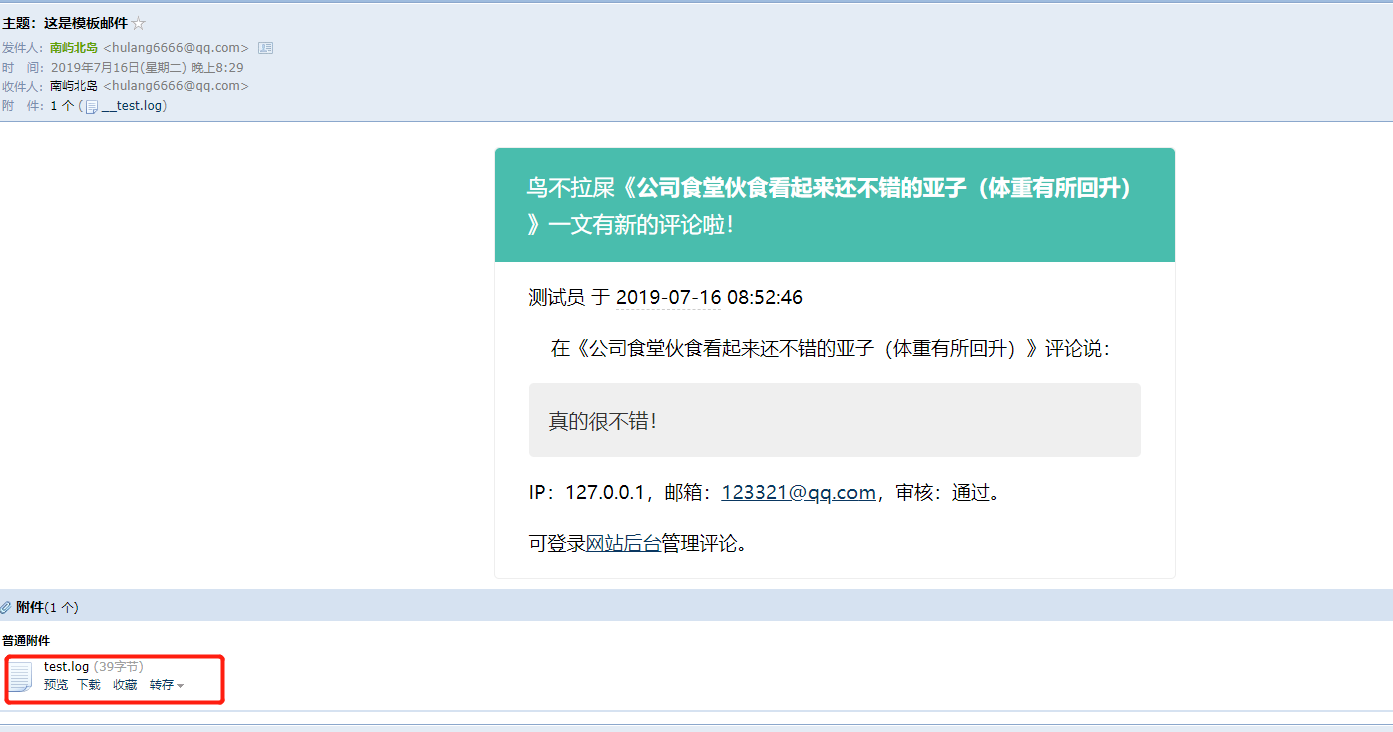
新增邮件模板
sendMail.html
<!DOCTYPE html>
<html lang="zh" xmlns:th="http://www.thymeleaf.org">
<head>
<meta charset="UTF-8"/>
<title>Title</title>
</head>
<body>
<div style="border-radius:5px;font-size:19px;width:680px;font-family:微软雅黑,'Helvetica Neue',Arial,sans-serif;margin:10px auto 0px;border:1px solid #eee;max-width:100%;">
<div style="width:100%;background:#49BDAD;color:#FFFFFF;border-radius:5px 5px 0 0;">
<p style="font-size:22px;word-break:break-all;padding:20px 32px;margin:0;"><span th:text="${siteTitle}"></span>《<a style="color:#FFFFFF;font-weight:bold;text-decoration:none;" target="_blank" th:href="${permalink}"><span th:text="${title}"></span></a>》一文有新的评论啦!</p>
</div>
<div style="margin:0px auto;width:90%">
<p><span th:text="${author}"/> 于 <span th:text="${time}"/></p>
<p> 在《<span th:text="${title}"/>》评论说:</p>
<p style="background:#EFEFEF;margin:15px 0px;padding:20px;border-radius:5px;font-size:20px;color:#333;"><span th:text="${text}"/></p>
<p>IP:<span th:text="${ip}"/>,邮箱:<span th:text="${mail}"/>,审核:<span th:text="${status}"/>。</p>
<p>可登录<a th:href="${manage}" target='_blank'>网站后台</a>管理评论。</p>
</div>
</div>
</body>
</html>
测试
@Test

public void sendTemplateMail() {

	//创建邮件字段

	Context context = new Context();

	context.setVariable("siteTitle", "鸟不拉屎");

	context.setVariable("permalink", "https://niaobulashi.com/archives/canteen.html/comment-page-1#comment-1152");

	context.setVariable("title", "公司食堂伙食看起来还不错的亚子(体重有所回升)");

	context.setVariable("author", "测试员");

	context.setVariable("time", "2019-07-16 08:52:46");

	context.setVariable("text", "真的很不错!");

	context.setVariable("ip", "127.0.0.1");

	context.setVariable("mail", "123321@qq.com");

	context.setVariable("status", "通过");

	context.setVariable("manage", "https://niaobulashi.com");

	// 将字段加载到页面模板中

	String emailContent = templateEngine.process("sendMail", context);

	// 添加附件

	String filePath="E:\\workspace\\javaWorkspace\\spring-boot-learning\\spring-boot-21-schedule-mail\\doc\\test.log";

	mailService.sendHtmlMail("hulang6666@qq.com","主题:这是模板邮件",emailContent, filePath);

}
四、定时任务
定时任务在SpringBoot默认的SpringBootStart包中已经存在
启动类开启定时任务
@SpringBootApplication

@EnableScheduling

public class ScheduleMailApplication {

    public static void main(String[] args) {

        SpringApplication.run(ScheduleMailApplication.class, args);

    }

}
创建定时任务
@Component

public class SchedulerTask {

    private int count=0;

    @Scheduled(cron="*/8 * * * * ?")

    private void process(){

        System.out.println("定时任务开启,以跑:  "+(count++));

    }

}
Quart Cron表达式扩展
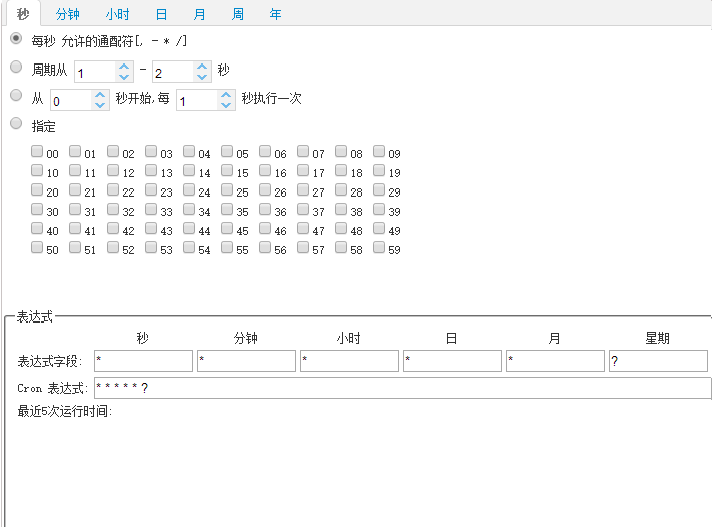
cron的表达式是字符串,实际上是由七子表达式,描述个别细节的时间表。
- Seconds
- Minutes
- Hours
- Day-of-Month
- Month
- Day-of-Week
- Year (可选字段)
1)Cron表达式的格式:秒 分 时 日 月 周 年(可选)。
字段名 允许的值 允许的特殊字符
秒 0-59 , - * /
分 0-59 , - * /
小时 0-23 , - * /
日 1-31 , - * ? / L W C
月 1-12 or JAN-DEC , - * /
周几 1-7 or SUN-SAT , - * ? / L C #
年 (可选字段) empty, 1970-2099 , - * /
“*” 代表整个时间段
“?”字符:表示不确定的值
“,”字符:指定数个值
“-”字符:指定一个值的范围
“/”字符:指定一个值的增加幅度。n/m表示从n开始,每次增加m
“L”字符:用在日表示一个月中的最后一天,用在周表示该月最后一个星期X
“W”字符:指定离给定日期最近的工作日(周一到周五)
“#”字符:表示该月第几个周X。6#3表示该月第3个周五
2)Cron表达式范例:
每隔5秒执行一次:*/5 * * * * ?
每隔1分钟执行一次:0 */1 * * * ?
每天23点执行一次:0 0 23 * * ?
每天凌晨1点执行一次:0 0 1 * * ?
每月1号凌晨1点执行一次:0 0 1 1 * ?
每月最后一天23点执行一次:0 0 23 L * ?
每周星期天凌晨1点实行一次:0 0 1 ? * L
在26分、29分、33分执行一次:0 26,29,33 * * * ?
每天的0点、13点、18点、21点都执行一次:0 0 0,13,18,21 * * ?
Corn表达式在线验证:http://cron.qqe2.com/
五、定时发送邮件
定时1分钟发送邮件
SchedulerTask
@Component

public class SchedulerTask {

    private int count=0;

    @Autowired

    private MailService mailService;

    @Autowired

    private TemplateEngine templateEngine;

    /**

     * 每隔一分钟执行一次

     */

    @Scheduled(cron="0 */1 * * * ?")

    private void process(){

        System.out.println("this is scheduler task runing  "+(count++));

        //创建邮件字段

        Context context = new Context();

        context.setVariable("siteTitle", "鸟不拉屎");

        context.setVariable("permalink", "https://niaobulashi.com/archives/canteen.html/comment-page-1#comment-1152");

        context.setVariable("title", "公司食堂伙食看起来还不错的亚子(体重有所回升)");

        context.setVariable("author", "测试员");

        context.setVariable("time", "2019-07-16 08:52:46");

        context.setVariable("text", "真的很不错!");

        context.setVariable("ip", "127.0.0.1");

        context.setVariable("mail", "123321@qq.com");

        context.setVariable("status", "通过");

        context.setVariable("manage", "https://niaobulashi.com");

        // 将字段加载到页面模板中

        String emailContent = templateEngine.process("sendMail", context);

        // 添加附件

        String filePath="E:\\workspace\\javaWorkspace\\spring-boot-learning\\spring-boot-21-schedule-mail\\doc\\test.log";

        mailService.sendHtmlMail("hulang6666@qq.com","主题:这是模板邮件",emailContent, filePath);

    }

}
测试

源码地址:https://github.com/niaobulashi/spring-boot-learning/tree/master/spring-boot-21-schedule-mail
Spring Boot2(十三):整合定时任务发送邮件的更多相关文章
- Spring Boot2.0 整合 Kafka
Kafka 概述 Apache Kafka 是一个分布式流处理平台,用于构建实时的数据管道和流式的应用.它可以让你发布和订阅流式的记录,可以储存流式的记录,并且有较好的容错性,可以在流式记录产生时就进 ...
- Spring Boot2.X整合消息中间件RabbitMQ原理简浅探析
目录 1.简单概述RabbitMQ重要作用 2.简单概述RabbitMQ重要概念 3.Spring Boot整合RabbitMQ 前言 RabbitMQ是一个消息队列,主要是用来实现应用程序的异步和解 ...
- 手把手教你Spring Boot2.x整合Elasticsearch(ES)
文末会附上完整的代码包供大家下载参考,码字不易,如果对你有帮助请给个点赞和关注,谢谢! 如果只是想看java对于Elasticsearch的操作可以直接看第四大点 一.docker部署Elastics ...
- 基于Redis的消息队列使用:spring boot2.0整合redis
一 . 引入依赖 <?xml version="1.0" encoding="UTF-8"?> <project xmlns="ht ...
- 手把手教你Spring Boot2.x整合kafka
首先得自己搭建一个kafka,搭建教程请自行百度,本人是使用docker搭建了一个单机版的zookeeper+kafka作为演示,文末会有完整代码包提供给大家下载参考 废话不多说,教程开始 一.老规矩 ...
- Spring Boot2 系列教程 (十三) | 整合 MyBatis (XML 版)
前言 如题,今天介绍 SpringBoot 与 Mybatis 的整合以及 Mybatis 的使用,之前介绍过了 SpringBoot 整合MyBatis 注解版的使用,上一篇介绍过 MyBatis ...
- 项目一:第十四天 1.在realm中动态授权 2.Shiro整合ehcache 缓存realm中授权信息 3.动态展示菜单数据 4.Quartz定时任务调度框架—Spring整合javamail发送邮件 5.基于poi实现分区导出
1 Shiro整合ehCache缓存授权信息 当需要进行权限校验时候:四种方式url拦截.注解.页面标签.代码级别,当需要验证权限会调用realm中的授权方法 Shiro框架内部整合好缓存管理器, ...
- spring与quartz整合实现分布式动态创建,删除,改变执行时间定时任务(mysql数据库)
背景:因为在项目中用到了定时任务,当时想到了spring的quartz,写完发现费了很大功夫,光是整合就花了一上午,其中最大的问题就是版本问题,项目中用的是spring3.2.8的版本,查阅发现,3. ...
- Spring Boot2(九):整合Jpa的基本使用
一.前言 今天早上看到一篇微信文章,说的是国内普遍用的Mybatis,而国外确普遍用的是Jpa.我之前也看了jpa,发现入门相当容易.jpa对于简单的CRUD支持非常好,开发效率也会比Mybatis高 ...
随机推荐
- RelativeSource 简述
原文:RelativeSource 简述 RelativeSource实现标记扩展,以描述绑定源相对于绑定目标的位置. <Binding> <Binding.RelativeSour ...
- Win10《芒果TV》更新v3.5.2星玥版:修复电视台直播异常,优化添加下载提示
Win10版<芒果TV>在更新夏至版之后,根据收集到的热心用户反馈,全平台同步更新星玥版v3.5.2,修复电视台直播异常,优化添加下载提示,进一步提升使用体验. Win10版<芒果T ...
- Advanced Installer 中测试数据库连接提示“未发现数据源名称并且未指定默认驱动程序”的解决办法
原文:Advanced Installer 中测试数据库连接提示"未发现数据源名称并且未指定默认驱动程序"的解决办法 最近需要制作一个安装包,安装包的要求如下: 1.用户手工填写M ...
- Win10的UWP之进度条
原文:Win10的UWP之进度条 关于UWP的进度条的处理的方案有两种方案 我们新建一个项目,然后处理的界面如下的代码 <Grid.RowDefinitions> <RowDefin ...
- LINQ学习笔记(一)
LINQ,语言集成查询(Language Integrated Query)是一组用于C#和Visual Basic语言的扩展. 它允许编写C#或Visual Basic代码以查询数据库相同的方法操作 ...
- tf.nn.softmax & tf.nn.reduce_sum & tf.nn.softmax_cross_entropy_with_logits
tf.nn.softmax softmax是神经网络的最后一层将实数空间映射到概率空间的常用方法,公式如下: \[ softmax(x)_i=\frac{exp(x_i)}{\sum_jexp(x_j ...
- Delphi中TResourceStream流使用
Resource可以是任意文件(图像.声音.office都可以),直接打包到编译的exe文件中,调用也非常方便 打开一个新的或已有的delphi工程 1.先在 Project->resource ...
- Qt实现网络播放器
写了这么多的博客,关于网络的还不算多,经常有人询问一些关于网络传输.制作在线试听及下载音乐.构造及解析数据等的一些问题,今天就在这里一并讲解. 网络操作: 主要涉及:QNetwor ...
- modelform组件以及ChoiceField属性
一. Forms组件补充 1.__init__() 如果继承forms.Form的类中的每一个字段,或者大部分字段都做了相同的约束,可以将该约束放到__init__中编写 实例:每一个字段都需要添加f ...
- pycharm安装及配置全过程
首先要准备两个文件,一是pycharm-community,二是python-3.7.2-amd. PyCharm 的下载地址:http://www.jetbrains.com/pycharm/dow ...