SpringBoot:2.SpringBoot整合Thymeleaf模板引擎渲染web视图
在Web开发过程中,Spring Boot可以通过@RestController来返回json数据,那如何渲染Web页面?Spring Boot提供了多种默认渲染html的模板引擎,主要有以下几种:
- Thymeleaf
- FreeMarker
- Velocity
- Groovy
- Mustache
Spring Boot 推荐使用这些模板引擎来代替 Jsp,Thymeleaf 只是其中一种,下面我们来简单聊聊Thymeleaf及实践一下如何整合Spring Boot和Thymeleaf。
1.Thymeleaf 介绍
Thymeleaf简单的说,就是一款用于渲染 XML/XHTML/HTML5 内容的模板引擎,可用于Web与非Web环境中的应用开发。
2.实践Spring Boot整合Thymeleaf
2.1 构建Spring Boot项目
我们以SpringBoot:1.开启SpringBoot之旅的源码作为基础修改,项目名为:02.Spring-Boot-Thymeleaf 仅保留Application.java启动类,其他都去除。
基本的目录结构
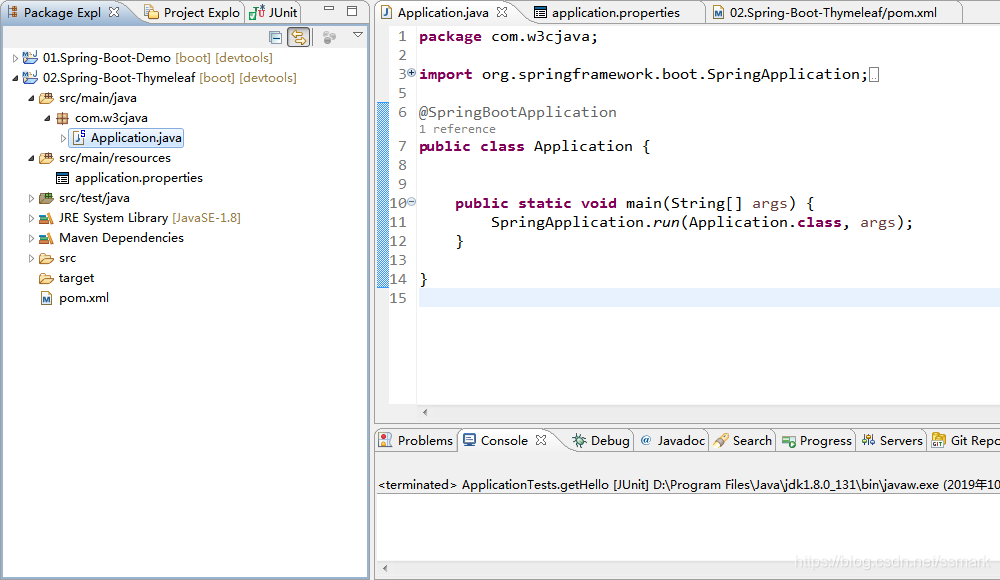
Application.java
package com.w3cjava;

import org.springframework.boot.SpringApplication;

import org.springframework.boot.autoconfigure.SpringBootApplication;

@SpringBootApplication

public class Application {

	public static void main(String[] args) {

		SpringApplication.run(Application.class, args);

	}

}
pom.xml
<?xml version="1.0" encoding="UTF-8"?>

<project xmlns="http://maven.apache.org/POM/4.0.0" xmlns:xsi="http://www.w3.org/2001/XMLSchema-instance"

	xsi:schemaLocation="http://maven.apache.org/POM/4.0.0 https://maven.apache.org/xsd/maven-4.0.0.xsd">

	<modelVersion>4.0.0</modelVersion>

	<parent>

		<groupId>org.springframework.boot</groupId>

		<artifactId>spring-boot-starter-parent</artifactId>

		<version>2.1.9.RELEASE</version>

		<relativePath/> <!-- lookup parent from repository -->

	</parent>

	<groupId>com.w3cjava</groupId>

	<artifactId>02.Spring-Boot-Thymeleaf</artifactId>

	<version>0.1</version>

	<name>02.Spring-Boot-Thymeleaf</name>

	<description>Thymeleaf project for Spring Boot</description>

	<properties>

		<java.version>1.8</java.version>

		<maven-jar-plugin.version>3.0.0</maven-jar-plugin.version>

	</properties>

	<dependencies>

		<!-- 支持web的模块依赖 -->

	    <dependency>

	        <groupId>org.springframework.boot</groupId>

	        <artifactId>spring-boot-starter-web</artifactId>

	        <!-- 排除tomcat依赖 -->

	        <exclusions>

	            <exclusion>

	                <groupId>org.springframework.boot</groupId>

	                <artifactId>spring-boot-starter-tomcat</artifactId>

	            </exclusion>

	        </exclusions>

	    </dependency>

	    <!-- jetty依赖 -->

	    <dependency>

	        <groupId>org.springframework.boot</groupId>

	        <artifactId>spring-boot-starter-jetty</artifactId>

	    </dependency>

		<!-- 测试模块依赖 -->

		<dependency>

			<groupId>org.springframework.boot</groupId>

			<artifactId>spring-boot-starter-test</artifactId>

			<scope>test</scope>

		</dependency>

		<!-- 热部署依赖 -->

	    <dependency>

	        <groupId>org.springframework.boot</groupId>

	        <artifactId>spring-boot-devtools</artifactId>

	        <optional>true</optional>

	    </dependency>

	</dependencies>

	<build>

		<plugins>

			<plugin>

				<groupId>org.springframework.boot</groupId>

				<artifactId>spring-boot-maven-plugin</artifactId>

			</plugin>

		</plugins>

	</build>

</project>
2.2 引入Thymeleaf依赖
<!-- thymeleaf模板引擎依赖 -->

<dependency>

    <groupId>org.springframework.boot</groupId>

    <artifactId>spring-boot-starter-thymeleaf</artifactId>

</dependency>
2.3 构建IndexController
package com.w3cjava.controller;

import org.springframework.stereotype.Controller;

import org.springframework.ui.ModelMap;

import org.springframework.web.bind.annotation.RequestMapping;

@Controller

public class IndexController {

	@RequestMapping("/")

	public String index(ModelMap map) {

		// 加入一个属性,用来在模板中读取

		map.addAttribute("host", "http://www.w3cjava.com");

		// return模板文件的名称,对应src/main/resources/templates/index.html

		return "index";

	}

}
2.4 渲染页面
在项目src/main/resources/templates目录下新建一个模板文件index.html文件,内容如下
<!DOCTYPE html>

<html>

<head lang="en">

    <meta charset="UTF-8" />

    <title></title>

</head>

<body>

<h1 th:text="${host}">Hello World</h1>

</body>

</html>
2.5 访问路径
通过访问路径http://localhost:8080/ 结果页面如下。

以上仅仅只是展示了Thymeleaf渲染文本的语法,更多Thymeleaf的页面语法,还请访问Thymeleaf的官方文档查询使用。
2.6 Thymeleaf的默认参数配置
Thymeleaf给我们提供部分参数的默认配置项,比如渲染模板默认路径为resources目录下templates下的文件,文件类型为text/html等等。
如需要修改默认配置,只需复制下面要修改的属性到application.properties中,并修改成需要的值。
# Enable template caching.

spring.thymeleaf.cache=true

# Check that the templates location exists.

spring.thymeleaf.check-template-location=true

# Content-Type value.

spring.thymeleaf.content-type=text/html

# Enable MVC Thymeleaf view resolution.

spring.thymeleaf.enabled=true

# Template encoding.

spring.thymeleaf.encoding=UTF-8

# Comma-separated list of view names that should be excluded from resolution.

spring.thymeleaf.excluded-view-names=

# Template mode to be applied to templates. See also StandardTemplateModeHandlers.

spring.thymeleaf.mode=HTML5

# Prefix that gets prepended to view names when building a URL.

spring.thymeleaf.prefix=classpath:/templates/

# Suffix that gets appended to view names when building a URL.

spring.thymeleaf.suffix=.html  spring.thymeleaf.template-resolver-order= # Order of the template resolver in the chain. spring.thymeleaf.view-names= # Comma-separated list of view names that can be resolved.
3.小结
Spring Boot整合Thymeleaf比较简单,采用了Spring Boot一贯的做法,几乎不用在配置文件中配置任何东西即可快速运行起来。
欢迎扫面下列二维码关注“余弦的自留地”公众微信号

万物之中,希望至美
SpringBoot:2.SpringBoot整合Thymeleaf模板引擎渲染web视图的更多相关文章
- Spring Boot☞ 使用Thymeleaf模板引擎渲染web视图
静态资源访问 在我们开发Web应用的时候,需要引用大量的js.css.图片等静态资源. 默认配置 Spring Boot默认提供静态资源目录位置需置于classpath下,目录名需符合如下规则: /s ...
- Spring Boot☞ 使用freemarker模板引擎渲染web视图
效果图 代码 package com.wls.integrateplugs.hello.controller; /** * Created by wls on 2017/8/24. */ import ...
- 【Springboot】Springboot整合Thymeleaf模板引擎
Thymeleaf Thymeleaf是跟Velocity.FreeMarker类似的模板引擎,它可以完全替代JSP,相较与其他的模板引擎,它主要有以下几个特点: 1. Thymeleaf在有网络和无 ...
- SpringBoot入门篇--使用Thymeleaf模板引擎进行页面的渲染
在做WEB开发的时候,我们不可避免的就是在前端页面之间进行跳转,中间进行数据的查询等等操作.我们在使用SpringBoot之前包括我在内其实大部分都是用的是JSP页面,可以说使用的已经很熟悉.但是我们 ...
- Spring Boot 2.0 整合Thymeleaf 模板引擎
本节将和大家一起实战Spring Boot 2.0 和thymeleaf 模板引擎 1. 创建项目 2. 使用Spring Initlizr 快速创建Spring Boot 应用程序 3. 填写项目配 ...
- springboot整合Thymeleaf模板引擎
引入依赖 需要引入Spring Boot的Thymeleaf启动器依赖. <dependency> <groupId>org.springframework.boot</ ...
- SpringBoot项目的前端+thymeleaf模板引擎
SpringBoot项目创建之后,后台的框架是SpringMVC.但前端的resource和template目录都是空的.这个时候需要创建前台页面. 习惯上,我们会创建JSP,但是,SpringBoo ...
- Spring Boot整合 Thymeleaf 模板引擎
什么是Thymeleaf Thymeleaf是一款用于渲染XML.XHTML.HTML5内容的模板引擎.类似Velocity,FreeMaker模板引擎,它也可以轻易的与Spring MVC等Web框 ...
- Spring Boot整合Thymeleaf模板引擎
什么是Thymeleaf Thymeleaf是一款用于渲染XML.XHTML.HTML5内容的模板引擎.类似Velocity,FreeMaker模板引擎,它也可以轻易的与Spring MVC等Web框 ...
随机推荐
- Recovery启动流程(2)---UI界面【转】
Recovery启动流程系列文章把recvoery目录下文件分成小块讲解,最后再以一条主线贯穿所有的内容.这篇文章主要讲解Recovery-UI的相关内容. 我们知道,当我们通过按键或者应用进入rec ...
- Android静态注册广播无法接收的问题(8.0+版本)
如果你静态注册的广播无法接收到消息,请先检查下:你的安卓版本是不是8.0+ * 前言** Google官方声明:Beginning with Android 8.0 (API level 26), t ...
- 05.Django基础五之django模型层(一)单表操作
一 ORM简介 MVC或者MVC框架中包括一个重要的部分,就是ORM,它实现了数据模型与数据库的解耦,即数据模型的设计不需要依赖于特定的数据库,通过简单的配置就可以轻松更换数据库,这极大的减轻了开发人 ...
- Cocos Creator 中 _worldMatrix 到底是什么(上)
Cocos Creator 中 _worldMatrix 到底是什么(上) 1. (矩阵)Matrix是什么,有什么用 (矩阵)Matrix一个神奇的存在?在开发过程中对里边各项值的含义是不是抓耳挠腮 ...
- 【Python笔记】Python变量类型
Python 变量类型 变量存储在内存中的值.这就意味着在创建变量时会在内存中开辟一个空间. 基于变量的数据类型,解释器会分配指定内存,并决定什么数据可以被存储在内存中. 因此,变量可以指定不同的数据 ...
- invalid comparison: java.util.ArrayList and java.lang.String解决
报错: Caused by: org.apache.ibatis.exceptions.PersistenceException: ### Error querying database. Cause ...
- line-height属性
line-height属性的细节 与大多数CSS属性不同,line-height支持属性值设置为无单位的数字.有无单位在子元素继承属性时有微妙的不同. 语法 line-height: normal | ...
- Python控制函数运行时间
在某个Flask项目在做后端接口时需要设置超时响应,因为接口中使用爬虫请求了多个网站,响应时间时长时短. 我需要设置一个最大响应时间,时间内如果接口爬虫没跑完,直接返回请求超时. 从网上了解到有两种方 ...
- 如何配置VMware客户虚拟机使用NAT模式联网通信
本例中配置客户虚拟机(CentOS)使用NAT(网络地址转换Network Address Translation)模式进行联网到公网(互联网).客户机网段为192.168.1.0/24网段,经NAT ...
- IDEA 学习笔记之 Web项目开发
Web项目开发: 添加新模块: 起名: 添加jars: 添加Tomcat/local: 添加项目: 启动Tomcat: 看到web页面: 修改页面: 重新部署页面: