SpringBoot:2.SpringBoot整合Thymeleaf模板引擎渲染web视图
在Web开发过程中,Spring Boot可以通过@RestController来返回json数据,那如何渲染Web页面?Spring Boot提供了多种默认渲染html的模板引擎,主要有以下几种:
- Thymeleaf
- FreeMarker
- Velocity
- Groovy
- Mustache
Spring Boot 推荐使用这些模板引擎来代替 Jsp,Thymeleaf 只是其中一种,下面我们来简单聊聊Thymeleaf及实践一下如何整合Spring Boot和Thymeleaf。
1.Thymeleaf 介绍
Thymeleaf简单的说,就是一款用于渲染 XML/XHTML/HTML5 内容的模板引擎,可用于Web与非Web环境中的应用开发。
2.实践Spring Boot整合Thymeleaf
2.1 构建Spring Boot项目
我们以SpringBoot:1.开启SpringBoot之旅的源码作为基础修改,项目名为:02.Spring-Boot-Thymeleaf 仅保留Application.java启动类,其他都去除。
基本的目录结构
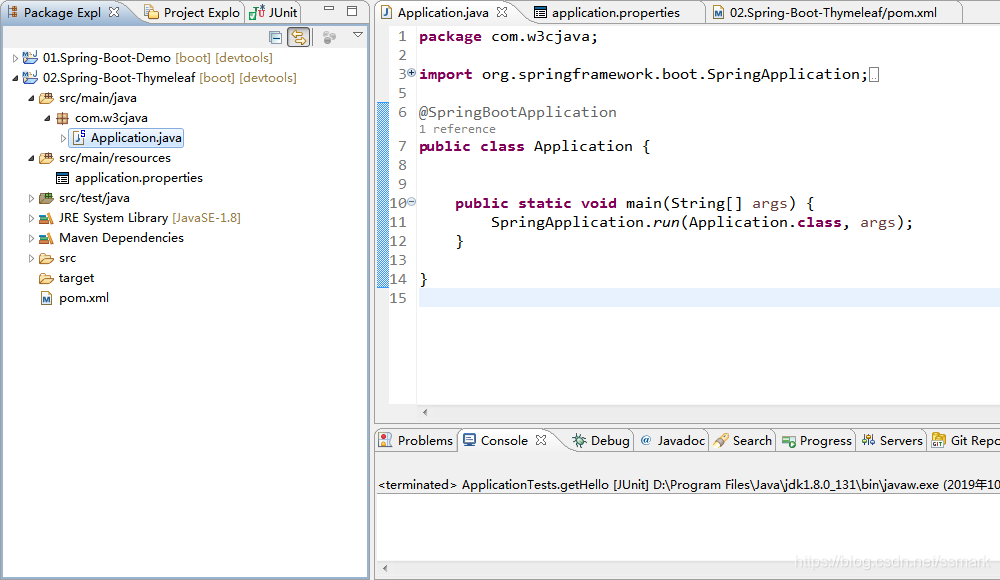
Application.java
package com.w3cjava;

import org.springframework.boot.SpringApplication;

import org.springframework.boot.autoconfigure.SpringBootApplication;

@SpringBootApplication

public class Application {

	public static void main(String[] args) {

		SpringApplication.run(Application.class, args);

	}

}
pom.xml
<?xml version="1.0" encoding="UTF-8"?>

<project xmlns="http://maven.apache.org/POM/4.0.0" xmlns:xsi="http://www.w3.org/2001/XMLSchema-instance"

	xsi:schemaLocation="http://maven.apache.org/POM/4.0.0 https://maven.apache.org/xsd/maven-4.0.0.xsd">

	<modelVersion>4.0.0</modelVersion>

	<parent>

		<groupId>org.springframework.boot</groupId>

		<artifactId>spring-boot-starter-parent</artifactId>

		<version>2.1.9.RELEASE</version>

		<relativePath/> <!-- lookup parent from repository -->

	</parent>

	<groupId>com.w3cjava</groupId>

	<artifactId>02.Spring-Boot-Thymeleaf</artifactId>

	<version>0.1</version>

	<name>02.Spring-Boot-Thymeleaf</name>

	<description>Thymeleaf project for Spring Boot</description>

	<properties>

		<java.version>1.8</java.version>

		<maven-jar-plugin.version>3.0.0</maven-jar-plugin.version>

	</properties>

	<dependencies>

		<!-- 支持web的模块依赖 -->

	    <dependency>

	        <groupId>org.springframework.boot</groupId>

	        <artifactId>spring-boot-starter-web</artifactId>

	        <!-- 排除tomcat依赖 -->

	        <exclusions>

	            <exclusion>

	                <groupId>org.springframework.boot</groupId>

	                <artifactId>spring-boot-starter-tomcat</artifactId>

	            </exclusion>

	        </exclusions>

	    </dependency>

	    <!-- jetty依赖 -->

	    <dependency>

	        <groupId>org.springframework.boot</groupId>

	        <artifactId>spring-boot-starter-jetty</artifactId>

	    </dependency>

		<!-- 测试模块依赖 -->

		<dependency>

			<groupId>org.springframework.boot</groupId>

			<artifactId>spring-boot-starter-test</artifactId>

			<scope>test</scope>

		</dependency>

		<!-- 热部署依赖 -->

	    <dependency>

	        <groupId>org.springframework.boot</groupId>

	        <artifactId>spring-boot-devtools</artifactId>

	        <optional>true</optional>

	    </dependency>

	</dependencies>

	<build>

		<plugins>

			<plugin>

				<groupId>org.springframework.boot</groupId>

				<artifactId>spring-boot-maven-plugin</artifactId>

			</plugin>

		</plugins>

	</build>

</project>
2.2 引入Thymeleaf依赖
<!-- thymeleaf模板引擎依赖 -->

<dependency>

    <groupId>org.springframework.boot</groupId>

    <artifactId>spring-boot-starter-thymeleaf</artifactId>

</dependency>
2.3 构建IndexController
package com.w3cjava.controller;

import org.springframework.stereotype.Controller;

import org.springframework.ui.ModelMap;

import org.springframework.web.bind.annotation.RequestMapping;

@Controller

public class IndexController {

	@RequestMapping("/")

	public String index(ModelMap map) {

		// 加入一个属性,用来在模板中读取

		map.addAttribute("host", "http://www.w3cjava.com");

		// return模板文件的名称,对应src/main/resources/templates/index.html

		return "index";

	}

}
2.4 渲染页面
在项目src/main/resources/templates目录下新建一个模板文件index.html文件,内容如下
<!DOCTYPE html>

<html>

<head lang="en">

    <meta charset="UTF-8" />

    <title></title>

</head>

<body>

<h1 th:text="${host}">Hello World</h1>

</body>

</html>
2.5 访问路径
通过访问路径http://localhost:8080/ 结果页面如下。

以上仅仅只是展示了Thymeleaf渲染文本的语法,更多Thymeleaf的页面语法,还请访问Thymeleaf的官方文档查询使用。
2.6 Thymeleaf的默认参数配置
Thymeleaf给我们提供部分参数的默认配置项,比如渲染模板默认路径为resources目录下templates下的文件,文件类型为text/html等等。
如需要修改默认配置,只需复制下面要修改的属性到application.properties中,并修改成需要的值。
# Enable template caching.

spring.thymeleaf.cache=true

# Check that the templates location exists.

spring.thymeleaf.check-template-location=true

# Content-Type value.

spring.thymeleaf.content-type=text/html

# Enable MVC Thymeleaf view resolution.

spring.thymeleaf.enabled=true

# Template encoding.

spring.thymeleaf.encoding=UTF-8

# Comma-separated list of view names that should be excluded from resolution.

spring.thymeleaf.excluded-view-names=

# Template mode to be applied to templates. See also StandardTemplateModeHandlers.

spring.thymeleaf.mode=HTML5

# Prefix that gets prepended to view names when building a URL.

spring.thymeleaf.prefix=classpath:/templates/

# Suffix that gets appended to view names when building a URL.

spring.thymeleaf.suffix=.html  spring.thymeleaf.template-resolver-order= # Order of the template resolver in the chain. spring.thymeleaf.view-names= # Comma-separated list of view names that can be resolved.
3.小结
Spring Boot整合Thymeleaf比较简单,采用了Spring Boot一贯的做法,几乎不用在配置文件中配置任何东西即可快速运行起来。
欢迎扫面下列二维码关注“余弦的自留地”公众微信号

万物之中,希望至美
SpringBoot:2.SpringBoot整合Thymeleaf模板引擎渲染web视图的更多相关文章
- Spring Boot☞ 使用Thymeleaf模板引擎渲染web视图
静态资源访问 在我们开发Web应用的时候,需要引用大量的js.css.图片等静态资源. 默认配置 Spring Boot默认提供静态资源目录位置需置于classpath下,目录名需符合如下规则: /s ...
- Spring Boot☞ 使用freemarker模板引擎渲染web视图
效果图 代码 package com.wls.integrateplugs.hello.controller; /** * Created by wls on 2017/8/24. */ import ...
- 【Springboot】Springboot整合Thymeleaf模板引擎
Thymeleaf Thymeleaf是跟Velocity.FreeMarker类似的模板引擎,它可以完全替代JSP,相较与其他的模板引擎,它主要有以下几个特点: 1. Thymeleaf在有网络和无 ...
- SpringBoot入门篇--使用Thymeleaf模板引擎进行页面的渲染
在做WEB开发的时候,我们不可避免的就是在前端页面之间进行跳转,中间进行数据的查询等等操作.我们在使用SpringBoot之前包括我在内其实大部分都是用的是JSP页面,可以说使用的已经很熟悉.但是我们 ...
- Spring Boot 2.0 整合Thymeleaf 模板引擎
本节将和大家一起实战Spring Boot 2.0 和thymeleaf 模板引擎 1. 创建项目 2. 使用Spring Initlizr 快速创建Spring Boot 应用程序 3. 填写项目配 ...
- springboot整合Thymeleaf模板引擎
引入依赖 需要引入Spring Boot的Thymeleaf启动器依赖. <dependency> <groupId>org.springframework.boot</ ...
- SpringBoot项目的前端+thymeleaf模板引擎
SpringBoot项目创建之后,后台的框架是SpringMVC.但前端的resource和template目录都是空的.这个时候需要创建前台页面. 习惯上,我们会创建JSP,但是,SpringBoo ...
- Spring Boot整合 Thymeleaf 模板引擎
什么是Thymeleaf Thymeleaf是一款用于渲染XML.XHTML.HTML5内容的模板引擎.类似Velocity,FreeMaker模板引擎,它也可以轻易的与Spring MVC等Web框 ...
- Spring Boot整合Thymeleaf模板引擎
什么是Thymeleaf Thymeleaf是一款用于渲染XML.XHTML.HTML5内容的模板引擎.类似Velocity,FreeMaker模板引擎,它也可以轻易的与Spring MVC等Web框 ...
随机推荐
- centos php7 安装mysqli扩展心得
在新配服务器时发现,php无法连接到mysql.通过phpinfo发现.根本没有显示mysqli的相关配置.经过一系列研究.总结了下.: 第一步: 在phpinfo里没有mysqli配置,原因是安装p ...
- 亮剑.NET学习札记
学习前提要: 因为书的版本过老,有些章节不学了,要学的包括以下章节 暂定:1,2,4,5,6,7,9,10,11,12,13,14,15,16,17,18,附录A 第一章:主要是介绍.NET,包括面向 ...
- SpringBoot集成Shiro 实现动态加载权限
一.前言 本文小编将基于 SpringBoot 集成 Shiro 实现动态uri权限,由前端vue在页面配置uri,Java后端动态刷新权限,不用重启项目,以及在页面分配给用户 角色 . 按钮 .ur ...
- 【django】分页
分页 1.简单分页 from django.conf.urls import url from django.contrib import admin from app01 import views ...
- 坑爹的tp-link管理密码设置
tp-link管理密码最长14位,我设置了15位的密码,突然等不上去,上网发现不少人也有类似情况,后来看到一个文章说tp-link管理密码,可以设置6-15,于是抱着试一试的态度,输入我设置密码的前 ...
- Ubuntu 搭建Zookeeper服务
1.下载安装包 官方下载地址http://apache.fayea.com/zookeeper/ 2.安装 安装前确保系统已安装过JDK,JDK安装过程可参照 2.1 解压下载好的tar.gz安装包到 ...
- springboot值mybatis 别名等配置
在application配置文件中添加如下: mybatis: #该配置替换在sql-config-map中的typeAliases配置 type-aliases-package: com.ww.ww ...
- 阿里云服务器ecs配置之安装nginx
一.简介 Nginx是一款轻量级的网页服务器.反向代理服务器.相较于Apache.lighttpd具有占有内存少,稳定性高等优势.它最常的用途是提供反向代理服务. 二 .安装 1.准备工作 Nginx ...
- Angular6 CodeMirror在线编辑sql 智能提示
1. 安装ng2-codemirror包.codemirror包 npm install ng2-codemirror -- save npm install codemirror -- save 2 ...
- openstack问题记录
先去查看对应的日志:/var/log/,再来排查错误 1.实例处于错误状态 解决办法: 1.使用openstack hypervisor list查看 2.然后openstack hypervisor ...