使用Topshelf组件 一步一步创建 Windows 服务
我们先来介绍一下使用它的好处,以下论述参考自其他大神。
topshelf是创建windows服务的一种方式,相比原生实现ServiceBase、Install.Installer更为简单方便, 我们只需要几行代码即可实现windows服务的开发。
topshelf本身支持windows及linux下mono上部署安装,同样也是开源的。
topshelf相对原生来说,调试起来比较方便,可以在开发时以控制台的形式直接f5调试,发布时用命令以服务的形式部署。
还一个比较有用的特性是支持多实例的部署,这样可以在一台机器上部署多个相对的服务。类似的工具有instsrv和srvany。
多实例有一个好处就是容灾,当一个服务部署多份时,这样其中任何一个服务实例挂了,剩余的可以继续执行。
多实例可以是主备的方式,主挂了备服务才会执行。也可以以负载均衡的方式实现,多实例抢占进程锁或分布式锁,谁拿到谁执行。
先写出具体步骤:
// 新建控制台应用程序
// 使用Nuget安装Topshelf,选择能用的最新版本
// 使用Nuget安装NLog和NLog.config,选择能用的最新版本,用于打印日志 Nlog需要配置文件,详见NLog.config
// 初始化配置文件,创建AppConfigHelper类,继承 ConfigurationSection (需要引用System.Configuration程序集)
// 完善App.Config配置文件,读取App.Config配置文件,具体查看AppConfigHelper类
// 创建一个注册服务类TopshelfRegistService,初始化Topshelf注册
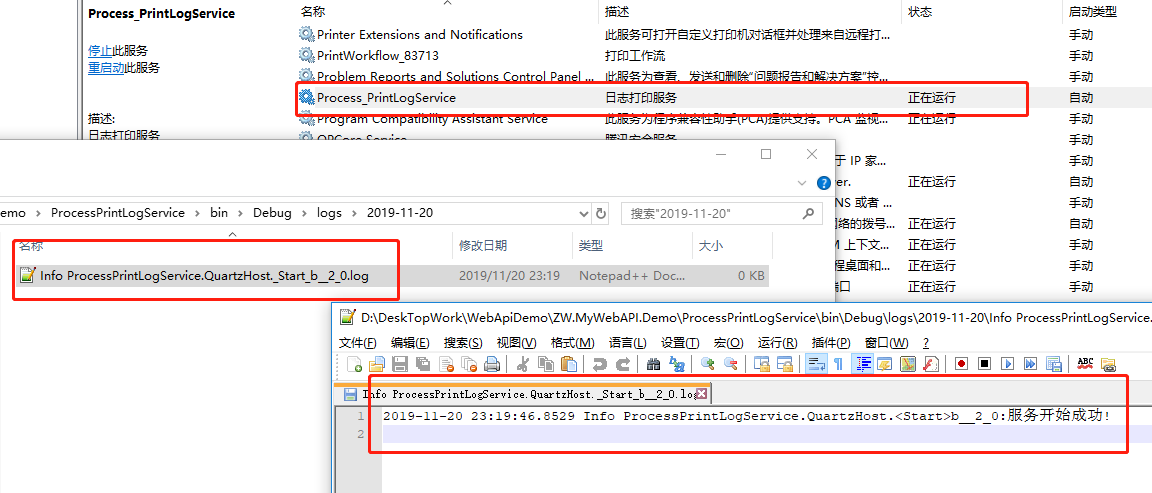
// 我们的目标很简单,就是让服务打印一个日志文件
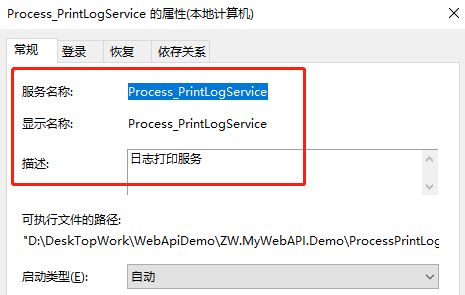
// 编译并生成项目,进入 bin\Debug 目录下,找到xxx.exe 执行 install 命令,Windows 服务就诞生了
// 注意:如果出现需要以管理员身份启动的提示,重新以管理员身份启动 cmd
//接下来直接上代码与截图


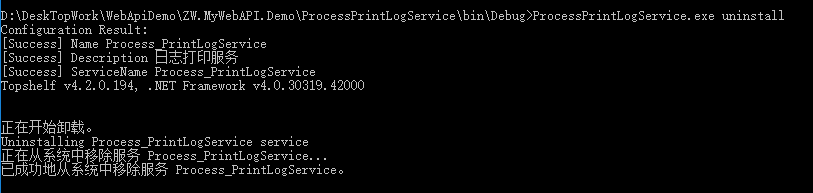
卸载服务:
当我们启动服务的时候,成功打印出了日志,表示一切成功
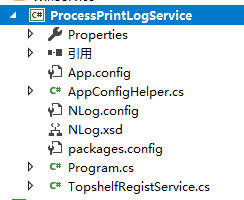
程序结构很简单,如下图所示:
接下来,我们直接上实现代码,我会按照步骤依次给出:
1,Program主程序代码
 namespace ProcessPrintLogService

 {

     class Program

     {

         public static readonly Logger log = LogManager.GetCurrentClassLogger();

         private static readonly AppConfigHelper config = AppConfigHelper.Initity();

         static void Main(string[] args)

         {

             TopshelfRegistService.Regist(config, true);

         }

     }

 }
2.AppConfigHelper类,用于读取配置文件,使用配置文件的方式可以使你后期将该服务应用于多个应用程序
namespace ProcessPrintLogService

{

    public class AppConfigHelper : ConfigurationSection

    {

        private static AppConfigHelper _AppConfig = null;

        private static readonly object LockThis = new object();

        /// <summary>

        /// 获取当前配置 获取section节点的内容

        /// 使用单例模式

        /// </summary>

        /// <returns></returns>

        public static AppConfigHelper Initity()

        {

            if (_AppConfig == null)

            {

                lock (LockThis)

                {

                    if (_AppConfig == null)

                    {

                        //获取app.config文件中的section配置节点

                        _AppConfig = (AppConfigHelper)ConfigurationManager.GetSection("AppConfigHelper");

                    }

                }

            }

            return _AppConfig;

        }

        //创建一个AppConfigHelper节点

        //属性分别为:ServiceName、Desc 等....

        //这里介绍一下属性标签:ConfigurationProperty 它可以在配置文件中根据属性名获取Value值

        //可以参考文章https://www.cnblogs.com/liunlls/p/configuration.html

        /// <summary>

        /// 服务名称

        /// </summary>

        [ConfigurationProperty("ServiceName", IsRequired = true)]

        public string ServiceName

        {

            get { return base["ServiceName"].ToString(); }

            internal set { base["ServiceName"] = value; }

        }

        /// <summary>

        /// 描述

        /// </summary>

        [ConfigurationProperty("Desc", IsRequired = true)]

        public string Description

        {

            get { return base["Desc"].ToString(); }

            internal set { base["Desc"] = value; }

        }

    }

}
3.Topshelf组件注册服务
namespace ProcessPrintLogService

{

    /// <summary>

    /// Topshelf组件注册服务

    /// </summary>

    internal class TopshelfRegistService

    {

        /// <summary>

        /// 注册入口

        /// </summary>

        /// <param name="config">配置文件</param>

        /// <param name="isreg">是否注册</param>

        public static void Regist(AppConfigHelper config, bool isreg = false)

        {

            //这里也可以使用HostFactory.Run()代替HostFactory.New()

            var host = HostFactory.New(x =>

            {

                x.Service<QuartzHost>(s =>

                {

                    //通过 new QuartzHost() 构建一个服务实例

                    s.ConstructUsing(name => new QuartzHost());

                    //当服务启动后执行什么

                    s.WhenStarted(tc => tc.Start());

                    //当服务停止后执行什么

                    s.WhenStopped(tc => tc.Stop());

                    //当服务暂停后执行什么

                    s.WhenPaused(w => w.Stop());

                    //当服务继续后执行什么

                    s.WhenContinued(w => w.Start());

                });

                if (!isreg) return; //默认不注册

                //服务用本地系统账号来运行

                x.RunAsLocalSystem();

                //服务的描述信息

                x.SetDescription(config.Description);

                //服务的显示名称

                x.SetDisplayName(config.ServiceName);

                //服务的名称(最好不要包含空格或者有空格属性的字符)Windows 服务名称不能重复。

                x.SetServiceName(config.ServiceName);

            });

            host.Run();  //启动服务  如果使用HostFactory.Run()则不需要该方法

        }

    }

    /// <summary>

    /// 自定义服务

    /// </summary>

    internal class QuartzHost

    {

        public readonly Logger log = LogManager.GetLogger("QuartzHost");

        public QuartzHost()

        {

            var service = AppConfigHelper.Initity();

        }

        //服务开始

        public void Start()

        {

            try

            {

                Task.Run(() =>

                {

                    log.Info($"服务开始成功!");

                });

            }

            catch (Exception ex)

            {

                Task.Run(() =>

                {

                    log.Fatal(ex, $"服务开始失败!错误信息:{0}", ex);

                });

                throw;

            }

        }

        //服务停止

        public void Stop()

        {

            Task.Run(() =>

            {

                log.Trace("服务结束工作");

            });

        }

    }

}
4.App.config配置文件
<?xml version="1.0" encoding="utf-8" ?>

<configuration>

  <!--该节点一定要放在最上边-->

  <configSections>

    <section name="AppConfigHelper" type="ProcessPrintLogService.AppConfigHelper,ProcessPrintLogService"/>

  </configSections>

  <!--TopSelf服务配置文件 -->

  <AppConfigHelper

    ServiceName="Process_PrintLogService"

    Desc="日志打印服务"

    />

  <!--数据库连接字符串 -->

  <connectionStrings>

    <add name="ConnectionString" connectionString=""/>

  </connectionStrings>

  <startup>

    <supportedRuntime version="v4.0" sku=".NETFramework,Version=v4.5.2" />

  </startup>

</configuration>
5.Nlog.config日志配置文件
<?xml version="1.0" encoding="utf-8" ?>

<nlog xmlns="http://www.nlog-project.org/schemas/NLog.xsd"

      xmlns:xsi="http://www.w3.org/2001/XMLSchema-instance">

  <targets>

    <!--type="File|Console" 属性是设置日志输出目标是"File"(文件)或者"Console"(控制台)-->

    <!--fileName="${basedir}/logs/${shortdate}/${level}/${callsite}.log" 设置日记记录文件的路径和名称-->

    <!--layout="${longdate} ${level} ${callsite}:${message}" 设置日志输出格式-->

    <target name="t1"

            type="File"

            fileName="${basedir}/logs/${shortdate}/${level} ${callsite}.log"

            layout="${longdate} ${level} ${callsite}:${message}"

          archiveAboveSize=""

          archiveNumbering="Rolling"

          concurrentWrites="false"

          keepFileOpen="true"

          maxArchiveFiles =""

    />

    <!--输出至控制台-->

    <target name="t2" type="Console" layout="${longdate} ${level} ${callsite}:${message}" />

  </targets>

  <rules>

    <!--如果填*,则表示所有的Logger都运用这个规则,将所有级别的日志信息都写入到“t1”和“t2”这两个目标里-->

    <logger name="*" writeTo="t1,t2"/>

  </rules>

</nlog>
以上就是此次示例的全部代码,到此你也许会有一个问题,就是我想定时执行我的任务?比如每天几点执行,或者每几分钟执行一次等等,那我们该怎么做呢?
答案是使用:Quartz.net ,接下来我将会使用 Quartz.net 实现上述的定时任务。
参考文献:
https://www.jianshu.com/p/f2365e7b439c
http://www.80iter.com/blog/1451523192435464/
https://www.itsvse.com/thread-7503-1-1.html?tdsourcetag=s_pctim_aiomsg
https://www.cnblogs.com/yanglang/p/7199913.html
使用Topshelf组件 一步一步创建 Windows 服务的更多相关文章
- 使用 Topshelf 组件一步一步创建 Windows 服务 (2) 使用Quartz.net 调度
上一篇说了如何使用 Topshelf 组件快速创建Windows服务,接下来介绍如何使用 Quartz.net 关于Quartz.net的好处,网上搜索都是一大把一大把的,我就不再多介绍. 先介绍需要 ...
- 使用Topshelf 5步创建Windows 服务 z
使用Topshelf创建Windows 服务简要的介绍了创建Windows服务的另一种方法,老外的一篇文章Create a .NET Windows Service in 5 steps with T ...
- 使用Topshelf 5步创建Windows 服务
使用Topshelf创建Windows 服务简要的介绍了创建Windows服务的另一种方法,老外的一篇文章Create a .NET Windows Service in 5 steps with T ...
- C# 使用Vici WinService组件来创建Windows服务
Vici WinService 是 Windows平台下使用C#开发的轻量级用于创建,删除服务的类库,您只需简单的几行代码即可实现多线程异步服务的创建,删除,运行 废话不多说,直接上代码 /***** ...
- 使用Topshelf创建Windows服务
概述 Topshelf是创建Windows服务的另一种方法,老外的一篇文章Create a .NET Windows Service in 5 steps with Topshelf通过5个步骤详细的 ...
- [Solution] Microsoft Windows 服务(2) 使用Topshelf创建Windows服务
除了通过.net提供的windows服务模板外,Topshelf是创建Windows服务的另一种方法. 官网教程:http://docs.topshelf-project.com/en/latest/ ...
- Topshelf创建Windows服务
使用Topshelf创建Windows服务 概述 Topshelf是创建Windows服务的另一种方法,老外的一篇文章Create a .NET Windows Service in 5 steps ...
- 使用 Topshelf 结合 Quartz.NET 创建 Windows 服务
Ø 前言 之前一篇文章已经介绍了,如何使用 Topshelf 创建 Windows 服务.当时提到还缺少一个任务调度框架,就是 Quartz.NET.而本文就展开对 Quartz.NET 的研究,以 ...
- 使用 Topshelf 创建 Windows 服务
Ø 前言 C# 创建 Windows 服务的方式有很多种,Topshelf 就是其中一种方式,而且使用起来比较简单.下面使用 Visual Studio Ultimate 2013 演示一下具体的使 ...
随机推荐
- 日志::spdlog
https://github.com/gabime/spdlog git clone https://github.com/gabime/spdlog.git cd spdlog && ...
- CSAPP: 位操作实现基本运算
目录 实验要求 实现代码 1.pow2plus1 2.pow2plus4 3.bitXor 4.tmin 5.isTmax 6.allOddBits 7.negate 8.isAsciiDigit 9 ...
- python中requests模块-params与data的区别
一般来说,params 在 get 请求中使用,data 在 post 请求中使用
- ESP8266开发之旅 网络篇① 认识一下Arduino Core For ESP8266
博主的 ESP8266开发之旅 专栏主要分为三个部分: 基础篇 网络篇 应用篇 从这一篇开始,博主将会带领各位读者在基础篇的基础上进入网络的世界.在此,博主认为各位读者已经具备以下前提 ...
- 关于MySQL的经典例题50道 答案参考
答案不全面,欢迎交流沟通 -- 1.查询"01"课程比"02"课程成绩高的学生的信息及课程分数select * from sc s INNER JOIN sc ...
- Tomcat原理与优化随笔
1. 基础组件: Server, Service: Connector(http, https, ajp用于Apache反向代理), Engine Engine: Realm用于安全配置等,如User ...
- unity基础命令
获取所挂脚本元素的组件: rd = GetComponent<Rigidbody>(); 获取其他元素的组件: rd = GameObject.Find("Player" ...
- SteamVR Plugin
使用HTC vive基于unity做虚拟现实,需要用到steamVR插件,最近查找了很多资料,稍微做一下总结. 做虚拟现实无非是头显在场景中的camera功能以及手柄的操作功能. (一)camera以 ...
- Hibernate 查询方式、JPA查询方式
hibernate 查询方式: OID 查询 对象导航查询 HQL 方式查询 QBC方式查询 原生SQL方式查询 JPA 查询方式: OID 查询 对象导航查询 JPQL 方式查询 CriteriaB ...
- SpringBoot集成JWT实现权限认证
目录 一.JWT认证流程 二.SpringBoot整合JWT 三.测试 上一篇文章<一分钟带你了解JWT认证!>介绍了JWT的组成和认证原理,本文将介绍下SpringBoot整合JWT实现 ...