vue学习(四)插槽
一 匿名插槽
   // 语法
  Vue.component('MBtn', {

        template: `

        <button>

            <slot></slot>

        </button>

       `,

    });
使用
<!DOCTYPE html>

<html lang="zh-CN">

<head>

    <meta charset="UTF-8">

    <title>Title</title>

    <meta name="viewport" content="width=device-width ,initial-scale=1">

    <script src="https://cdn.jsdelivr.net/npm/vue"></script>

</head>

<body>

<div id="app">

    <App></App>

</div>

<script>

    Vue.component('MBtn', {

        template: `

        <button>

            <slot></slot>

        </button>

       `,

    });

    const App = {

        data() {

            return {

                msg: '数据'

            }

        },
我们可以使用匿名插槽的名字 也可以像下面那样 但是必须要有 —

        template: `

            <div>

                <MBtn>登陆</MBtn>

                <m-btn>注册</m-btn>

            </div>`

    };

    let app = new Vue({

        el: '#app',

        components: {

            App

        }

    })

</script>

</body>

</html>
二 具名插槽
   // 语法
  Vue.component('MBtn', {

        template: `

            <button>

                <slot name="login"></slot>

                <slot name="register"></slot>

                <slot name="submit"></slot>

            </button>

       `

    });
用
  <MBtn>

      <template slot="login">

           <a href="#">登陆</a>
      </template>

  </MBtn>
具体使用
<!DOCTYPE html>

<html lang="zh-CN">

<head>

    <meta charset="UTF-8">

    <title>Title</title>

    <meta name="viewport" content="width=device-width ,initial-scale=1">

    <script src="https://cdn.jsdelivr.net/npm/vue"></script>

</head>

<body>

<div id="app">

    <App></App>

</div>

<script>

    Vue.component('MBtn', {

        template: `

            <button>

                <slot name="login"></slot>

                <slot name="register"></slot>

                <slot name="submit"></slot>

            </button>

       `

    });

    const App = {

        template: `

        <div>

            <MBtn>

                <template slot="login">

                    <a href="#">登陆</a>

                </template>

            </MBtn>

            <MBtn>

                <template slot="register">

                    <a href="#">注册</a>

                </template>

            </MBtn>

            <MBtn>

                <template slot="submit">

                    <a href="#">提交</a>

                </template>

            </MBtn>

        </div>

        `

    };

    let app = new Vue({

        el: '#app',

        components: {

            App

        }

    })

</script>

</body>

</html>
三 作用域插槽
有时候让插槽内容能够访问子组件中才有的数据是很有用的。(来自官网)
首先我们有一段代码
<!DOCTYPE html>

<html lang="zh-CN">

<head>

    <meta charset="UTF-8">

    <title>Title</title>

    <meta name="viewport" content="width=device-width ,initial-scale=1">

    <script src="https://cdn.jsdelivr.net/npm/vue"></script>

</head>

<body>

<div id="app">

    <App></App>

</div>

<script>

    const todoList={

      data(){

      },

      props:{

          todos:Array,

          defaultValue:[]

      },

      template:`

      <ul>

         <li v-for="item in todos" :key="item.id">

            {{item.title}}

         </li>

      </ul>

      `

    };

    const App={

        data(){

           return{

                todoList:[

                    {

                        title:'大哥你好吗',

                        isComplate:true,

                        id:1

                    },

                    {

                        title:'小弟我还行啊',

                        isComplate:false,

                        id:2

                    },

                     {

                        title:'你在干什么',

                        isComplate:false,

                        id:3

                    },

                     {

                        title:'抽烟喝酒烫头',

                        isComplate:true,

                        id:4

                    }

                ]

           }

        },

        components:{

            todoList

        },

        template:`

        <todoList :todos="todoList"></todoList>

        `

    };

    let app = new Vue({

        el:'#app',

        components:{

            App

        }

    })

</script>

</body>

</html>
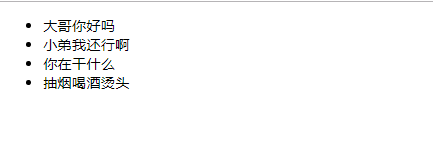
效果如下:
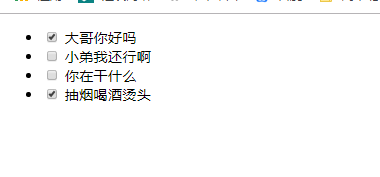
好了 产品经理来 说 要给完成的打对勾
你肯定会说简单来看----加有一个 input就可以啦
    const todoList={

      data(){

      },

      props:{

          todos:Array,

          defaultValue:[]

      },

      template:`

      <ul>

         <li v-for="item in todos" :key="item.id">

            <input type="checkbox" v-model="item.isComplate">

            {{item.title}}

         </li>

      </ul>

      `

    };
但是我们的数据要在好几个组件上用 不能写死咯
具体步骤:
1 需要我们在子组件中放一个插槽
2.父组件中使用
子组件:放插槽

      template:`

      <ul>

         <li v-for="item in todos" :key="item.id">

            <slot :itemValue="item"></slot>

            {{item.title}}

         </li>

      </ul>

      `
父组件:使用

        template:`

        <todoList :todos="todoList">

            <template v-slot="data">

              <input type="checkbox" v-model="data.itemValue.isComplate">

            </template>

        </todoList>

        `
总代码
<!DOCTYPE html>

<html lang="zh-CN">

<head>

    <meta charset="UTF-8">

    <title>Title</title>

    <meta name="viewport" content="width=device-width ,initial-scale=1">

    <script src="https://cdn.jsdelivr.net/npm/vue"></script>

</head>

<body>

<div id="app">

    <App></App>

</div>

<script>

    const todoList={

      data(){

      },

      props:{

          todos:Array,

          defaultValue:[]

      },

      template:`

      <ul>

         <li v-for="item in todos" :key="item.id">

            <slot :itemValue="item"></slot>

            {{item.title}}

         </li>

      </ul>

      `

    };

    const App={

        data(){

           return{

                todoList:[

                    {

                        title:'大哥你好吗',

                        isComplate:true,

                        id:1

                    },

                    {

                        title:'小弟我还行啊',

                        isComplate:false,

                        id:2

                    },

                     {

                        title:'你在干什么',

                        isComplate:false,

                        id:3

                    },

                     {

                        title:'抽烟喝酒烫头',

                        isComplate:true,

                        id:4

                    }

                ]

           }

        },

        components:{

            todoList

        },

        template:`

        <todoList :todos="todoList">

            <template v-slot="data">    # data自己定义

              <input type="checkbox" v-model="data.itemValue.isComplate">

            </template>

        </todoList>

        `

    };

    let app = new Vue({

        el:'#app',

        components:{

            App

        }

    })

</script>

</body>

</html>
vue学习(四)插槽的更多相关文章
- day 83 Vue学习四之过滤器、钩子函数、路由、全家桶等
Vue学习四之过滤器.钩子函数.路由.全家桶等 本节目录 一 vue过滤器 二 生命周期的钩子函数 三 vue的全家桶 四 xxx 五 xxx 六 xxx 七 xxx 八 xxx 一 Vue的过滤 ...
- day 84 Vue学习四之过滤器、钩子函数、路由、全家桶等
本节目录 一 vue过滤器 二 生命周期的钩子函数 三 vue的全家桶 四 xxx 五 xxx 六 xxx 七 xxx 八 xxx 一 Vue的过滤器 1 moment.js 在这里我们先介绍一个 ...
- vue学习之插槽
插槽 插槽(Slot)是Vue提出来的一个概念,正如名字一样,插槽用于决定将所携带的内容,插入到指定的某个位置,从而使模板分块,具有模块化的特质和更大的重用性. 个人理解:我感觉插槽就是父组件控制插槽 ...
- Vue学习笔记-插槽基本使用
为了让我们的组件更加具有扩展性,可以使用插槽 <div id="app"> <cpn> <span>返回</span> <in ...
- 【Vue】Vue学习(四)-状态管理中心Vuex的简单使用
一.vuex的简介 Vuex 是一个专为 Vue.js 应用程序开发的状态管理模式.Vuex背后的基本思想,就是前面所说的单向数据流.图4就是Vuex实现单向数据流的示意图. Store ...
- Vue学习之--------插槽【默认插槽、具名插槽、作用域插槽】(2022/8/30)
插槽Vue.js官网介绍:https://vuejs.org/guide/components/slots.html 会牵涉到template的用法.占位.实际不渲染到页面中 1.默认插槽: 1.1 ...
- Vue学习四:v-if及v-show指令使用方法
本文为博主原创,未经允许不得转载: <!DOCTYPE html> <html lang="zh"> <head> <meta http- ...
- vue 学习四 了解组件
1组件的注册 全局注册 import Vue from 'vue'; import com from './component1'; Vue.component("com_name" ...
- vue学习(四) v-on:事件绑定
//html <div id="app"> <input type="button" value="ok" v-bind: ...
- vue学习目录 vue初识 this指向问题 vue组件传值 过滤器 钩子函数 路由 全家桶 脚手架 vuecli element-ui axios bus
vue学习目录 vue学习目录 Vue学习一之vue初识 Vue学习二之vue结合项目简单使用.this指向问题 Vue学习三之vue组件 Vue学习四之过滤器.钩子函数.路由.全家桶等 Vue学习之 ...
随机推荐
- 大部分政府网站U-mail存在直接拿shell漏洞
大部分网站政府网站U-mail存在直接拿shell漏洞加入webmail/userapply.php?execadd=333&DomainID=111直接爆出物理地址 然后将 aa' unio ...
- layer 点击yes后在回调函数里获取layer.open({})iframe里面元素
参考:http://fly.layui.com/jie/19690/ yes: function(index, layero) { uid.value = $(layero).find('iframe ...
- Percona XtraBackup不锁库搭建slave数据库-基于GTID
Percona XtraBackup不锁库搭建slave数据库-基于GTID 1.下载安装epel源并安装 wget http://ftp.cuhk.edu.hk/pub/linux/fedora-e ...
- 使用U盘安装Linux最美桌面发行版Elementary OS 及常用开发环境配置(JDK,Redis,MySQL,Docker,IDEA,STS)
前言 假期在家无聊,刚好把六年前的一台笔记本电脑利用起来,原来电脑虽然说配置说不上古董机器,但是运行win系统感觉还是不流畅,所幸给换成Linux桌面版系统,在网上查阅了很多,Linux桌面系统要么推 ...
- 使用Spring Cloud Gateway保护反应式微服务(二)
抽丝剥茧,细说架构那些事——[优锐课] 接着上篇文章:使用Spring Cloud Gateway保护反应式微服务(一) 我们继续~ 将Spring Cloud Gateway与反应式微服务一起使用 ...
- IdentityServer4专题之二:OpenID介绍
1.基于概念 OpenId是一个以用户为中心的数字身份识别框架,它具有开放.分散.自由等特性.OpenId的创建是基于这样一个概念:我们可以通过URI(或者URL网址)来识别一个网站.同样,我们也可以 ...
- 吴裕雄 Bootstrap 前端框架开发——Bootstrap 图片:为图片添加圆角 (IE8 不支持)
<!DOCTYPE html> <html> <head> <meta charset="utf-8"> <title> ...
- eclipse console 查看全部的输出
参考:https://blog.csdn.net/thatluck/article/details/52080736
- LR_问题_平均响应时间解释,summary与analysis不一致----Summary Report中的时间说明
Summary是按整个场景的时间来做平均的,最大最小值,也是从整个场景中取出来的. (1) 平均响应时间:事物全部响应时间做平均计算 (2) 90%响应时间:将事物全部响应时间 ...
- SpringBoot如何返回页面
SpringBoot中使用Controller和页面的结合能够很好地实现用户的功能及页面数据的传递.但是在返回页面的时候竟然会出现404或者500的错误,我总结了一下如何实现页面的返回以及这里面所包含 ...