案例(拖拽对话框、高清放大镜、自制滚动条、元素的隐藏方式、表格隔行变色、tab切换效果、字符串拼接、刷新评论)
一、拖拽对话框
   <style>

        .of{

            width: 500px;

        }

        #link,#close{

            text-decoration: none;

            margin: 0 10px;

            font-size: 20px;

        }

        #login{

            width: 500px;

            height: 500px;

            background: gray;

            display: none;

            position: absolute;

            left:;

            top: 50px;

        }

    </style>
<div class="of">
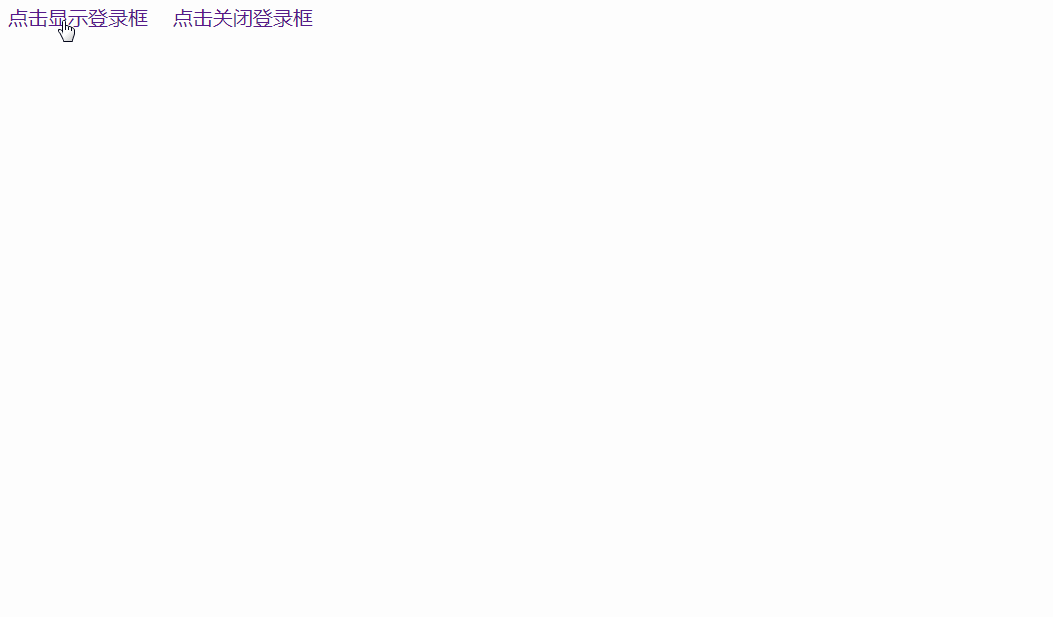
<a href="#" id="link">点击显示登录框</a>
<a href="#" id="close">点击关闭登录框</a>
</div>
<div id="login" class="login">按下鼠标在这里拖动</div><!-- 登录框 -->
<script>
//获取超链接,注册点击事件,显示登录框
document.getElementById("link").onclick=function(){
document.getElementById("login").style.display="block";
};
//获取关闭链接.注册点击事件,隐藏登录框
document.getElementById("close").onclick=function(){
document.getElementById("login").style.display="none";
};
//按下鼠标,移动鼠标,移动登录框
document.getElementById("login").onmousedown=function(e){
var spaceX=e.clientX-document.getElementById("login").offsetLeft;
var spaceY=e.clientY-document.getElementById("login").offsetTop;
//移动的事件
document.onmousemove=function(e){
var x=e.clientX-spaceX;
var y=e.clientY-spaceY;
document.getElementById("login").style.left=x+"px";
document.getElementById("login").style.top=y+"px";
};
};
//鼠标弹起事件
document.onmouseup = function() {
document.onmousemove = null;
};
</script>
二、高清放大镜
   <style>

      #box{

          height: 450px;

          width: 450px;

          position: relative;

      }

      .small{

          width: 450px;

          height: 450px;

          border: 1px solid red;

          position: absolute;

          left:;

      }

      .mask{

          width: 150px;

          height:150px;

          background: gray;

          opacity: 0.4;

          position: absolute;

          cursor: move;

          left:;

          top:;

          display: none;

      }

      .big{

          width: 400px;

          height: 400px;

          border: 1px solid blue;

          float: left;

          overflow: hidden;

          display: none;

          position: absolute;

          right: -450px;

      }

    </style>
    <div id="box">

        <div id="small" class="small">

            <img src="small.jpg" alt="">

            <div class="mask" id="mask"></div>

        </div>

        <div id="big" class="big"><img src="big.jpg" alt="" id="bim"></div>

    </div>

    <script>

        //获取元素

        var box=document.getElementById("box");

        var small=document.getElementById("small");

        var mask=document.getElementById("mask");

        var big=document.getElementById("big");

        var bigImg=document.getElementById("bim");

        //鼠标进入显示遮挡层和大图div

        box.onmouseover=function(){

            mask.style.display="block";

            big.style.display="block";

        };

        box.onmouseout=function(){

            mask.style.display="none";

            big.style.display="none";

        };

        //鼠标的移动事件---鼠标在小图div上移动

        small.onmousemove=function(e){

            //鼠标此时的可视区域的横坐标e.clientX和纵坐标e.clientY

            //主要是设置鼠标在遮挡层的之间显示

            var x=e.clientX-mask.offsetWidth/2;

            var y=e.clientY-mask.offsetHeight/2;

            //横坐标和纵坐标的最小值

            x=x<0?0:x;

            y=y<0?0:y;

            //横坐标和纵坐标的最大值

            x=x>small.offsetWidth-mask.offsetWidth?small.offsetWidth-mask.offsetWidth:x;

            y=y>small.offsetHeight-mask.offsetHeight?small.offsetHeight-mask.offsetHeight:y;

            //为遮挡层的left和top赋值

            mask.style.left=x+"px";

            mask.style.top=y+"px";

            //遮挡层的移动距离/大图的移动距离=遮挡层的最大移动距离/大图的最大移动距离

            //大图的移动距离=遮挡层的移动距离*大图的最大移动距离/遮挡层的最大移动距离

            //大图的横向最大移动距离

            var maxX=bigImg.offsetWidth-big.offsetWidth;

            //大图的纵向最大移动距离(比例取一个即可)

            var maxY=bigImg.offsetHeight-big.offsetHeight;

            //大图的横向移动的坐标(比例取一个即可)

            var bigImgMoveX=x*maxX/(small.offsetWidth-mask.offsetWidth);

            //大图纵向移动的坐标

            var bigImgMoveY=y*maxX/(small.offsetWidth-mask.offsetWidth);

            //设置图片移动

            bigImg.style.marginLeft=-bigImgMoveX+"px";

            bigImg.style.marginTop=-bigImgMoveY+"px";

        };

    </script>

三、自制滚动条
   <style>

        .box{

            width: 604px;

            height: 702px;

            border: 1px solid #000;

            overflow: hidden;

        }

        .content{

            width: 550px;

            border: 1px solid red;

            float: left;

        }

        .scroll{

            width: 50px;

            height: 700px;

            border: 1px solid blue;

            float: right;

            position: relative;

        }

        .bar{

            width: 40px;

            height: 80px;

            background: red;

            border-radius: 20px;

            position: absolute;

            top: 0;

            left: 5px;

        }

    </style>
 <div class="box" id="box">

        <div class="content" id="content">

            开始文字文字文字文字文字文字文字文字文字文字文字文字文字文字文字文字文字文字文字文字文字文字文字文字文字文字文字文字文字文字文字文字文字文字文字文字文字文字文字文字文字文字文字文字文字文字文字文字文字文字文字文字文字文字文字文字文字文字文字文字文字文字文字文字文字文字文字文字文字文字文字文字文字文字文字文字文字文字文字文字文字文字文字文字文字文字文字文字文字文字文字文字文字文字文字文字文字文字文字文字文字文字文字文字文字文字文字文字文字文字文字文字文字文字文字文字文字文字文字文字文字文字文字文字文字文字文字文字文字文字文字文字文字文字文字文字文字文字文字文字文字文字文字文字文字文字文字文字文字文字文字文字文字文字文字文字文字文字文字文字文字文字文字文字文字文字文字文字文字文字文字文字文字文字文字文字文字文字文字文字文字文字文字文字文字文字文字文字文字文字文字文字文字文字文字文字文字文字文字文字文字文字文字文字文字文字文字文字文字文字文字文字文字文字文字文字文字文字文字文字文字文字文字文字文字文字文字文字文字文字文字文字文字文字文字文字文字文字文字文字文字文字文字文字文字文字文字文字文字文字文字文字文字文字文字文字文字文字文字文字文字文字文字文字文字文字文字文字文字文字文字文字文字文字文字文字文字文字文字文字文字文字文字文字文字文字文字文字文字文字文字文字文字文字文字文字文字文字文字文字文字文字文字文字文字文字文字文字文字文字文字文字文字文字文字文字文字文字文字文字文字文字文字文字文字文字文字文字文字文字文字文字文字文字文字文字文字文字文字文字文字文字文字文字文字文字文字文字文字文字文字文字文字文字文字文字文字文字文字文字文字文字文字文字文字文字文字文字文字文字文字文字文字文字文字文字文字文字文字文字文字文字文字文字文字文字文字文字文字文字文字文字文字文字文字文字文字文字文字文字文字文字文字文字文字文字文字文字文字文字文字文字文字文字文字文字文字文字文字文字文字文字文字文字文字文字文字文字文字文字文字文字文字文字文字文字文字文字文字文字文字文字文字文字文字文字文字文字文字文字文字文字文字文字文字文字文字文字文字文字文字文字文字文字文字文字文字文字文字文字文字文字文字文字文字文字文字文字文字文字文字文字文字文字文字文字文字文字文字文字文字文字文字文字文字文字文字文字文字文字文字文字文字文字文字文字文字文字文字文字文字文字文字文字文字文字文字文字文字文字文字文字文字文字文字文字文字文字文字文字文字文字文字文字文字文字文字文字文字文字文字文字文字文字文字文字文字文字文字文字文字文字文字文字文字文字文字文字文字文字文字文字文字文字文字文字文字文字文字文字文字文字文字文字文字文字文字文字文字文字文字文字文字文字文字文字文字文字文字文字文字文字文字文字文字文字文字文字文字文字文字文字文字文字文字文字文字文字文字文字文字文字文字文字文字文字文字文字文字文字文字文字文字文字文字文字文字文字文字文字文字文字文字文字文字文字文字文字文字文字文字文字文字文字文字文字文字文字文字文字文字文字文字文字文字文字文字文字文字文字文字文字文字文字文字文字文字文字文字文字文字文字文字文字文字文字文字文字文字文字文字文字文字文字文字文字文字文字文字文字文字文字文字文字文字文字文字文字文字文字文字文字文字文字文字文字文字文字文字文字文字文字文字文字文字文字文字文字文字文字文字文字文字文字文字文字文字文字文字文字文字文字文字文字文字文字文字文字文字文字文字文字文字文字文字文字文字文字文字文字文字文字文字文字文字文字文字文字文字文字文字文字文字文字文字文字文字文字文字文字文字文字文字文字文字文字文字文字文字文字文字文字文字文字文字文字文字文字文字文字文字文字文字文字文字文字文字文字文字文字文字文字文字文字文字文字文字文字文字文字文字文字文字文字文字文字文字文字文字文字文字文字文字文字文字文字文字文字文字文字文字文字文字文字文字文字文字文字文字文字文字文字文字文字结束

        </div>

        <div class="scroll" id="scroll">

            <div class="bar" id="bar"></div>

        </div>

    </div>

    <script>

        //获取需要的元素

        var box=document.getElementById("box");

        var content=document.getElementById("content");

        var scroll=document.getElementById("scroll");

        var bar=document.getElementById("bar");

        //设置滚动条(bar)的高度:通过比例来确定

        //滚动条的高/装滚动条的div的高=box的高/文字div的高

        //滚动条(bar)的高=装滚动条(scroll)div的高*box的高/文字div(content)的高

        var height=scroll.offsetHeight*box.offsetHeight/content.offsetHeight;

        bar.style.height=height+"px";

        //移动滚动条(暂时不考虑兼容性)

        bar.onmousedown=function(e){

            var spaceY=e.clientY-bar.offsetTop;

            document.onmousemove=function(e){//移动事件

                var y=e.clientY-spaceY;

                y=y<0?0:y;//最小值

                y=y>scroll.offsetHeight-bar.offsetHeight?scroll.offsetHeight-bar.offsetHeight:y;//最大值

                bar.style.top=y+"px";

                //设置鼠标移动的时候,文字不被选中

                window.getSelection?window.getSelection().removeAllRanges():document.selection.empty();

                //设置文字的移动距离

                //滚动条的移动距离/文字div的移动距离=滚动条的最大移动距离/文字div的最大移动距离

                //文字div移动距离=滚动条的移动距离*文字div的最大移动距离/滚动条的最大移动距离

                var moveY=y*(content.offsetHeight-box.offsetHeight)/(scroll.offsetHeight-bar.offsetHeight);

                content.style.marginTop=-moveY+"px";

            };

        };

        //鼠标抬起的时候,把移动事件干掉

        document.onmouseup=function(){

            document.onmousemove=null;

        };

    </script>

四、元素的隐藏方式
    <input type="button" value="显示效果" id="btn">

    <div id="dv" style="width: 200px;height: 200px;background:red;"></div>哈哈

    <script>

        document.getElementById("btn").onclick=function(){

            //第一种方法:display="none",不占位置

            document.getElementById("dv").style.display="none";

            //第二种方法:visibility="hidden",占位置

            document.getElementById("dv").style.visibility="hidden",占位置;

            //第三种方法:透明度设置为0,占位置

            document.getElementById("dv").style.opacity=0;

            //第四种方法:高度设置为0,并且边框设置为0,占位置

            document.getElementById("dv").style.height="0px";

            document.getElementById("dv").style.border="0px solid red";

        }

    </script>
五、表格隔行变色
   <table border="1" id="tb">

        <tr>

            <th>关羽</th>

            <td>青龙偃月刀青龙偃月刀青龙偃月刀</td>

        </tr>

        <tr>

            <th>张飞</th>

            <td>丈八蛇矛丈八蛇矛丈八蛇矛丈八蛇矛</td>

        </tr>

        <tr>

            <th>赵云</th>

            <td>青釭剑青釭剑青釭剑青釭剑青釭剑</td>

        </tr>

        <tr>

            <th>马超</th>

            <td>龙骑枪龙骑枪龙骑枪龙骑枪龙骑枪</td>

        </tr>

    </table>

    <script>

        //获取所有的行

        trs=document.getElementById("tb").getElementsByTagName("tr");

        for(var i=0;i<trs.length;i++){

            trs[i].style.backgroundColor=i%2==0?"red":"yellow";

            //鼠标进入

            trs[i].onmouseover=mouseoverHandle;

            //鼠标离开

            trs[i].onmouseout=mouseoutHandle;

        }

        //当鼠标进入的时候,先把设置后的颜色保存起来,等到鼠标离开的时候再恢复

        var lastColor="";

        function mouseoverHandle(){

            lastColor=this.style.backgroundColor;

            this.style.backgroundColor="blue";

        }

        function mouseoutHandle(){

            this.style.backgroundColor=lastColor;

        }

    </script>

六、tab切换效果
   <style>

        *{

            margin:;

            padding:;

            font-size: 20px;

        }

        ul{

            width: 500px;

            margin: 50px auto;

        }

        li{

            list-style: none;

            float: left;

            margin: 0 10px;

        }

        a{

            text-decoration: none;

        }

        .current{

            background: red;

        }

    </style>
<ul id="uu">
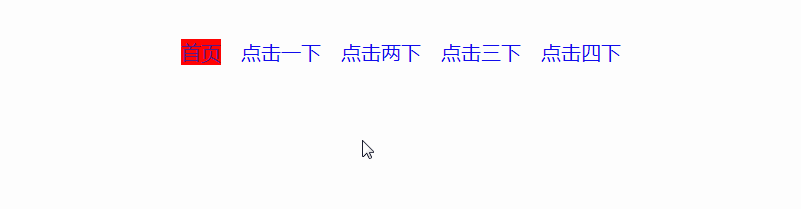
<li class="current"><a href="http://www.baidu.com">首页</a></li>
<li><a href="javascript:void(0)">点击一下</a></li>
<li><a href="javascript:void(0)">点击两下</a></li>
<li><a href="javascript:void(0)">点击三下</a></li>
<li><a href="javascript:void(0)">点击四下</a></li>
</ul>
<script>
var ul=document.getElementById("uu");
var liObjs=ul.children;
for(var i=0;i<liObjs.length;i++){
//每个li中的i
var aObj=getFirstElementChild(liObjs[i]);
//注册点击事件
aObj.onclick=function(){
//第一件事:把这a所在的li的所有的兄弟元素的类样式移除
for(var j=0;j<liObjs.length;j++){
liObjs[j].removeAttribute("class");
}
//第二件事:当前点击的a元素的父级元素li,设置背景颜色
this.parentNode.className="current";
return false;//阻止超链接跳转
}
}
//获取任意一个父级元素的第一个子级元素
function getFirstElementChild(element){
if(element.firstElementChild){//支持
return element.firstElementChild;
}else{
var node=element.firstChild;//第一个子节点
while(node&&node.nodeType!=1){//存在,并且不是标签
node=node.nextSibling;//循环下一个节点,直到是标签,跳出循环
}
return node;//返回一个是标签的节点(即是元素了)
}
}
</script>
七、字符串拼接
    <input type="button" value="拼接" id="btn"><br>

    <input type="text" value=""><br>

    <input type="text" value=""><br>

    <input type="text" value=""><br>

    <input type="text" value=""><br>

    <input type="text" value=""><br>

    <script>

    //方法一:使用字符串进行拼接

        // document.getElementById("btn").onclick=function(){

        //     var str="";

        //     //获取所以的文本框,返回一个对象

        //     var inputs=document.getElementsByTagName("input");

        //     //循环遍历到倒数第二个input

        //     for(var i=0;i<inputs.length-1;i++){

        //         if(inputs[i].type!="button"){//排除掉button按钮

        //             str+=inputs[i].value+"|";

        //         }

        //     }

        //     console.log(str+inputs[inputs.length-1].value);

        // };

    //方法二:使用数组进行拼接

    document.getElementById("btn").onclick=function(){

        var str=[];

        //获取所有的文本框

        var inputs=document.getElementsByTagName("input");

        //循环遍历input,排除button按钮

        for(var i=0;i<inputs.length;i++){

            if(inputs[i].type!="button"){

                //使用push方法追加

                str.push(inputs[i].value);

            }

        }

        //使用join方法改变字符串中间的符号

        console.log(str.join("|"));

    };

    </script>
八、刷新评论
<table border="1">
<tbody id="tbd">
<tr>
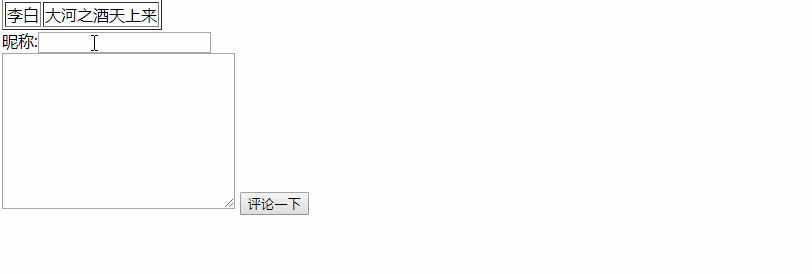
<td>李白</td>
<td>大河之酒天上来</td>
</tr>
</tbody>
</table>
昵称:<input type="text" id="username"><br>
<textarea cols="30" rows="10" id="tt"></textarea>
<input type="button" value="评论一下" id="btn">
<script>
document.getElementById("btn").onclick=function(){
//创建行
var tr=document.createElement("tr");
document.getElementById("tbd").appendChild(tr);
//创建第一列
var td1=document.createElement("td");
tr.appendChild(td1);
td1.innerHTML=document.getElementById("username").value;
//创建第二列
var td2=document.createElement("td");
tr.appendChild(td2);
td2.innerHTML=document.getElementById("tt").value;
//读取完数据删除内容
document.getElementById("tt").value="";
document.getElementById("username").value="";
};
</script>
案例(拖拽对话框、高清放大镜、自制滚动条、元素的隐藏方式、表格隔行变色、tab切换效果、字符串拼接、刷新评论)的更多相关文章
- JS---案例:高清放大镜
案例:高清放大镜 分3步 1. 鼠标进入和离开,显示和隐藏遮挡层和大图div 2. 鼠标在小层上移动,鼠标横纵坐标,为可视区域坐标-遮挡层的宽高,鼠标移动的时候,在一个区域内移动,需要判断和定义下移动 ...
- element-ui dialog组件添加可拖拽位置 可拖拽宽高
edge浏览器下作的gifhttp://www.lanourteam.com/%E6... 有几个点需要注意一下 每个弹窗都要有唯一dom可操作 指令可以做到 拖拽时要添加可拖拽区块 header 由 ...
- js 拖拽 鼠标事件,放大镜效果
设置网站播放视频 只有一个是播放的 //需要引入jquery var v = $("video") v.bind("play",function(){ for( ...
- day52—JavaScript拖拽事件的应用(自定义滚动条)
转行学开发,代码100天——2018-05-07 前面的记录里展示了JavaScript中鼠标拖拽功能,今天利用拖拽功能实现另一个应用场景——自定义滚动条(作为控制器)的用法. 常通过自定义滚动条控制 ...
- JS Web API 拖拽对话框案例
<style> .login-header { width: 100%; text-align: right; height: 30px; font-size: 24px; line-he ...
- 用vue的自定义组件写了一个拖拽 组件,局部的 只能在自定义元素内的
简单实现 没有做兼容<!DOCTYPE html> <html lang="en"> <head> <meta charset=" ...
- JS组件系列——Bootstrap Table 表格行拖拽(二:多行拖拽)
前言:前天刚写了篇JS组件系列——Bootstrap Table 表格行拖拽,今天接到新的需要,需要在之前表格行拖拽的基础上能够同时拖拽选中的多行.博主用了半天时间研究了下,效果是出来了,但是感觉不尽 ...
- Html5拖拽复制
拖拽是一种常见的特性,即抓取对象以后拖到另一个位置. 在 HTML5 中,拖拽是标准的一部分,任何元素都能够拖拽. Html5拖拽非常常见的一个功能,但是大部分拖拽的案例都是一个剪切的过程, 项目中需 ...
- html5 Sortable.js 拖拽排序源码分析
最近公司项目经常用到一个拖拽 Sortable.js插件,所以有空的时候看了 Sortable.js 源码,总共1300多行这样,写的挺完美的. 本帖属于原创,转载请出名出处. 官网http:// ...
随机推荐
- WUSTOJ 1332: Prime Factors(Java)
题目链接:1332: Prime Factors Description I'll give you a number , please tell me how many different prim ...
- IO中断
>>>io的中断编程 以上例程会有什么问题呢? 注意:CPU内部寄存器
- 数据结构与算法--递归(recursion)
递归的概念 简单的说: 递归就是方法自己调用自己,每次调用时传入不同的变量.递归有助于编程者解决复杂的问题,同时可以让代码变得简洁. 递归调用机制 我列举两个小案例,来帮助大家理解递归 1.打印问题 ...
- DBShop后台RCE之曲线救国
本文最早发布在朋友的公众号 黑客信徒 中,文章是自己写的 不存在抄袭 特此申明 --------------------- 前言 DBShop是一款基于ZendFramework2框架的电子商务系统 ...
- iOS开发常见的宏定义(实用)
iOS开发过程中使用一些常用的宏可以提高开发效率,提高代码的重用性:将这些宏放到一个头文件里然后再放到工程中的-Prefix.pch文件中(或者直接放到-Prefix.pch中)直接可以使用,灰常方便 ...
- Leaflet 调用百度瓦片地图服务
在使用 leaflet 调用第三方瓦片地图服务的项目,主要谷歌地图.高德地图.百度地图和 OSM 地图,与其他三种地图对比,百度地图的瓦片组织方式是不同的.百度从中心点经纬度(0,0)度开始计算瓦片, ...
- [LeetCode] 45. Jump game II ☆☆☆☆☆(跳跃游戏 2)
https://leetcode-cn.com/problems/jump-game-ii/solution/xiang-xi-tong-su-de-si-lu-fen-xi-duo-jie-fa-b ...
- [#Linux] CentOS 7 美化调优
优化美化系统,是为了让新系统能更顺眼顺手,符合自己过去在windows下的使用习惯,从而实现平稳过渡. 正如开篇时谈到的,现在的桌面版linux已相当友好(特别是Ubuntu),基本不需要做什么额外设 ...
- SQL SERVER-JOB搬迁脚本
选中JOB,按F7打开对象游览器: 选中相应的JOB,生成脚本. 搬迁JOB,新实例上要有相应的DB和操作员. 脚本中有2个@enabled,一个是job enable,一个是schedule是否生效 ...
- Nginx+PHP负载均衡集群环境中Session共享方案 - 运维笔记
在网站使用nginx+php做负载均衡情况下,同一个IP访问同一个页面会被分配到不同的服务器上,如果session不同步的话,就会出现很多问题,比如说最常见的登录状态. 下面罗列几种nginx负载均衡 ...