SpringCloud Sleuth
1.定义
Sleuth(分布式请求链路跟踪):提供了一套完整的服务跟踪解决方案,也兼容zipkin。
参考网址:https://github.com/spring-cloud/spring-cloud-sleuth
2.项目开发
源代码:https://github.com/zhongyushi-git/cloud-sleuth.git
2.1环境搭建
这里需要下载zipkin的jar才能使用。
1)zipkin下载地址:https://dl.bintray.com/openzipkin/maven/io/zipkin/java/zipkin-server/2.12.9/zipkin-server-2.12.9-exec.jar
2)在下载的jar目录下执行命令
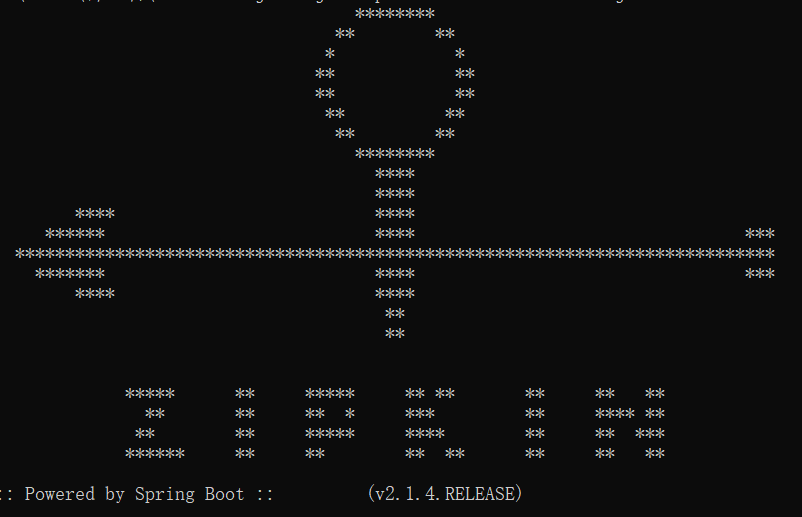
java -jar zipkin-server-2.12.9-exec.jar
看到下图说明配置成功
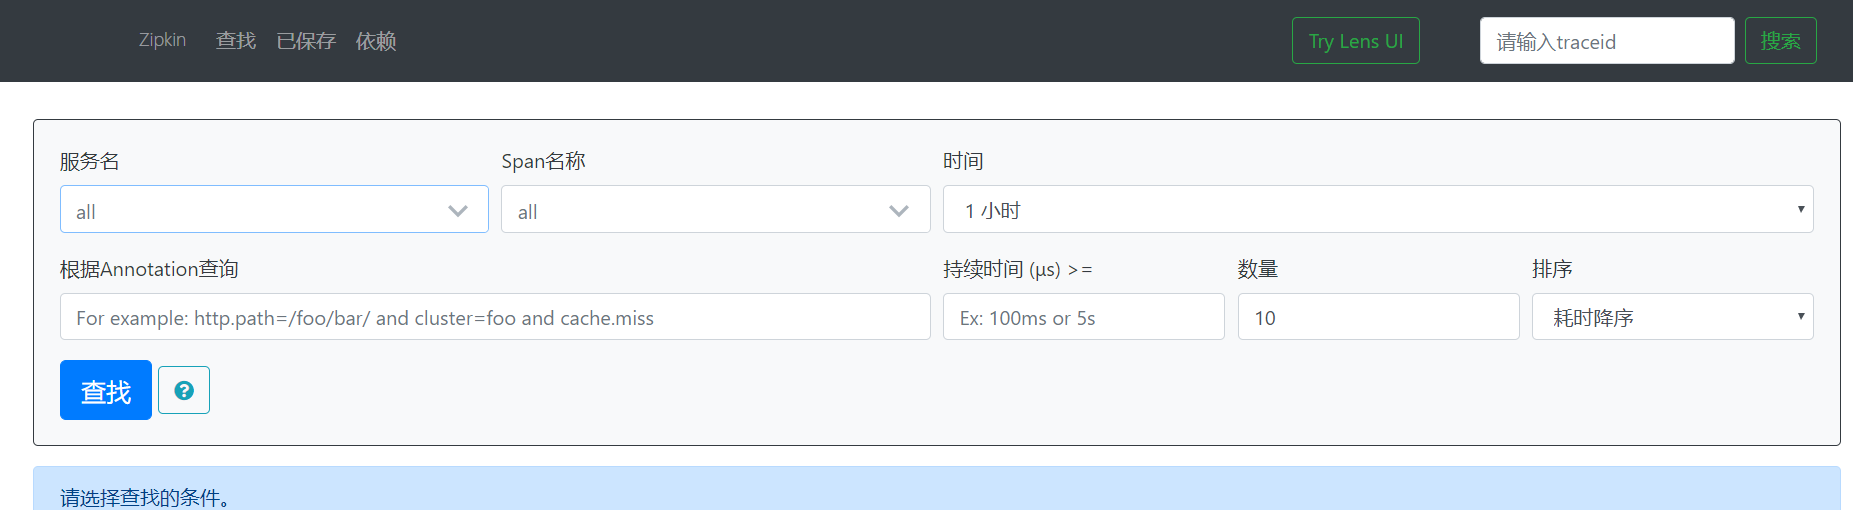
3)访问http://localhost:9411/zipkin/可看到相关的页面,主要用来查看请求的调用记录的。
2.2父工程搭建
创建一个maven的父工程cloud-sleuth,导入依赖
<!--统一管理jar包版本-->

    <properties>

        <project.build.sourceEncoding>UTF-8</project.build.sourceEncoding>

        <maven.compiler.source>1.8</maven.compiler.source>

        <maven.compiler.target>1.8</maven.compiler.target>

        <junit.version>4.12</junit.version>

        <log4j.version>1.2.17</log4j.version>

    </properties>

    <!--  依赖管理,父工程锁定版本-->

    <dependencyManagement>

        <dependencies>

            <!--spring boot 2.2.2-->

            <dependency>

                <groupId>org.springframework.boot</groupId>

                <artifactId>spring-boot-dependencies</artifactId>

                <version>2.2.2.RELEASE</version>

                <type>pom</type>

                <scope>import</scope>

            </dependency>

            <!--spring cloud Hoxton.SR1-->

            <dependency>

                <groupId>org.springframework.cloud</groupId>

                <artifactId>spring-cloud-dependencies</artifactId>

                <version>Hoxton.SR1</version>

                <type>pom</type>

                <scope>import</scope>

            </dependency>

            <!--junit-->

            <dependency>

                <groupId>junit</groupId>

                <artifactId>junit</artifactId>

                <version>${junit.version}</version>

            </dependency>

            <!--log4j-->

            <dependency>

                <groupId>log4j</groupId>

                <artifactId>log4j</artifactId>

                <version>${log4j.version}</version>

            </dependency>

        </dependencies>

    </dependencyManagement>

    <build>

        <plugins>

            <plugin>

                <groupId>org.springframework.boot</groupId>

                <artifactId>spring-boot-maven-plugin</artifactId>

                <configuration>

                    <fork>true</fork>

                    <addResources>true</addResources>

                </configuration>

            </plugin>

        </plugins>

    </build>
2.3注册服务eureka
1)创建一个子工程cloud-eureka-server7001,导入依赖
2)yml配置
server:

  port: 7001

eureka:

  instance:

    #eureka服务端的实例名称

    #单机版

    hostname: localhost

  client:

    #false表示不向注册中心注册自己

    register-with-eureka: false

    #false表示自己端就是注册中心,我的职责就是维护服务实例,并不需要去检索服务

    fetch-registry: false

    service-url:

      #设置与Eureka Server交互的地址查询服务和注册服务都需要依赖这个地址

      #单机版

      defaultZone: http://${eureka.instance.hostname}:${server.port}/eureka/
3)创建包com.zys.cloud,包下创建启动类
package com.zys.cloud;

import org.springframework.boot.SpringApplication;

import org.springframework.boot.autoconfigure.SpringBootApplication;

import org.springframework.cloud.netflix.eureka.server.EnableEurekaServer;

@SpringBootApplication

@EnableEurekaServer

public class EurekaMain7001 {

    public static void main(String[] args) {

        SpringApplication.run(EurekaMain7001.class, args);

    }

}
2.4服务提供者模块
1)创建一个子工程cloud-provider8001作为服务消费者,导入依赖
<dependencies>

        <!--web-->

        <dependency>

            <groupId>org.springframework.boot</groupId>

            <artifactId>spring-boot-starter-web</artifactId>

        </dependency>

        <dependency>

            <groupId>org.springframework.boot</groupId>

            <artifactId>spring-boot-starter-actuator</artifactId>

        </dependency>

        <!--eureka-client-->

        <dependency>

            <groupId>org.springframework.cloud</groupId>

            <artifactId>spring-cloud-starter-netflix-eureka-client</artifactId>

        </dependency>

        <!--包含了sleuth+zipkin-->

        <dependency>

            <groupId>org.springframework.cloud</groupId>

            <artifactId>spring-cloud-starter-zipkin</artifactId>

        </dependency>

    </dependencies>
2)yml配置
server:

  port: 8001

spring:

  application:

    name: cloud-provider

  zipkin:

    #监控地查看址

    base-url: http://localhost:9411

  sleuth:

    sampler:

      #采样率

      probability: 1

#把客户端注册到服务列表中

eureka:

  client:

    #表示是否将自己注册进EurekaServer默认为true

    register-with-eureka: true

    #是否从EurekaServer抓取已有的注册信息,默认为true。单节点无所谓,集群必须设置为true才能配合ribbon使用负载均衡

    fetch-registry: true

    service-url:

      #单机版

      defaultZone: http://localhost:7001/eureka

  #设置入驻的服务的名称,是唯一的

  instance:

    instance-id: cloud-provider

    #访问路径显示ip

    prefer-ip-address: true
里面主要是配置了ziplin的相关信息。
3)创建包com.zys.cloud,包下创建启动类
package com.zys.cloud;

import org.springframework.boot.SpringApplication;

import org.springframework.boot.autoconfigure.SpringBootApplication;

import org.springframework.cloud.client.discovery.EnableDiscoveryClient;

import org.springframework.cloud.netflix.eureka.EnableEurekaClient;

@SpringBootApplication

@EnableEurekaClient

public class ProviderMain8001 {

    public static void main(String[] args) {

        SpringApplication.run(ProviderMain8001.class, args);

    }

}
4)在包下新建controller接口
package com.zys.cloud.controller;

import org.springframework.beans.factory.annotation.Value;

import org.springframework.web.bind.annotation.GetMapping;

import org.springframework.web.bind.annotation.PathVariable;

import org.springframework.web.bind.annotation.RestController;

@RestController

public class UserController {

    @Value("${server.port}")

    private String port;

    @GetMapping("/user/get")

    public String get() {

        return "provider port is :" + port;

    }

}
2.5服务消费者模块
1)创建一个子工程cloud-provider8001作为服务消费者,导入依赖
 <dependencies>

        <!--web-->

        <dependency>

            <groupId>org.springframework.boot</groupId>

            <artifactId>spring-boot-starter-web</artifactId>

        </dependency>

        <dependency>

            <groupId>org.springframework.boot</groupId>

            <artifactId>spring-boot-starter-actuator</artifactId>

        </dependency>

        <!--eureka-client-->

        <dependency>

            <groupId>org.springframework.cloud</groupId>

            <artifactId>spring-cloud-starter-netflix-eureka-client</artifactId>

        </dependency>

        <!--包含了sleuth+zipkin-->

        <dependency>

            <groupId>org.springframework.cloud</groupId>

            <artifactId>spring-cloud-starter-zipkin</artifactId>

        </dependency>

    </dependencies>
2)yml配置
server:

  port: 80

spring:

  application:

    name: cloud-consumer

  zipkin:

    #监控地查看址

    base-url: http://localhost:9411

  sleuth:

    sampler:

      #采样率

      probability: 1

#把客户端注册到服务列表中

eureka:

  client:

    #表示是否将自己注册进EurekaServer默认为true

    register-with-eureka: true

    #是否从EurekaServer抓取已有的注册信息,默认为true。单节点无所谓,集群必须设置为true才能配合ribbon使用负载均衡

    fetch-registry: true

    service-url:

      #单机版

      defaultZone: http://localhost:7001/eureka

  #设置入驻的服务的名称,是唯一的

  instance:

    instance-id: cloud-provider

    #访问路径显示ip

    prefer-ip-address: true
3)创建包com.zys.cloud,包下创建启动类
package com.zys.cloud;

import org.springframework.boot.SpringApplication;

import org.springframework.boot.autoconfigure.SpringBootApplication;

import org.springframework.cloud.netflix.eureka.EnableEurekaClient;

@SpringBootApplication

@EnableEurekaClient

public class ConsumerMain80 {

    public static void main(String[] args) {

        SpringApplication.run(ConsumerMain80.class, args);

    }

}
4)在包下新建config的配置类
package com.zys.cloud.config;

import org.springframework.cloud.client.loadbalancer.LoadBalanced;

import org.springframework.context.annotation.Bean;

import org.springframework.context.annotation.Configuration;

import org.springframework.web.client.RestTemplate;

//相当于spring中的applicationContext.xml

@Configuration

public class ConfigBean {

    @Bean

    @LoadBalanced

    public RestTemplate getRestTemplate(){

        return new RestTemplate();

    }

}
5)在包下新建controller接口
package com.zys.cloud.controller;

import org.springframework.beans.factory.annotation.Autowired;

import org.springframework.web.bind.annotation.*;

import org.springframework.web.client.RestTemplate;

import java.util.Map;

@RestController

@RequestMapping("/consumer")

public class UserController {

    private final  String BASE_URL="http://cloud-provider";

    @Autowired

    private RestTemplate restTemplate;

    @GetMapping("/get")

    public String get(){

        return restTemplate.getForObject(BASE_URL+"/user/get",String.class);

    }

}
2.6测试
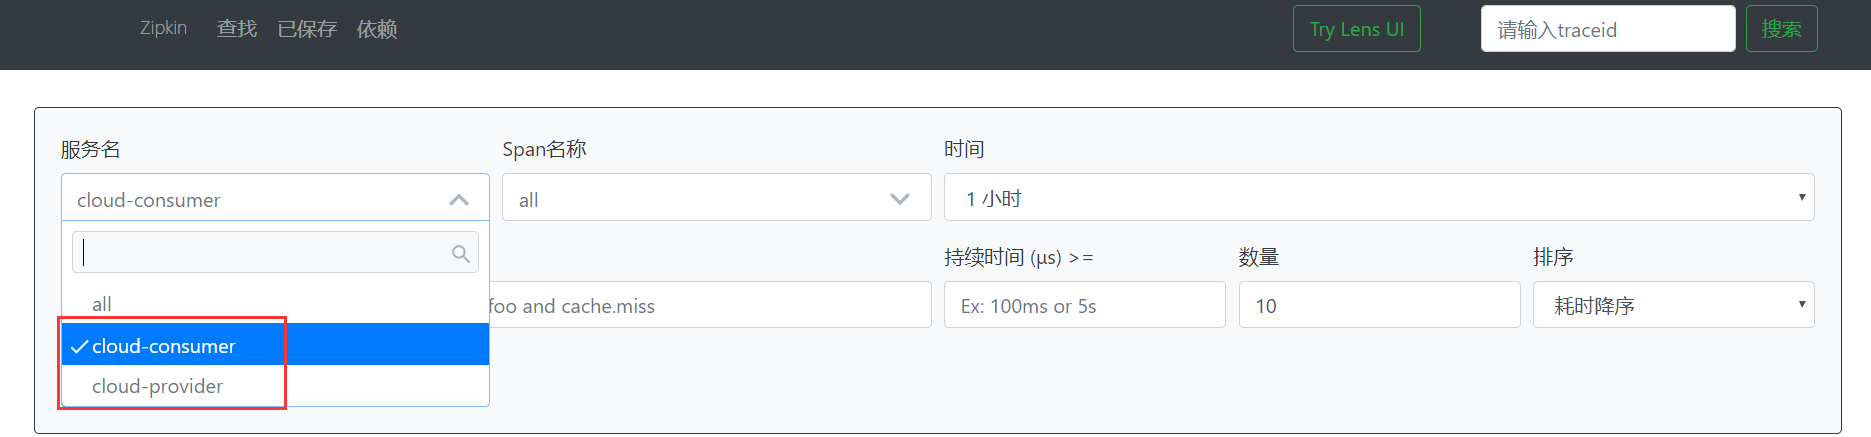
先启动7001,然后启动8001,最后启动80。访问http://localhost/consumer/get,然后再回到zipkin的页面,发现服务名多了两个,分别是设置的消费者和生产者。
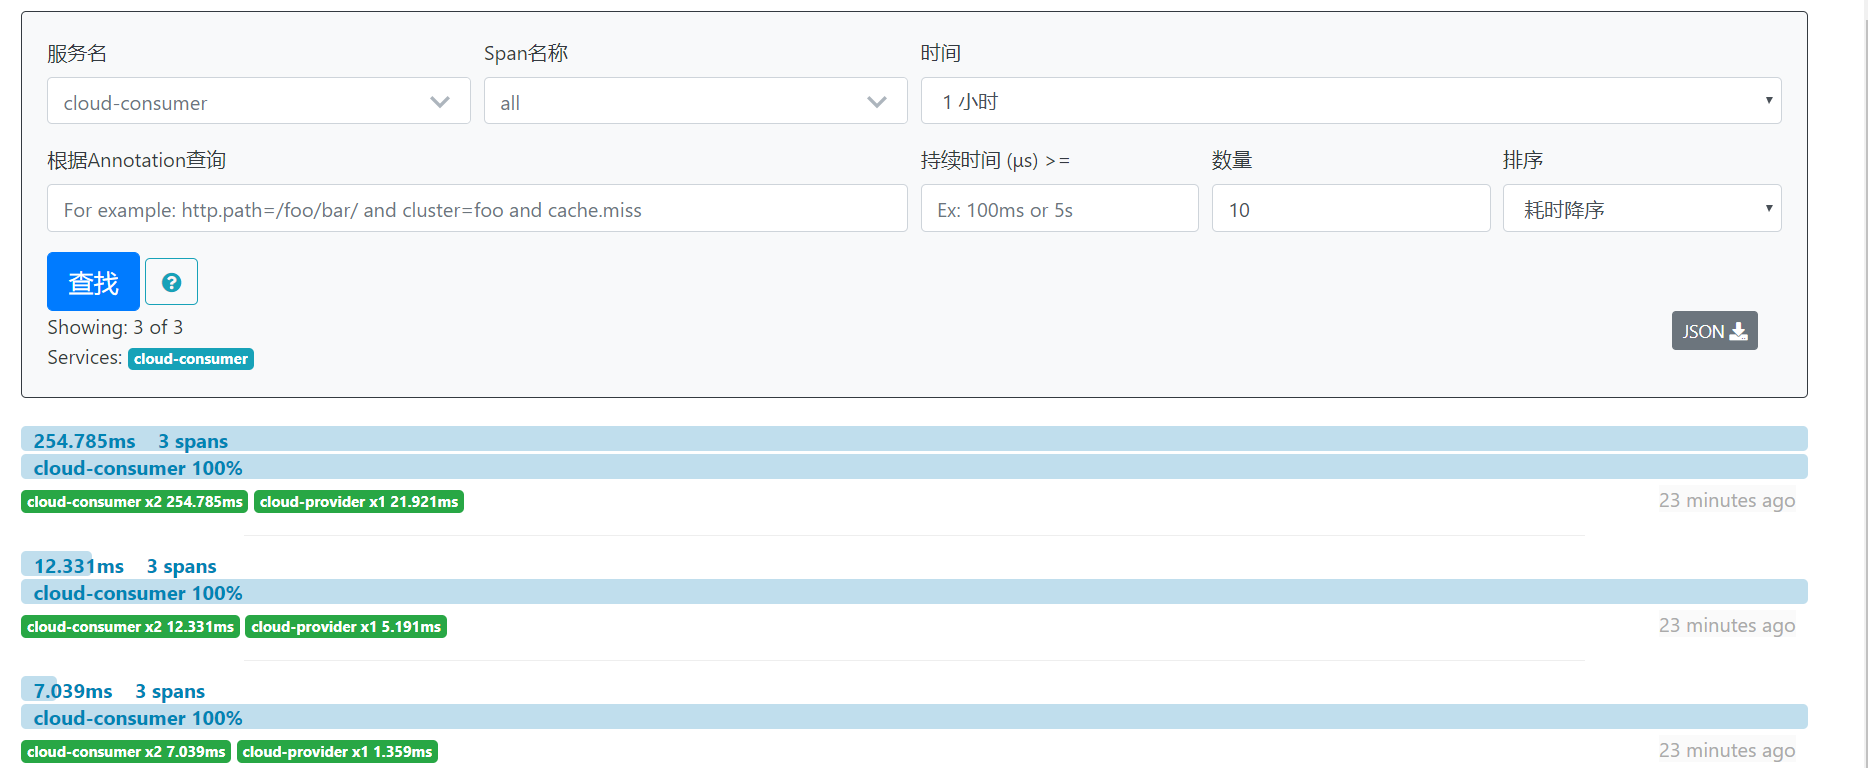
选择一个服务后点击查找,就会显示出链路信息
SpringCloud Sleuth的更多相关文章
- 新版本SpringCloud sleuth整合zipkin
SpringCloud Sleuth 简介 Spring Cloud Sleuth为Spring Cloud实现了分布式跟踪解决方案. Spring Cloud Sleuth借鉴了Dapper的术语. ...
- SpringCloud Sleuth + Zipkin 实现链路追踪
一.Sleuth介绍 为什么要使用微服务跟踪? 它解决了什么问题? 1.微服务的现状? 随着业务的发展,单体架构变为微服务架构,并且系统规模也变得越来越大,各微服务间的调用关系也变得越来越复杂 ...
- SpringCloud学习笔记(十、SpringCloud Sleuth)
目录: 什么是SpringCloud Sleuth 为什么使用SpringCloud Sleuth 如何使用SpringCloud Sleuth 什么是SpringCloud Sleuth: Spri ...
- springcloud -- sleuth+zipkin整合rabbitMQ详解
为什么使用RabbitMQ? 我们已经知道,zipkin的原理是服务之间的调用关系会通过HTTP方式上报到zipkin-server端,然后我们再通过zipkin-ui去调用查看追踪服务之间的调用链路 ...
- SpringCloud Sleuth 使用
1. 介绍 Spring-Cloud-Sleuth是Spring Cloud的组成部分之一,为SpringCloud应用实现了一种分布式追踪解决方案,其兼容了Zipkin, HTrace和log- ...
- SpringCloud Sleuth入门介绍
案例代码:https://github.com/q279583842q/springcloud-e-book 一.Sleuth介绍 为什么要使用微服务跟踪?它解决了什么问题? 1.微服务的现状? ...
- SpringCloud入门(十一):Sleuth 与 Zipkin分布式链路跟踪
现今业界分布式服务跟踪的理论基础主要来自于 Google 的一篇论文<Dapper, a Large-Scale Distributed Systems Tracing Infrastructu ...
- 学习一下 SpringCloud (五)-- 配置中心 Config、消息总线 Bus、链路追踪 Sleuth、配置中心 Nacos
(1) 相关博文地址: 学习一下 SpringCloud (一)-- 从单体架构到微服务架构.代码拆分(maven 聚合): https://www.cnblogs.com/l-y-h/p/14105 ...
- SpringCloud(八)Sleuth 分布式请求链路跟踪
SpringCloud Sleuth 分布式请求链路跟踪 概述 为什么会出现这个技术?需要解决哪些问题? 在微服务框架中,一个由客户端发起的请求在后端系统中会经过多个不同的的服务节点调用来协同产生最后 ...
随机推荐
- Pytest(3)fixture的使用
fixture的优势 Pytest的fixture相对于传统的xUnit的setup/teardown函数做了显著的改进: 命名方式灵活,不局限于 setup 和teardown 这几个命名 conf ...
- 2019icpc徐州站 Cat 计蒜客 - 42540 && The Answer to the Ultimate Question of Life, The Universe, and Everything. 计蒜客 - 42545
VJ链接:https://vjudge.net/contest/412095#problem/A Cat 计蒜客 - 42540 题意: 给你一个区间[L,R],给你现在拥有的钱S.你需要从[L,R] ...
- ZOJ3640-Help Me Escape 概率dp
题意: 在一个迷宫中有n条路经,你会被随机传送到一条路径,每条路径有一个挑战难度ci,你最初有一个战斗力f,如果你的战斗力大于ci,那么呆在那里ti天就可以成功逃出迷宫.如果你的战斗力小于等于ci,那 ...
- A - Promotions
题目详见http://7xjob4.com1.z0.glb.clouddn.com/3f644de6844d64706eb36baa3a0c27b0 这题是普通的拓扑排序,要把每一层的都保存下来. # ...
- 洛谷P1628合并序列【模板】(Trie+dfs)
很久之前写的题了,当时不知道怎么dfs所以卡了一段时间,^_^ 题解:由于题目给了一大堆字符串,所以首先考虑应该可以建树,之后找到T所在的位置,对T所在的位置dfs就行了 代码: 1 #include ...
- Python——Django框架——Form框架
一.引入Form包 from django import forms 二.定义规则 class Forms_Login(forms.Form): 用户名 = forms.CharField(requi ...
- 并发编程之java内存模型(Java Memory Model ,JMM)
一.图例 0.两个概念 Heap(堆):运行时的数据区,由垃圾回收负责,运行时分配内存(所以慢),对象存放在堆上 如果两个线程,同时调用同一个变量,怎两个线程都拥有,该对象的私有拷贝 (可以看一下,T ...
- 在Python中使用BeautifulSoup进行网页爬取
目录 什么是网页抓取? 为什么我们要从互联网上抓取数据? 网站采集合法吗? HTTP请求/响应模型 创建网络爬虫 步骤1:浏览并检查网站/网页 步骤2:创建用户代理 步骤3:导入请求库 检查状态码 步 ...
- Pymongo 笔记
Pymongo 1.MongoDB概念 MongoDB是一种非关系型数据库(NoSQL),MongoDB数据存储于内存,内存不足则将热度低数据写回磁盘.存储的数据结构为文档.每个数据库包含若干集合(c ...
- 操作系统 part3
1.操作系统四特性 并发:一个时间段,多个进程在宏观上同时运行 共享:系统中的资源可以被多个并发进程共同使用(互斥共享,同时共享) 虚拟:利用多道程序设计,利用时分复用(分时系统)和空分复用(虚拟内存 ...