Springboot源码分析之EnableAspectJAutoProxy
摘要:
Spring Framwork的两大核心技术就是IOC和AOP,AOP在Spring的产品线中有着大量的应用。如果说反射是你通向高级的基础,那么代理就是你站稳高级的底气。AOP的本质也就是大家所熟悉的CGLIB动态代理技术,在日常工作中想必或多或少都用过但是它背后的秘密值得我们去深思。本文主要从Spring AOP运行过程上,结合一定的源码整体上介绍Spring AOP的一个运行过程。知其然,知其所以然,才能更好的驾驭这门核心技术。
    @Target({ElementType.TYPE})

    @Retention(RetentionPolicy.RUNTIME)

    @Documented

    @Import({AspectJAutoProxyRegistrar.class})

    public @interface EnableAspectJAutoProxy {

        //表明该类采用CGLIB代理还是使用JDK的动态代理

        boolean proxyTargetClass() default false;

    	 /**

         * @since 4.3.1 代理的暴露方式:解决内部调用不能使用代理的场景  默认为false表示不处理

         * true:这个代理就可以通过AopContext.currentProxy()获得这个代理对象的一个副本(ThreadLocal里面),从而我们可以很方便得在Spring框架上下文中拿到当前代理对象(处理事务时很方便)

         * 必须为true才能调用AopContext得方法,否则报错:Cannot find current proxy: Set 'exposeProxy' property on Advised to 'true' to make it available.

         */

        boolean exposeProxy() default false;

    }
所有的EnableXXX驱动技术都得看他的@Import,所以上面最重要的是这一句@Import(AspectJAutoProxyRegistrar.class),下面看看它
    class AspectJAutoProxyRegistrar implements ImportBeanDefinitionRegistrar {

        AspectJAutoProxyRegistrar() {

        }

        public void registerBeanDefinitions(AnnotationMetadata importingClassMetadata, BeanDefinitionRegistry registry) {

            //注册了一个基于注解的自动代理创建器   AopConfigUtils.registerAspectJAnnotationAutoProxyCreatorIfNecessary(registry);

            AnnotationAttributes enableAspectJAutoProxy = AnnotationConfigUtils.attributesFor(importingClassMetadata, EnableAspectJAutoProxy.class);

            if (enableAspectJAutoProxy != null) {

                  //表示强制指定了要使用CGLIB

                if (enableAspectJAutoProxy.getBoolean("proxyTargetClass")) {

                    AopConfigUtils.forceAutoProxyCreatorToUseClassProxying(registry);

                }

              //强制暴露Bean的代理对象到AopContext

                if (enableAspectJAutoProxy.getBoolean("exposeProxy")) {

                    AopConfigUtils.forceAutoProxyCreatorToExposeProxy(registry);

                }

            }

        }

    }
AspectJAutoProxyRegistrar是一个项容器注册自动代理创建器
    @Nullable

    	public static BeanDefinition registerAspectJAnnotationAutoProxyCreatorIfNecessary(

    			BeanDefinitionRegistry registry, @Nullable Object source) {

    		return registerOrEscalateApcAsRequired(AnnotationAwareAspectJAutoProxyCreator.class, registry, source);

    	}
说明:spring容器的注解代理创建器就是AnnotationAwareAspectJAutoProxyCreator
    @Nullable

        private static BeanDefinition registerOrEscalateApcAsRequired(Class<?> cls, BeanDefinitionRegistry registry, @Nullable Object source) {

            Assert.notNull(registry, "BeanDefinitionRegistry must not be null");

          //这里如果我们自己定义了这样一个自动代理创建器就是用我们自定义的

            if (registry.containsBeanDefinition("org.springframework.aop.config.internalAutoProxyCreator")) {

                BeanDefinition apcDefinition = registry.getBeanDefinition("org.springframework.aop.config.internalAutoProxyCreator");

                if (!cls.getName().equals(apcDefinition.getBeanClassName())) {

                    int currentPriority = findPriorityForClass(apcDefinition.getBeanClassName());

                  /**

                   *用户注册的创建器,必须是InfrastructureAdvisorAutoProxyCreator

                   *AspectJAwareAdvisorAutoProxyCreator,AnnotationAwareAspectJAutoProxyCreator之一

                  */

                    int requiredPriority = findPriorityForClass(cls);

                    if (currentPriority < requiredPriority) {

                        apcDefinition.setBeanClassName(cls.getName());

                    }

                }

                return null;

            }

          //若用户自己没有定义,那就用默认的AnnotationAwareAspectJAutoProxyCreator

          RootBeanDefinition beanDefinition = new RootBeanDefinition(cls);

    		  beanDefinition.setSource(source);

          //此处注意,增加了一个属性:最高优先级执行,后面会和@Async注解一起使用的时候起关键作用

    		beanDefinition.getPropertyValues().add("order", Ordered.HIGHEST_PRECEDENCE);

    		beanDefinition.setRole(BeanDefinition.ROLE_INFRASTRUCTURE);

    		registry.registerBeanDefinition(AUTO_PROXY_CREATOR_BEAN_NAME, beanDefinition);

    		return beanDefinition;

        }
我们就成功的注入了一个Bean:AnnotationAwareAspectJAutoProxyCreator 基于注解的自动代理创建器
Spring中自动创建代理器
由此可见,Spring使用BeanPostProcessor让自动生成代理。基于BeanPostProcessor的自动代理创建器的实现类,将根据一些规则在容器实例化Bean时为匹配的Bean生成代理实例。
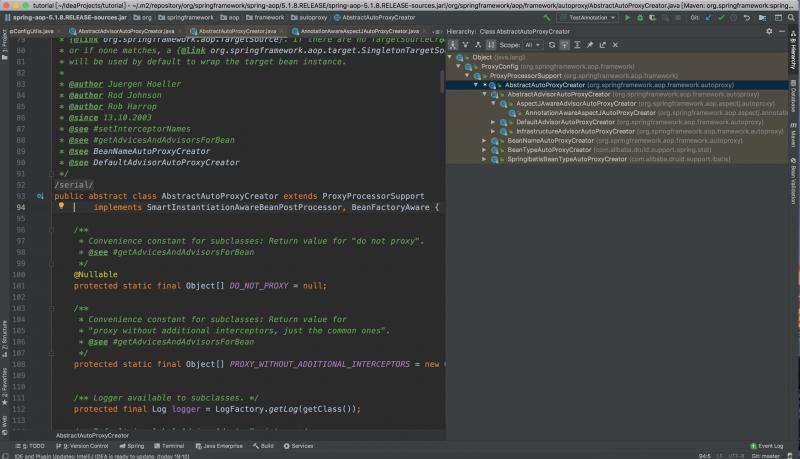
AbstractAutoProxyCreator是对自动代理创建器的一个抽象实现。最重要的是,它实现了SmartInstantiationAwareBeanPostProcessor接口,因此会介入到Spring IoC容器Bean实例化的过程。
SmartInstantiationAwareBeanPostProcessor继承InstantiationAwareBeanPostProcessor所以它最主要的 职责是在bean的初始化前,先会执行所有的InstantiationAwareBeanPostProcessor#postProcessBeforeInstantiation,谁第一个返回了不为null的Bean,后面就都不会执行了 。然后会再执行BeanPostProcessor#postProcessAfterInitialization
    protected Object getEarlyBeanReference(String beanName, RootBeanDefinition mbd, Object bean) {

    		Object exposedObject = bean;

    		if (!mbd.isSynthetic() && hasInstantiationAwareBeanPostProcessors()) {

    			for (BeanPostProcessor bp : getBeanPostProcessors()) {

    				if (bp instanceof SmartInstantiationAwareBeanPostProcessor) {

    					SmartInstantiationAwareBeanPostProcessor ibp = (SmartInstantiationAwareBeanPostProcessor) bp;

    					exposedObject = ibp.getEarlyBeanReference(exposedObject, beanName);

    				}

    			}

    		}

    		return exposedObject;

    	}
说明:这个方法是spring的三级缓存中的其中一环,当你调用Object earlySingletonReference = getSingleton(beanName, false);时候就会触发,其实还有一个地方exposedObject = initializeBean(beanName, exposedObject, mbd);也会触发导致返回一个代理对象。
    protected Object initializeBean(final String beanName, final Object bean, @Nullable RootBeanDefinition mbd) {

    		if (System.getSecurityManager() != null) {

    			AccessController.doPrivileged((PrivilegedAction<Object>) () -> {

    				invokeAwareMethods(beanName, bean);

    				return null;

    			}, getAccessControlContext());

    		}

    		else {

    			invokeAwareMethods(beanName, bean);

    		}

    		Object wrappedBean = bean;

    		if (mbd == null || !mbd.isSynthetic()) {

    			wrappedBean = applyBeanPostProcessorsBeforeInitialization(wrappedBean, beanName);

    		}

    		try {

    			invokeInitMethods(beanName, wrappedBean, mbd);

    		}

    		catch (Throwable ex) {

    			throw new BeanCreationException(

    					(mbd != null ? mbd.getResourceDescription() : null),

    					beanName, "Invocation of init method failed", ex);

    		}

    		if (mbd == null || !mbd.isSynthetic()) {

    			wrappedBean = applyBeanPostProcessorsAfterInitialization(wrappedBean, beanName);

    		}

    		return wrappedBean;

    	}
强调: 这2个地方虽然都有后置增强的作用,但是@Async所使用的AsyncAnnotationBeanPostProcessor不是SmartInstantiationAwareBeanPostProcessor的实现类,所以此处会导致@Transactional和@Async处理循环依赖时候的不一致性。对于循环依赖后续会有单独章节进行分享。
AbstractAdvisorAutoProxyCreator
如何创建代理对象后续文章在进行分析。
Springboot源码分析之EnableAspectJAutoProxy的更多相关文章
- SpringBoot源码分析之SpringBoot的启动过程
SpringBoot源码分析之SpringBoot的启动过程 发表于 2017-04-30 | 分类于 springboot | 0 Comments | 阅读次数 SpringB ...
- Springboot源码分析之项目结构
Springboot源码分析之项目结构 摘要: 无论是从IDEA还是其他的SDS开发工具亦或是https://start.spring.io/ 进行解压,我们都会得到同样的一个pom.xml文件 4. ...
- 从SpringBoot源码分析 配置文件的加载原理和优先级
本文从SpringBoot源码分析 配置文件的加载原理和配置文件的优先级 跟入源码之前,先提一个问题: SpringBoot 既可以加载指定目录下的配置文件获取配置项,也可以通过启动参数( ...
- springboot源码分析-SpringApplication
SpringApplication SpringApplication类提供了一种方便的方法来引导从main()方法启动的Spring应用程序 SpringBoot 包扫描注解源码分析 @Spring ...
- Springboot源码分析之jar探秘
摘要: 利用IDEA等工具打包会出现springboot-0.0.1-SNAPSHOT.jar,springboot-0.0.1-SNAPSHOT.jar.original,前面说过它们之间的关系了, ...
- Springboot源码分析之代理三板斧
摘要: 在Spring的版本变迁过程中,注解发生了很多的变化,然而代理的设计也发生了微妙的变化,从Spring1.x的ProxyFactoryBean的硬编码岛Spring2.x的Aspectj注解, ...
- Springboot源码分析之事务拦截和管理
摘要: 在springboot的自动装配事务里面,InfrastructureAdvisorAutoProxyCreator ,TransactionInterceptor,PlatformTrans ...
- SpringBoot源码分析(二)启动原理
Springboot的jar启动方式,是通过IOC容器启动 带动了Web容器的启动 而Springboot的war启动方式,是通过Web容器(如Tomcat)的启动 带动了IOC容器相关的启动 一.不 ...
- Springboot源码分析之Spring循环依赖揭秘
摘要: 若你是一个有经验的程序员,那你在开发中必然碰到过这种现象:事务不生效.或许刚说到这,有的小伙伴就会大惊失色了.Spring不是解决了循环依赖问题吗,它是怎么又会发生循环依赖的呢?,接下来就让我 ...
随机推荐
- Contos7 常用命令
```pythoncentos常用命令: 查看所有运行的单元:systemctl list-units 查看所有单元:systemctl list-units --all 查看所有启动的服务:syst ...
- 从0系统学Android--1.2 手把手带你搭建开发环境
要想进行程序开发,首先我们需要搭建开发环境,下面就开始搭建环境. 1.2.1 所需的工具 首先 Android 开发是基于 Java 的,因此你需要掌握简单的 Java 语法.会基础的 Java 语法 ...
- ThreadLocal的使用场景:Web容器、Spring容器、日志打印
一.对于HTTP事务的理解 一次HTTP请求,就是一个事务.事务者,必须完整的执行其中的所有步骤,不能中断. 二.HTTP事务的隔离 每次HTTP请求对应一个HTTP事务,而每个请求都对应一个线程,线 ...
- CF1195C Basketball Exercise (dp + 贪心)
题解出处:https://www.luogu.org/problemnew/solution/CF1195C 很水的一道C题……目测难度在黄~绿左右.请各位切题者合理评分. 注意到可以选择的球员编号是 ...
- 数组(ArrayPool数组池、Span<T>结构)
前言 如果需要使用相同的类型的多个对象,就可以使用集合和数组,这一节主要讲解数组,其中会重点涉及到Span<T>结构和ArrayPool数组池.我们也会先涉及到简单的数组.多维数组.锯齿数 ...
- linux初学者-SElinux篇
linux初学者-SElinux篇 SElinux是强制访问控制(MAC)安全系统,是linux历史上最杰出的新安全系统.对于linux安全模块来说,SElinux的功能是最全面的,测试也是最充分的, ...
- 记一次搭建ftp服务器的简略经历
需求:在linux中搭建一个ftp 服务器,用户为:user1 目录为 /data/use1 , 安全设置:限制权限,只能访问自己目录,限制端口,只允许特定ip访问. 1,安装vs ...
- 比特币and区块链
比特币简介 比特币(Bitcoin:比特金)最早是一种网络虚拟货币,可以购买现实生活当中的物品.它的特点是分散化.匿名.只能在数字世界使用,不属于任何国家和金融机构,并且不受地域的限制,可以在世界上的 ...
- IDEA:No SLF4J providers were found.
如果您是用IDEA 的 maven 写的 将slf4j的导入包 更改 为下列代码 <dependency> <groupId>org.slf4j</groupId> ...
- angularjs通信以及postmessage与iframe通信
这篇文章是用markdown工具写的,有需要的可以使用vscode打开 # angularjs 控制器.组件之间的通信 ## 一.基于事件的方式 此方式下,主要通过 angularjs 内置指令` ...