
【认证与授权】Spring Security自定义页面
在前面的篇幅中,我们对认证和授权流程大致梳理了一遍。在这个过程中我们一直都是使用系统生成的默认页面,登录成功后也是直接调转到根路径页面。而在实际的开发过程中,我们是需要自定义登录页面的,有时还会添加各类验证机制,在登录成功后会跳转至指定页面,还会进行各种美化,甚至是前后端分离的方式。这时,就需要我们对自定义登录进行实现。
本章节使用spring-security-custom-login
一、工程准备
1、pom.xml
<?xml version="1.0" encoding="UTF-8"?>

<project xmlns="http://maven.apache.org/POM/4.0.0"

         xmlns:xsi="http://www.w3.org/2001/XMLSchema-instance"

         xsi:schemaLocation="http://maven.apache.org/POM/4.0.0 http://maven.apache.org/xsd/maven-4.0.0.xsd">

    <parent>

        <artifactId>security-study</artifactId>

        <groupId>cn.wujiwen.security</groupId>

        <version>0.0.1-SNAPSHOT</version>

    </parent>

    <modelVersion>4.0.0</modelVersion>

    <description>自定义登录页面</description>

    <artifactId>spring-security-custom-login</artifactId>

    <dependencies>

        <dependency>

            <groupId>org.springframework.boot</groupId>

            <artifactId>spring-boot-starter-security</artifactId>

        </dependency>

        <dependency>

            <groupId>org.springframework.boot</groupId>

            <artifactId>spring-boot-starter-web</artifactId>

        </dependency>

        <dependency>

            <groupId>org.springframework.boot</groupId>

            <artifactId>spring-boot-starter-thymeleaf</artifactId>

        </dependency>

    </dependencies>

</project>
我们引入了thymeleaf,也是官方推荐的做法。
2、application.yml
server:

  port: 8080

spring:

  security:

    user:

      name: admin

      password: admin

      roles: ADMIN
非常的熟悉,端口、基础用户等信息
3、启动类Application
@SpringBootApplication

public class SecurityLoginApplication {

    public static void main(String[] args) {

        SpringApplication.run(SecurityLoginApplication.class,args);

    }

}
二、自定义SecurityConfig
自定义SecurityConfig需继承WebSecurityConfigurerAdapter并重写相关配置即可,由于今天只涉及到自定义页面的信息,所以我们只需要重写configure(HttpSecurity http) 方法即可。在重写这个方法前,我们先来看一下原来这个方法是干什么的。
	protected void configure(HttpSecurity http) throws Exception {

		http

            // 1 声明ExpressionUrlAuthorizationConfigurer,要求所有URL必须登录认证后才能访问

			.authorizeRequests().anyRequest().authenticated()

			.and()

            // 2 声明一个默认的FormLoginConfigurer

			.formLogin()

            .and()

            // 3 声明一个默认的HttpBasicConfigurer

			.httpBasic();

	}
- 对任何请求要求用户已认证(通俗地讲,用户必须先登录才能访问任何资源);
- 启用用户名密码表单登录认证机制;
- 启用
Http Basic认证机制;
下面我们就通过重写上述的方法来做到自定义登录页面等信息
@EnableWebSecurity

public class SecurityConfig extends WebSecurityConfigurerAdapter {

    @Override

    protected void configure(HttpSecurity http) throws Exception {

        http.csrf().disable();

        http.authorizeRequests().anyRequest().authenticated()

                .and().httpBasic().and()

            	// 1

                .formLogin().loginPage("/login")

                // 2

            	.loginProcessingUrl("/loginAction")

            	// 3

                .defaultSuccessUrl("/index")

                .permitAll();

    }

}
我们发现其实和缺省方法中并没有太大的差别,只有三处的变化
loginPage()中将指定自定义登录页面的请求路径loginProcessingUrl()为认证的请求接口,也就是我们常说的form表单中的action。如果不指定,将采用loginPage中的值。defaultSuccessUrl()为认证成功后跳转的页面地址
三、自定义页面
在springboot中使用html页面这里就不过多赘述,一般情况下在resource下新建templates文件下,将需要的页面放到该文件下即可。我的路径为
_resource

  |_templates

	|_login.html

	|_index.html
1、login.thml
<!DOCTYPE html>

<html xmlns="http://www.w3.org/1999/xhtml" xmlns:th="http://www.thymeleaf.org"

      xmlns:sec="http://www.thymeleaf.org/thymeleaf-extras-springsecurity3">

<head>

    <title>Spring Security Example </title>

</head>

<body>

<div th:if="${param.error}">

    用户名或密码错误

</div>

<div th:if="${param.logout}">

    你已经退出

</div>

<form th:action="@{/loginAction}" method="post">

    <div><label> 账号 : <input type="text" name="username"/> </label></div>

    <div><label> 密码 : <input type="password" name="password"/> </label></div>

    <div><input type="submit" value="登录"/></div>

</form>

</body>

</html>
这里我将action与loginProcessingUrl()对应,你也可以自己尝试更换或使用默认或与loginPage()一致的。
到这里我们就完成了一个最简单的表单提交的页面了。当我们点击submit按钮时,正确的请求路径将是
curl -x POST -d "username=admin&password=admin" http://127.0.0.1:8080/loginAction
这里可能会有个疑问了,为啥你的参数就是username和password呢?嗯~ 当然可以自己指定的啊,因为在FormLoginConfigurer中默认的指定参数
public FormLoginConfigurer() {

		super(new UsernamePasswordAuthenticationFilter(), null);

		usernameParameter("username");

		passwordParameter("password");

	}
2、index.html
<!DOCTYPE html>

<html xmlns="http://www.w3.org/1999/xhtml" xmlns:th="http://www.thymeleaf.org"

      xmlns:sec="http://www.thymeleaf.org/thymeleaf-extras-springsecurity3">

<head>

    <title>Spring Security Example</title>

</head>

    <body>

        <h2>Welcome <b th:text="${username}"></b></h2>

    </body>

</html>
这是个认证成功后的欢迎页面,比较简单,显示当前登录用户即可
四、BaseContoller
上面我们定义了各类路径和请求地址,接下来我们需要定义如果将这些页面映射出来
@Controller

public class BaseController {

    // loginPage("/login") 将跳转到login.html

    @GetMapping("/login")

    public String login() {

        return "login";

    }

	// index.html

    @RequestMapping("/index")

    public String index(Model model, HttpServletRequest request) {

        model.addAttribute("username",request.getUserPrincipal().getName());

        return "index";

    }

}
五、测试
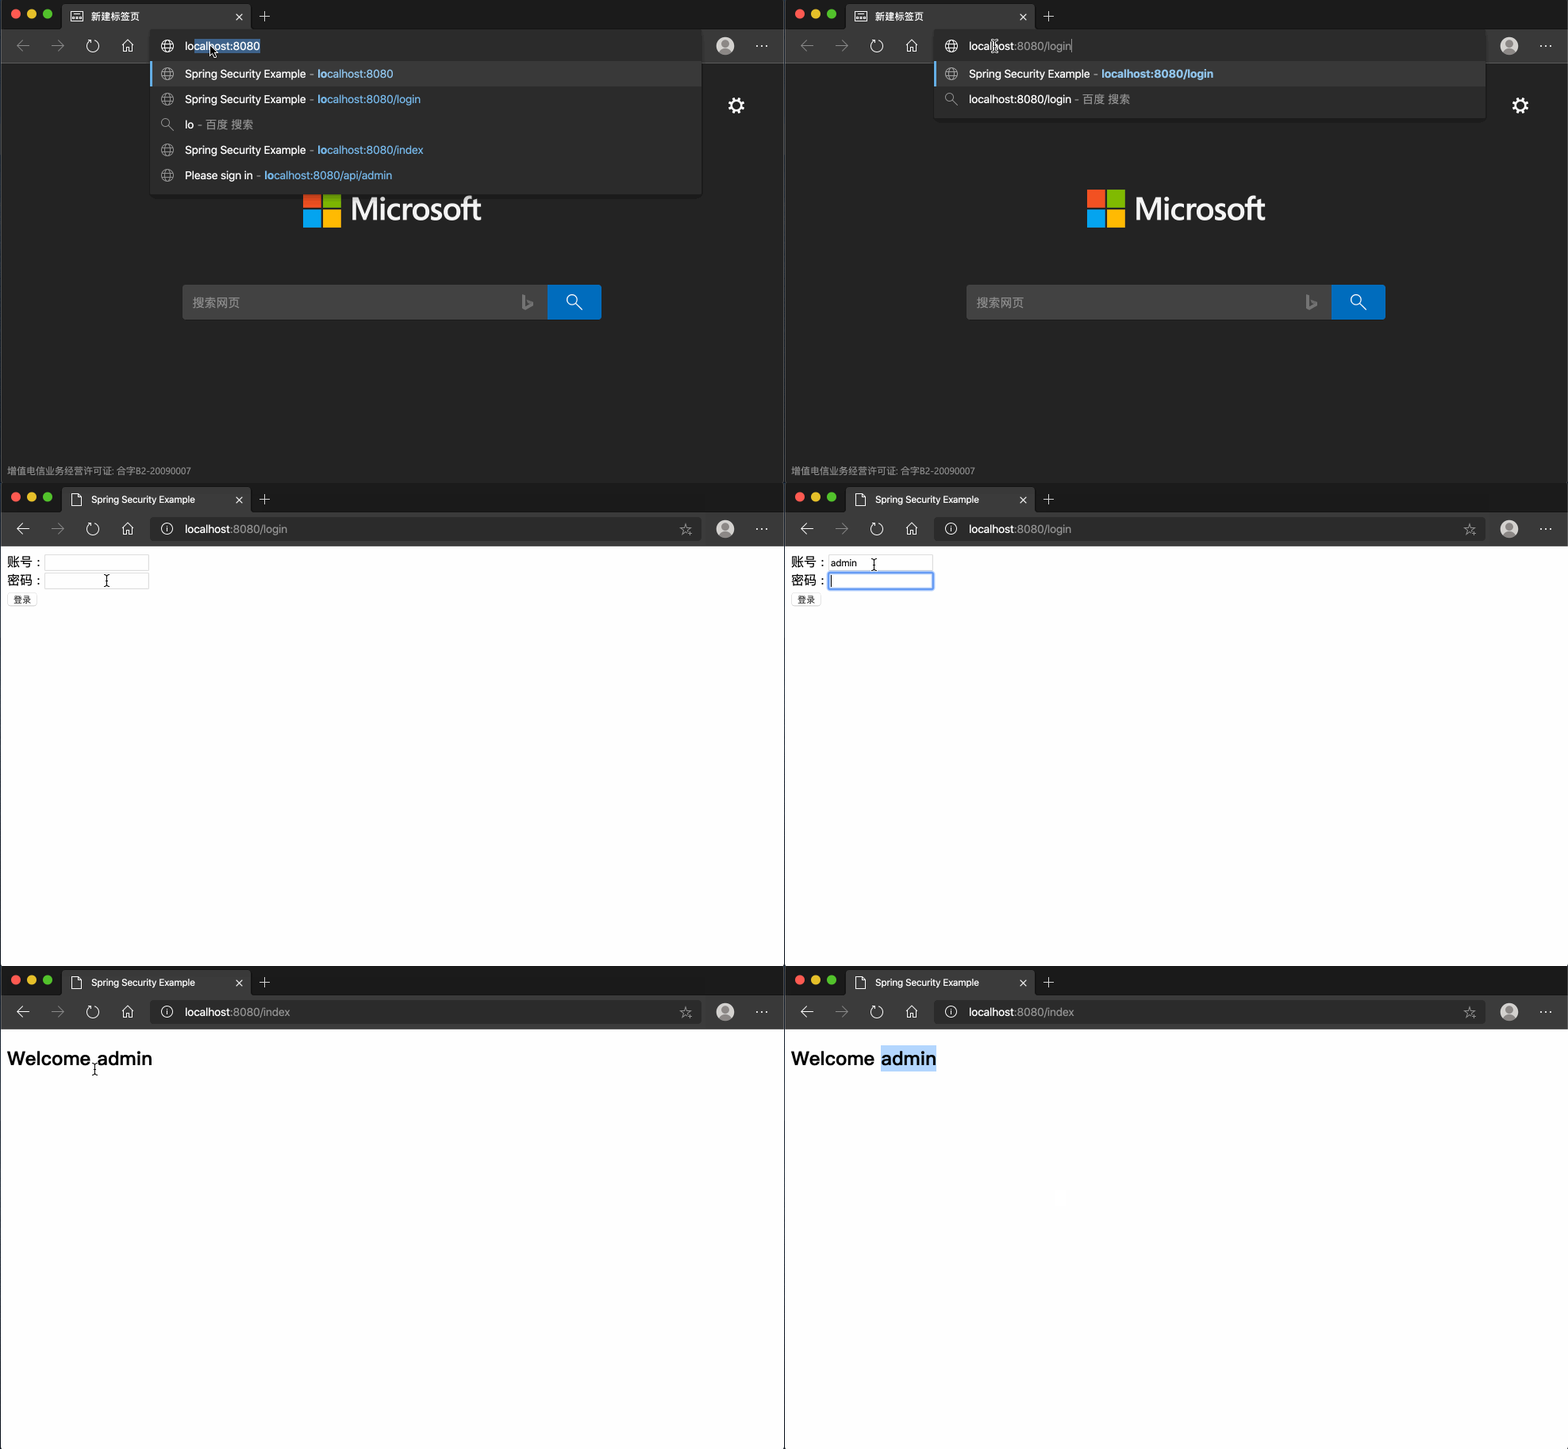
到这里我们已经完成了一个简单的自定义登录页面的改造了。当然,在实际的项目中需要自定义的东西还有很多很多,比如,当认证不通过时如果操作,当用户退出登录时如果操作,这些都没有去实现。
还有人会说,这都什么年代了,前后端分离啊,这些都可以通过一步步的改造来实现的。
(完)
【认证与授权】Spring Security自定义页面的更多相关文章
- Spring Security 自定义登录认证(二)
一.前言 本篇文章将讲述Spring Security自定义登录认证校验用户名.密码,自定义密码加密方式,以及在前后端分离的情况下认证失败或成功处理返回json格式数据 温馨小提示:Spring Se ...
- (二)spring Security 自定义登录页面与校验用户
文章目录 配置 security 配置下 MVC 自定义登录页面 自定义一个登陆成功欢迎页面 效果图 小结: 使用 Spring Boot 的快速创建项目功能,勾选上本篇博客需要的功能:web,sec ...
- spring security自定义指南
序 本文主要研究一下几种自定义spring security的方式 主要方式 自定义UserDetailsService 自定义passwordEncoder 自定义filter 自定义Authent ...
- 解决Spring Security自定义filter重复执行问题
今天做项目的时候,发现每次拦截器日志都会打两遍,很纳闷,怀疑是Filter被执行了两遍.结果debug之后发现还真是!记录一下这个神奇的BUG! 问题描述 项目中使用的是Spring-security ...
- Spring Security自定义认证页面(动态网页解决方案+静态网页解决方案)--练气中期圆满
写在前面 上一回我们简单分析了spring security拦截器链的加载流程,我们还有一些简单的问题没有解决.如何自定义登录页面?如何通过数据库获取用户权限信息? 今天主要解决如何配置自定义认证页面 ...
- 02 spring security 自定义用户认证流程
1. 自定义登录页面 (1)首先在static目录下面创建login.html 注意: springboot项目默认可以访问resources/resources, resources/s ...
- Spring Security 自定义登录页面
SpringMVC + Spring Security,自定义登录页面登录验证 学习参考:http://www.mkyong.com/spring-security/spring-security-f ...
- 【JavaEE】SSH+Spring Security自定义Security的部分处理策略
本文建立在 SSH与Spring Security整合 一文的基础上,从这篇文章的example上做修改,或者从 配置了AOP 的example上做修改皆可.这里主要补充我在实际使用Spring Se ...
- springboot学习之授权Spring Security
SpringSecurity核心功能:认证.授权.攻击防护(防止伪造身份) 涉及的依赖如下: <dependency> <groupId>org.springframework ...
随机推荐
- java接口工厂模式理解
作为实际java开发经验还不到一年的我,第一次写博客,诚惶诚恐,怕把自己的谬误公之于众,误人子弟,不过转念一想,若是能有同行加以指点评判,将他们的真知灼见描述出来,那这篇文章就算抛转引玉了. 最近在阅 ...
- stand up meeting 12-14
今日更新: 项目的refactor部分均已经基本完成.答题界面和结果展示界面与code hunters team项目的merge部分也已经完成. 当然在这其中我们也遇到了一个小问题,在背单词模块中的词 ...
- ATcoder E - Flatten 质因子分解求LCM
题解:其实就是求n个数的lcm,由于数据特别大,求lcm时只能用质因子分解的方法来求. 质因子分解求lcm.对n个数每个数都进行质因子分解,然后用一个数组记录某个质因子出现的最大次数.然后累乘pow( ...
- Problem D. Ice Cream Tower
题解:二分加贪心,,,二分答案,然后进行判断,判断的时候,首先给每一组配一个最大的球,然后在向每一组里面填球,注意填球的时候要按组进行,每一组先填一个,然后更新每一组内的最小值,方便下一次寻找. #i ...
- 数据结构与算法--二分搜索(binary search)
前言 之前面试准备秋招,重新翻起了<编程之美>.在第三章节看到了一道关于二分搜索的讨论,觉得有许多细节是自己之前也没怎么特别注意地方,比如二分搜索的初始条件,转化.终止条件之类的. 问题 ...
- 【LeetCode】 99. Recover Binary Search Tree [Hard] [Morris Traversal] [Tree]
Two elements of a binary search tree (BST) are swapped by mistake. Recover the tree without changing ...
- [php] phpStudy+XDebug配置
一.配置前说明: 1.phpStudy集成了XDebug扩展,所以不用单独下载XDebug. 2.打开XDebug扩展:其它选项菜单 > PHP扩展 > Xdebug 二.配置步骤: ph ...
- [PHP] 调用微博API 发微博OAuth2.0
在实际测试中出现很多问题, 第一就是按照文档调用ACCESS_TOKEN的时候费老劲啦,因为是编辑线上的,有好多中文空格,没有看出来!整了好久! 第二个就是在调用api发微博的时候出现乱码!必须把发送 ...
- Springboot:属性常量赋值以及yml配置文件语法(四)
方式一: 注解赋值 构建javaBean:com\springboot\vo\Dog 1:@Component:注册bean到spring容器中 2:添加get set toString方法 3:使用 ...
- 通用Mapper使用
通用Mapper介绍 产生背景 使用Mybatis的开发者大多会因为繁多的XML映射配置而头痛不已