Spring Cloud 快速入门
Spring Cloud快速入门
代码地址:
https://gitee.com/gloryxu/spring-cloud-test
EureKa:服务注册中心
添加依赖
     <dependency>

            <groupId>org.springframework.cloud</groupId>

            <artifactId>spring-cloud-starter-netflix-eureka-server</artifactId>

        </dependency>
开启Eureka Server
@EnableEurekaServer

@SpringBootApplication

public class EurekaApplication {

    public static void main(String[] args) {

        SpringApplication.run(EurekaApplication.class, args);

    }

}
配置
#设置tomcat服务端口号

server.port=

# 本地调试环境下关闭自我保护机制

eureka.server.enable-self-preservation=false

# 清理间隔时间,单位为毫秒

eureka.server.eviction-interval-timer-in-ms=

#设置服务名称

spring.application.name=eureka-service

eureka.instance.hostname=localhost

#注册中心不需要注册自己

eureka.client.register-with-eureka=false

#注册中心不需要去发现服务

eureka.client.fetch-registry=false

#设置服务注册中心的URL

eureka.client.serviceUrl.defaultZone=http://${eureka.instance.hostname}:${server.port}/eureka
启动成功

2.创建一个服务提供者
添加依赖
<dependency>

            <groupId>org.springframework.cloud</groupId>

            <artifactId>spring-cloud-starter-netflix-eureka-client</artifactId>

        </dependency>
@EnableDiscoveryClient // 声明这是一个Eureka Client

@SpringBootApplication

public class Server1Application {

    public static void main(String[] args) {

        SpringApplication.run(Server1Application.class, args);

    }

}
添加配置
server.port=

#设置服务名

spring.application.name=hello-service

#设置服务注册中心的URL,本服务要向该服务注册中心注册自己

eureka.client.serviceUrl.defaultZone=http://localhost:8101/eureka
添加Controller
@RestController

public class HelloController {

    Logger logger = LoggerFactory.getLogger(HelloController.class);

    @RequestMapping("/hello")

    public String hello() {

        return "hello";

    }

}
启动注册成功


3.创建一个消费者
添加依赖
    <dependency>

            <groupId>org.springframework.cloud</groupId>

            <artifactId>spring-cloud-starter-netflix-eureka-client</artifactId>

        </dependency>

        <dependency>

            <groupId>org.springframework.cloud</groupId>

            <artifactId>spring-cloud-starter-openfeign</artifactId>

        </dependency>
LoadBalanced 方式可实现负载均衡
@EnableFeignClients

@EnableDiscoveryClient

@SpringBootApplication

public class ConsumerApplication {

    @Bean

    @LoadBalanced

    public RestTemplate restTemplate() {

        return new RestTemplate();

    }

    public static void main(String[] args) {

        SpringApplication.run(ConsumerApplication.class, args);

    }

}
添加配置
server.port=

spring.application.name=hello-consumer

eureka.client.serviceUrl.defaultZone=http://localhost:8101/eureka/
声明Feign方式 ,value为注册的服务名
@FeignClient(value = "hello-service")

public interface HelloService {

    @RequestMapping(value = "/hello")

    String hello();

}
以下以两种方式调用服务提供者,一种是以Rest方式,另一种以Feign方式
@RestController
public class ConsumerController { Logger logger = LoggerFactory.getLogger(ConsumerController.class); @Autowired
private RestTemplate restTemplate;
@Autowired
HelloService helloService; @GetMapping("/getserver")
public String getserver() {
String xx=restTemplate.getForObject("http://hello-service/hello", String.class);
return "consumer finish result:"+xx;
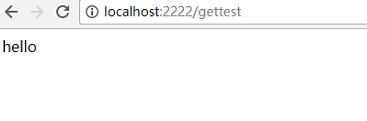
} @GetMapping("/gettest")
public String gettest(){
return helloService.hello();
}
}
启动


4.创建Zuul路由
添加依赖
<dependency>

            <groupId>org.springframework.cloud</groupId>

            <artifactId>spring-cloud-starter-netflix-eureka-client</artifactId>

        </dependency>

        <dependency>

            <groupId>org.springframework.cloud</groupId>

            <artifactId>spring-cloud-starter-netflix-zuul</artifactId>

        </dependency>
加入注解,以便注册到注册中心
@EnableZuulProxy

@SpringBootApplication

public class ZuulApplication {

    public static void main(String[] args) {

        SpringApplication.run(ZuulApplication.class, args);

    }

}
配置路由,以下是以服务的方式调用
spring.application.name=eureka-zuul

server.port=

zuul.routes.hello-service.path=/hello-service/**

zuul.routes.hello-service.serviceId=hello-service

eureka.client.serviceUrl.defaultZone=http://localhost:8101/eureka/
启动 注册成功,调用成功


Spring Cloud 快速入门的更多相关文章
- spring boot入门教程——Spring Boot快速入门指南
Spring Boot已成为当今最流行的微服务开发框架,本文是如何使用Spring Boot快速开始Web微服务开发的指南,我们将使创建一个可运行的包含内嵌Web容器(默认使用的是Tomcat)的可运 ...
- Spring Boot 快速入门
Spring Boot 快速入门 http://blog.csdn.net/xiaoyu411502/article/details/47864969 今天给大家介绍一下Spring Boot MVC ...
- Spring Boot快速入门(二):http请求
原文地址:https://lierabbit.cn/articles/4 一.准备 postman:一个接口测试工具 创建一个新工程 选择web 不会的请看Spring Boot快速入门(一):Hel ...
- Spring Cloud Gateway入门
1.什么是Spring Cloud GatewaySpring Cloud Gateway是Spring官方基于Spring 5.0,Spring Boot 2.0和Project Reactor等技 ...
- Spring Cloud Alibaba入门实战之nacos(一)
Spring Cloud Alibaba入门实战之nacos(一) 前情介绍 Spring Cloud Alibaba 是阿里巴巴提供的新一代的微服务解决方案,相信会有越来越多采用微服务架构的公司 ...
- Spring Cloud 从入门到精通
Spring Cloud 是一套完整的微服务解决方案,基于 Spring Boot 框架,准确的说,它不是一个框架,而是一个大的容器,它将市面上较好的微服务框架集成进来,从而简化了开发者的代码量. 本 ...
- 主流微服务一站式解决方案Spring Cloud Alibaba入门看这篇就足够了
学习路线 **本人博客网站 **IT小神 www.itxiaoshen.com 生态概述 架构演进 什么是微服务 https://martinfowler.com/microservices/ Mic ...
- Spring Cloud Ribbon入门
一.简介 Spring Cloud Ribbon是一个基于Http和TCP的客户端负载均衡工具,它是基于Netflix Ribbon实现的.它不像服务注册中心.配置中心.API网关那样独立部署,但是它 ...
- Spring Boot 快速入门 史上最简单
1.Spring Boot 概述 Spring Boot 是所有基于 Spring 开发的项目的起点.Spring Boot 的设计是为了让你尽可能快的跑起来 Spring 应用程序并且尽可能减少你的 ...
随机推荐
- 洛谷P5289 [十二省联考2019]皮配(01背包)
啊啊啊边界判错了搞死我了QAQ 这题是一个想起来很休闲写起来很恶心的背包 对于\(k=0\)的情况,可以发现选阵营和选派系是独立的,对选城市选阵营和学校选派系分别跑一遍01背包就行了 对于\(k> ...
- Day053--MySQL
MySQL安装和基本管理https://www.cnblogs.com/majj/p/9160383.html 管理员模式运行cmd 打开终端,输入mysqld,打开服务端. 打开终端,输入mysql ...
- Linux Centos7.x下安装部署VNC的实操详述
VNC (Virtual Network Console)是虚拟网络控制台的缩写.它 是一款优秀的远程控制工具软件,由著名的AT&T的欧洲研究实验室开发的.VNC 是在基于 UNIX和 Lin ...
- python之路(10)类的内置函数
目录 isinstance()和issubclass() __setitem__.__getitem__和__delitem__ __str__和__reper__ __format__ __slot ...
- 前端面试题整理—Node篇
1.node有哪些特征,与其他服务器端对比 特征:单线程.事件驱动.非阻塞I/O node 无法直接渲染静态页面,提供静态服务 node 没有根目录的概念 node 必须通过路由程序指定文件才能渲染文 ...
- 第二章,循环结构,输入输出,clock
计时 计时函数: clock() 返回目前为止运行的时间 注意要除以常数 CLOCKS_PER_SEC, 才能得到以秒为单位. 头文件 time.h 管道 在windows命令行下执行echo 20| ...
- opencv中imgshow图像显示为灰色
1.图像数据类型是否正确 2.图像是否存在 3.在imgshow()语句下添加watkey();
- 【C#第一天】数据相关
程序的基本任务:对数据进行处理. 数据分为常量和变量. 变量本质上是内存的空间,用来存储信息. 数据类型:本质上是数据的存储方式及其能参与运算的抽象. 数据类型分两大类:值类型(Value Type) ...
- Codeforces Round #542 (Div. 1) 题解
开学了住校了打不了深夜场 好难受啊QwQ A 显然对于每个起点,我们只需要贪心记录这个起点出发出去的糖果数量以及离自己最近的糖果 因为这个起点最后一次装载糖果一定是装载终点离自己最近的那个糖果 $ O ...
- web前端效率提升之浏览器与本地文件的映射-遁地龙卷风
1.chrome浏览器,机制是拦截url, 1.在浏览器Element中调节的css样式可以直接同步到本地文件,反之亦然,浏览器会重新加载css,省去刷新 2.在source面板下对js的编辑可以同步 ...