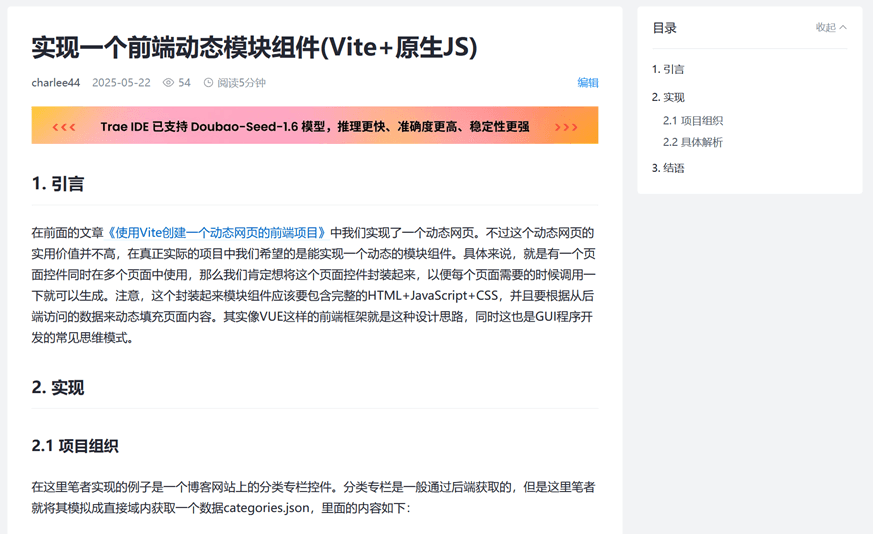
给Markdown渲染网页增加一个目录组件(Vite+Vditor+Handlebars)(上)
1 引言
在上一篇文章《解决Vditor加载Markdown网页很慢的问题(Vite+JS+Vditor)》中,我们通过设置域内CDN的方式解决Vditor加载Markdown网页很慢的问题。而在这篇文章中,笔者将会开发实现一个前端中很常见的需求:给基于Markdown渲染的文档网页增加一个目录组件。
需要说明的是,原生的Markdown标准并没有规定生成目录的写法,但是国内的博文网站似乎都支持一个拓展来实现目录的生成:
[toc]
但是这样生成的目录是通常是位于文章页面的最上方,这样就失去了目录的意义。比较好的实现是像CSDN或者掘金一样,额外生成一个目录组件,并且固定在侧栏上方。这样可以在浏览文章的时候,随时定位所在的目录;同时还可以使用目录来导航。
阅读本文可能需要的前置文章:
2 详叙
2.1 整体结构
将渲染Markdown文档的部分封装成单独的组件(post-article.js、post-article.handlebars和post-article.css),增加一个文章目录组件(post-toc.js、post-toc.handlebars、post-toc.css)。另外post-data.json是我们提前准备的博客文章,里面除了保存有Markdown格式的文档字符串,还有一些文章的相关数据;1.png和2.png则是文章中图片。项目组织结构如下:
my-native-js-app/
├── public/
│ ├── 1.png
│ ├── 2.png
│ └── post-data.json
├── src/
│ ├── components/
│ │ ├── post-article.css
│ │ ├── post-article.handlebars
│ │ ├── post-article.js
│ │ ├── post-toc.css
│ │ ├── post-toc.handlebars
│ │ └── post-toc.js
│ ├── main.js
│ └── style.css
├── index.html
└── package.json
还是按照代码的执行顺序来介绍这个功能的实现。首先还是index.html:
<!DOCTYPE html>

<html lang="en">

<head>

  <meta charset="UTF-8" />

  <link rel="icon" type="image/svg+xml" href="/vite.svg" />

  <meta name="viewport" content="width=device-width, initial-scale=1.0" />

  <title>Vite App</title>

</head>

<body>

  <div id="app">

    <div id="post-article-placeholder"></div>

    <div id="article-toc-placeholder"></div>

  </div>

  <script type="module" src="/src/main.js"></script>

</body>

</html>
主要就是增加了post-article-placeholder和article-toc-placeholder这两个元素,分别作为Markdown博文和博文目录的容器。其实这里面还有个页面布局的问题,不过这个问题我们下一篇文章再说。这里还是先看main.js:
import "./style.css";

import "./components/post-article.js";
2.2 博文内容组件
引用了post-article.js,也就是Markdown博文内容组件。那么就进入post-article.js:
import "./post-article.css";

import { CreateTocPanel } from "./post-toc.js";

import Handlebars from "handlebars";

import templateSource from "./post-article.handlebars?raw";

import "vditor/dist/index.css";

import Vditor from "vditor";

// 初始化文章标签面板

async function InitializePostArticlePanel() {

  try {

    const response = await fetch("/post-data.json");

    if (!response.ok) {

      throw new Error("网络无响应");

    }

    const blogData = await response.json();

    // 编译模板

    const template = Handlebars.compile(templateSource);

    // 渲染模板

    const renderedHtml = template({

      blogMeta: blogData.blogMeta,

    });

    // 将渲染好的HTML插入到页面中

    document.getElementById("post-article-placeholder").innerHTML =

      renderedHtml;

    // 显示内容

    Vditor.preview(document.getElementById("post-content"), blogData.content, {

      cdn: window.location.origin,

      markdown: {

        toc: false,

        mark: true, //==高亮显示==

        footnotes: true, //脚注

        autoSpace: true, //自动空格,适合中英文混合排版

      },

      math: {

        engine: "KaTeX", //支持latex公式

        inlineDigit: true, //内联公式可以接数字

      },

      hljs: {

        style: "github", //代码段样式

        lineNumber: true, //是否显示行号

      },

      anchor: 2, // 为标题添加锚点 0:不渲染;1:渲染于标题前;2:渲染于标题后

      lang: "zh_CN", //中文

      theme: {

        current: "light", //light,dark,light,wechat

      },

      lazyLoadImage:

        "https://cdn.jsdelivr.net/npm/vditor/dist/images/img-loading.svg",

      transform: (html) => {

        // 使用正则表达式替换图片路径,并添加居中样式及题注

        return html.replace(

          /<img\s+[^>]*src="\.\/([^"]+)\.([a-zA-Z0-9]+)"\s*alt="([^"]*)"[^>]*>/g,

          (match, p1, p2, altText) => {

            // const newSrc = `${backendUrl}/blogs/resources/images/${postId}/${p1}.${p2}`;

            const newSrc = `${p1}.${p2}`;

            const imgWithCaption = `

                    <div style="text-align: center;">

                        <img src="${newSrc}" class="center-image" alt="${altText}">

                        <p class="caption">${altText}</p>

                    </div>

                    `;

            return imgWithCaption;

          }

        );

      },

      after() {

        CreateTocPanel();

      },

    });

  } catch (error) {

    console.error("获取博客失败:", error);

  }

}

document.addEventListener("DOMContentLoaded", InitializePostArticlePanel);
post-article.js中的内容改进自《通过JS模板引擎实现动态模块组件(Vite+JS+Handlebars)》中的案例,不过略有不同。首先是获取博文数据:
const response = await fetch("/post-data.json");

if (!response.ok) {

    throw new Error("网络无响应");

}

const blogData = await response.json();

// 编译模板

const template = Handlebars.compile(templateSource);

// 渲染模板

const renderedHtml = template({

    blogMeta: blogData.blogMeta,

});

// 将渲染好的HTML插入到页面中

document.getElementById("post-article-placeholder").innerHTML =

    renderedHtml;
在实际项目开发中,应该是从远端API获取数据,这里进行了简化,将数据提前准备好了放置在域内。然后,将这个数据与编译的Handlebars模板一起渲染成HTML元素。从下面的post-article.handlebars中可以看到,博文组件中内容不仅包含Markdown博文内容元素,还有诸如时间、统计信息、标签等元素:
<div id="main-content">

    <h1 id="post-title">{{blogMeta.title}}</h1>

    <div class="post-stats">

        <span class = "post-stat">

            <span></span><span class = "text">已于</span>{{blogMeta.createdTime}}<span class = "text">修改</span>

        </span>

        <span class = "post-stat">

            <span>️</span>{{blogMeta.postStats.viewCount}}<span class = "text">阅读</span>

        </span>

        <span class = "post-stat">

            <span></span>{{blogMeta.postStats.likeCount}}<span class = "text">点赞</span>

        </span>

        <span class = "post-stat">

            <span></span>{{blogMeta.postStats.commentCount}}<span class = "text">评论</span>

        </span>

    </div>

    <div class="post-tags">

        <span class = "tags-title">

            <span></span><span class = "text">文章标签</span>

        </span>

        {{#each blogMeta.tagNames}}

        <span class = "post-tag">{{this}}</span>

        {{/each}}

    </div>

    <div class="post-categories">

        专栏

        {{#each blogMeta.categoryNames}}

        <span> {{this}} </span>

        {{/each}}

        收录该内容

    </div>

    <div id="post-content"></div>

</div>
Markdown博文内容元素是使用Vditor来渲染初始化的,这一点与之前的案例一样。不同的是增加了一个after配置:
import { CreateTocPanel } from "./post-toc.js";

//...

after() {

    CreateTocPanel();

},
这个after配置的意思是当Vditor渲染完成以后,就立刻执行CreateTocPanel()函数,这个函数来自于博文目录组件post-toc.js,表示要开始创建博文目录了。
2.2 博文目录组件
post-toc.js中的代码如下所示:
import "./post-toc.css";

import Handlebars from "handlebars";

import templateSource from "./post-toc.handlebars?raw";

export function CreateTocPanel() {

  const headings = document.querySelectorAll(

    "#post-content h1, #post-content h2, #post-content h3"

  );

  const tocContent = [];

  headings.forEach((heading, index) => {

    const content = {};

    content["id"] = heading.id;

    content["title"] = heading.textContent;

    const marginLeft =

      heading.tagName === "H2" ? 20 : heading.tagName === "H3" ? 40 : 0;

    content["marginLeft"] = marginLeft;

    tocContent.push(content);

  });

  // 编译模板

  const template = Handlebars.compile(templateSource);

  // 渲染模板

  const renderedHtml = template({

    tocContent,

  });

  // 将渲染好的HTML插入到页面中

  const articleTocPlaceholder = document.getElementById(

    "article-toc-placeholder"

  );

  articleTocPlaceholder.innerHTML = renderedHtml;

  // 联动:滚动时同步激活目录项

  window.addEventListener("scroll", () => {

    let activeHeading;

    headings.forEach((heading) => {

      const rect = heading.getBoundingClientRect();

      if (rect.top >= 0 && rect.top <= window.innerHeight / 2) {

        activeHeading = heading;

      }

    });

    if (activeHeading) {

      document

        .querySelectorAll(".toc-sidebar .toc a")

        .forEach((link) => link.classList.remove("active"));

      const escapedId = CSS.escape(activeHeading.id); //安全地转义选择器中的特殊字符

      const activeLink = document.querySelector(

        `.toc-sidebar .toc a[href="#${escapedId}"]`

      );

      if (activeLink) activeLink.classList.add("active");

    }

  });

}
这段代码是实现博文目录功能的关键代码。首先,搜索查询渲染成HTML形式的博文内容中的标题元素h1、h2和h3:
const headings = document.querySelectorAll(

    "#post-content h1, #post-content h2, #post-content h3"

  );
然后提取出关键数据:
const tocContent = [];

  headings.forEach((heading, index) => {

    const content = {};

    content["id"] = heading.id;

    content["title"] = heading.textContent;

    const marginLeft =

      heading.tagName === "H2" ? 20 : heading.tagName === "H3" ? 40 : 0;

    content["marginLeft"] = marginLeft;

    tocContent.push(content);

  });
将其传入Handlebars模板进行渲染:
// 编译模板

  const template = Handlebars.compile(templateSource);

  // 渲染模板

  const renderedHtml = template({

    tocContent,

  });

  // 将渲染好的HTML插入到页面中

  const articleTocPlaceholder = document.getElementById(

    "article-toc-placeholder"

  );

  articleTocPlaceholder.innerHTML = renderedHtml;
模板post-toc.handlebars中的内容非常简单:
<div class="toc-sidebar">

    <div class="toc">

        <h3>文章目录</h3>

        <ul>

            {{#each tocContent}}

            <li style="margin-left: {{marginLeft}}px;">

                <a href="#{{id}}" class="">

                    {{title}}

                </a>

            </li>

            {{/each}}

        </ul>

    </div>

</div>
可以看到这里能够获取一级、二级还有三级标题,通过样式的缩进(margin-left)来体现标题的不同。另外,href属性的设置也保证了能通过点击来实现跳转。
最后实现联动,通过文章标题元素范围的判定,来高亮目录中标题元素的样式,让用户直到浏览到博文中的哪一段了:
// 联动:滚动时同步激活目录项

  window.addEventListener("scroll", () => {

    let activeHeading;

    headings.forEach((heading) => {

      const rect = heading.getBoundingClientRect();

      if (rect.top >= 0 && rect.top <= window.innerHeight / 2) {

        activeHeading = heading;

      }

    });

    if (activeHeading) {

      document

        .querySelectorAll(".toc-sidebar .toc a")

        .forEach((link) => link.classList.remove("active"));

      const escapedId = CSS.escape(activeHeading.id); //安全地转义选择器中的特殊字符

      const activeLink = document.querySelector(

        `.toc-sidebar .toc a[href="#${escapedId}"]`

      );

      if (activeLink) activeLink.classList.add("active");

    }

  });
3 结语
最终实现的效果如下图所示:
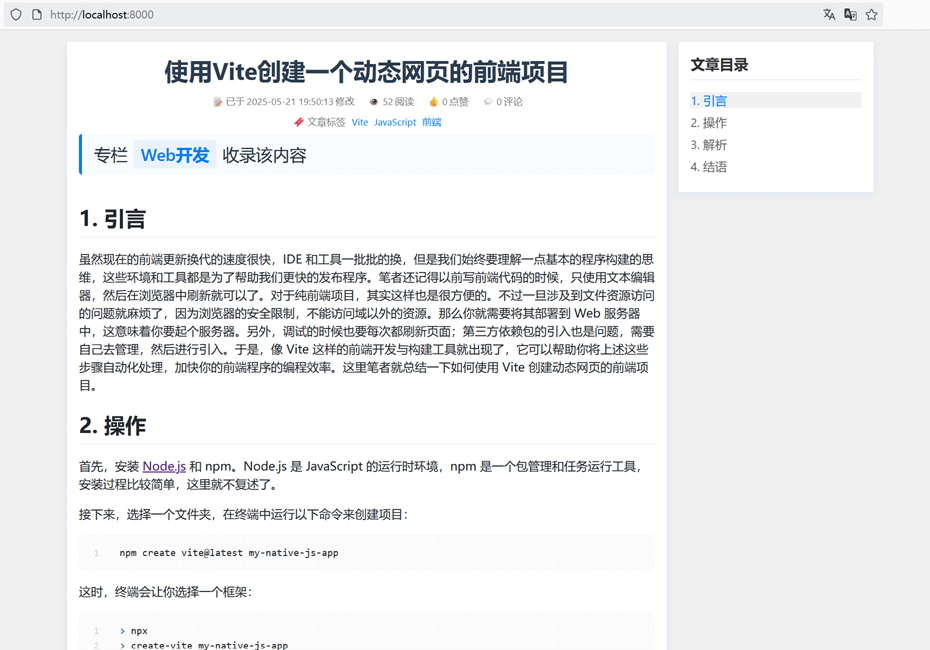
虽然功能大致实现了,不过还有一些问题没有说清楚,比如在浏览文章的过程中,博文目录是如何始终保证黏在页面的右上角的?这个问题就放在下篇中继续论述了。
给Markdown渲染网页增加一个目录组件(Vite+Vditor+Handlebars)(上)的更多相关文章
- 在/proc文件系统中增加一个目录hello,并在这个目录中增加一个文件world,文件的内容为hello world
一.题目 编写一个内核模块,在/proc文件系统中增加一个目录hello,并在这个目录中增加一个文件world,文件的内容为hello world.内核版本要求2.6.18 二.实验环境 物理主机:w ...
- Vertica增加一个数据存储的目录
Vertica增加一个数据存储的目录 操作语法为: ADD_LOCATION ( 'path' , [ 'node' , 'usage', 'location_label' ] ) 各节点添加目录,并 ...
- echarts之简单的入门——【二】再增加一个柱状图和图例组件
echarts之简单的入门——[一]做个带时间轴的柱状统计图 现在需求说,我需要知道日答题总次数和活跃人数,那么我们如何在上面的图表中增加一个柱状图呢? 如果你看过简单入门中的配置项手册中series ...
- CAD在网页中增加一个射线
主要用到函数说明: IMxDrawBlockTableRecord::AddRay 向记录中增加一个射线,详细说明如下: 参数 说明 point1 射线上的点1 point2 射线上的点2 js代码实 ...
- CAD增加一个有形的线型(网页版)
主要用到函数说明: _DMxDrawX::AddTextStyle1 向数据库中增加一个文字样式.详细说明如下: 参数 说明 BSTR pszName 文字样式名称 BSTR pszFileName ...
- 【万字长文】从零配置一个vue组件库
简介 本文会从零开始配置一个monorepo类型的组件库,包括规范化配置.打包配置.组件库文档配置及开发一些提升效率的脚本等,monorepo 不熟悉的话这里一句话介绍一下,就是在一个git仓库里包含 ...
- 基于.NetCore开发博客项目 StarBlog - (19) Markdown渲染方案探索
前言 笔者认为,一个博客网站,最核心的是阅读体验. 在开发StarBlog的过程中,最耗时的恰恰也是文章的展示部分功能. 最开始还没研究出来如何很好的使用后端渲染,所以只能先用Editor.md组件做 ...
- 发布自己第一个npm 组件包(基于Vue的文字跑马灯组件)
一.前言 总结下最近工作上在移动端实现的一个跑马灯效果,最终效果如下: 印象中好像HTML标签的'marquee'的直接可以实现这个效果,不过 HTML标准中已经废弃了'marquee'标签 既然HT ...
- Laravel 项目中编写第一个 Vue 组件
和 CSS 框架一样,Laravel 不强制你使用什么 JavaScript 客户端框架,但是开箱对 Vue.js 提供了良好的支持,如果你更熟悉 React 的话,也可以将默认的脚手架代码替换成 R ...
- iOS开发中的Markdown渲染
iOS开发中的Markdown渲染 BearyChat的消息是全面支持Markdown语法的,所以在开发BearyChat的iOS客户端的时候需要处理Markdown的渲染. 主要是两套实现方案: 直 ...
随机推荐
- centos 防火墙配置,并限制端口
查看防火墙状态 systemctl status firewalld 如果防火墙处于停止状态,则启动它: systemctl start firewalld 并设置防火墙开机自启: systemctl ...
- golang 使用goto进行多错误处理
goto 语句介绍 在 Go 语言中,可以通过goto语句跳转到标签,进行代码间的无条件跳转.另外,goto语句在快速跳出循环.避免重复退出方面可以简化代码实现过程,但在结构化程序设计中一般不主张使用 ...
- GitFlow ⼯作流
前言 Git 是一个开源分布式版本控制系统,它可以很方便的帮我们记录文件的改动,就像下面一样: 我们可以很快的跳到文件改动的某一个版本(就像时空穿梭一样). Git 在程序开发中,作为一个源码管理系统 ...
- jquery的radio的change事件
一.用的jquery的radio的change事件:当元素的值发生改变时,会发生 change 事件,radio选择不同name值选项的时候恰巧是值发生改变 表单单选框 <input type= ...
- PHP Fatal error: Uncaught RedisException: Redis server went away in
PHP Fatal error: Uncaught RedisException: Redis server went away in 导致这个问题的原因可能有 1.redis未安装,php没有开启r ...
- 关于IPMP
国际项目经理资质认证(International Project Manager Professional,简称IPMP)是国际项目管理协会(International Project Managem ...
- BUUCTF---还原大师(MD5)
1.题目 我们得到了一串神秘字符串:TASC?O3RJMV?WDJKX?ZM,问号部分是未知大写字母,为了确定这个神秘字符串,我们通过了其他途径获得了这个字串的32位MD5码.但是我们获得它的32位M ...
- [每日算法 - 华为机试] leetcode20 :有效的括号 「栈」
入口 力扣https://leetcode.cn/problems/valid-parentheses/submissions/ 题目描述 给定一个只包括 '(',')','{','}','[','] ...
- 【JVM之内存与垃圾回收篇】垃圾回收相关概念
垃圾回收相关概念 System.gc() 的理解 在默认情况下,通过 System.gc() 或者 Runtime.getRuntime().gc() 的调用,会显式触发 FullGC,同时对新生代. ...
- RESTful的连接时间超时时间设定
dsResrful的连接方式时,如何设定timeout呢? DSRestConnection.HTTP.ConnectTimeout := 5000; 就这么简单.因为封装的indy的TidHTTP. ...