
Android:Fragment
Fragment 概念
把 Activity 中的一段 UI 和逻辑封装到一个 Fragment 中,实现可拔插,减少对 Activity 代码的侵入。
Fragment 定义和管理自己的布局,具有自己的生命周期,并且可以处理自己的输入事件。Fragment 不能独立存在,而是必须由 Activity 或另一个 Fragment 托管。
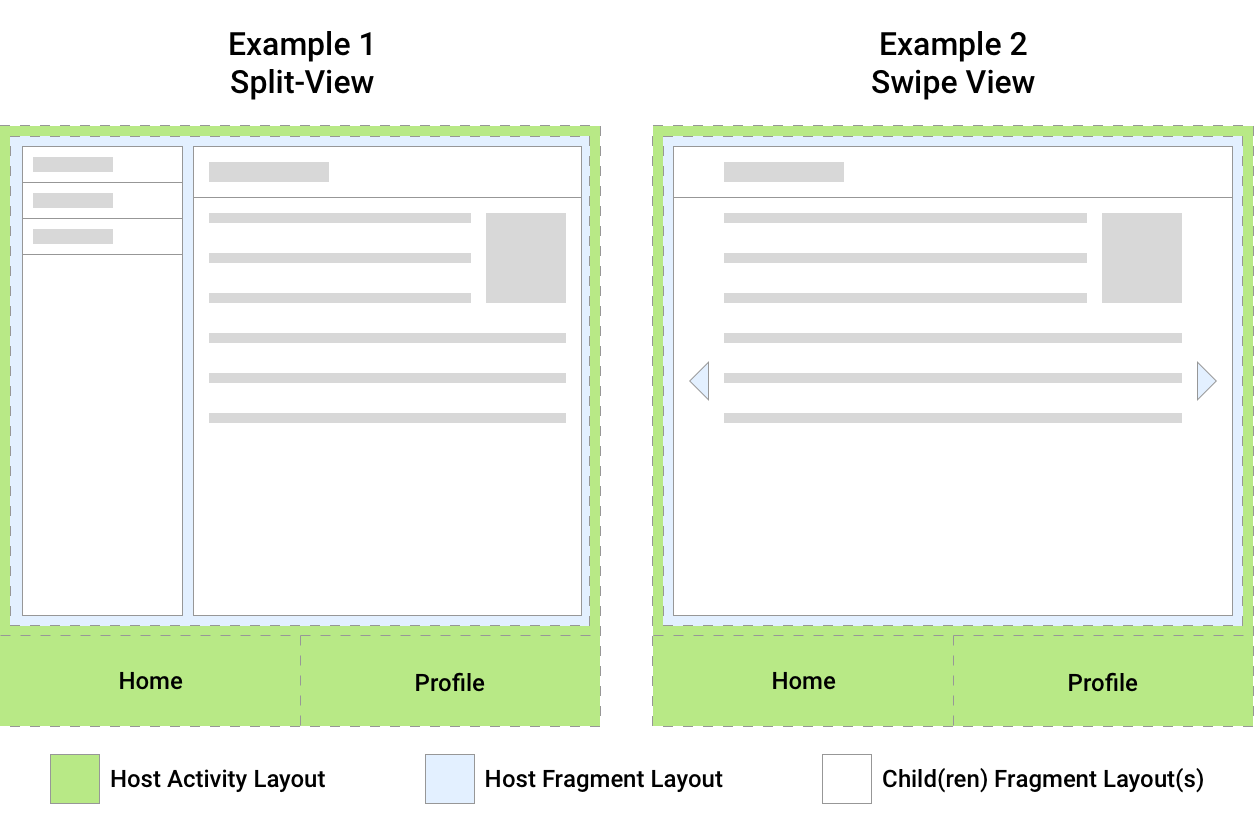
图中 Example1,一共有三个 Fragment,蓝色的 Fragment 嵌套了两个子 Fragment。Example2 是一个 swipe 视图,蓝色的 Fragment 有两个以上的 Fragment。
Fragment 应该管理它自己的界面所需的逻辑,避免让一个 Fragment 依赖于另一个 Fragment 或从一个 Fragment 操控另一个 Fragment。
- 模块:可以在同一 Activity 或多个 Activity 中使用同一 Fragment;或者把一个 Activity 划分为多个 Fragment 进行布局。
- 嵌套:Fragment 可以作为另一个 Fragment 的父级。
创建 Fragment
FragmentContainerView
创建一个 Fragment XML 视图 fragment_index.xml:
<?xml version="1.0" encoding="utf-8"?>

<FrameLayout xmlns:android="http://schemas.android.com/apk/res/android"

  android:layout_width="match_parent"

  android:layout_height="match_parent">

  <TextView

    android:layout_width="match_parent"

    android:layout_height="wrap_content"

    android:text="Index Fragment"

    android:textSize="30sp" />

</FrameLayout>
创建一个 Fragment 实现类,IndexFragment:
class IndexFragment : Fragment(R.layout.fragment_index) {

}
在 activity_main.xml 添加一个 FragmentContainerView:
<?xml version="1.0" encoding="utf-8"?>

<androidx.constraintlayout.widget.ConstraintLayout xmlns:android="http://schemas.android.com/apk/res/android"

  xmlns:app="http://schemas.android.com/apk/res-auto"

  xmlns:tools="http://schemas.android.com/tools"

  android:layout_width="match_parent"

  android:layout_height="match_parent"

  android:background="#FFC107"

  tools:context=".MainActivity">

  <androidx.fragment.app.FragmentContainerView

    android:id="@+id/fragment_container_view"

    android:name="com.example.chap04.IndexFragment"

    android:layout_width="match_parent"

    android:layout_height="200dp"

    android:layout_marginBottom="531dp"

    android:background="#009688"

    app:layout_constraintBottom_toBottomOf="parent"

    app:layout_constraintEnd_toEndOf="parent"

    app:layout_constraintStart_toStartOf="parent"

    app:layout_constraintTop_toTopOf="parent" />

</androidx.constraintlayout.widget.ConstraintLayout>
属性 name 添加 IndexFragment,启动 Activity 时会把 fragment_index.xml 视图插入到 FragmentContainerView 中。
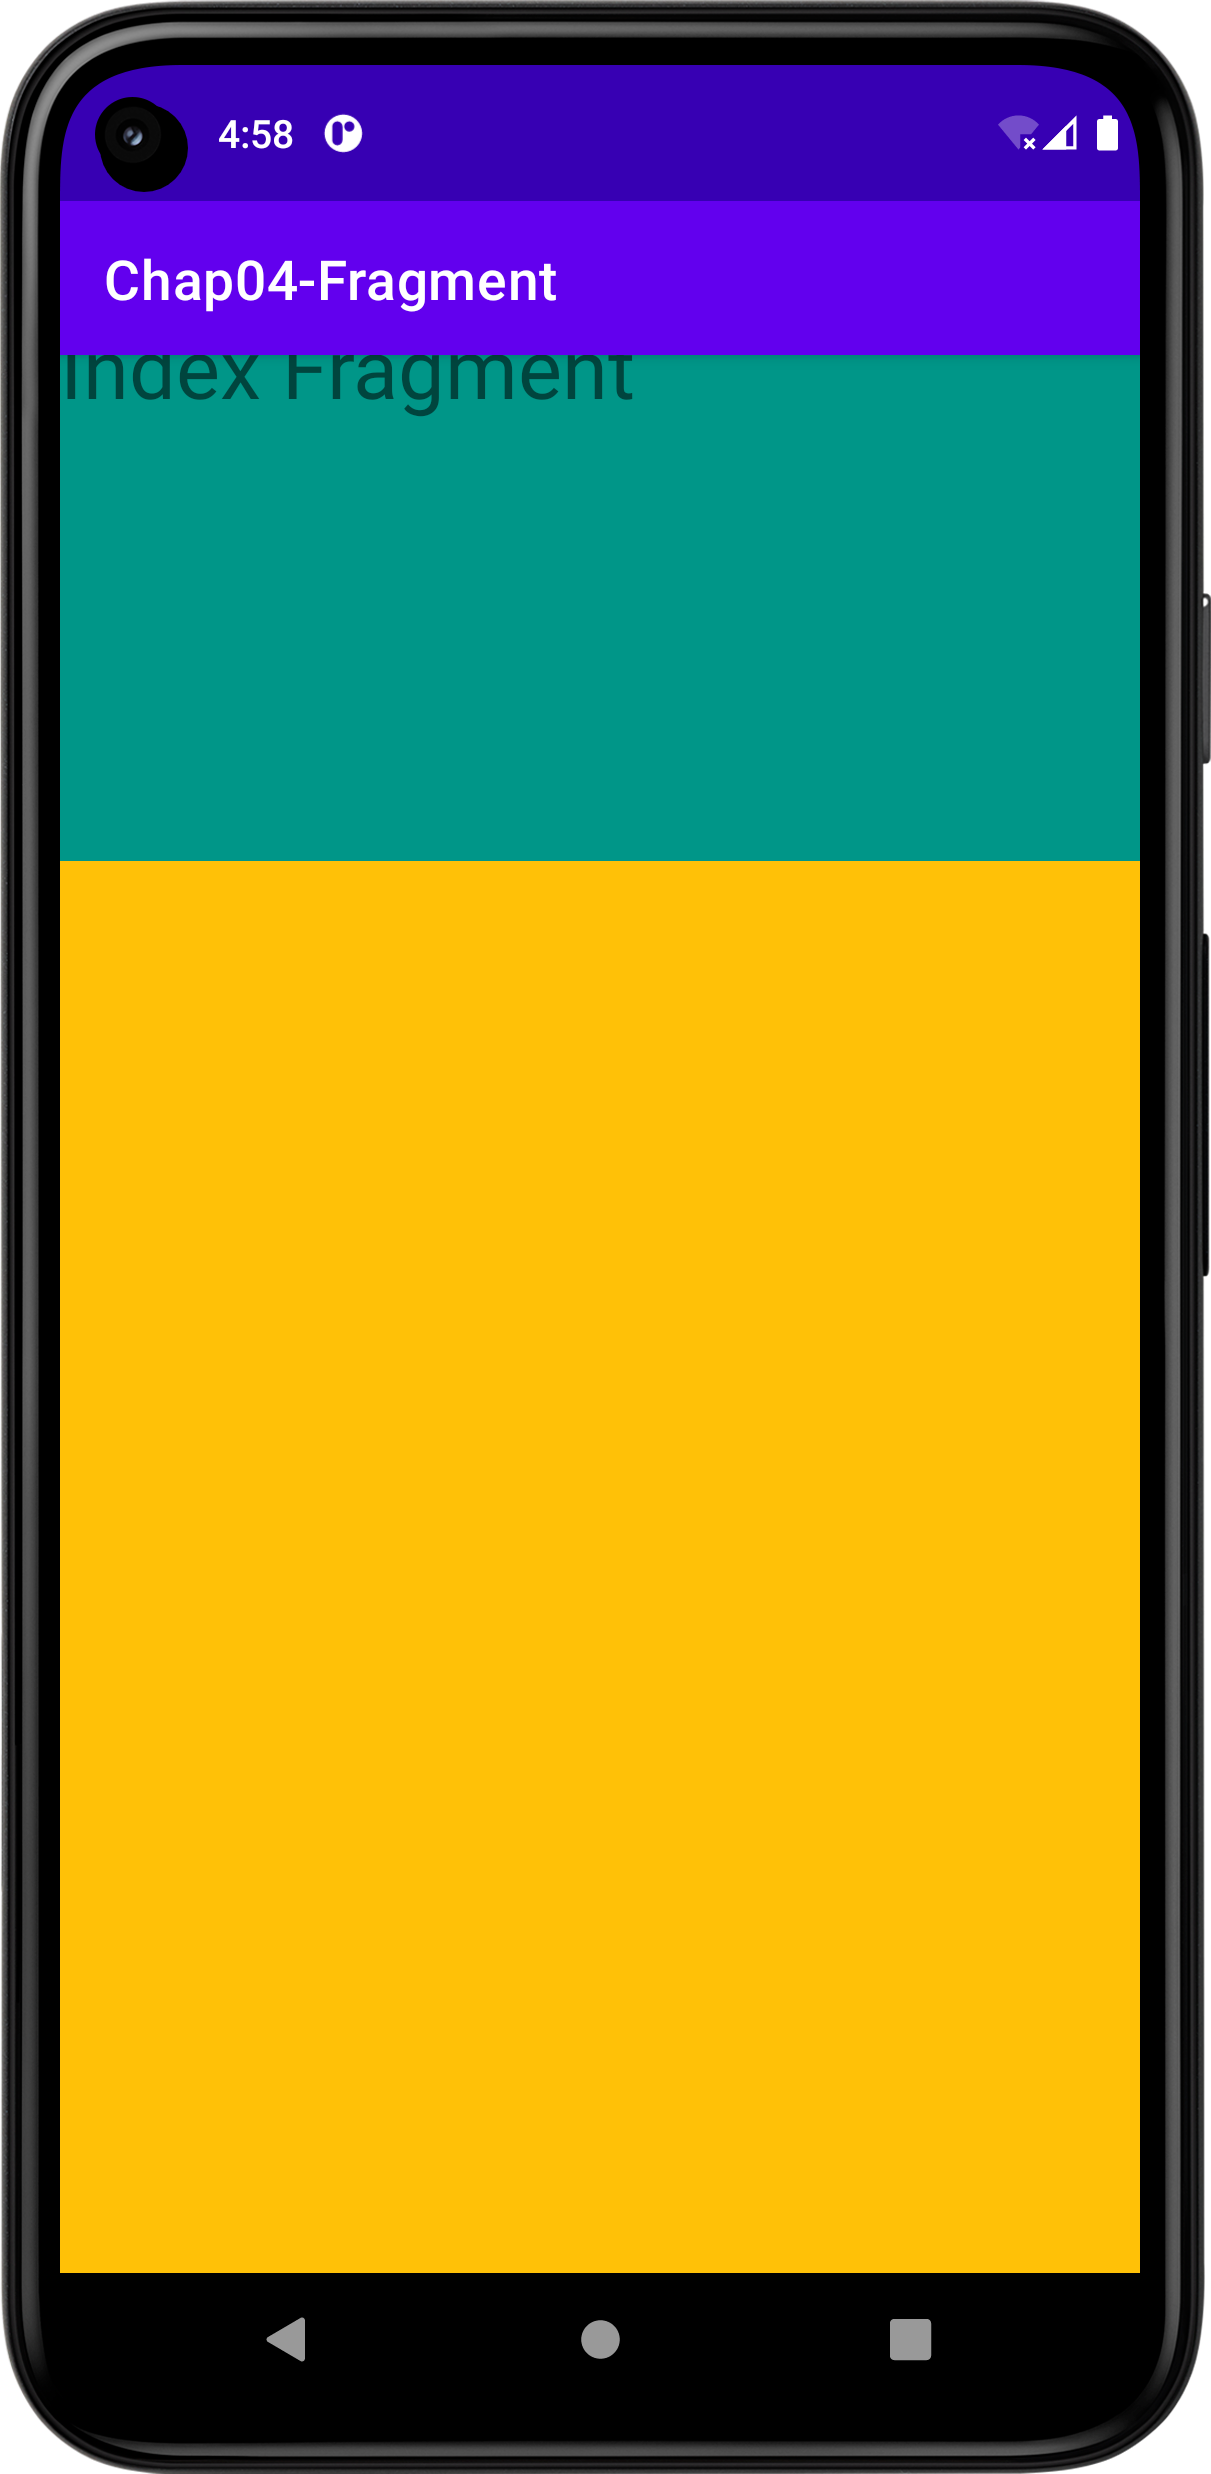
通过上图得知,绿色区域是 IndexFragment,橙色区域是 Activity,我们通过 Fragment 实现了划分 Activity 布局的管理,接下来将通过 Kotlin 代码实现对 Fragment 的替换、删除、增加操作,进一步了解 Fragment。
FragmentManager
FragmentManager 可以替换、删除、增加 Fragment。在 activity_main.xml 中,删除 FragmentContainerView 的 name 属性,而是通过 FragmentManager 把 Fragment 的视图插入到 Activity 中:
<?xml version="1.0" encoding="utf-8"?>

<androidx.constraintlayout.widget.ConstraintLayout xmlns:android="http://schemas.android.com/apk/res/android"

  xmlns:app="http://schemas.android.com/apk/res-auto"

  xmlns:tools="http://schemas.android.com/tools"

  android:layout_width="match_parent"

  android:layout_height="match_parent"

  android:background="#FFC107"

  tools:context=".MainActivity">

  <androidx.fragment.app.FragmentContainerView

    android:id="@+id/fragment_container_view"

    android:layout_width="match_parent"

    android:layout_height="200dp"

    android:layout_marginBottom="531dp"

    android:background="#009688"

    app:layout_constraintBottom_toBottomOf="parent"

    app:layout_constraintEnd_toEndOf="parent"

    app:layout_constraintStart_toStartOf="parent"

    app:layout_constraintTop_toTopOf="parent" />

</androidx.constraintlayout.widget.ConstraintLayout>
你需要获取 FragmentManager,并调用 beginTransaction() 得到 FragmentTransaction。调用 add() 添加 Fragment 到指定 View 中,这里是资源 ID 为 fragment_container_view 的 View(也就是 FragmentContainerView)。最后,调用 commit() 提交 FragmentTransaction。
class MainActivity : AppCompatActivity(R.layout.activity_main) {

  override fun onCreate(savedInstanceState: Bundle?) {

    super.onCreate(savedInstanceState)

    supportFragmentManager

      .beginTransaction()

      .setReorderingAllowed(true)

      .add(R.id.fragment_container_view, IndexFragment(), null)

      .commit()

  }

}
当 FragmentManager 执行 FragmentTransaction 时,特别是堆栈上运行并运行动画和转换时(Fragment 切换其他 Fragment 时执行的动画效果),应该总是使用 setReorderingAllowed(true)。调用这个方法可确保如果同时执行多个 FragmentTransaction 时,任何一个 Fragment 都不会经历生命周期更改或执行其动画或转换。了解更多关于 setReorderingAllowed 的信息,请看官方文档的 Fragment Transaction。简而言之,调用这个函数可以提升性能,避免过多更改堆栈上其他 Fragment 的生命周期。
Bundle 传递数据
Fragment 可以接收从 Activity 传递过来的 Bundle 类型数据。在 add() 方法被调用时传入参数,Fragment 通过 requireArguments() 就可以获取到。
MainActivity.kt:
class MainActivity : AppCompatActivity(R.layout.activity_main) {

  override fun onCreate(savedInstanceState: Bundle?) {

    super.onCreate(savedInstanceState)

    if (savedInstanceState == null) {

      val bundle = Bundle()

      bundle.putInt("param", 20);

      supportFragmentManager

        .beginTransaction()

        .setReorderingAllowed(true)

        .add(R.id.fragment_container_view, IndexFragment().javaClass, bundle, null)

        .commit()

    }

  }

}
IndexFragment.kt:
class IndexFragment : Fragment(R.layout.fragment_index) {

  override fun onViewCreated(view: View, savedInstanceState: Bundle?) {

    val int = requireArguments().getInt("param")

    Log.d("Test", int.toString())

  }

}
接下来对if (savedInstanceState == null)进行一个解释。直接通过现象来观察一个问题:
1️⃣去掉这一个判断,来看看会发生什么:
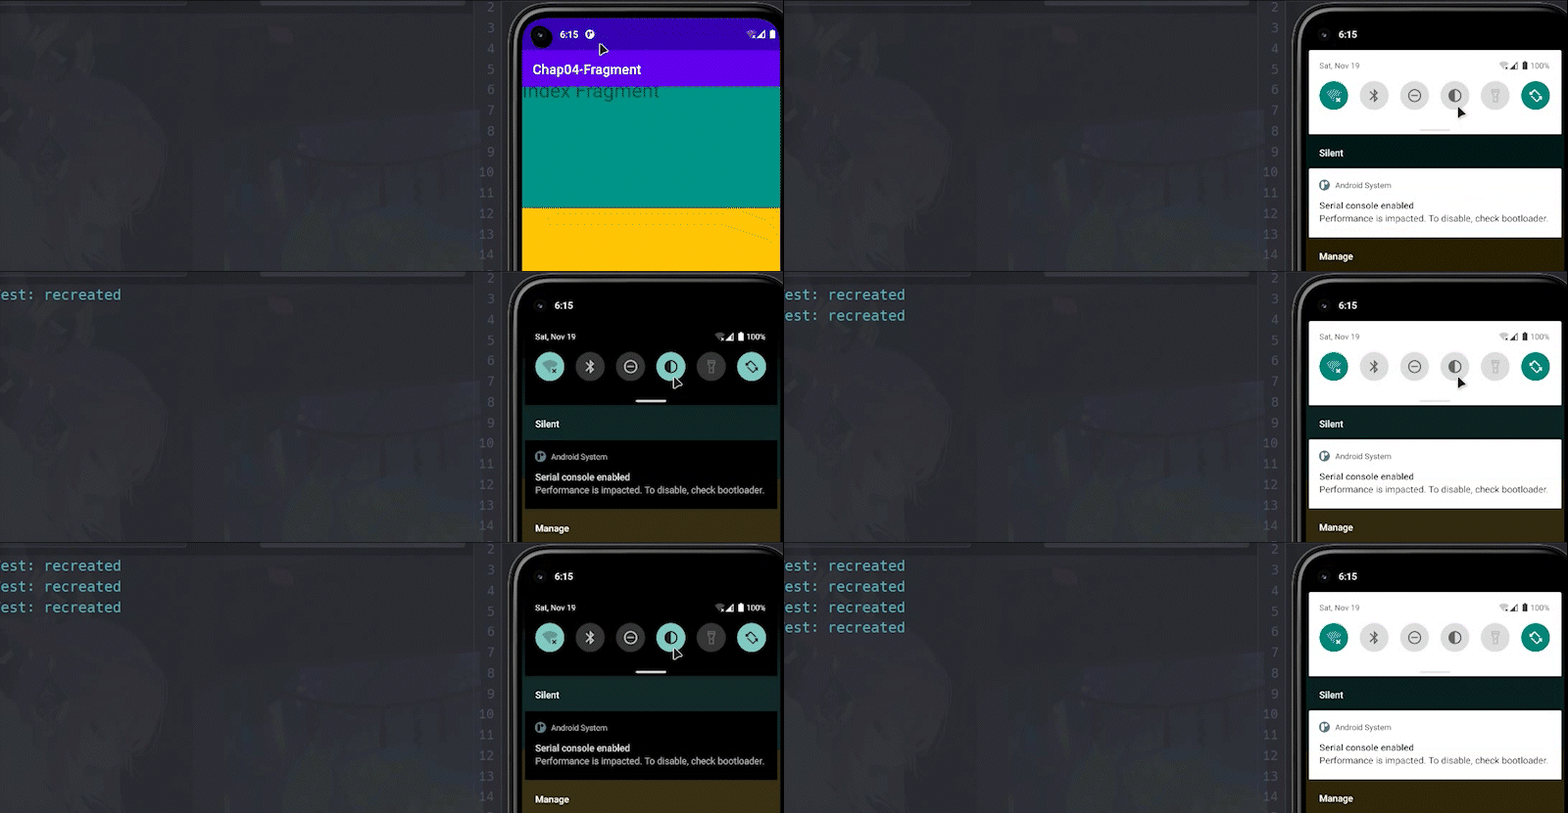
我切换了黑夜/白昼模式,Logcat 中就打印了多次,说明我们的 onCreate 函数多次被调用,同时也多次重复添加 Fragment。
2️⃣加上这一个判断,再来看看会发生什么:
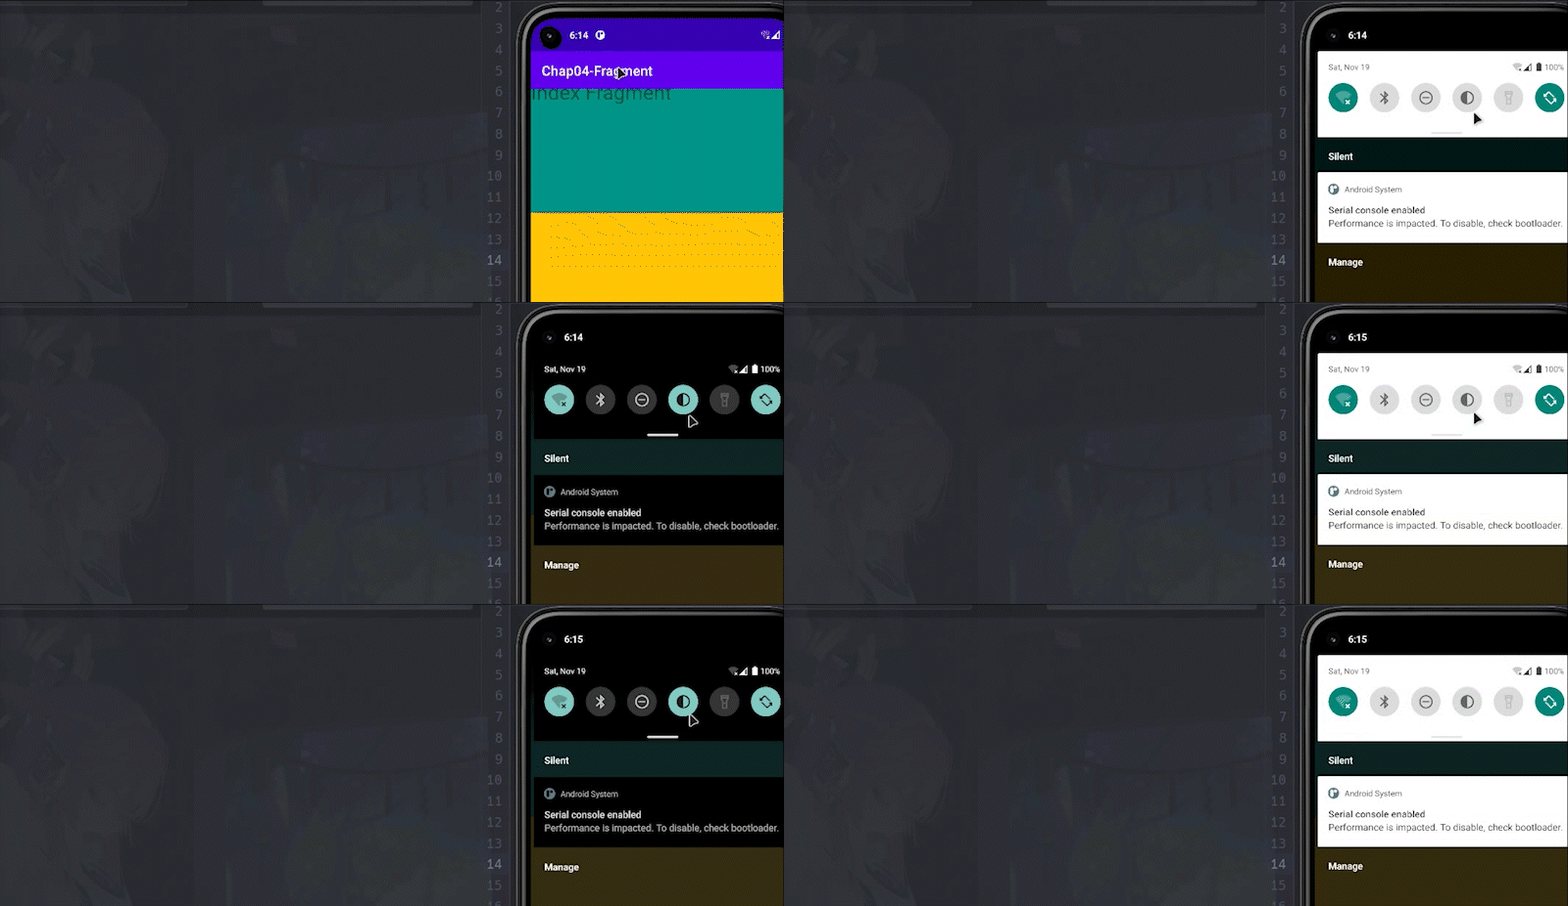
屏幕反转、屏幕黑夜/白昼模式切换都会触发onCreate(),而 savedInstanceState 能记录 Activity 的变化,当 Activity 初始时它才是 null。所以要加上一个判断,Activity 第一次创建时才增加 Fragment 到视图中,避免重复添加 Fragment。
实现 TabBar
前面已经简单地了解了 FragmentManager 和 FragmentTransaction。现在通过 Tabbar 案例来实现 Fragment 的切换。
activity_main.xml
<?xml version="1.0" encoding="utf-8"?>

<androidx.constraintlayout.widget.ConstraintLayout xmlns:android="http://schemas.android.com/apk/res/android"

  xmlns:app="http://schemas.android.com/apk/res-auto"

  xmlns:tools="http://schemas.android.com/tools"

  android:layout_width="match_parent"

  android:layout_height="match_parent"

  tools:context=".MainActivity">

  <androidx.fragment.app.FragmentContainerView

    android:id="@+id/fragment_container_view"

    android:name="com.example.chap04.IndexFragment"

    android:layout_width="match_parent"

    android:layout_height="0dp"

    app:layout_constraintBottom_toTopOf="@+id/tabbar"

    app:layout_constraintEnd_toEndOf="parent"

    app:layout_constraintStart_toStartOf="parent"

    app:layout_constraintTop_toTopOf="parent" />

  <LinearLayout

    android:id="@+id/tabbar"

    android:layout_width="0dp"

    android:layout_height="50dp"

    android:gravity="center_horizontal|center_vertical"

    android:orientation="horizontal"

    app:layout_constraintBottom_toBottomOf="parent"

    app:layout_constraintEnd_toEndOf="parent"

    app:layout_constraintStart_toStartOf="parent">

    <TextView

      android:id="@+id/nav_index"

      android:layout_width="wrap_content"

      android:layout_height="match_parent"

      android:layout_weight="1"

      android:gravity="center"

      android:text="首页" />

    <TextView

      android:id="@+id/nav_dynamic"

      android:layout_width="wrap_content"

      android:layout_height="match_parent"

      android:layout_weight="1"

      android:gravity="center"

      android:text="动态" />

    <TextView

      android:id="@+id/nav_person"

      android:layout_width="wrap_content"

      android:layout_height="match_parent"

      android:layout_weight="1"

      android:gravity="center"

      android:text="我的" />

  </LinearLayout>

</androidx.constraintlayout.widget.ConstraintLayout>
MainActivity.kt
class MainActivity : AppCompatActivity(R.layout.activity_main) {

  override fun onCreate(savedInstanceState: Bundle?) {

    super.onCreate(savedInstanceState)

    if (savedInstanceState == null) {

      findViewById<TextView>(R.id.nav_index).setOnClickListener {

        supportFragmentManager

          .beginTransaction()

          .setReorderingAllowed(true)

          .replace(R.id.fragment_container_view, IndexFragment().javaClass, null)

          .commit()

      }

      findViewById<TextView>(R.id.nav_dynamic).setOnClickListener {

        supportFragmentManager

          .beginTransaction()

          .setReorderingAllowed(true)

          .replace(R.id.fragment_container_view, DynamicFragment().javaClass, null)

          .commit()

      }

      findViewById<TextView>(R.id.nav_person).setOnClickListener {

        supportFragmentManager

          .beginTransaction()

          .setReorderingAllowed(true)

          .replace(R.id.fragment_container_view, PersonFragment().javaClass, null)

          .commit()

      }

    }

  }

}
实现效果
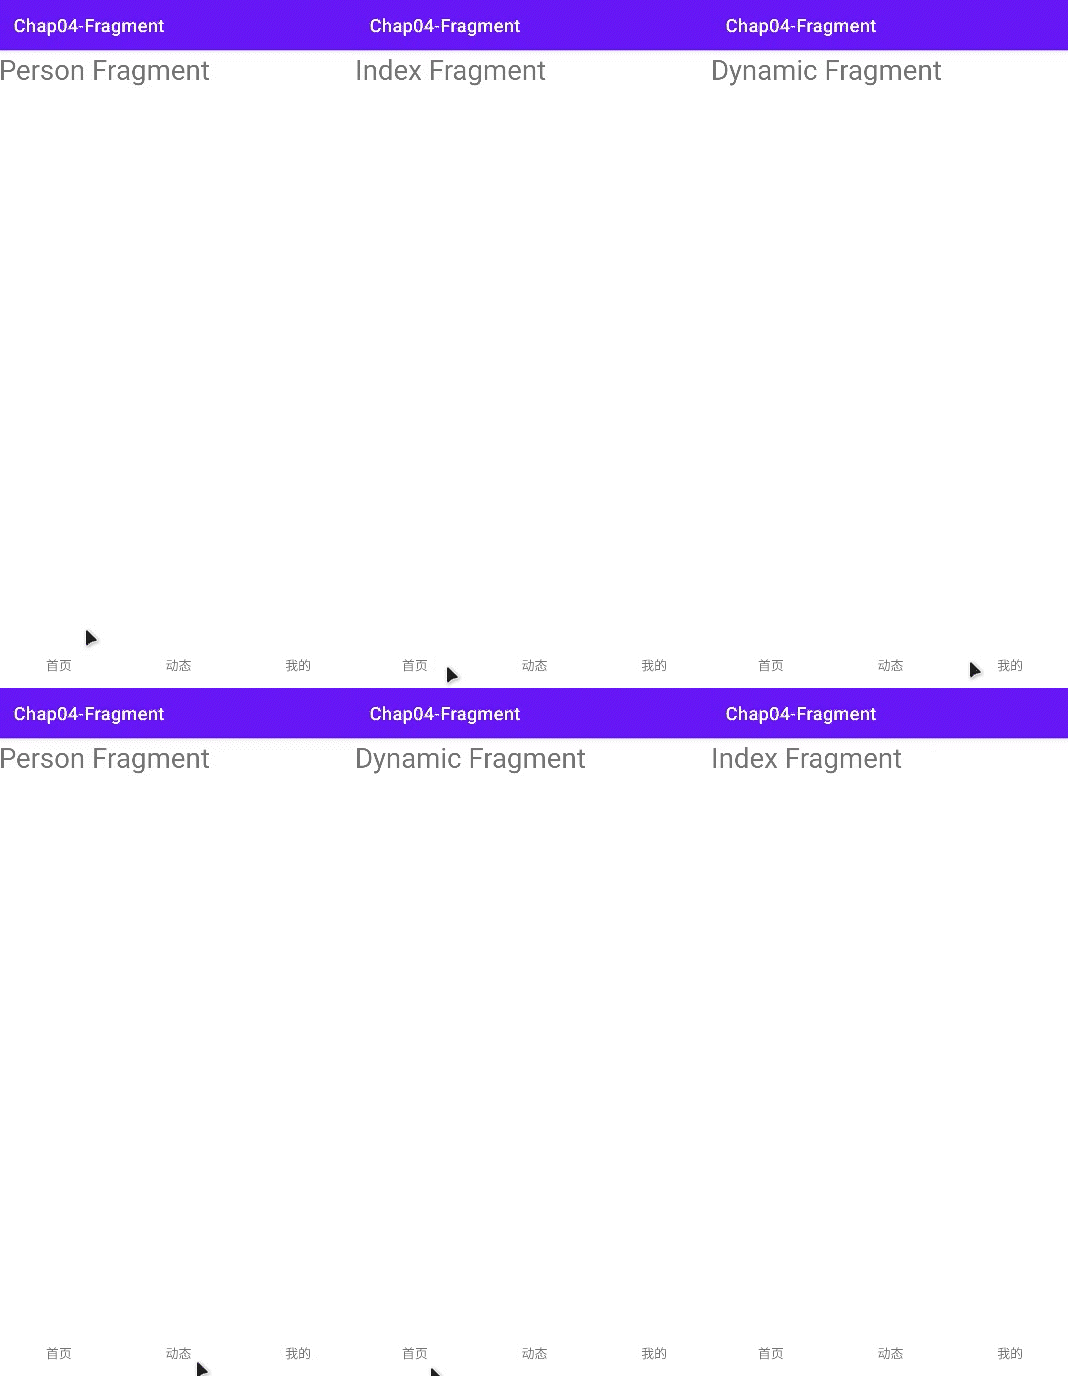
这种 TabBar 的切换方式是通过 FragmentManager 和 FragmentTransaction 替换视图中的 FragmentContainerView,还有一种是不借助这两个类实现页面切换,通过 ViewPager2 来实现页面,而且也是实现页面滑动的最简单方式。
借助 ViewPager2 实现 TabBar
activity_main.xml
<?xml version="1.0" encoding="utf-8"?>

<androidx.constraintlayout.widget.ConstraintLayout xmlns:android="http://schemas.android.com/apk/res/android"

  xmlns:app="http://schemas.android.com/apk/res-auto"

  xmlns:tools="http://schemas.android.com/tools"

  android:layout_width="match_parent"

  android:layout_height="match_parent"

  tools:context=".MainActivity">

  <androidx.viewpager2.widget.ViewPager2

    android:id="@+id/view_pager2"

    android:layout_width="match_parent"

    android:layout_height="0dp"

    app:layout_constraintBottom_toTopOf="@+id/tabbar"

    app:layout_constraintEnd_toEndOf="parent"

    app:layout_constraintStart_toStartOf="parent"

    app:layout_constraintTop_toTopOf="parent" />

  <LinearLayout

    android:id="@+id/tabbar"

    android:layout_width="0dp"

    android:layout_height="50dp"

    android:gravity="center_horizontal|center_vertical"

    android:orientation="horizontal"

    app:layout_constraintBottom_toBottomOf="parent"

    app:layout_constraintEnd_toEndOf="parent"

    app:layout_constraintStart_toStartOf="parent">

    <TextView

      android:id="@+id/nav_index"

      android:layout_width="wrap_content"

      android:layout_height="match_parent"

      android:layout_weight="1"

      android:gravity="center"

      android:text="首页" />

    <TextView

      android:id="@+id/nav_dynamic"

      android:layout_width="wrap_content"

      android:layout_height="match_parent"

      android:layout_weight="1"

      android:gravity="center"

      android:text="动态" />

    <TextView

      android:id="@+id/nav_person"

      android:layout_width="wrap_content"

      android:layout_height="match_parent"

      android:layout_weight="1"

      android:gravity="center"

      android:text="我的" />

  </LinearLayout>

</androidx.constraintlayout.widget.ConstraintLayout>
页面和上面的没多大区别,只是把 FragmentContainerView 替换成了 ViewPager2。
ViewPager2Adapter.kt
class ViewPage2Adapter(fragmentActivity: FragmentActivity, fragments: List<Fragment>) : FragmentStateAdapter(fragmentActivity) {

  private var fragments: List<Fragment>

  init {

    this.fragments = fragments

  }

  override fun getItemCount(): Int {

    return fragments.size

  }

  override fun createFragment(position: Int): Fragment {

    return fragments[position]

  }

}
MainActivity.kt
class MainActivity : AppCompatActivity(R.layout.activity_main) {

  override fun onCreate(savedInstanceState: Bundle?) {

    super.onCreate(savedInstanceState)

    if (savedInstanceState == null) {

      val pager = findViewById<ViewPager2>(R.id.view_pager2)

      val navBars = listOf<TextView>(findViewById(R.id.nav_index), findViewById(R.id.nav_dynamic), findViewById(R.id.nav_person))

      val fragments = listOf(IndexFragment(), DynamicFragment(), PersonFragment())

      pager.adapter = ViewPage2Adapter(this, fragments)

      var lastPosition = 0

      pager.registerOnPageChangeCallback(object : ViewPager2.OnPageChangeCallback() {

        override fun onPageSelected(currPosition: Int) {

          navBars[lastPosition].setBackgroundResource(R.color.white)

          navBars[currPosition].setBackgroundResource(R.color.nav_selected)

          lastPosition = currPosition

        }

      })

      navBars[0].setOnClickListener {

        pager.currentItem = 0

      }

      navBars[1].setOnClickListener {

        pager.currentItem = 1

      }

      navBars[2].setOnClickListener {

        pager.currentItem = 2

      }

    }

  }

}
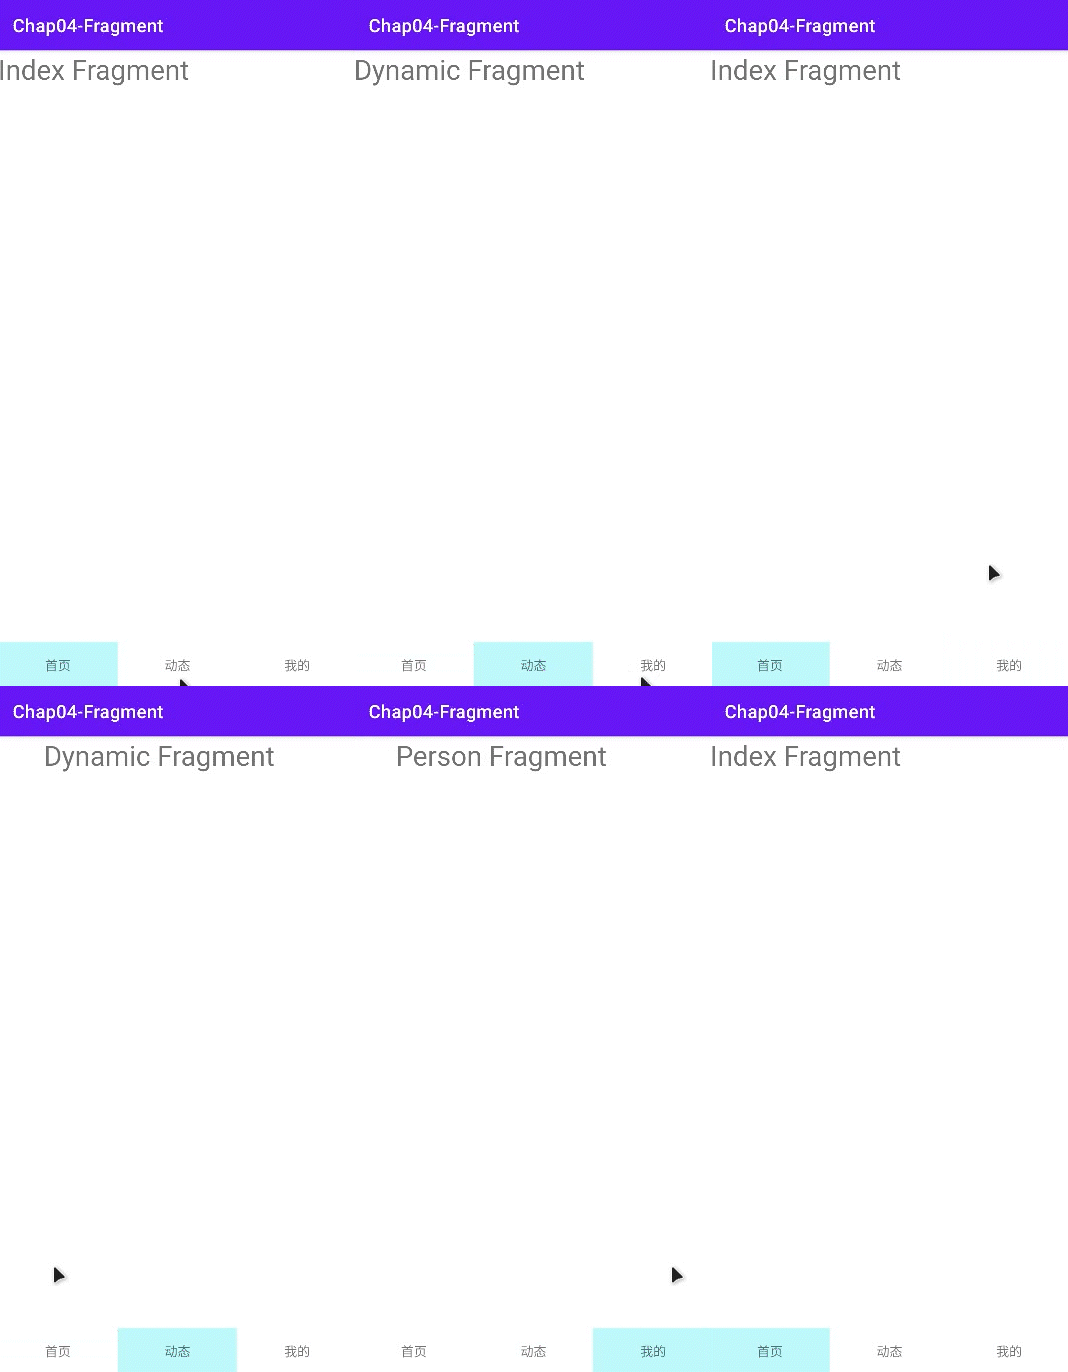
切换 ViewPager2 的项时也需要改变底部导航栏的背景颜色,所以需要给 ViewPager2 注册一个监听器(registerOnPageChangeCallback),动态地得到 position,从而实现鼠标滑动时也改变底部导航栏对应的背景颜色。
实现效果
Gitee 仓库地址:Chap04-Fragment
Android:Fragment的更多相关文章
- Android:Fragment+ViewPager实现Tab滑动
public class FragAdapter extends FragmentPagerAdapter { private List<Fragment> fragments ; pub ...
- Android:手把手教你 实现Activity 与 Fragment 相互通信,发送字符串信息(含Demo)
前言Activity 与 Fragment 的使用在Android开发中非常多今天,我将主要讲解 Activity 与 Fragment 如何进行通信,实际上是要解决两个问题: Activity 如何 ...
- Android:理解Fragment
最近都在公司搞测试,静不下心来学android.今天就把Fragment搞懂吧. Fragment的几点要点: 1.用于大屏幕平板,容纳更多组件,可复用2.Fragment必须嵌入Activity中 ...
- android 学习随笔二十三(动画:Fragment )
Fragment * 用途:在一个Activity里切换界面,切换界面时只切换Fragment里面的内容 * 在一个Activity中切换多个界面,每个界面就是一个Fragment* Fragmnen ...
- android UI:Fragment碎片
碎片(Fragment) 嵌入与活动中的UI片段,为了合理的分配布局而存在,这是我的简单理解.多用于兼顾手机与平板的UI,也适用于灵活高级的UI制作. Demo 简单的按键切换两片不同的Demo 新建 ...
- Android用户界面开发:Fragment
Android用户界面开发:Fragment 1:注意事项 3.0以前的Android 版本要使用FragmentActivity 来装载Fragment ,使用到support v4包. 3.0 ...
- 【转】 Pro Android学习笔记(四三):Fragment(8):再谈Transaction和管理器
目录(?)[-] Transaction的一些操作 再谈FragmentManager 调用其他fragment的方法 唤起activity 唤起fragment和相互通信 一些其它 Transact ...
- 【转】 Pro Android学习笔记(四二):Fragment(7):切换效果
目录(?)[-] 利用setTransition 利用setCustomAnimations 通过ObjectAnimator自定义动态效果 程序代码的编写 利用fragment transactio ...
- 【转】 Pro Android学习笔记(四十):Fragment(5):适应不同屏幕或排版
目录(?)[-] 设置横排和竖排的不同排版风格 改写代码 对于fragment,经常涉及不同屏幕尺寸和不同的排版风格.我们在基础小例子上做一下改动,在横排的时候,仍是现实左右两个fragment,在竖 ...
- 【转】 Pro Android学习笔记(四一):Fragment(6):数据保留
目录(?)[-] 通过fragment参数实现数据保留 对TitleFragment进行修改 对DetailActivity进行修改 通过savedInstanceState进行数据保留 保留frag ...
随机推荐
- java抽象类的定义和使用
1. 抽象类的规则 ● 抽象类不可以被实例化,也就是不能被new,会出现编译错误.抽象类如果想实例化可以通过非抽象子类的方式去实现. ● 抽象类中不一定有抽象方法,但有抽象方法的类一定是抽象类.而且抽 ...
- JavaScript:立即执行函数
想象一下,如果我希望某个代码块,只执行一次,就不再执行,应该怎么办? 代码块肯定是用函数来表示,执行肯定是调用函数,但是确保只执行一次,该怎么办? 我们为什么可以多次调用函数,因为函数名指向了函数的内 ...
- 【转载】EXCEL VBA 同时选择多个工作表的方法
如果要用VBA同时选择多个工作表,可以利用数组或设置"Select"方法的参数为"False"来扩展所选择的内容,如下面的一些代码: 1.用工作表名称: ...
- asp前端无法获取后端中select *查询带出来的全部字段
1.环境 前端:ASP.vbscript 后端:vb 数据库:Sql Server 2.问题描述 最近在做需求时碰到一个很奇怪的问题,后端通过select *查询带出来的字段,在前端只能获取到部分字段 ...
- [OpenCV实战]12 使用深度学习和OpenCV进行手部关键点检测
目录 1 背景 2 实现 3 结果和代码 4 参考 手部关键点检测是在手指上找到关节以及在给定图像中找到指尖的过程.它类似于在脸部(面部关键点检测)或身体(人体姿势估计)上找到关键点.但是手部检测不同 ...
- rvm安装ruby
macOS11.1 打开终端 使用下面命令查看ruby版本 rvm list known 然后安装 rvm install 2.0.0 查看ruby版本 ruby -v 系统默认使用ruby版本 ...
- 图文并茂使用VUE+Quasar CLI开发和构建PWA,registerServiceWorker介绍
看文档 文档地址:Preparation for PWA 1.将PWA模式添加到我们的Quasar项目中: npx quasar mode add pwa 我们看一下有哪些变化 向Quasar项目添加 ...
- Array list练习
Array list练习 数据添加到集合 生成6个1~33之间的随机整数,添加到集合,并遍历 public class Test01ArrayList { public static void mai ...
- 结构型模式 - 享元模式Flyweight
学习而来,代码是自己敲的.也有些自己的理解在里边,有问题希望大家指出. 更像是单例模式 + 简单工厂模式 享元模式的定义与特点 享元(Fiyweight)模式的定义:运用共享技术来有效的支持大量细粒度 ...
- VUE 轮询、轮询终止 beforeRouteLeave
目录 1 在data中定义 2 在methods中定义 3 开始轮询 4 终止轮询 方法一: destroyed() 方法二:beforeRouteLeave(to, from, next) 推荐 所 ...